

What Does TRAVEL Mean on a Mountain Bike: Is More Travel Better?

I love riding my mountain bike down steep hills and off of lifts but I have noticed that even after adjusting my current suspension I am bottoming out on relatively small drops. That is why I decided to upgrade my suspension to have more travel distance. In this guide I will explain what that means for various kinds of bikes and suspension set ups.
What is “Travel” on a Mountain Bike?
Travel is simply the maximum distance that either the front or rear suspension of the Mountain Bike can compress, when absorbing force, before bottoming out. The higher the travel the more force the suspension can comfortably absorb. The lower amount of travel the lower amount of force absorbed.

Types of Mountain Bike Suspension
There are three types of suspension setups that any Mountain Bike might have (I will get into the third later). For right now it is most likely that your bike will either have a “Hard-Tail” or “Full Suspension” setup.
The difference between a hard-tail and a full suspension mountain bike is that on a full suspension bike there is a rear shock absorber as opposed to just the front fork. A hard-tail, therefore, will not have rear suspension components and will simply have a “hard” rear frame.

The differences between hard-tail and full suspension…
Price: A full suspension mountain bike will be much more expensive than a hard-tail mountain bike.
Comfort / Downhill Capability: A full suspension mountain bike is going to be much more comfortable to ride and be able to handle much higher drops. Although, this does come at the cost of reduced ability to put power into the trail.
Weight: A full suspension is going to add the components to your mountain bike so by definition will be heavier than a hard-tail
Maintenance: Again, the more parts you add the more that can go wrong and the more that needs to be adjusted.
Given this distinction between hard-tail and full suspension mountain bikes the next two sections are going to be split between talking about front and rear suspension components.
Suspension is Fun to Talk About
- Mountain Bike Travel – Read What is Travel on a MTB and is More Better?
- What is Lockout on a Mountain Bike Fork – all about when to use it.
- Selecting a MTB fork is confusing, let me help with – C hoosing a Mountain Bike Suspension Fork
- Wheels and Hub widths – Why is this so confusing? Read – How to Adapt a MTB Wheel to a Boost Fork
Front Suspension and Travel Distance on an MTB

The front suspension, or forks, of any mountain bike is going to be split into a few components. The steerer tube which goes into the center of the crown which branches into two stanchions. These stanchions are what slide into the brace and slider which ends in two dropouts that attach to the wheel.
The main way that riders upgrade their front suspension is by increasing the travel of the stanchions. In essence, this is increasing the length of compression that the front suspension withstands. A shorter travel will be more responsive and allow you to put more power into the trail while a longer suspension is better for rough trails and high lifts.
Here is a chart of common travel distances on the front suspension of the mountain bike…
Another thing that is important to keep in mind is the diameter of the stanchion tubes. As the amount of travel increases so does the diameter of the stanchion to maintain durability and stability.
Here is a chart of the common stanchion tube diameters on the front suspension of the mountain bike…
As I mention before, many riders will upgrade their mountain bikes front suspension by increasing the amount of travel that the suspension is capable of. This is really only done in two scenarios as if it is done without thought then it could actually hamper performance.
- When you have anything other than a downhill mountain bike and want to try to imitate one.
- This one kind of ties in with the previous. But, travel distance is increased when a rider desires a more comfortable ride and intends to do mostly downhill riding with large drops. If there is a large amount of uphill riding then a long travel will only make it more difficult to ride the bike.
Something that is often mentioned on MTB suspension is a “Lockout” I explained what it is and when to use your lockout in another article on this website: What is a Lockout Fork and When to Use It
Rear Suspension and Travel Distance
Now this is where things can get really complicated. This is because there are around five main rear suspension designs that manufactures implement in mountain bikes. They are as follows…
Single Pivot: In this design the rear shock of the mountain bike is connected to a swingarm by the titular single pivot point located just above the chain rings. This is the simplest rear suspension design and therefore is often the cheapest to manufacture.

The downside of the design is that the compression is going to be consistent throughout the travel of the shock as opposed to some newer designs which increase the stiffness of the rear shock as it becomes more and more compressed to hopefully prevent bottoming out.
Linkage-Driven Single Pivot: In this design there is still a swingarm connected to a single pivot point. The difference is that there is some kind of linkage which allows the manufacturers to manipulate the compression curve which was previously constant throughout the travel.
Horst-Link / Four Bar: Put simply, the rear axle of the mountain bike is not directly connected to the mainframe of the bike. This will reduce pedal bob (the bob that comes from the rhythmic nature of pedaling) and will also allow the manufacturer to manipulate the compression arc (amount of force needed to compress throughout the travel of the shock.
Twin-Link / Virtual Pivot Point: This design implements a triangular design that connects to the mainframe by two pivoting links. This design performs very similar to the Horst-Link but is not patented so is often cheaper to manufacture.
High Pivot: This is the same as the single pivot with the exception that the pivot point is placed much higher on the frame. There is also the addition of an idler pully which routs the path of the chain above the pivot point as to eliminate what would otherwise result in extremely high levels of pedal bob.

Can I Put 27.5-inch Wheels on a 26-inch Wheel MTB?

Should I Buy a 26-Inch Mountain Bike?

Who is a 26-Inch Mountain Bike Good For?
The rear shock and how it is sized.
The rear shock of the mountain bike is comprised of a single compression chamber as opposed to the front suspension which relies on two. The shock is placed horizontal (Often with a slight diagonal tilt) to the ground, again as opposed to the front suspension which is placed vertically to the ground.
Furthermore, the rear shock attaches to the frame of the bike by two eyelets which is actually how they (the shocks) are sized. Although, the same style shock is used no matter the design of your rear suspension.
Finding the Correct Eye-to-Eye Length of a Mountain Bike Rear Shock:
To find the eye-to-eye distance measure from the center of one pivot eyelet on the shock to the second one. This distance is the eye-to-eye length that you must use to find correctly sized rear shocks for your mountain bike.
Using shocks with incorrect eye-to-eye lengths can cause problems with the efficiency of the suspension and even can cause it to work against you. The travel on a rear shock is therefore more restricted although can vary slightly as the compression chamber can be of slightly different sized even if the overall length must be the same.
Just as with the front shock the longer the travel the better the shock will be at absorbing force, and the worse it will be for riding your mountain bike uphill (putting power to the trail).
MTB Tools I Love and Recommend
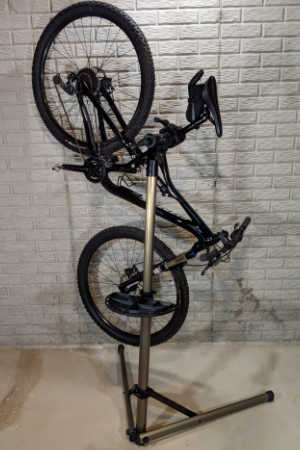
I own each of these tools and only recommend things I own and use.
- Bike Hand Bike Repair Stand . Nice mountain bikes don’t have a kick stand so keeping your MTB safe but conveniently stored is essential. I keep my bike on my stand whenever I’m not riding it. This makes it easy to lube the chain, inflate the tires and adjust the derailleur. Highly recommended – Bike Hand Bike Repair Stand (👈 Link to Amazon to see what thousands of others have said)
- A basic MTB toolbox for replacing a chain, adjusting brakes and dialing in the fit. Bike Hand has a 37-piece box that has most of the specialty bike tools to keep your MTB properly maintained. The Bike Hand brand is value packed for the avid rider. Check out the competitive prices with this link to Amazon 👉 Bike Hand 37 pcs Bike Repair Tool Kit
- Get a good air pressure gauge, if you get just a tiny bit serious about MTBing you’re going to start playing with tire pressure. A couple psi can make your tires sticking or not. Get a good gauge, I highly recommend the Topeak Smartgauge D2 , it’s accurate, flexible and easy to use. An Amazon best seller, here’s a link 👉 Topeak Smartgauge D2
- Carry a multitool with you on every ride. I’m serious, most of the time you can MacGyver something to get back to the trailhead if you have a multitool. I’ve got the Crank Brothers M19 , it’s worn, rubbed and abused – but it still works. Thousands sold on Amazon – check it out with this link 👉 Crank Brothers M19
How to Balance Your Suspension with a Full Suspension Mountain Bike
Balancing the amount of force that the front and rear suspensions on a full suspension mountain bike is crucial to getting the most out of said mountain bike. If one component is compressing slower or faster than the other then the comfort of the ride can be dramatically compromised. As can the overall effectiveness of the suspension system.
It is not essential that the front and rear suspensions have the exact same amount of travel although the closer they are the easier it will be to balance them. Balancing them involves adjusting the pressure inside of the chambers so that each shock, no matter the travel, bottoms out at the same time. A longer shock will need less pressure when paired with a shorter shock and vice versa.
Coil Shocks VS Air Shocks
There are two main kinds of suspension. Those which rely on springs to compress and those which rely on compressed air. The benefits of an air shock are that it is lightweight, easily tune-able, and naturally get stiffer near the point of bottoming out. The downsides are that they require more maintenance and are also not as responsive.
The reason why some rider chooses coil springs, even though they must be bought specific to the weight of the rider and are also heavier, is that they are extremely responsive. Additionally, coil springs don’t fade in stiffness when riding for long periods of time as some air coils will.
The Third Kind of Mountain Bike Suspension Setup (A Rigid Bike)

The third, and most uncommon, form of suspension on a mountain bike is… well… to not have one at all. On a rigid bike you will not find either a front or rear suspension system and rather just a solid frame comprising the entire mountain bike.
This kind of mountain bike setup is most widely used for fat tire bikes as with a fat tire bike it is absolutely necessary to be able to put a lot of power from the pedals into the trail. This is because of the friction accosted with a fat tire.
Rigid suspension systems on fat tire bikes are able to be implemented due to the natural suspension capabilities of having such a large tire. This larger tire works to absorb force and the low pressure you can ride at work to smooth out the ride as well.
Additionally, often time rider will upgrade their rigid style mountain bikes with increased cushion seats.
Some regular tire mountain bikes implement a rigid style suspension system although they are much less comfortable to ride and require a more experienced rider. These bikes can provide a great experience if you’re constantly going uphill and don’t plan to encounter any rough terrain.

David Humphries is the creator of DIY Mountain Bike. For me a relaxing day involves riding my mountain bike to decompress after a long day. When not on my bike I can be found wrenching on it or making YouTube videos at 👉 DIY Mountain Bike Read more about David HERE .
Looking for more How To MTB articles? Click -> HERE

Bicycle fork
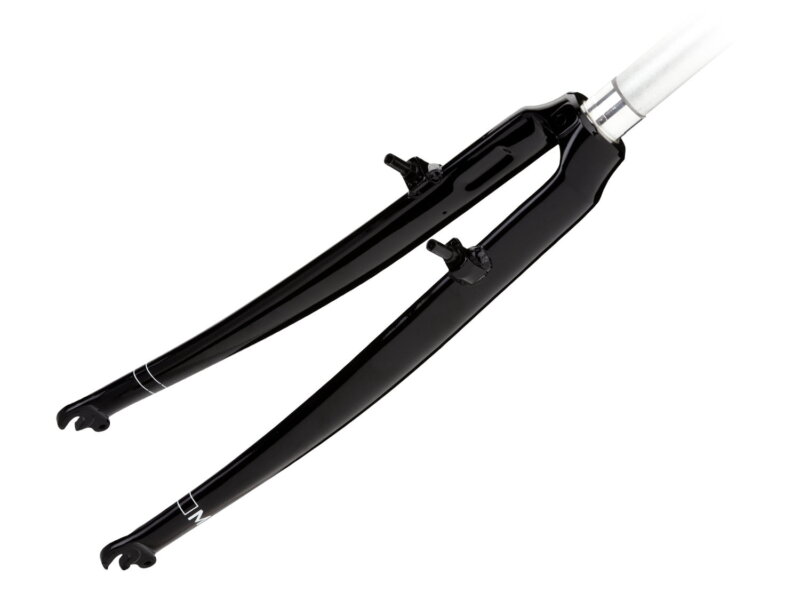
This post explains bicycle fork types and basic terms. A separate post explains the names of bicycle fork and headset bearing parts .
If you have any questions (or additions and corrections), please use the BikeGremlin forum: www.bikegremlin.net
Table Of Contents (T.O.C.):
- What is a bicycle fork?
- Important dimensions
- Types of forks 3.1. Systems of fork attachment …..3.1.1. Threaded forks …..3.1.2. Threadless – “ahead” forks 3.2. Brake attachment system …..3.2.1. Brakes mounted at the centre of the fork …..3.2.2. Brakes mounted on fork leg mounts …..3.2.3. Disc brakes 3.3. Suspension vs rigid forks …..3.3.1. Rigid forks …..3.3.2. Suspension forks …..3.3.3. Suspension corrected rigid forks
In this article, I’ve explained most things related to bicycle fork design, types, brake mounts, etc.
I’ve also discussed the mix-matching in terms of swapping rigid for suspension forks or vice-versa.
My fork & headset article series:
- Bicycle fork models and brake mounts
- Headsets [01] Names of fork and headset parts
- Headsets [02] Important fork, head tube and headset dimensions
- Headsets [03] Headset bearings standards – SHIS
– T.O.C. –
1. What is a bicycle fork?
A bicycle fork is a part of the bicycle on which the front wheel is mounted and which is turned via handlebars in order to steer the bicycle.
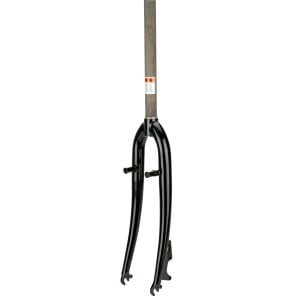
It consists of a steerer tube, crown and fork legs and dropout for receiving wheel axle. It usually has brake mounts as well.
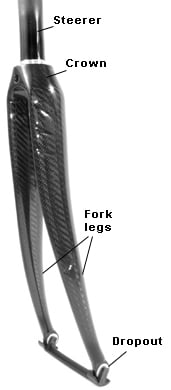
The point where the steerer tube and the crown connect is the point up to which the fork is inside the frame. The part below that intersection is visible.
Help BikeGremlin stay online & independent
This website is educational, free, objective, and not commercial (sponsors don’t enjoy paying if you mention all the product downsides that you notice 🙂 ).
How much does a WordPress website cost?
If you find this site to be good and helpful , and if $5 per month is what you can afford to set aside, please consider supporting my work with a Patreon donation:
patreon.com/bikegremlin
2. Important dimensions
There are three dimensions important when choosing a bicycle fork:
- Steerer tube length – for big frames, or when looking for a more upright seating position, with higher handlebars, it is important to have a long steerer tube.
- Fork legs length , or to be more precise, the length between the crown-steerer intersection, to the dropout. Axle to crown. Important to determine the wheel size which the fork is made for.
- Rake – how far is the axle moved from the steering axis. A picture explains it better:
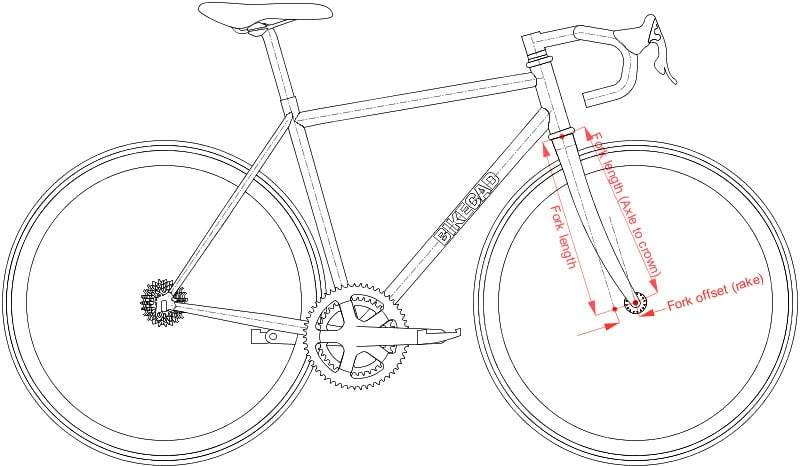
Rake affects handling, in a way explained in the post about bicycle frame geometry .
3. Types of forks
There are several types of bicycle forks. Two standards of fork attachment , three standards for brake attachment . Also, there are forks with shock absorbers and stiff forks without any springs . So, when choosing a bicycle fork, apart from the size which is needed (kids bike, big bike, MTB etc), it is important to know: how it’s mounted, which brake mounts it has, is it suspension fork.
3.1. Systems of fork attachment
There are two groups of standards:
3.1.1. Threaded forks
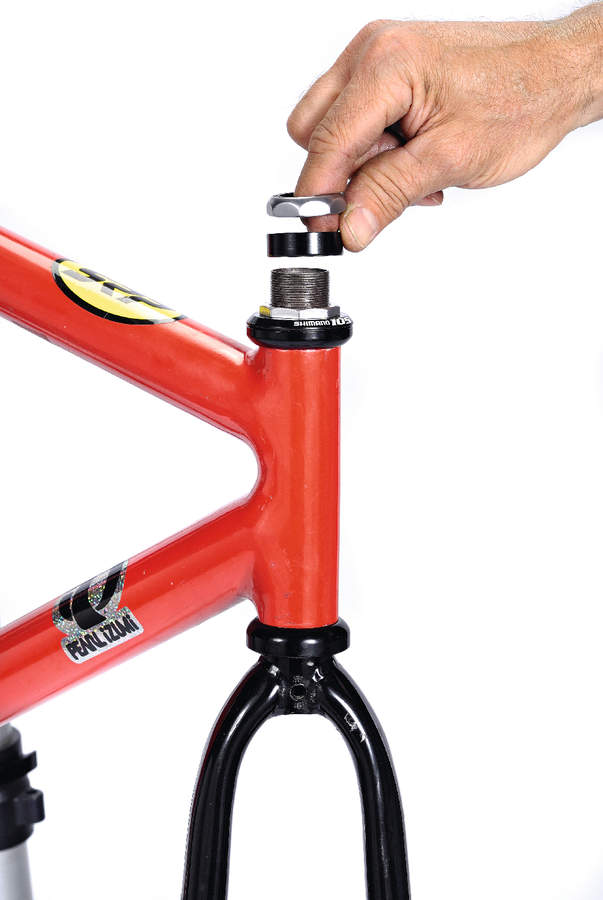
The advantage of this system is that handlebar height can easily be adjusted – one bolt is unscrewed and the handlebars are moved up and down.
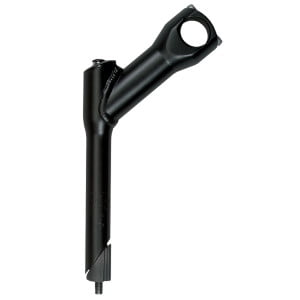
The greatest flaw of this system is that the bars are held in place with a quill and one bolt. In one place. Moisture gets in, it can rust, then it can get stuck. It can also rust a lot and get loose without any warning. The stem is held just at the place of the quill – the top part of the fork just prevents the stem from moving left-right, but it doesn’t hold it tight in place.
3.1.2. Threadless – “ahead” forks
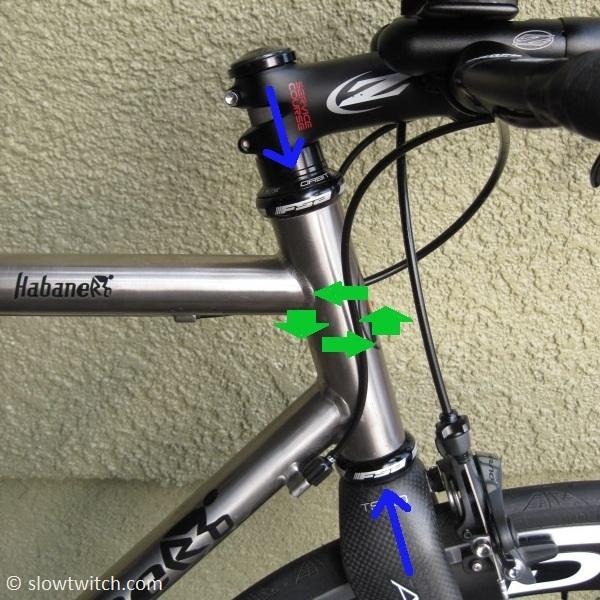
Fork is put into the frame, then stem and spacers are stacked to cover the protruding steering tube. Then at the top there is a cap with a bolt that is fastened to preload steerer bearings. After the preload is set, the fork is held in place by tightening stem bolts – usually two. This system allows for one bolt to snap and it is all still safe and works well. It also holds the stem much more securely and firmly.
3.2. Brake attachment system
There are three standard systems. Forks usually support one, sometimes two, and very seldom all three brake mounting standards. The standards are:
- Brakes mounted at the centre of the fork
- Brakes mounted on fork leg mounts
- Disc brakes
3.2.1. Brakes mounted at the centre of the fork
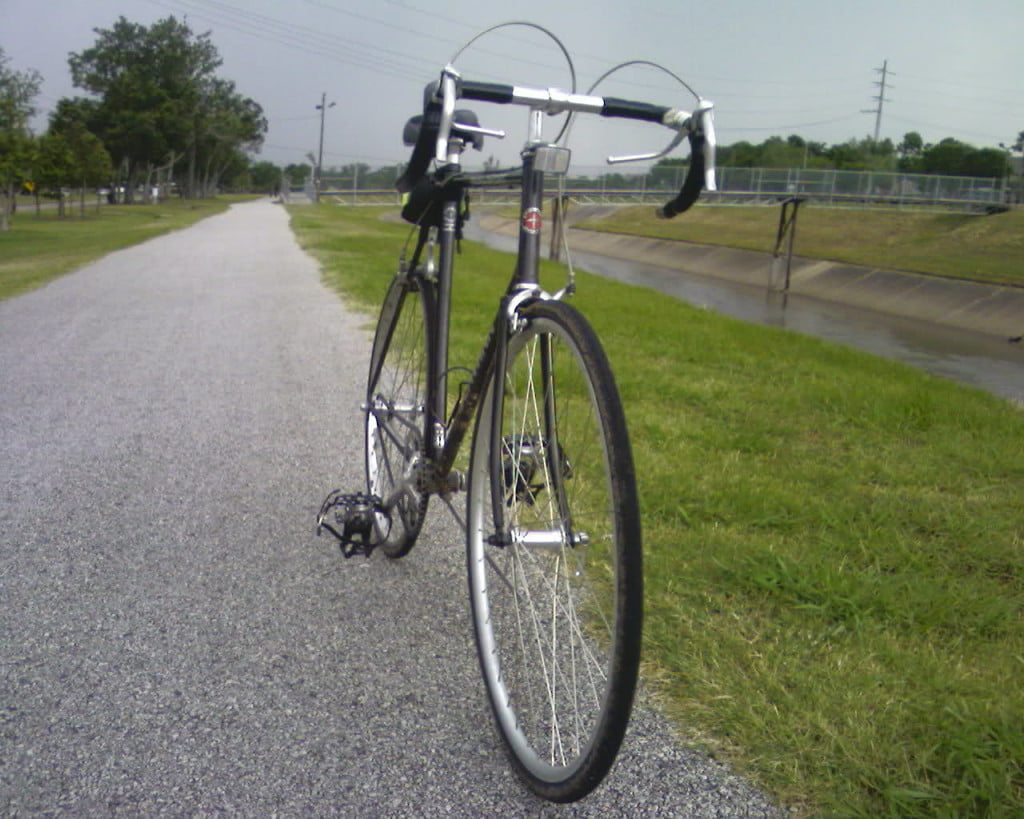
Mounting system popular with older bicycles and (with slight mounting nut variations) with modern road bikes.
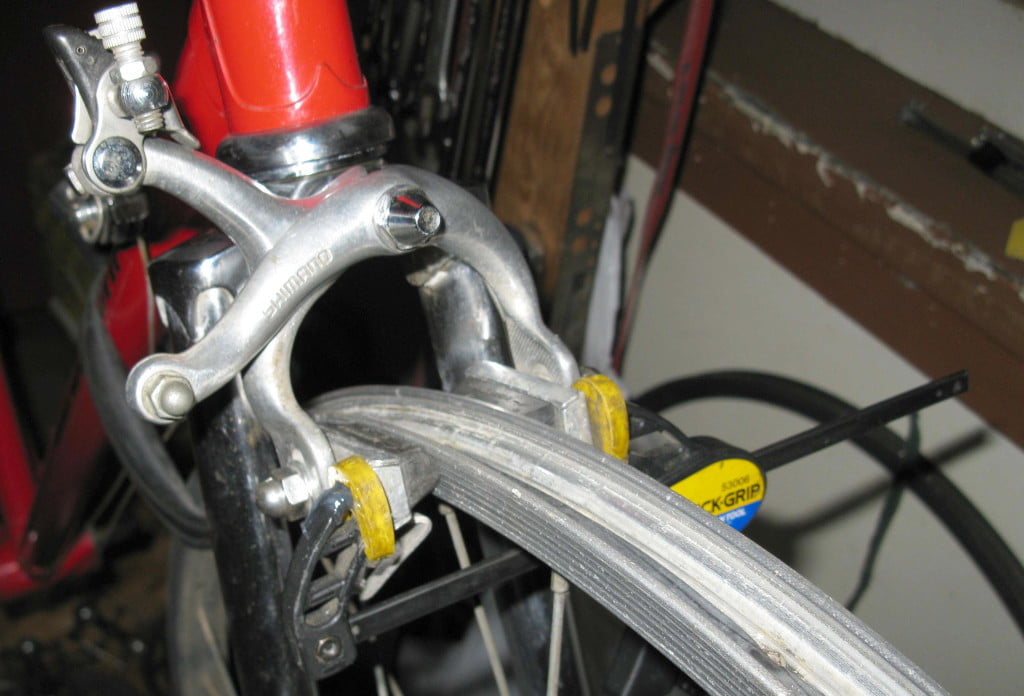
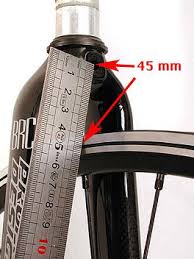
Fork compatible with this system has a hole for mounting the brake drilled. Also, the hole is up to 6 cm away from the rim, so that brake calipers can reach the rim.
With this kind of forks, it is important to know for what wheel size they are made. In case a smaller wheel is used, brake calipers might not reach the rim. In case a larger wheel is put, it might not fit at all.
Modern bicycle forks have recessed rear side for nut that holds the calipers to be screwed in, while the old standard is with round rear side. This is important because of brake compatibility:
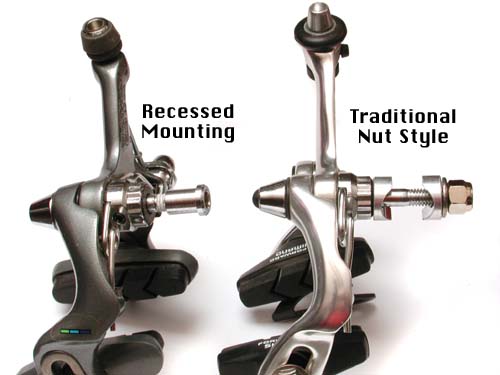
3.2.2. Brakes mounted on fork leg mounts
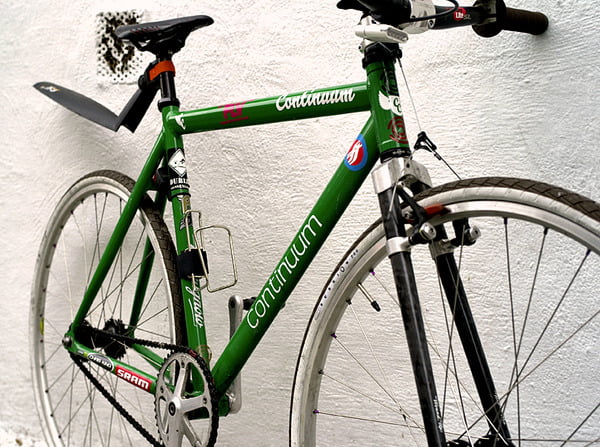
Brakes mounted on fork mounts are usually of cantilever, or V-brake type. Cantilever brakes require frame mounted brake cable stops above brake calipers as well as fork mounts (detailed about that in a separate article).
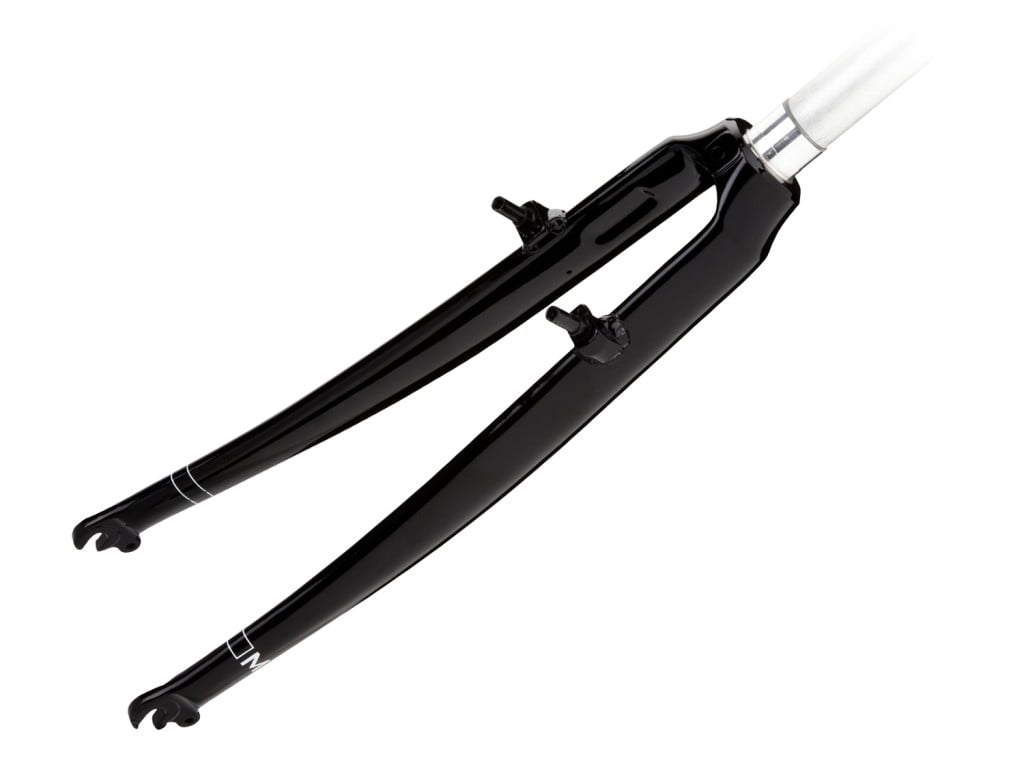
Many of such forks have a hole drilled in the middle. Through that hole, a bolt can be put for holding mudguard, or for attaching brake mounted at the fork centre.
Here it is also important to make sure that fork is used with appropriate size of wheels. Fork for 28″ wheels can take 26″ wheels, but in that case brakes will be placed too high in that case and won’t be able to catch the rims of the smaller wheel.
3.2.3. Disc brakes
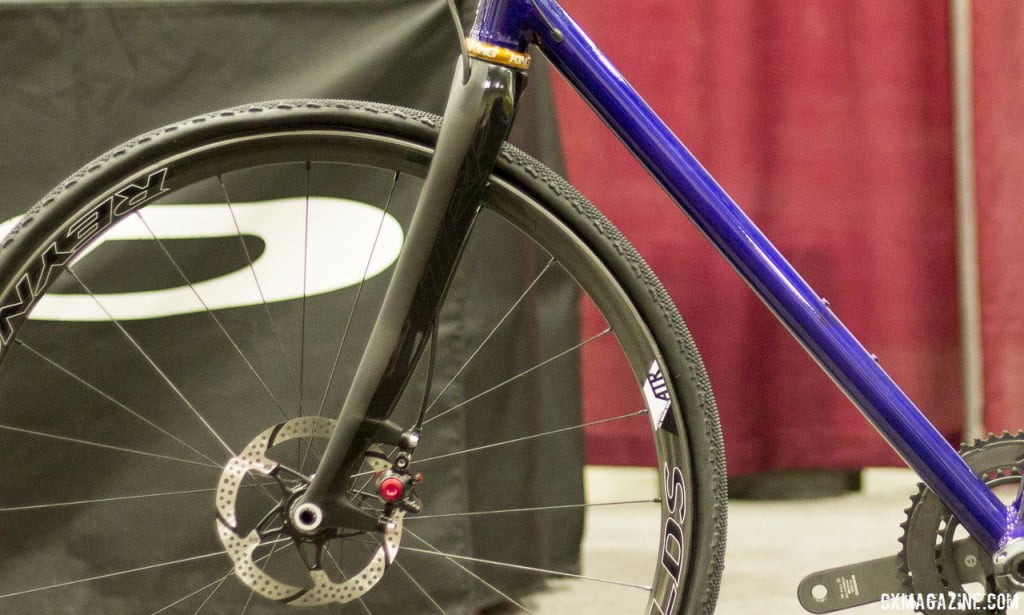
Disc brakes are mounted on the left hand side of the wheels, so the left fork leg has mounts for disc brake caliper fastening.
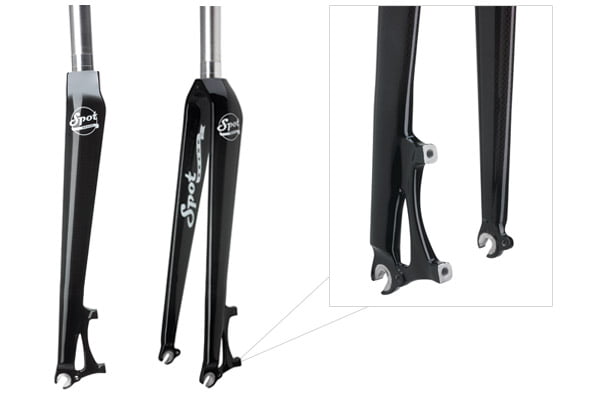
These forks can also have drilled hole in the middle for “ordinary” brakes, or mudguard mounting. They can also have V-brake mounts.
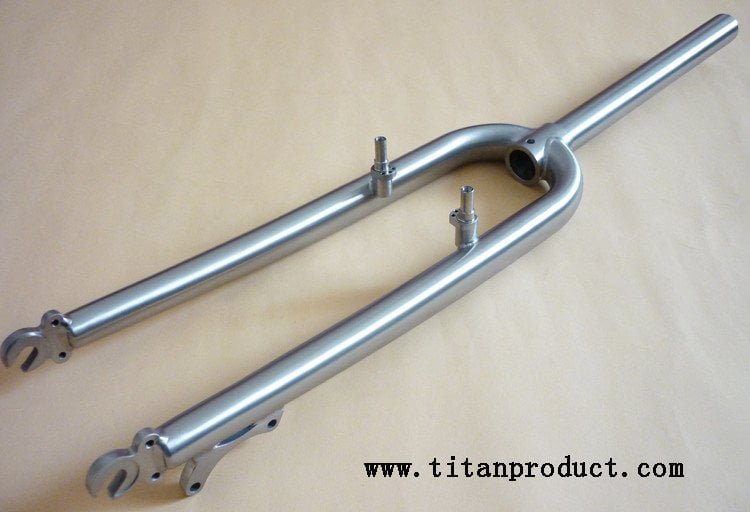
Here combining different sized wheels is OK, because disc brakes don’t use rims as braking surface. However, using a small fork with too big a wheel can be a problem – it might not fit.
3.3. Suspension vs rigid forks
3.3.1. rigid forks.
Rigid fork concept is clear – metal fork of appropriate length for the wheels it is made for.
3.3.2. Suspension forks
Suspension forks are telescopic forks with a certain amount of travel. Parts of the suspension fork are shown in the picture below:
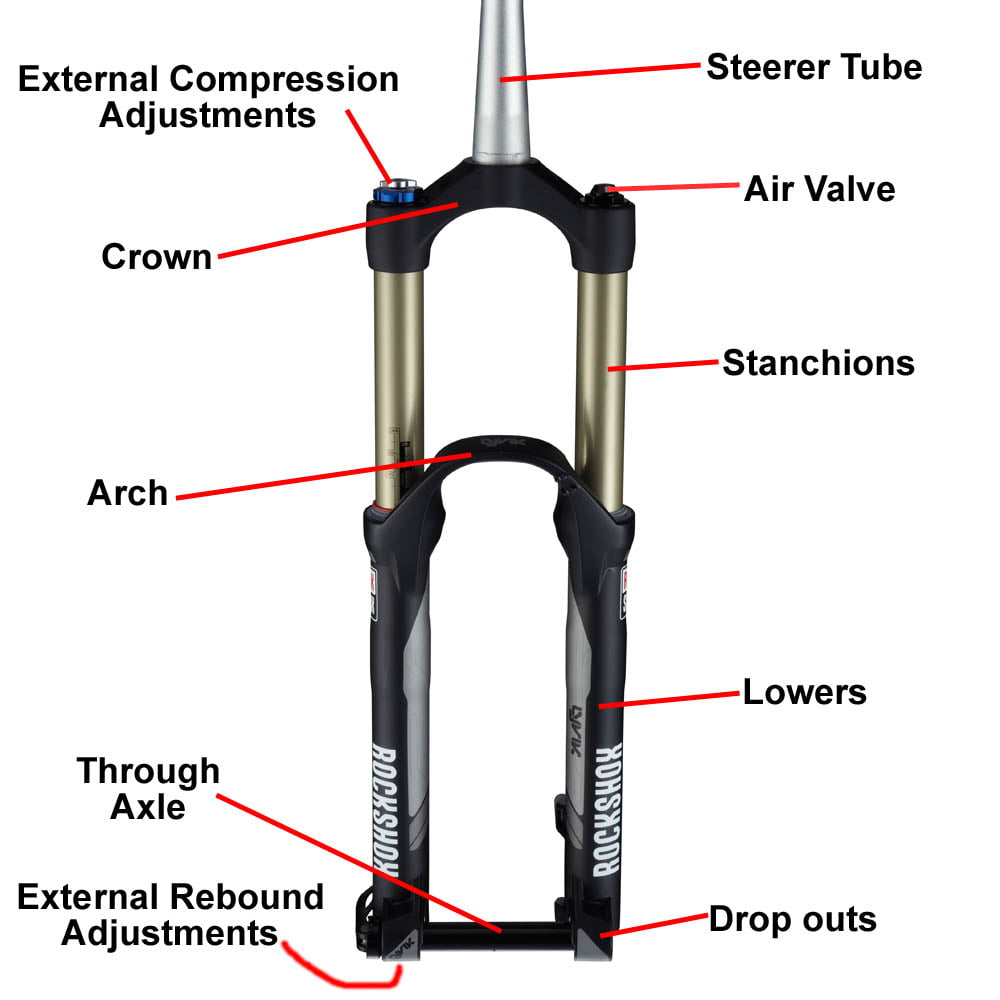
Detailed explanation of suspension forks is given in the article: Advantages and disadvantages of suspension on bicycles . Here I’ll just mention important attributes, without defining them:
- Amount of fork travel – usually between 6 and 20 cm.
- Possibility of lockout (or lock) – making it behave like a rigid fork – good when climbing hills
- Possibility of adjusting preload, compression damping and rebound rate.
Suspension forks compress when the front wheel hits a bump, then moving slowly back into previous position. They extend to a degree when a wheel reaches a small hole in the road. Doing this, good quality suspension forks improve front wheel traction and make the ride more comfortable.
Theri downside is greater weight and need for maintenance. For most riding conditions and styles, enough dampening can be achieved just using fatter tyres.
3.3.3. Suspension corrected rigid forks
Suspension forks are generally longer than rigid forks. Because of travel, in order to prevent the crown from hitting the tyre, suspension forks need to be longer.
If a bicycle frame is made for (longer) suspension fork, and for any reason, one wants to switch to a rigid fork, regular rigid for will be too short. Too short fork will ruin the bicycle’s frame geometry , making steering too twitchy. That is why suspension corrected rigid forks were introduced. They have axle to crown dimension about 10 cm longer than a standard rigid fork.
In other words, suspension-corrected forks look like regular forks, just fork legs are longer (longer axle-to-crown distance) .
For 622 mm sized wheels (28″ and 29″), standard “ordinary” fork axle-to-crown length is from about 37 cm for road bikes with narrow tyres, to about 40 cm for trekking bicycles with wider tyres (up to about 42 cm for frames designed for very wide tyres). Suspension-corrected fork axle-to-crown length ranges from 45 to 50 cm .
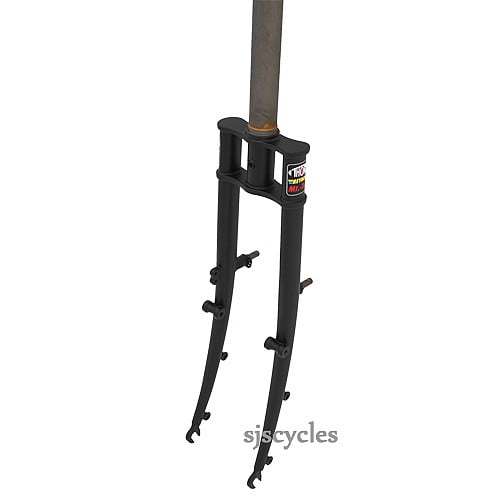
These forks are often more expensive and less widely available.
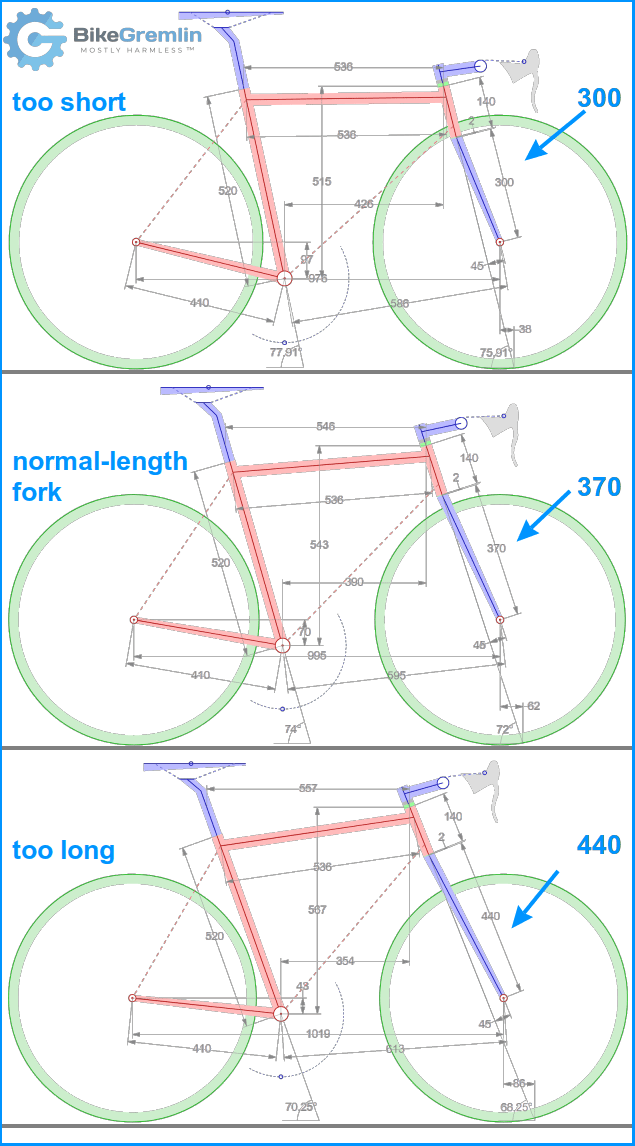
The following picture shows how fork length, whether it’s too short, or too long, affects the entire bicycle frame geometry:
Relja Novović
Relja is an avid cyclist, a pretty good bike mechanic, and a professional computer systems administrator – with decades of experience in both those fields (computers and bikes 🙂 ). Relja Novović’s credentials and a short biography
1 thought on “Bicycle fork”
After two days of looking for a detailed explanation of forks and “hangers”, this is the most concise information and best explanation I’ve found anywhere. Really, thank you sincerely
Comments are closed.
Please use the BikeGremlin.net forum for any comments or questions.
If you've found any errors or lacking information in the article(s) - please let me know by commenting on the BikeGremlin forum . You can comment anonymously (by registering with any name/nickname), but I think it is good to publicly document all the article additions (and especially corrections) - even if their author chooses to remain anonymous.

- Mountain Bikes
- Gravel Bikes
- Hybrid Bikes
- Electric Bikes
- Commuter Bikes
- Exercise Bikes
- Women’s Bikes
- Kids’ Bikes
- All Best Bike Brands
- Mountain Bike Brands
- Electric Bike Brands
- Bike Rack Brands
- Brand Review: Rad Power Bikes
- Brand Review: Ride1UP Bikes
Disclaimer: Bikexchange is reader-supported . We may earn an affiliate commission when you buy through the links on our site.
Complete Mountain Bike Suspension Guide: Explaining Basic Concepts and Adjustments
Image source: cannondale.com
Bike suspension is one of the most complicated topics in cycling. It would take a university degree to understand all the details of how suspension works, how the individual components interact, and how each adjustment impacts performance.
This article isn’t going to provide you with the level of detail. However, we will cover the basics of how mountain bike suspension works, the terminology used to describe the systems, the different types of rear suspension platforms, and a quick guide to setting up your fork and rear shock.
So if you know very little about mountain bike suspension but want to understand all the basics, you’re in the right place!
Table of Contents
Overview of mtb suspension and terminology.
- Mountain Bike Forks Explained
- Rear Suspension Explained
Key Mountain Bike Suspension Concepts
- Basic Mountain Bike Suspension Adjustments
Before diving into mountain bike suspension in more detail, it’s helpful to understand how suspension works and go over some important terminology.
How Does Mountain Bike Suspension Work?
Mountain bike suspension uses shocks that allow the wheels to move up and down a predetermined path. This movement absorbs bumps to help keep the tires in contact with the ground for better traction and control and reduces the impact on the rider, increasing comfort.
All MTB suspension has a spring (air or coil) and a damper . The spring provides resistance to the wheel’s movement when it hits an obstacle (compression) and the energy to move back down after compressing (rebound).
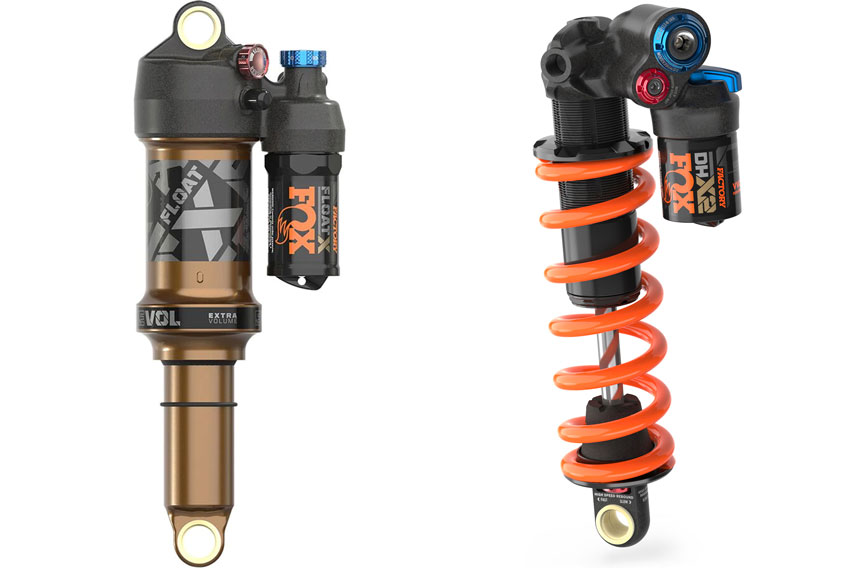
Fox Float X Factory air shock (left) and Fox DHX2 Trunnion coil rear shock (right).
The damper is a mechanism in the fork stanchion or shock body that regulates compression and rebound speeds. Modern mountain bike forks and shocks allow you to control each one independently.
Overall, suspension design balances the absorption of impacts, the effect of braking forces, and pedaling efficiency to create a system that best serves a bike’s intended use. This interplay is particularly relevant for full-suspension bikes .
Suspension Terminology
- Bottom-out – Refers to the shock or fork reaching the limit of its travel. A fork should only bottom out occasionally. Regularly bottoming out means it’s set too soft; never bottoming out means it’s too firm.
- Compression damping – Controls the rate of compression when the shock is under load. More damping gives the fork a firmer feel.
- Lockout – This lever significantly reduces compression or stops it completely. Use it to improve pedaling efficiency for climbs or pavement.
- Linear compression rate – Resistance to compression increases at a steady rate throughout the entire travel.
- Progressive compression rate – Resistance to compression increases at a varied rate, with less resistance at the beginning of the stroke and more resistance at the end.
- Preload – Pre-compressing the spring with a ring so that more force is required to begin compressing the suspension, making it stiffer. The equivalent of increasing air pressure in air suspension.
- Rebound damping – This resistance controls how quickly the suspension returns to its original position after compression.
- Sag – The distance the suspension moves into its travel under the rider’s weight while stationary.
Coil vs. Air Springs
Coil spring suspension is the older of the two designs. Steel coils have linear compression rates (see above) and are available with different resistance levels, typically matched to the frame size and the average rider weight in that height range. If your suspension is still too soft or firm after making the appropriate adjustments, you can replace your spring with a softer or firmer one.
An air spring is a pressurized air chamber. By changing the internal pressure using a shock pump, you can change the characteristics of the spring. Air springs have progressive compression rates, are lighter, and are more tunable than coils.
Guide to Mountain Bike Forks
There are two kinds of suspension mountain bikes: hardtails and full-suspension MTBs .
Mountain bike forks are highly variable and adjustable to suit different riding styles and riders. In contrast, hybrid forks offer minimal impact absorption with little-to-no adjustment capability.
Suspension Fork Parts and Terminology
This section will cover the most important fork-specific terminology and the individual components that make up the fork. Forks work in a telescopic motion , wherein the stanchions drop into the lowers when under load.

Image credit: TheProsCloset.com
- Crown – Connects the two stanchions to each other and the steerer tube. Moreover, 200mm-travel forks on some of the best downhill bikes have a dual-crown design to increase stiffness for the extreme demands of this discipline.
- Front travel – Front travel is the distance the wheel moves when the fork reaches full compression. Wheel travel and fork travel are equal.
- Lowers – The outer tubes into which the stanchions slide. The lowers connect to the wheel via the axle.
- Stanchions – These tubes connect to the headset via the steerer and consist of an air chamber or coil spring and damper mechanism.
- Steerer – Connects the fork uppers to the frame’s headset.
Types of Fork Suspension
There are two types of fork currently on the market, the standard double-prong design shown in the diagram above and a single-prong used by Cannondale.
Cannondale’s proprietary ‘Lefty’ fork has a single left-sided stanchion. It provides the same basic functionality as a standard fork but weighs less.
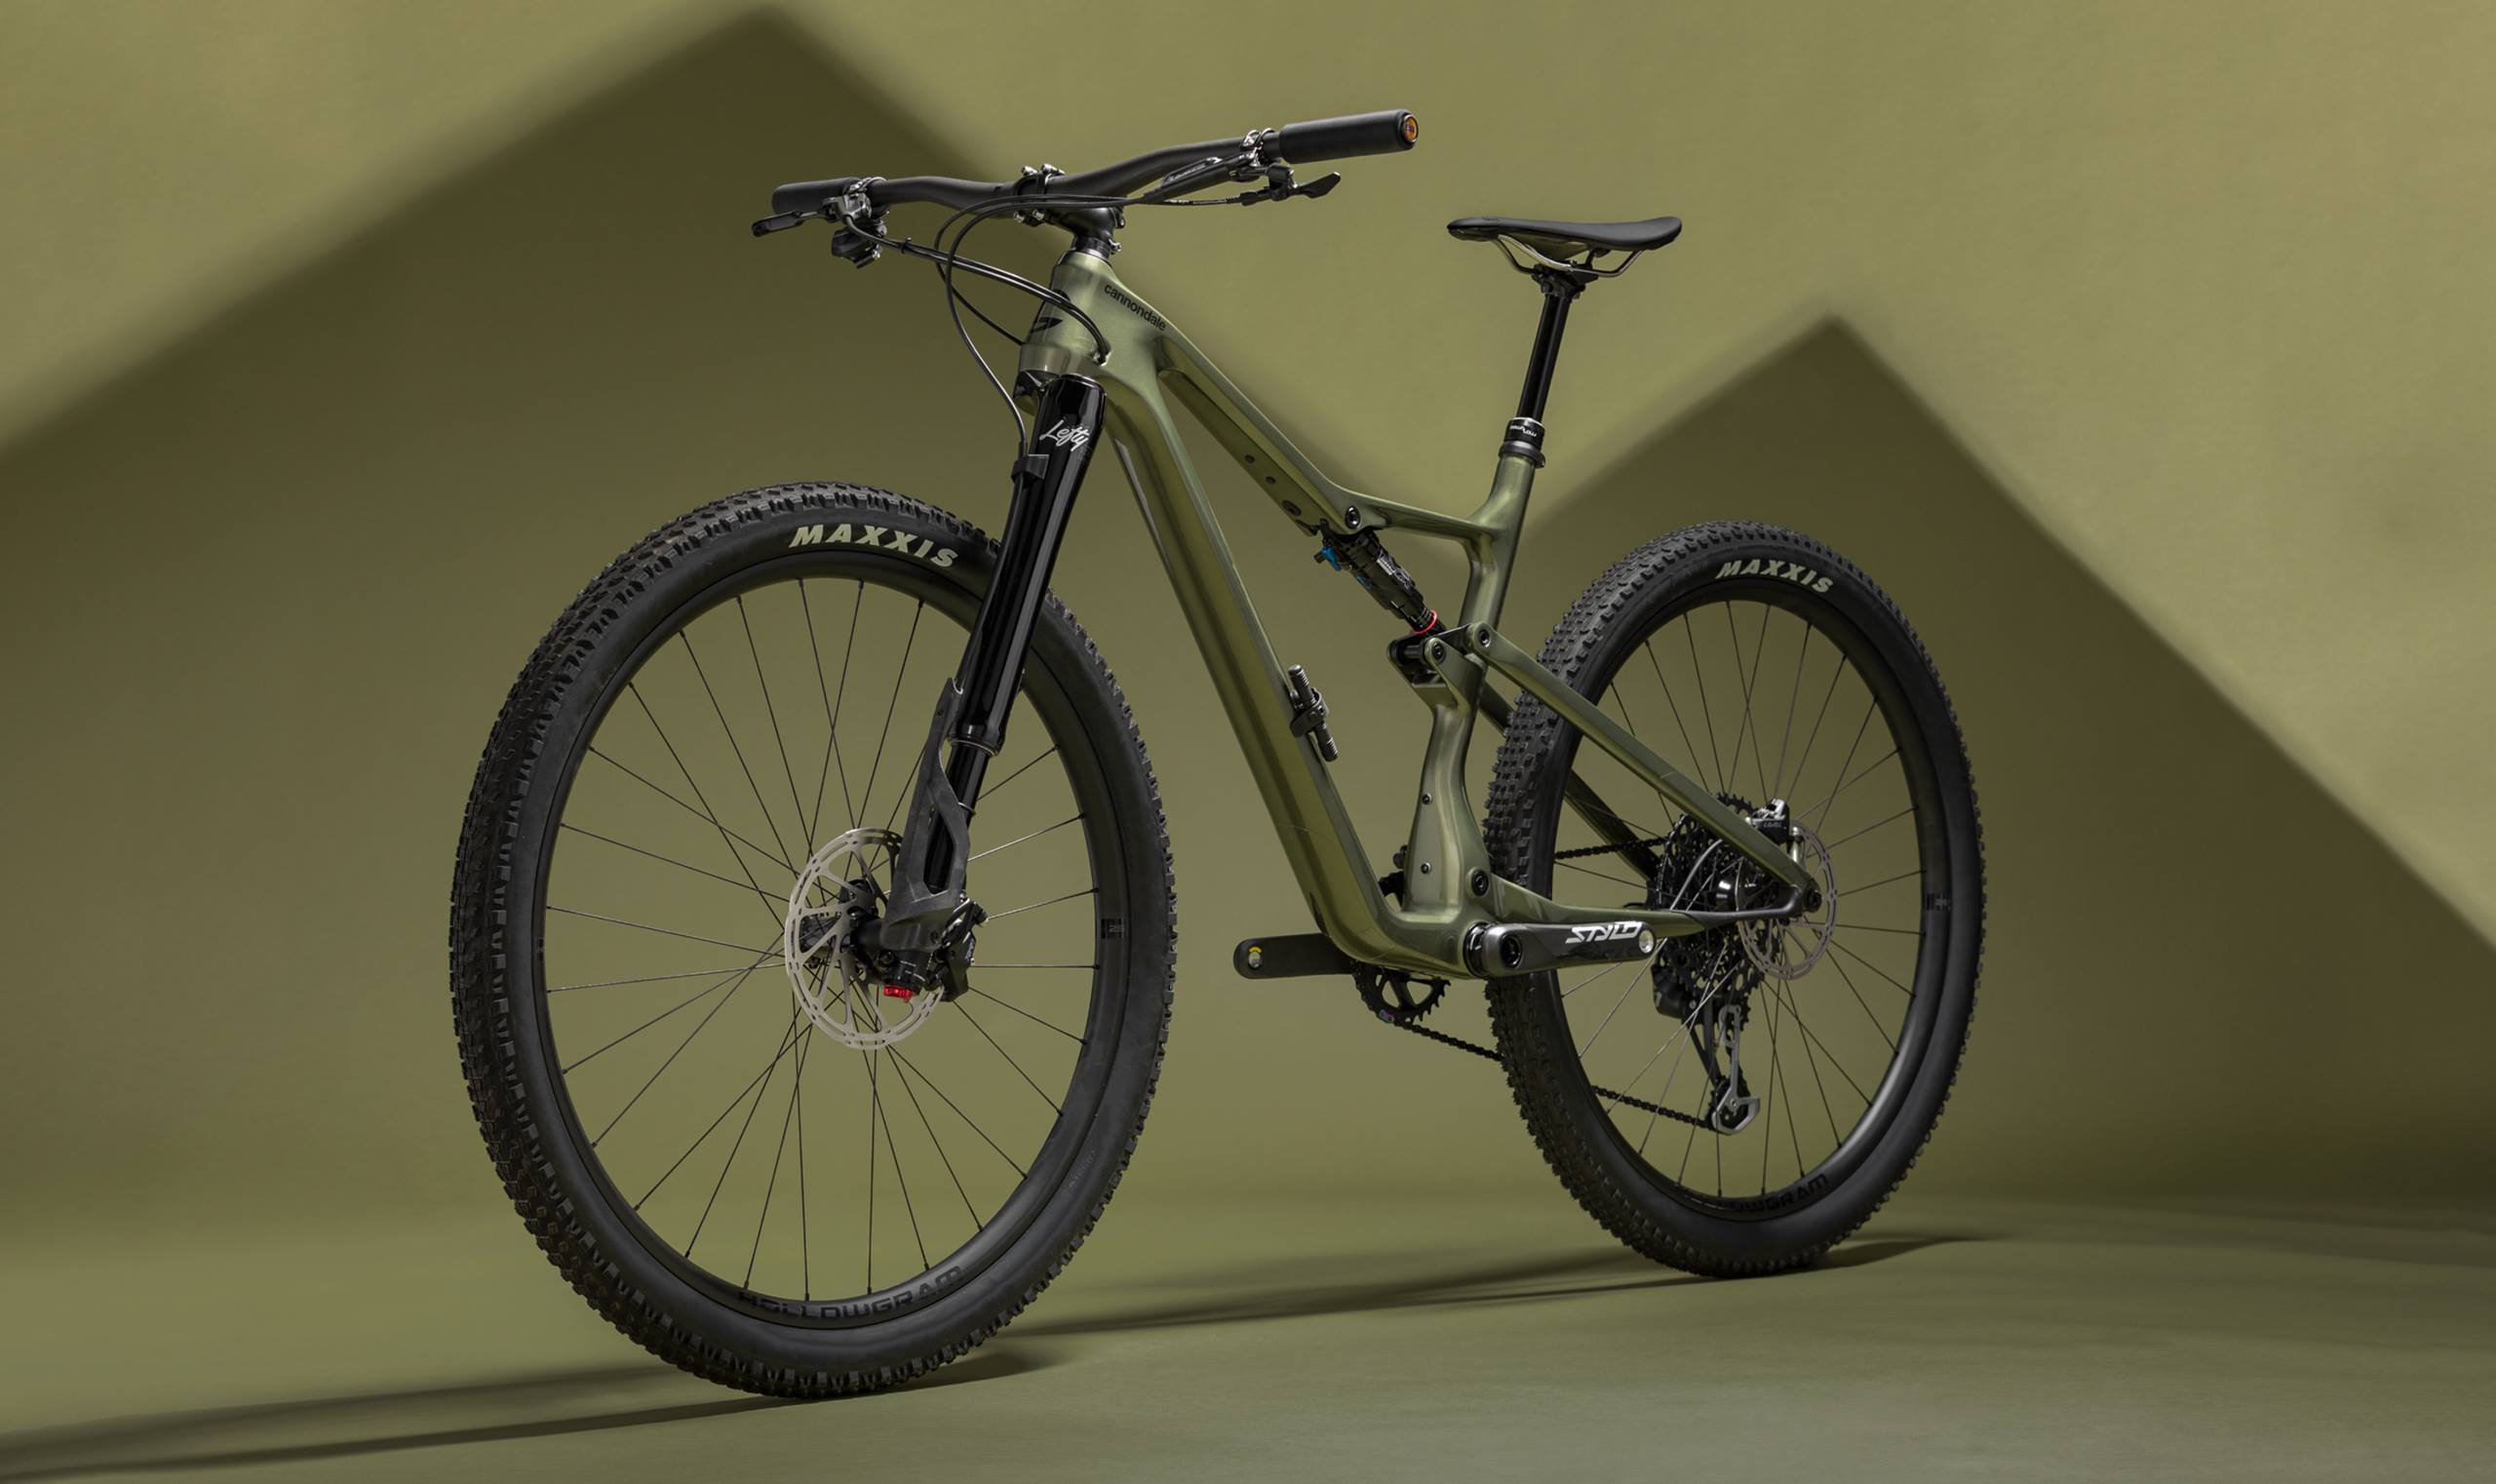
Cannondale Scalpel with a Lefty Ocho fork.
Most MTB forks use air springs, thanks to their lighter weight and tunability. However, cheap beginner mountain bikes and some downhill mountain bikes still use coil springs or offer them as an alternative, like the Santa Cruz Nomad .
Mountain bike forks for adults’ bikes range from 100 to 200mm of travel. Forks with less than 100mm travel are typically only for hybrids or kids’ MTBs.
- Cross-country: 100-120mm
- Trail: 120-150mm
- Enduro: 150-180mm
- Downhill: 180-200mm
The amount of travel required is specific to the trails ridden and the riding style; more isn’t always better. Extra travel means more weight (in a fork of equal quality), lower efficiency, and more sluggish handling.
Another critical measurement in bike suspension fork design is stanchion diameter. When the fork experiences an impact, a small amount of lateral flex occurs in the stanchion; the thicker the stanchions, the less they flex. A fork designed to handle harder and faster hits needs wider, stiffer stanchions to ensure they don’t flex too much and cause damage.
Wider-diameter stanchions flex less , which is better for more extreme riding like the enduro or downhill. However, the trade-off for wider stanchions is extra weight, so weight-conscious disciplines, like XC, use narrow-stanchion forks.
- Cross country and Trail: 30-32mm
- Trail: 32-34mm
- Enduro: 35-38mm
- Downhill: 40mm
Guide to Mountain Bike R ear Suspension
A fork shock moves together with the front wheel because the fork shock directly connects to the front axle. In contrast, the rear shock indirectly links to the rear wheel, requiring one or more pivot points that allow the rear wheel to move along a variable yet predictable path as the shock compresses.
Interestingly, the first rear suspension MTBs actually used forks in the rear dropout, but this was an ineffective design and was quickly discontinued.
This section will mention several important suspension kinematics concepts, which we will explain in more detail in the following section. Now, let’s take a closer look at rear suspension and how it works.
Mountain Bike Shock Anatomy and Measurements
Several different components make up a MTB shock. So you can better understand how rear mountain bike suspension shocks work, we’ve labeled this Fox Float DPX2 air shock. Coil mountain bike shocks are primarily used on heavy-duty downhill mountain bikes as they don’t lose performance from heat buildup like air shocks.
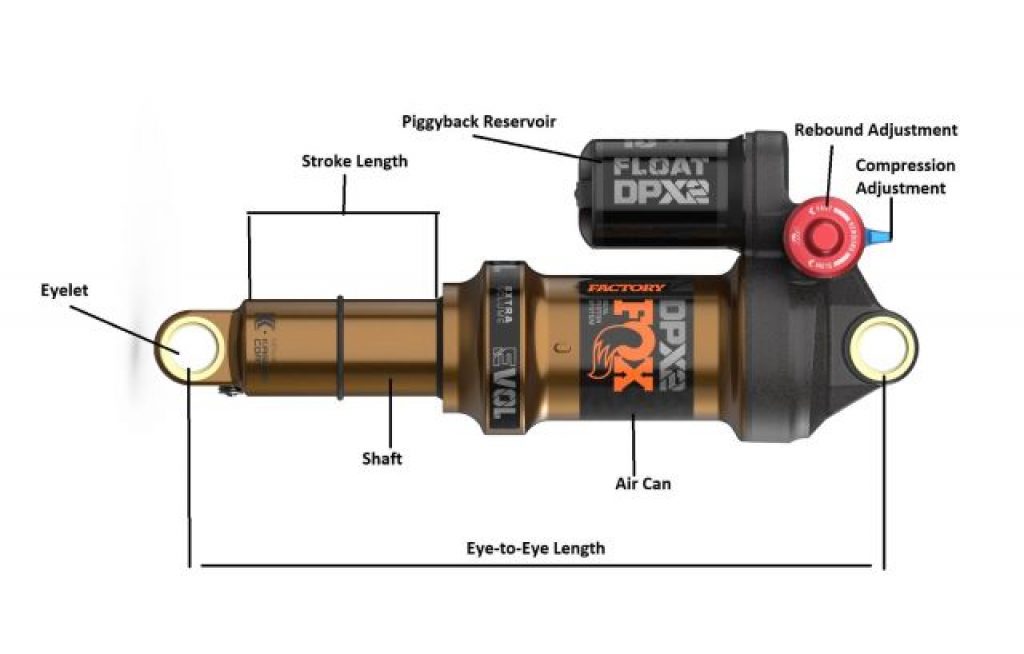
- Eye-to-eye – The total length of the shock, measured as the distance between the two eyelets (mounting points).
- Stroke length – The distance the shock compresses under load.
- Rear travel – The distance the wheel compresses when the shock is fully compressed.
- Leverage ratio – How much the rear wheel compresses in relation to the shock. For example, a 2:1 leverage ratio means the wheel compresses 2mm for every 1mm of shock compression.
- Linkage – The components in the frame’s rear that connect the rear MTB shock to the rear wheel.
- Piggyback reservoir – This keeps the damper reservoir away from the main body to reduce the effect of heat buildup on the damper’s function, increasing performance.
Mountain Bike Rear Suspension Types and How They Work
Rear mountain bike suspension is a much more complex system than front suspension, as they rely on one or more pivots in the frame and linkages to connect the MTB rear shock and the rear wheel. The pivot(s) allows the rear triangle and linkages to articulate and simultaneously compress the rear wheel and rear shock, according to the leverage ratio.
Rear shocks typically sit within the frame’s main triangle, but the position within the main triangle changes in each system. One side of the shock mounts to a point in the main triangle, and the other side mounts to the rear triangle.
In general, rear mountain bike shocks perform the same task as the fork, absorbing impacts to improve comfort and help you maintain control and traction by keeping the rear tire in contact with the ground.
There are four broadly-used rear suspension configurations, each with its own subtle advantages and disadvantages. The average recreational mountain biker won’t notice much difference between rear mountain bike suspension types.
Single Pivot
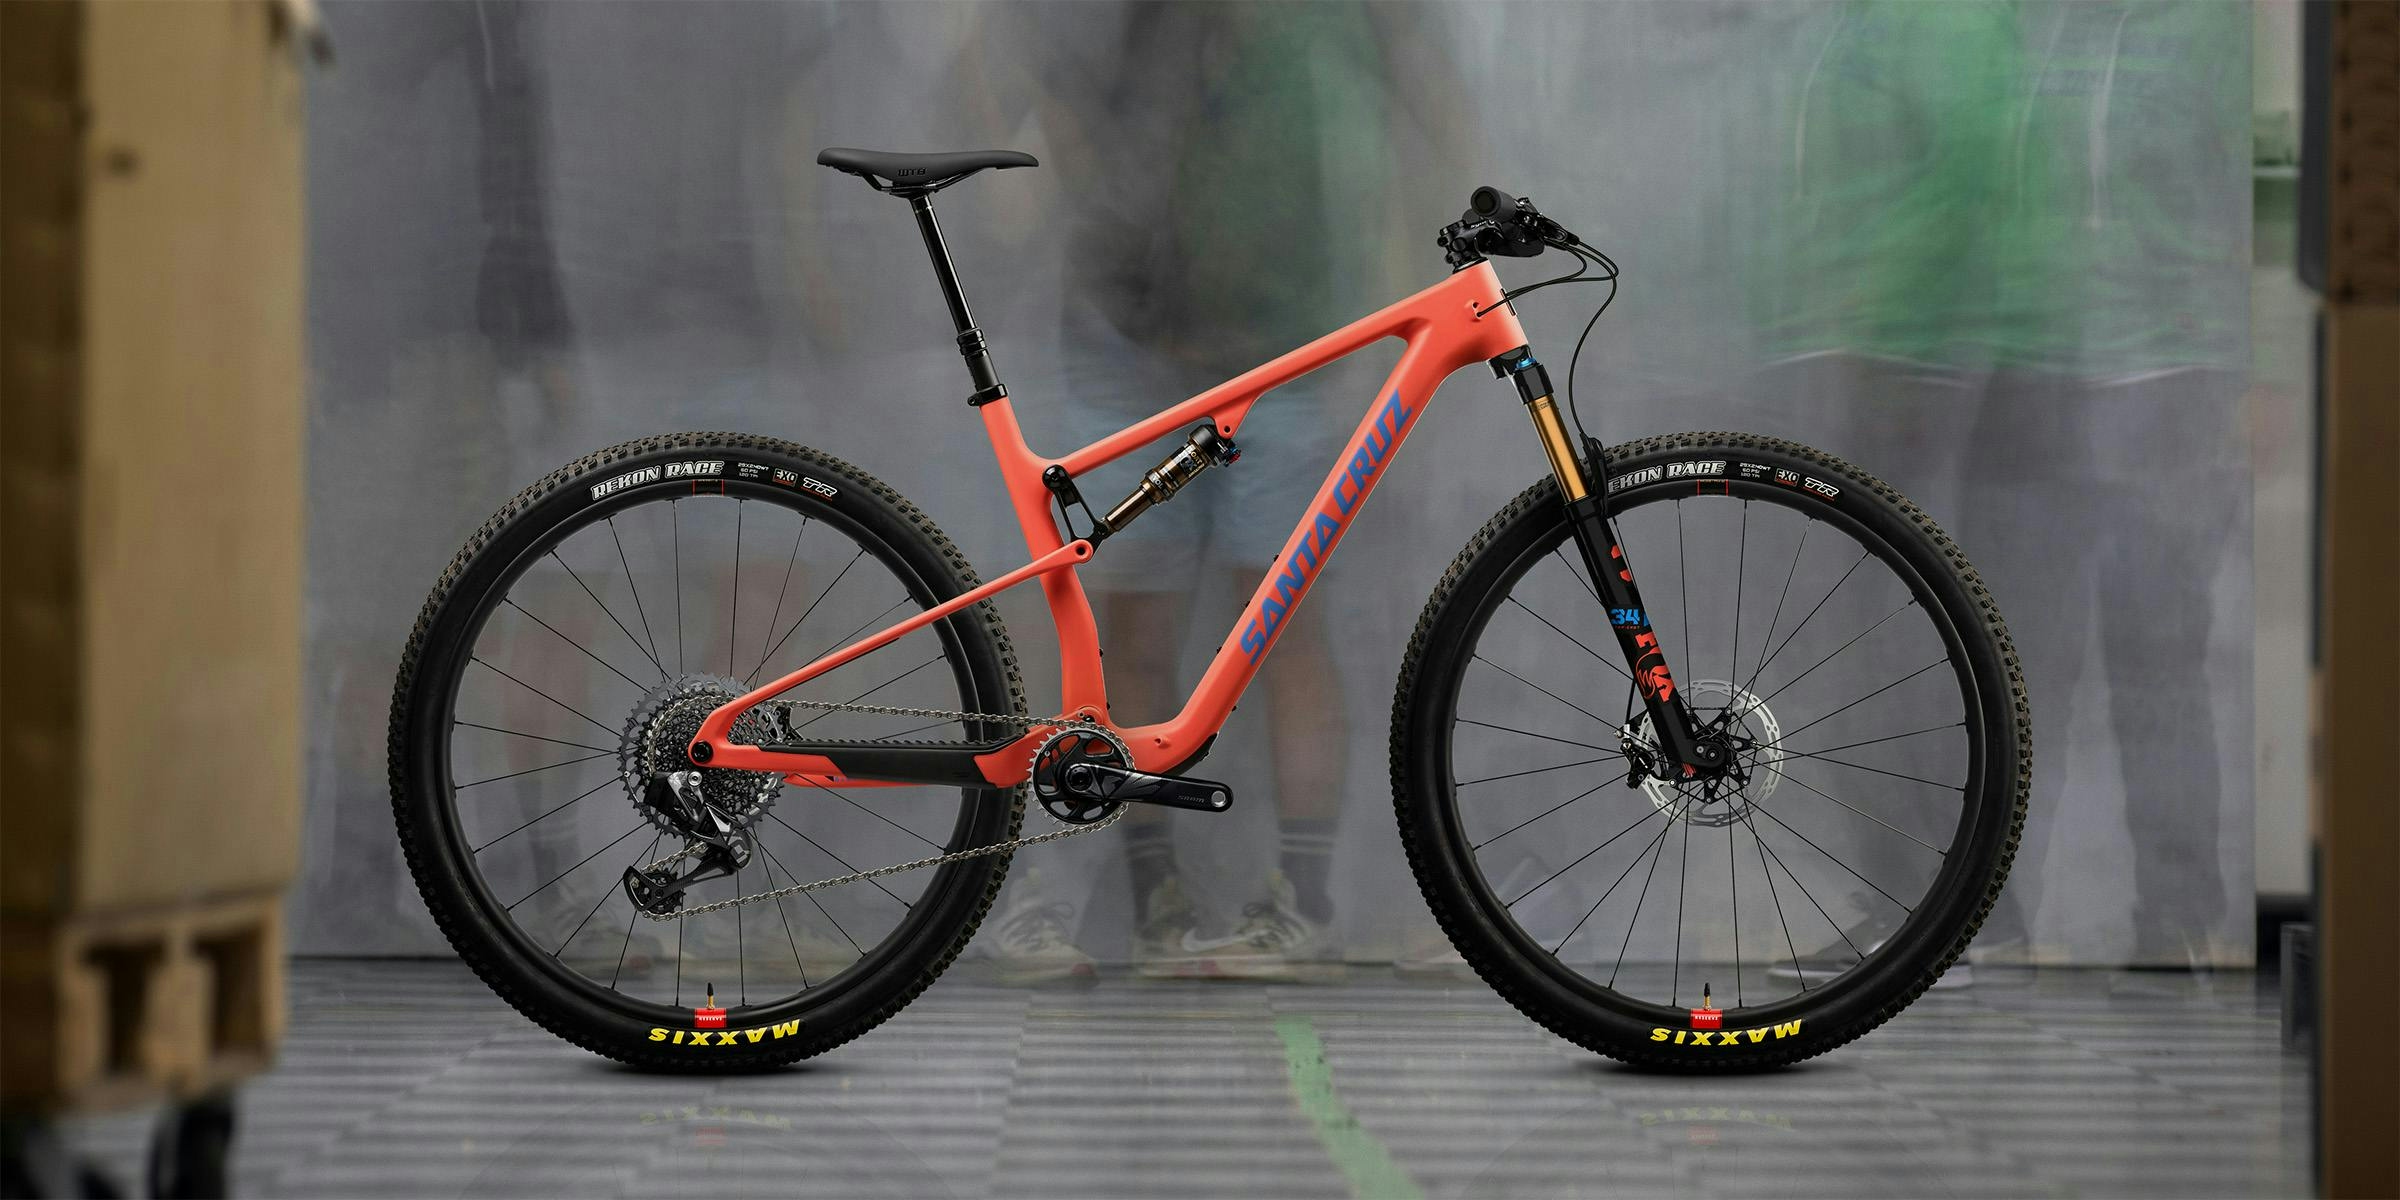
The Santa Cruz Blur uses a simple single-pivot configuration.
In single-pivot rear suspension, the rear axle pivots in a constant arc around a single unmoving point. A continuous swingarm links the rear axle, the main triangle (on the top tube or downtube), and the shock.
This simple design reduces mechanical complexity and weight and makes the bike easier and cheaper to maintain. In addition, there is no patent on the design, so that any manufacturer can use it.
The downside of the single pivot system is the linear leverage ratio, meaning that the resistance to compression increases at the same rate, and you can’t modify the leverage curve.
Linkage-drive Single Pivot

The Commencal Meta TR uses a single pivot with the four linkages.
The closest design to the single pivot configuration is a linkage-driven version. This system also uses a solid swingarm connecting the main triangle to the rear axle and pivoting around a single point. However, instead of connecting directly, the swingarm uses linkages to connect to the shock.
Various iterations of this design exist, but the general function is the same. A solid swingarm connects the rear axle and a single pivot. This swingarm rotates around this pivot with a fixed instant center throughout the travel.
Using the linkages, engineers can control the leverage ratio curve , so you can have a progressive curve instead of being stuck with a linear one. For example, manufacturers could select a stroke progression that’s softer at the start, providing better small bump sensitivity. Alternatively, a firmer start to the stroke would increase pedaling efficiency.
The downside of this system is extra mechanical complexity, meaning more maintenance and expensive repairs. In addition, the fixed instant center means designers can’t modify anti-squat and anti-rise characteristics independently.
Four-bar (Horst-link)
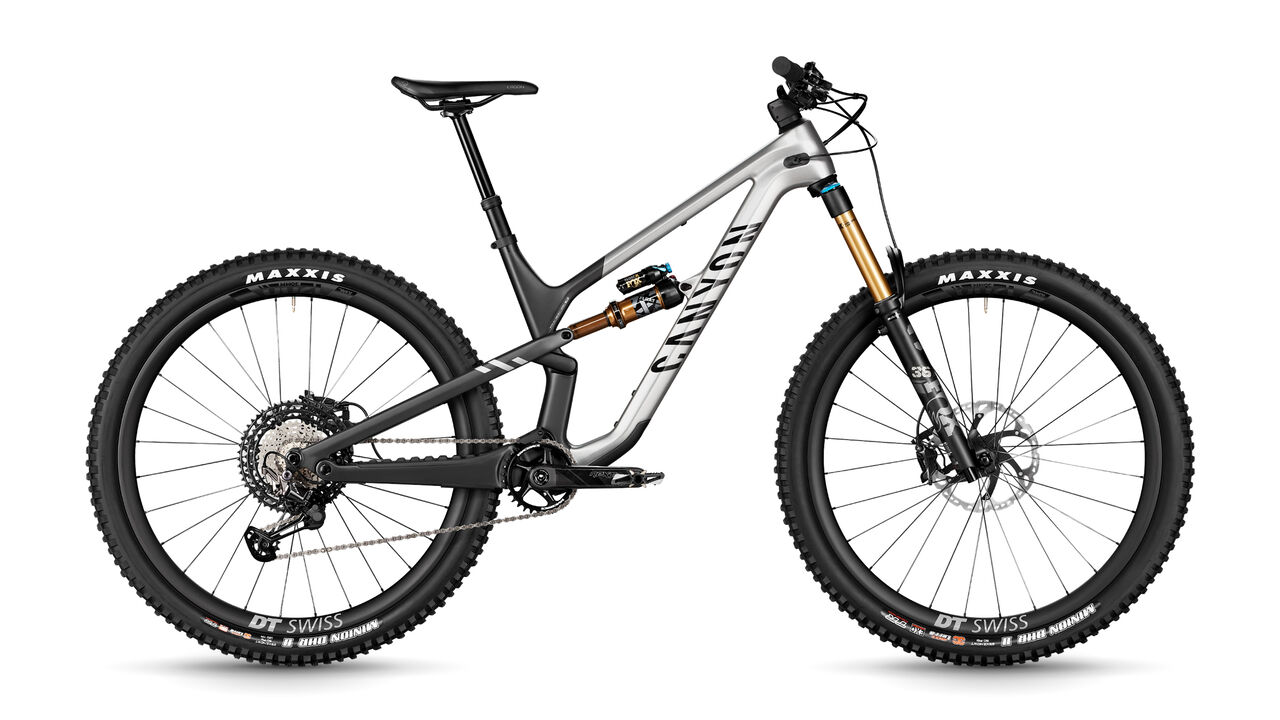
The Canyon Spectral uses a Horst-link with a pivot on the chainstay at the axle.
Specialized first popularized the four-bar suspension platform, with several brands now using their own variation. The main characteristic of this design is the pivot point on the end of the chainstay just below the rear axle. Instead of connecting to the chainstay, the axle connects to the seat stay.
The rear axle has a modified path that rotates around an instant center that changes position as the MTB rear shock moves through its travel because it’s not directly connected to the main triangle. This design allows engineers to manipulate anti-squat and anti-rise characteristics at different stages of the travel.
In general, manufacturers that use four-bar systems optimize for low anti-rise, so the braking forces have minimal impact on the suspension. Alternatively, you can design Horst-link suspension to have high anti-squat at the beginning of the stroke and less at the end. Higher anti-squat means less pedal bob but more pedal kickback.
In addition to having control of anti-squat and anti-rise , Horst-link suspension gives designers control over the leverage ratio curve. The downside is that these systems typically have lower anti-squat, meaning they’re less efficient.
Twin-link
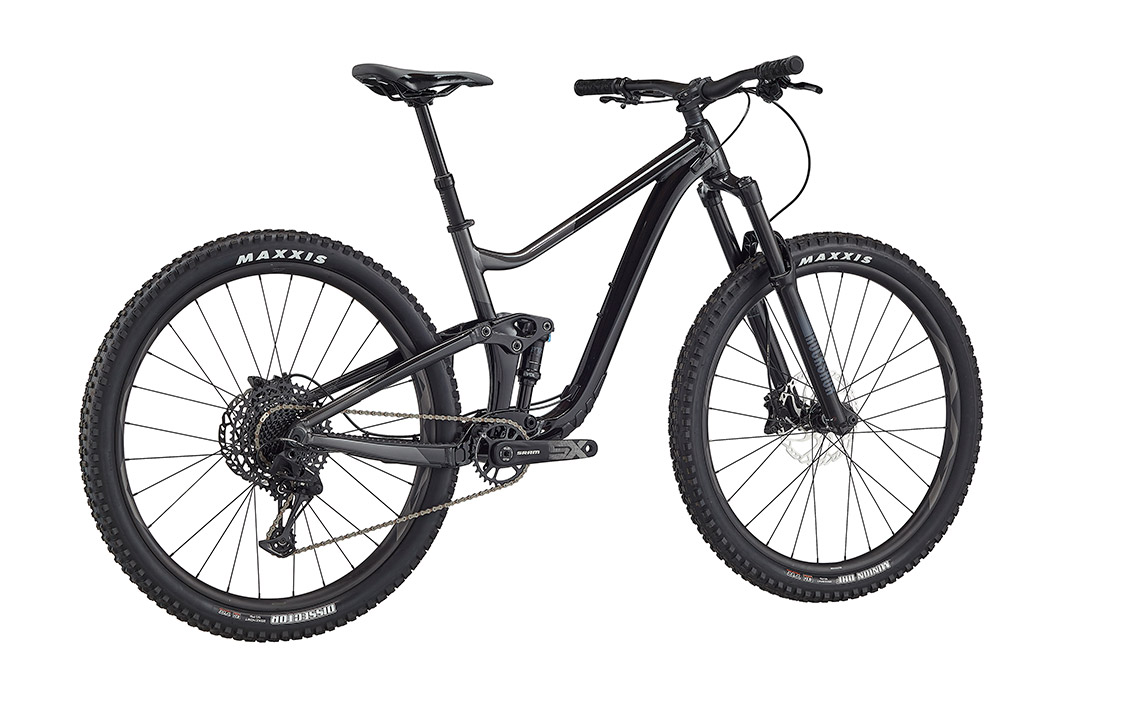
The Giant Trance X uses their proprietary Maestro twin-link suspension with co-rotating rocker links.
Twin-link systems usually use a fully rigid rear triangle that connects to the main triangle using two rocker links. Instead of being located beside the axle, the chainstay pivot is much closer to the main triangle. In the twin-link design, either the rear swingarm or one of the rocker links will drive the shock.
The twin-link design looks similar to a single pivot but performs similarly to the Horst-link with four pivot points, meaning the instant center can be designed to move throughout the travel. Again, an instant center that moves as the suspension compresses gives engineers control over the handling characteristics at different stages of the travel.
A critical differentiation between twin-link designs is the rotation of the rocker links. Some systems have counter-rotating links, like Santa Cruz’s Virtual Pivot Point (VPP) , while others, like DW-Link and Giant’s Maestro , use links that rotate in the same direction. Each configuration has specific characteristics which impact the system’s performance.
Twin-link suspension is highly tunable , like four-bar suspension, but the curves aren’t as predictable. Finally, a potential benefit is that the anti-squat and anti-rise are more consistent throughout the travel.
Alternative Designs
In addition to the four configurations described above, popular brands have their own proprietary iterations that attempt to improve performance. Let’s take a brief look at two of the most popular.
Firstly, you have Yeti’s Switch Infinity . This design uses a patented translating pivot that switches direction as the bike moves through its travel. This setup theoretically gives Yeti independent control over anti-squat and leverage ratio curves.
High pivot is another unique design that brands like Cannondale (Jekyll), Norco (Shore), and Devinci (Spartan) are using on select models. This distinct system uses an idler pulley to route the chain over the pivot point.
High pivot suspension has a more rearward axle path, improving impact absorption and increasing pedaling efficiency. However, there is more drivetrain drag, extra mechanical complexity and maintenance, and the geometry varies through the travel.
Understanding suspension kinematics concepts will help you understand how the different designs influence handling.
Bike designers must optimize how the system responds to braking forces, absorbs impacts, and influences pedaling efficiency.
Instant Center
The instant center is the point that the rear axle is rotating around at a given instant in the travel. For example, on a single-pivot rear suspension, the instant center is fixed at the pivot point, meaning the rear axle has a constant arc. Alternatively, manufacturers can create an instant center that floats (migrates) throughout the rear shock compression by using a combination of linkages.
To find the instant center at a given point, you draw a line through the pivot points of the top two linkages and another through the bottom and mark the point where the two lines intersect.
As the instant center moves, the anti-squat and anti-rise characteristics change. Designers can manipulate the path of the instant center to get their desired effects on performance at specific points in the travel.
Pedaling Efficiency
Pedaling efficiency refers to the percentage of energy that reaches the rear wheel from each pedal stroke. Generally, the more suspension a bike has, the less efficient it is to pedal. However, there are notable variances between suspension systems. The trade-off of higher efficiency is a less plush ride.
The most advanced suspension designs can maximize pedaling efficiency in the early part of the travel, where it’s most important, and let it digress throughout the travel.
What Is Pedal Bob?
‘Pedal bob’ is an oscillating motion that occurs when you push the pedals. To illustrate, you push the bottom bracket down, and your weight moves back as the bike accelerates, compressing and rebounding one or both shocks.
Unwanted compression and extension lead to wasted energy that the shock absorbs instead of transferring to the rear wheel. As a result, pedal bob is most impactful on climbs where pedaling efficiency is most notable to the rider.
What Is Anti-squat?
Anti-squat refers to how much the system resists the compression that occurs during pedal bob, creating a more efficient pedaling platform. Simply put, it’s how the suspension reacts when you accelerate.
The force that resists squatting (anti-squat) is called the chain-pull force. It comes from the tension in the chain that pulls the swingarm back down when the shock compresses and the rear wheel lifts. Increasing anti-squat reduces the sensitivity of your suspension, making for a harsher ride.
Manufacturers represent anti-squat in percentages. 100% would theoretically mean there is no pedal bob, as the squat and anti-squat forces cancel each other out. Less than 100% would amplify the squat forces, not counteract them, while greater than 100% would extend the suspension, which is actually necessary for some high-travel bikes to offset shifts in rider weight.
Because anti-squat depends on chain tension, the anti-squat percentage is different in each gear on the cassette or if you have multiple chainrings. In addition, factors like the rider’s center of gravity and where the shock is in its travel will contribute to the actual anti-squat in a given moment.
With so many variables to consider, giving a specific formula for the optimal anti-squat characteristics is impossible. It’s down to the manufacturer’s preference. Ideally, you want anti-squat to peak in the early to mid part of the travel and then drop off, which systems like Santa Cruz’s VPP achieve.
What Is Pedal Kickback?
Pedal kickback is the sudden backward movement of your pedals when the suspension compresses . When your mountain bike’s rear shock compresses under the force of an impact, your wheel and the attached cassette lift simultaneously. When the cassette lifts, it tugs on the chain, causing ‘chain growth’ and rotating the chainring backward.
The more anti-squat a bike has, the more pedal kickback it experiences in a proportional relationship. Manufacturers can reduce pedal kickback by using an idler pulley like in the high-pivot system.
You can decrease the anti-squat to minimize pedal kickback and increase the sensitivity of your bike mid-ride by shifting into harder gears (the smaller cogs on the cassette and the larger chainring if you have multiple). This technique is valuable when approaching rock gardens or rough descents.
Absorbing Impacts
Nobody would argue that suspension’s most important function is absorbing impacts. The last thing you want when riding on mountain trails is the energy from landings or big hits to repeatedly transfer from the rear wheel into your body.
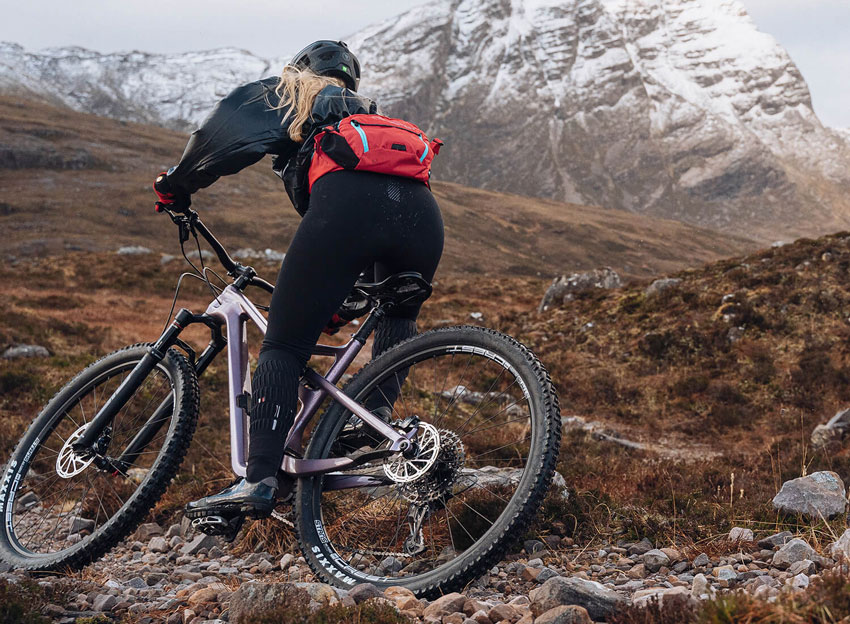
One of the main purposes of mountain bike suspension is to absorb impacts and make the ride more stable and comfortable. | Image source: cannondale.com
For this article, we won’t cover the kinematics of impact absorption in detail. However, it’s worth noting that suspension designers try to optimize the wheel path and the wheel rate for the specific bike.
The wheel path is a set path that the axle follows when there is an impact on the rear wheel. The wheel rate correlates to the stiffness of the shock at different points in the travel. Wheel rate can be progressive (soft at the start, firm at the end), linear, or digressive (firm at the start, softer at the end).
Gravity-focused MTB disciplines favor progressive wheel rates to prevent harsh bottom-outs and increase small bump sensitivity.
Braking Efficiency: What Is Anti-rise?
Anti-rise is the effect of braking forces on the suspension or how much the suspension compresses or extends from braking. By manipulating this, manufacturers can create a stable or active response to braking forces.
When you brake, your weight shifts forward, putting more pressure on the front of the bike and less on the rear, making the rear extend. Anti-rise counteracts this extension, so the bike stays level under braking forces.
In theory, high anti-rise makes the suspension feel harsher; therefore, manufacturers try to keep a low anti-rise percentage. 0% anti-rise means the suspension stays active and plush. 100% anti-rise means it doesn’t extend or compress from braking, and the geometry remains the same.
No suspension system can be completely isolated from braking forces, and the right balance of anti-rise to anti-squat and the other suspension kinematics is down to the type of bike.
How to Set up and Adjust Mountain Bike Suspension
Take time to set up your suspension and adjust it regularly to ensure it performs how you need it to, and avoid damaging the components by bottoming out too frequently.
Adjustments
There are several possible adjustments you can make to suspension. Higher-end components have more adjustability and more precise controls.
- Lockout – As mentioned, the lockout closes the damper to eliminate compression. Most bike suspension components, even hybrid forks, have a lockout lever, usually located on the top of the stanchion or on the shock body. However, premium MTBs may have a remote handlebar lever to control lockout. Use this adjustment when you ride on pavement or climb on smooth trails.
- Air pressure – Instead of using a mechanical preload as you would on a coil fork, air suspension forks use a Schrader valve, like those on tires, to adjust the air pressure. These require a specific shock pump, don’t use your tire pump. The fork valve is typically located on top of the stanchion under a cap or at the bottom of the lowers. You can reference your manufacturer’s setup guide to find their pressure estimate based on weight and frame size, but use sag to find the precise measurement.
- Preload – Adjust coil spring preload with the preload knob on top of the stanchion or the collar on the shock body. Increase the preload if your fork feels too soft, and decrease it if it’s too firm. The adjustment range is much lower for coil preload compared to air pressure. Big adjustments will require swapping out the coil.
- Damping – Most modern shocks allow you to tune them with compression and rebound damping. Compression damping also breaks down into high-speed compression and low-speed compression. High-speed compression damping controls how the shock reacts under big hits and landings; low-speed controls how it reacts under slow inputs like shifting weight. Increasing low-compression damping holds the suspension higher up in the travel and reduces pedal bob.
Basic Mountain Bike Suspension Setup
A basic suspension setup can help you get onto the trails quickly after buying a new bike. The following instructions include the most important initial adjustments. However, most shocks and forks offer extra adjustments that can fine-tune your suspension even more.
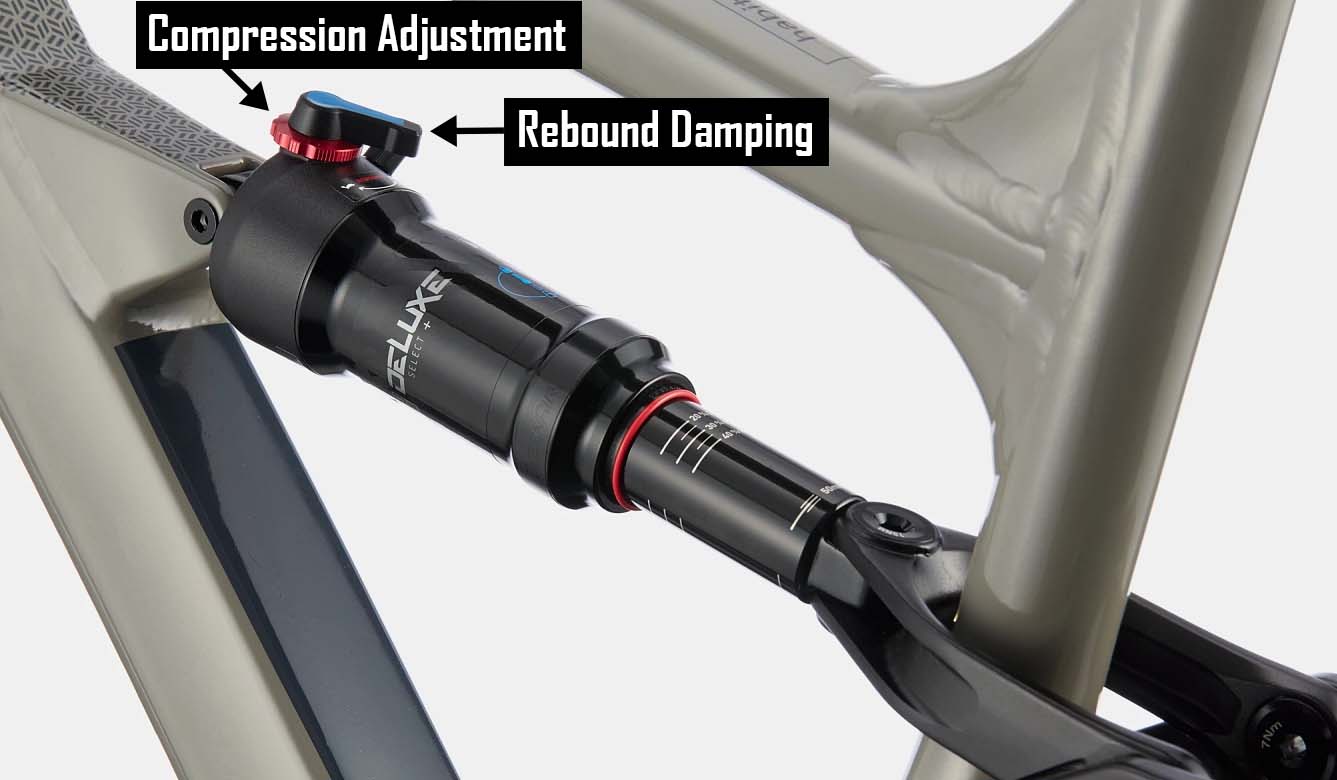
Compression and rebound suspension adjustment on an air rear shock.
Begin by getting dressed in your typical riding gear and carry your backpack or hydration pack if you usually ride with one. Next, inflate your tires to the correct air pressure , and pack your shock pump (if you have air suspension).
Then, take your bike to an open space where you can ride around slowly without interfering with traffic, such as an empty parking lot. id=sag
Setting Sag
Recommendations for sag depend on the discipline and the manufacturer. You can choose higher or lower settings based on your riding style and preferences. For more conservative riding or inexperienced riders, aim for more sag. Fox recommends the following:
- Rear shocks: 25-33%
- Forks: 15-20%

The o-ring lets you fine-tune the sag setting by allowing you to measure the travel. | Image source: liv-cycling.com
Before beginning, ensure that the lockout setting is off and that your compression adjustments are in the most open position. To set the rear sag, move the thin rubber ring on the shock (O-ring) to the end of the shaft flush with the shock body (if your suspension doesn’t have an O-ring, use a rubber band or a zip tie).
- Sit onto the saddle slowly, and allow your weight to press down with your feet off the ground.
- Dismount and note the position of the ring. On Fox suspension, the shaft has marks to indicate sag. If yours doesn’t have any, you must measure the distance to the ring and calculate it as a percentage of the total travel (usually indicated on the shock or fork). If you have more than your desired sag, say 29% instead of 25%, you need to add air pressure using your pump. If you don’t have enough, bleed some air.
- Unscrew the cap on the air valve and pump or bleed the air. Note the pressure before disconnecting the pump (in case you need to make more adjustments).
- Push down on the saddle to pump the suspension a few times to balance the air pressure inside.
- Measure the sag again by repeating step one and keep repeating the process until you hit your desired sag.
You can set up fork sag using the manufacturer’s air pressure chart or a similar process to the mountain bike rear shock.
- Push the ring on the fork stanchion to the bottom.
- Sit on the bike and start rolling. Then, slowly stand up and assume an attack position without bouncing the fork.
- Allow the fork to settle under your weight.
- Slowly bring your weight back to a seated position and gently stop the bike.
- Repeat the same pumping or bleeding process as required to reach your targetted sag, and note the air pressure.
- Retest the sag and repeat the process if necessary.
Setting Progression
Progression is set based on the force it takes to bottom out the suspension.
- Use the O-rings to measure this by pushing the fork ring to the bottom of the stanchion and the shock ring flush with the shock body.
- While rolling on flat terrain, stand up in an attack position and bounce on the fork as hard as possible without leaving the ground.
- Repeat this single explosive bounce, but focus on the rear shock this time.
- You should use between 80 and 90% of your fork travel and roughly 90% of the shock travel during this test, indicated by the rings.
- If you use more travel than you want to, your suspension is probably too soft. Add a volume spacer or set a lower sag percentage to address this.
- If you don’t use enough travel, you could remove a volume spacer or set a slightly higher sag.
Rebound controls how fast the shock returns after compression—an appropriate rebound setting balances sensitivity and traction. You can use the air pressure of your shock and fork to set the rebound. The manufacturer’s setup instructions should have a guide for selecting the rebound lever position based on shock pressure. Alternatively, follow these steps.
- Start with the rear shock by turning the red rebound adjustment clockwise until it’s fully open.
- Find a sidewalk nearby and ride off at around walking pace while sitting on the saddle, noting how the suspension feels when you drop off.
- You want the suspension to compress, rebound slightly past the sag point, and compress again to reach the sag point.
- Repeat the process to achieve this effect, turning the rebound lever counter-clockwise with one click each time and noting the effect.
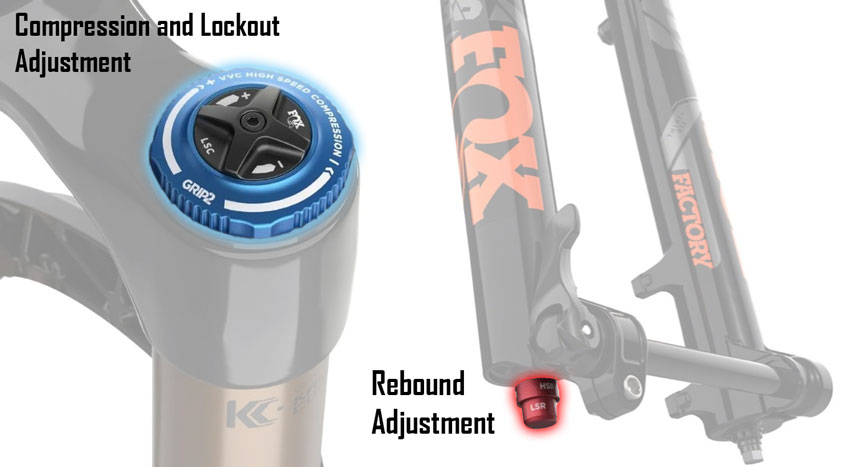
Compression (blue), Lockout (black) and Rebound (red) adjustment knobs on a Fox 36 Float Factory Grip 2 fork.
The fork uses a slightly different process (this works for hardtail bikes).
- Open the rebound on the fork fully by turning it fully clockwise.
- Without mounting the bike, push down hard on the handlebars and release suddenly so the fork can bounce up.
- Turn the rebound lever counter-clockwise one click and repeat this process until the wheel starts leaving the ground upon release.
- Then, turn the lever clockwise one more time, so the rebound is set at the fastest speed possible before the tire starts to leave the ground on release.
Double-check Rebound Speed
For full-suspension bikes, you want to ensure both the fork and the shock return at the same speed. If you’re unsure, err on the side of caution and set it so the fork returns slightly faster than the MTB rear shock. If the shock rebounds faster, it will cause a bucking motion.
Best Mountain Bikes You Can Buy
Best Full-Suspension Mountain Bikes Under $3,000
13 Best Hardtail Mountain Bikes We Recommend
Share this on:
About the Author

Jordan Grimes
Leave a reply cancel reply.
Your email address will not be published. Required fields are marked *

Suspension Fork: What You Need to Know for Your Bike
- By Daniel Shakibaie
- Bike Suspension , Bikes
Key Takeaways:
- Suspension forks are crucial for enhancing bike performance and providing a smoother ride
- Mountain bikes have a suspension system on the front and/or rear wheel(s)
- There are different types of mountain bikes designed for various riding styles
Types of Suspension Forks for Mountain Bikes
Choosing the right suspension fork for your bike, maintaining your suspension fork, upgrading your suspension fork, the role of compression damping, suspension forks for different bike types, understanding suspension fork terminology, suspension forks and gravel bikes, how to install a suspension fork, step 1: remove the old fork, step 2: prepare the new fork, step 3: install the new fork, step 4: adjust the fork, why is understanding suspension important for mountain bikers.
Understanding suspension is crucial for mountain bikers because it directly affects their overall riding experience. Knowing how mountain bike suspension works allows riders to make informed decisions about their equipment, optimize performance, and enhance safety. Suspension plays a vital role in absorbing impacts, maintaining traction, and improving control on challenging terrains, making it an essential aspect of mountain biking.
Tips for Adjusting Your Suspension Fork
Air pressure, compression damping, rebound damping, q: what is the purpose of a suspension fork on a mountain bike, q: what are the different types of suspension forks available for mountain bikes, q: how do rebound damping and shock pumps affect suspension forks, q: what factors should i consider when choosing a suspension fork for my bike, q: how do i maintain a suspension fork, q: can i upgrade my suspension fork, q: what is the role of compression damping in suspension forks, q: are there different suspension fork options for different types of bikes, q: what suspension fork terminology should i be familiar with, q: how do suspension forks and gravel bikes relate, q: how do i install a suspension fork, q: what tips can you provide for adjusting a suspension fork.
About The Author
Daniel Shakibaie
Want To Receive Exclusive Offers, Tips & Freebies?
More To Explore

8 of The Best Cycling Routes in Cotswolds (Unforgettable Rides)
6 best mountain bike brake pads for reliable stopping power.

Uncover the Best Cycling Routes in Jordan for Adventure Seekers

Explore the Best Cycling Routes in Iceland – Adventure Awaits
Subscribe to newsletter.
We hate spam so we pinky promise that we will only send you the good stuff. Sign up to our weekly newsletter to get tips, tricks & freebies😲
Affiliate Disclaimer
Please note that some of the links on ‘Outdoor Lab With J’ are affiliate links. This means we may earn a commission, at no additional cost to you, if you click through and make a purchase.
We only endorse products and services that we have personally used or believe to be valuable to our readers.
Our primary goal is to provide helpful and informative content, and any commissions help us maintain the site and continue to produce quality content. Thank you for your support.
Bikes By Brand
- Priority Bicycle
- Rad Power Bikes
Biking Guides
- Mountain Bike
- Hybrid Bike
Legal & About Us
- Terms & Conditions
- Privacy Policy
- Earning Disclaimer

Is It Worth Upgrading MTB Forks? Fork Suspension Upgrade Guide
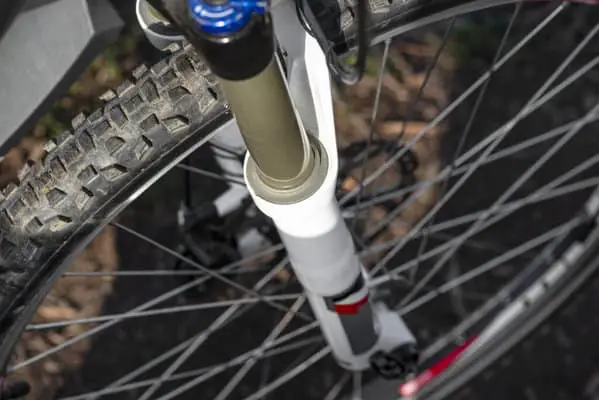
I remember my first time deciding to do some upgrades on my bike. This was the only bike I had at the time so I was trying to make it into something it wasn’t supposed to be. I guess that’s a mistake a lot of people do, judging by the bikes I’m seeing around.
But the most difficult question was; Is it worth upgrading MTB forks??
Judging by the value you get, a suspension is always within the top few upgrades to recommend. Especially, if a fork suspension you have can’t keep up with your skill level. Fork suspension will increase the capabilities of your bike way more than upgrading, for example, the drivetrain would.
Importance and value
The first thing to consider when upgrading a bicycle part is, always to replace the most insufficient part.
Usually, on new bikes, these would be tires. I would advise always to choose the most suitable tire for the terrain you are riding the most and make them tubeless. No question this will give you the most value possible, however, a new fork can change your bike from a mediocre one into a fully capable trail machine.
Your rides will certainly benefit the most from a better suspension. The only reason I wouldn’t value this the most is that it can cost a lot of money.
I won’t go into more details about tires and other upgrades, that would require a whole different article. If you have already decided that fork is your next upgrade then stick around and let’s see how to choose the proper one.
What Are The Best Forks?
When I’m talking about good suspensions, I like to consider only the market-leading manufacturers like Sram with their Rockshox forks, Fox forks, or some smaller but still very much competitive brand like Manitou forks. However, in terms of competitiveness on the market Manitou’s forks can be valued only in low to mid-tier suspension forks. Other than that I couldn’t talk about them as they are simply not represented nearly enough in the MTB world.
The reasoning behind taking into account only these brands is that most of the other brands haven’t even shown any tendency to improve or come up with some decent innovations for their suspensions.
Even those that tried simply failed in quality and longevity. I know that some of you might not agree with picking only these three, but that’s the realistic state of today’s bicycle suspension market.
Some manufacturers simply copy their technology but don’t let that fool you into thinking those are viable options to choose from. For the sometimes lower price, there will be some drawbacks in ride quality or durability.
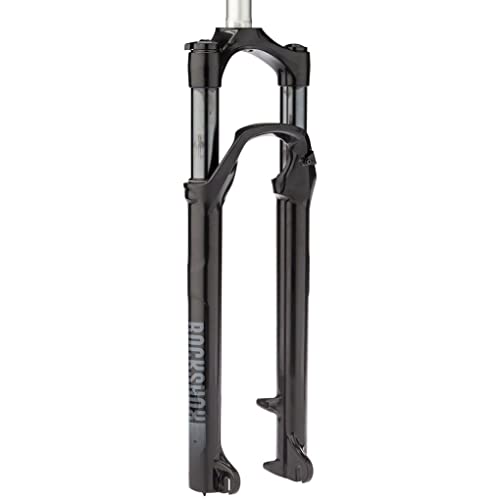
- 32mm straight wall steel chassis
- Brake Type: Post Mount 160
- External Adjustments: Rebound Damping
- External Adjustments: Low Speed Compression Damping
- Maximum Tire Width: 62
Prices pulled from the Amazon Product Advertising API on:
Product prices and availability are accurate as of the date/time indicated and are subject to change. Any price and availability information displayed on [relevant Amazon Site(s), as applicable] at the time of purchase will apply to the purchase of this product.
Low-end Vs. High-end Mtb Fork
Both Sram and Fox have forks to suit all the possible needs.
If you have the will and time, always do the complete research. These technologies are evolving year after year and it’s way worth the time invested in research.
When upgrading within these brand’s fork ranges, you should thoroughly compare and research everything. The reason being they have so many forks that seem similar on paper but the key details can be such game-changers for different types of bikes.
Even when you see the product descriptions differentiating in only like a lower weight between low-end and high-end forks, in reality, it’s so much more than that. Lower weight always comes with better materials and even better performance.
Manitou’s forks, on the other hand, may lack some high-end tech but they offer all the same tech as Rockshox in their lower and mid-tier forks for a bit lower price. For example, I’ve been using Manitou Markhor for some time on one of my bikes. Switched to it from a crashed Rockshox Recon RL and to be completely honest, Markhor has better upper-end travel, it soaks each and every small bump on the trail better than any Rockshox in the same price range. No matter how good you adjust it.
Can You Increase Fork Travel?
Travel is the most important feature to consider when changing forks. Ideally, you should keep the same travel distance your bike came with.
You probably already know there are several commonly used suspension travel distances for all the bike types but here are the examples.
- XC/Cross country – 100-120mm of travel
- Trail riding – 120-140mm of travel
- Enduro/All mountain – 150-170mm of travel
- Downhill riding – 180-220mm of travel
There are 80mm travel suspensions which are considered cross-country suspensions but I would not consider them at all for any semi serious-serious XC riding. Your average XC trail these days is much more technically advanced than it used to be some years ago and 80mm simply isn’t enough.
Travel distance increases with the increasing technicality of trails. And while downhill trails don’t look as technical as some others at first, they require the most speed carrying through the trail. That together with the high-speed stability, requires the most suspension travel.
Increasing suspension travel means you will have some tradeoffs. First of all, the handling capacity will be greatly reduced. It will feel a lot more sluggish. The front wheel and fork are angled more in front of you and that will greatly decrease turning capability.
High travel distances impact pedaling. You are simply losing pedaling force by suspension going up and down. This means it’s much harder to pedal at high speed, and don’t let me even start about how hard is it to climb.
How Does Increasing Fork Travel Affect a Bike’s Geometry?
Now that we mentioned some tradeoffs, keep in mind that you shouldn’t even increase travel distance for more than 20mm above the factory setup.
In theory, you can do that but keep in mind that there can be some severe consequences for your bike.
The first thing you may lose is geometry. Geometry is the most important feature of any bike, period. Manufacturers spend millions of dollars developing perfect geometry for each of their bike models and it has everything to do with how easy the bike is to ride and how good it feels. Not the mention the riding efficiency, which is the most important for racers.
Increasing the suspension travel increases the fork angle and moves your seating position back. Since your bike is designed for a specific type of riding, changing its geometry won’t adapt to another category but in most cases, it will simply destroy the bike’s capabilities.
For example, If you try to make an enduro bike out of a trail bike by increasing travel by too much you will have a bike that can’t properly ride any of the two. It will become unsafe to ride, as your position and control over the bike will be severely reduced.
Any serious manufacturer will make their frames in a certain quality for any specific riding type. From cross-country to downhill frame quality gradually increases, meaning if you turn your bike into something that it isn’t supposed to be, the frame won’t be durable enough.
It can result in head tube breaking and most likely some broken bones for the rider. Not something I would ever advise anyone to do.
Most bicycle brands take away your frame warranty if you do this. I guess it’s completely reasonable on their part.
The safest option to do is buying a fork with exactly the same suspension travel. And if you really want to increase or reduce travel distance, don’t go for more than 20mm and try to keep it in the same trail category which I mentioned above.
Choosing the right fork for your bike comes down to several important things to check and match first. The first and easiest is the wheel size.
There are 3 wheel sizes in today’s mountain biking.
- 26-inch wheels
- 27.5-inch wheels
- 29-inch tires/28-inch wheels
Mountain bikes in recent years are slightly moving towards 29-inch tire size. 29-inch tires are actually fitted on 28-inch wheels and the 29-inch wheel doesn’t exist. However, there are some brands that manufacture wheels and name them 29-inch wheels but those are 28-inch wheels adapted for some specific 29-inch tire sizes. Just mentioning that so it doesn’t confuse you.
27.5-inch wheels are still pretty common among most bike types, while 26-inch ones are a dying breed. The advantages in bike geometry and suspension travel today mean that you can keep the same stability with bigger wheels and increase the speed at the same time. A win-win situation if you ask me.
So, there are forks specific to each wheel size and you need to buy the one that fits your wheel size. Great thing is, this won’t usually affect your choice because manufacturers usually offer the same forks for all wheel sizes.
There are two different types of steerers. Older bikes usually had the threaded steerer which used a different headset locking system than we are used to seeing today.
If that is the steerer your bike has, consider that it probably isn’t even worth upgrading. Unless, of course, it’s a matter of sentiment and you want to upgrade it with new parts.
The non-threaded steerers are commonly used today. However, things are changing and improving here as well so you need to check on a few things.
Manufacturers developed something called tapered steerer . It’s a steerer that’s wider at the bottom. Normally, we used to have straight steerers which were 1-â…›” all the way but in recent years, trails have become more and more technical.
More technical terrain means you need to use your bike’s capabilities closer to the limit, and every mistake you make puts a pounding on your bike, especially, fork suspension. When it bottoms out in those situations, the steerer and the head tube are the only two parts that keep your bike from breaking apart.
That is when the need for a tapered steerer arose. People started breaking head tubes more often and this was an easy solution.
Why I’m explaining all this? While you can’t fit a tapered steerer in a 1-â…›” head tube, you can fit a straight steerer into the tapered head tube.
Is it a good idea? No .
A bit longer answer is that there are adapters that allow you to do this but they are not nearly as safe as they are claimed to be, nor they are effective at what you want to achieve. These adapters can never keep the 1-â…›” steerer stiff inside a tapered head tube. And that’s the whole point, stiff steerer and suspension doing all the work.
My advice is, identify which steerer your frame is made for and go with that. That way, not only you won’t do any damage, but you will end up with a much better performing bike.

- 【Specifications】28.6mm Threadless Straight Steerer, Crown Race: 30.0mm; Crown Lockout, Rebound Adjust; Travel:120mm; QR:9 mm *100 mm, Brake type: disc brakes, Tube Diameter: 32mm; Aluminum alloy+Magnesium alloy, Weight:about 1737g.
- 【Bucklos Sticker】The BUCKLOS sticker on the suspension fork is carefully designed by our company, Fashionable/beautiful/trend; At the same time, You can tear it off according to your own preferences without leaving any traces.
- 【Material】Mountain bike suspension fork, Made of high quality Aluminum alloy+Magnesium alloy.
- 【Package】1PC Bucklos Air Bicycle Suspension Front Fork (Boxed).
- 【Trustworthy and Service】BUCKLOS is committed to providing bicycle enthusiasts with cost-effective bicycle parts, And has provided assistance to more than 1,000,000+ users worldwide. If you have any questions, Please feel free to contact us, We will solve it in 24 hou
How Do I Know What Headset Fits My Bike?
For each steerer type, there is a matching headset. That means if you have to change your headset because of the bearings being worn out or damaged, you will probably change the whole headset. You don’t necessarily need to, but it is recommended.Â
Worn out or damaged bearings can put a lot of stress on the head screw and star nut. It’s perfectly possible to remove star nut from an old steerer and put it into a new one. However, considering it probably won’t be as stiff as a new one, you might not want to risk anything for a couple of bucks.
As a bike mechanic, I can tell you, most people damage their bikes with worn-out headsets.
So, if anything looks even a bit worn out, spend a few bucks more and change the whole headset. Be careful when choosing headsets, there are lots of complications and differences regarding frame type. You can learn more by checking one of the extensive articles on google as it is too much to explain in a few sentences. My favorite article to check up when I’m not sure which one is needed is the one from Park Tool ( Park Tool ).
How Do I Know What Size Axle I Need For My Bike?
It’s important that you get the fork axle that fits your front wheel hub. Be aware that some higher-end forks may not be available with all the axle variants.
Some people are forced to upgrade their wheels as well, in order to have a better fork.
Remember when I said upgrading your fork can get really expensive?
There are two most common axle types, 9mm Quick Release(QR) and thru-axle.
9mm is commonly used on low-end forks and hubs while thru-axle is much stiffer and better for front hub bearings.
While 9mm is simple, thru-axles come in several common dimensions.
The most common in my experience is 15x100mm thru-axle. It’s widely used in road cycling, and more importantly, mountain biking.
There is a 15x110mm axle as well. It’s usually called a “Boost†axle. Boost is the technology developed to strengthen wheel hubs and wheels themselves even further without turning to thicker axles.
Boost technology is a trail/enduro mountain biking replacement for 20mm thru-axles found in long-travel suspension mountain bikes, such as downhill bikes. These 20mm axles are always 20x110mm to give downhill bikes maximum stiffness.
There is a quick-release feature for thru-axles also. These are usually referred to as QR15 or QR20 so don’t let that confuse you, that’s not a standard QR which is 9mm but simply a QR system on a thru-axle.
Does Fork Offset Matter?
The offset isn’t really an issue these days, nor it necessarily ever was. The thing is 29er bikes gain a bit better handling with the 51mm offset which is referred to as G2 by some manufacturers. Mainly Trek because they were the ones to start with that.
In detail, 29-inch wheels have a longer “trail”. It’s a term that refers to the distance between the spot where the tire touches the ground and an imaginary line that goes through the head angle. The longer the trail distance is the slower turning will be.
Unlike the 46mm and similar offsets, a 51mm offset shortens the trail length and makes turning feel more like a 27.5-inch or even 26-inch wheel while keeping all the 29er benefits.
You can choose a simple path here and simply buy a fork with the same offset, but you can use this knowledge to make your turning quicker or more sluggish as well.
Some riders love sluggish steering because at high speed, especially going downhill, it gives you more stability.
Everything has its benefits.
Brake Mount
It’s really hard to find mountain bikes with v-brakes today. Disc brakes became a standard in mountain biking simply because of the stopping power they provide.
I’m afraid if you are upgrading fork suspension on a v-brake bicycle, you will have only some basic low-end forks to choose from. Forks used to feature both v-brake mount bolts and disc brake mounts but recently all the good manufacturers ditched v-brake mounts from their MTB forks.
For disc brakes , there are two mount types. The old one called I.S. mount required an adapter for every single disc brake size usually unnecessarily complicated things.
These days only post mounts are used on any decent fork. It still uses adapters but only for some disc sizes. In addition to being simpler, the mount is stiffer. How important that is with disc brakes I’m not sure but post mounts are, in my opinion, easier to adjust.
Coil vs. Air
Coil springs are usually found on lower-end suspensions while higher-end feature single or dual air springs.
Most people take away from this that air springs are better than coil springs, which isn’t true. They just behave differently and have different uses. Downhill fork suspensions, which are the pinnacle of mountain biking , mostly use coil springs.
There is a reason why low-end and downhill suspensions both use coils and that is because coils have linear compression. That simply means that coils run better on smoother terrain with less of those small bumps like small rocks, roots, etc. That also means they provide better stability, especially on jumps.
Low-end coil suspensions are usually used on everyday simple XC bikes which people use for the road as well, and that’s why coils are more than enough for them.
Unlike coil springs, air springs tend to compress more at the top and then get stiffer nearing the bottom end of their travel. This is extremely important for high speed rides with lots of small bumps because air spring will negate most of them, giving you a smoother ride. Stiffness at the bottom end prevents you from bottoming out your suspension and crashing.
I would recommend using air springs for any mountain biking except downhill. Even on everyday bikes because all the Rockshox or Fox forks have compression lockout which you can use to increase stiffness when needed. Simply said, for anything other than downhill, you get all the benefits with air springs. Not to mention, air springs are much easier to adjust for a rider’s weight.
Functions & Costs
Table of Contents
Rebound Adjustment
The rebound adjustment is a feature you can’t ride any trail without. A rebound is the return motion after a fork has been compressed. This feature simply adjusts how fast that will happen. Different adjustments allow the suspension to better handle different types of terrain.
Trails are never the same all along, so perfect adjustment doesn’t exist. However, adjusting rebound speed can still make a fork handle bumps better.
A slow rebound will handle repeated bumps with less efficiency. A fork will often stay compressed more than it should, not giving the rebound enough time to return suspension to its starting position. Fast rebound, however, will make repeated bumps feel too bouncy and reduce your stability.
A lockout is a feature most forks have these days. It can completely lock or make compression almost completely stiff. It’s an amazing feature for smooth parts of the trail where you can lock compression and use that to accelerate faster by pedaling.
It’s useful when riding on the road as well. But what’s most useful is a remote lockout on your handlebars. That way you can lock it while keeping a firm grip.
Personally, I love the lockout feature. Once you learn when to use it, it makes rides with variable terrain so efficient.
Compression Adjustment
Compression adjustment is similarly painful to properly adjust as rebound adjustment. Needs some experience with a specific fork/bike to learn its ways.
Though, once you get a hold of it, it’s a perfect feature to have. Since not everyone can ride the same trail at the same speed, compression adjustment lets you set the compression rate for the speed you are comfortable with.
Travel Adjustment
While the first three features are not so expensive to have, travel adjustment is found only on some high-end forks.
It’s the best feature of all, allowing you to partially turn your bike from, for example, an all-mountain bike to a trail or cross-country bike by changing the suspension travel.
How Do You Change a Fork?
To change the fork first you need to have some knowledge about how to adjust the brake. Make sure you can do it by yourself because you will have to take it off the fork.
Necessary tools to change the fork:
- Park Tool Hacksaw
- Stanley 15-412 Carbide Grit Hacksaw Blade 12 Inch for carbon steerers
- Park Tool SG-8 Carbon Composite Fork Threadless Saw Guide
- Venzo Bicycle Bike 1/4 Inch Driver – Torque Wrench (you can get away with a normal 4mm and 5mm hex wrench but it’s not recommended)
- Park Tool Crown Race Setting System
The first thing you need to do is take the wheel and the brake caliper off the fork. After you have taken that off, you can proceed to unscrew the stem bolts just enough to get it turning. The top cap is what actually holds the fork in the frame. Make sure the fork won’t fall down while you completely unscrew the top cap. Once the top cap is removed, keep holding the fork inside and slowly remove spacers and headset washers. Remember how they were put together. I like to place them on the table in order in which they were placed so I know exactly how to put them back later on.
Once the fork is out use a ruler to measure and mark the length of the steerer. If you are certain that’s the steerer height you want to have, you can place the Park Tool SG-8 Carbon Composite Fork Threadless Saw Guide on the marker. Proceed by cutting it at that line with Park Tool Hacksaw . Make sure you have Stanley 15-412 Carbide Grit Hacksaw Blade 12 Inch installed on your hacksaw if you are cutting a carbon steerer.
Before you can put the fork on the bike, you will need two things.
One is placing the crown race on a new fork. Unless you are changing the headset as well, you need to first take it off the old fork. I prefer doing that with a flat screwdriver instead of wasting money on special tools. It’s not that difficult to take it off. A difficult part is setting it to a new fork without damaging it. For this, you will need a Park Tool Crown Race Setting System and a hammer. Make sure to apply some Park Tool HPG-1 High-Performance Bicycle Grease on the steerer bottom part before trying to install a crown race. Now, you can slowly place the crown race on the steerer and use Park Tool Crown Race Setting System to carefully push it down and set it in place.
The other thing you need only applies to aluminum steerers, not the carbon ones. Threadless steerers need an insert that holds the headset together. In the case of a carbon steerer, it’s a compression plug that can be reused each time. However, in aluminum steerers, there is a star nut that can’t be reused, so you need a new one. Use the top cap bolt and a hammer to carefully push it into the top part of the steerer. It’s enough to place it 1/8 inch from the top. Try to get it as straight as possible, which won’t be that difficult once it’s inside because it tends to get straight by itself.
In case you are reusing the old headset and bearing, I’d suggest cleaning it all thoroughly. It’s good to use this opportunity to check if everything is in good shape. To assemble it all back you will need to grease all the contact parts on the bearing or the whole bearings in case of the open bearing type. Don’t forget to put some grease on the crown race while you are at it.
Now you can place the fork inside the headtube and put all the headset washers and spacers back in place the same way they were before. Once done with that, you will need to put the stem back on and secure the fork bearings with a top cap. Make sure you are tightening everything to the recommended tension. For that, it’s best to use a torque wrench like Venzo Bicycle Bike 1/4 Inch Driver – Torque Wrench . If everything is put in place properly, you can tighten the top cap just until the fork steerer has no play in the head tube.
Only after the top cap is tightened properly, you can tighten the stem bolts. Once again, follow the instructed torque specifications.
Now, all you need to do is put the wheel and the brake back, adjust it, and you are good to go.

- Comes with Guage perfect for bicycle carbon parts,1/4 Torque Fix Set, Torque range: 2-24 NM, Tolerance in: Accuracy +/- 4%.
- Allen Keys 3 /4 / 5 / 6 / 8 / 10 mm, plus 5mm Longer Allen Key for easy use, T20, T25 and T30 Torques, High quality. Great for bicycle parts or bolts. (Note: please do not try to use cheap quality tools, they will damage the parts).
- Note: Stop turning when you feel a click. Click means the torque has reached a preset value.
- ORDER NOW, WORRY-FREE! Were so confident about the product quality that we can provide a 10-year warranty! Made in Taiw
So basically, fork suspension shouldn’t be your first upgrade, mainly because of a high price. However, it’s an upgrade that will give you the most.
You can change a mediocre hardtail bike into an amazing bike, while full suspension bikes will require you to change the shock as well.
The ability to transform your bike into something it isn’t is something to consider as well, although following some guidelines is a necessity in this case.
If you’ve done those smaller upgrades like tires, pedals, etc., a fork is definitely the next choice in line. Even before drivetrain changes.
Privacy Overview
Best mountain bike forks – the best front suspension for trail, XC, enduro and downhill
The best mountain bike forks will add speed and control to your riding. Here are our top picks for every mountain bike discipline
The best mountain bike forks are a vital piece of equipment as they smooth out the trail surface by absorbing impacts and imperfections and, in doing so, improve traction, speed and control over bumpy and gnarly terrain.
However, this wasn’t always the case. Early examples of the mountain bike were bereft of such comfort-providing contraptions and rigid frames were the order of the day. In fact, it wasn’t until the early 1990s that the suspension fork was introduced to both downhill and cross-country racing. While it radically altered the feel and performance of the bikes, these early examples were more of the one-size-fits-all variety and sported between 30-50mm of travel.
Nowadays, the best mountain bike forks are lighter than ever before, be infinitely tuned, have more suspension travel and improved feedback. Which fork is best for your particular setup depends largely on the type of riding/discipline you prefer so we have broken this guide up into cross-country , trail , enduro , and downhill .
When running air suspension, you'll also need one of the best shock pumps to maintain and set it up.
Best mountain bike forks for trail
Why trust BikePerfect Our cycling experts have decades of testing experience. We\'ll always share our unbiased opinions on bikes and gear. Find out more about how we test.
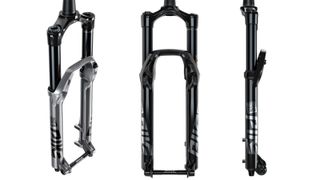
RockShox Pike Ultimate RC2
Our expert review:
Specifications
Reasons to buy, reasons to avoid.
RockShox's Pike fork has long been the benchmark of trail riding fork performance. The OG Pike was released in 2007 and was an instant hit - from there it has just got better and better.
The fork comes with RockShox's RC2 (or RCT3) damper and is enhanced by new SKF seals and Maxima Plush suspension fluid which keeps everything sliding smoothly together. This means the DebonAir negative spring works well to give excellent small -performance and boost cornering traction.
There's the option to experiment with compression as well as tuning the fork feel with volume spacers. That said we have had great results simply pumping them up to the recommended psi default set-up and hitting the trails.
Out on the trail the 35mm chassis is plenty stiff enough, offering steering precision and accuracy even if the trail starts to get verge on enduro territory. This doesn't come with a weight penalty either.
Read why we gave the RockShox Pike Ultimate RC2 a maximum five starts out of five.
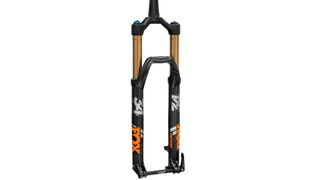
Fox Float 34 Factory GRIP2
Designed for trail riders, the Fox Float 34 Factory now gets the brand's GRIP2 damper and EVOL air-spring packaged in a super lightweight chassis - 1,769g in 650b guise, which is incredibly light.
As the name references, it gets 34mm stanchions complete with envy-inducing gold Kashima coatings, which are claimed to increases shock smoothness and sensitivity.
Despite its low weight, the Fox 34 is stiff, offering the suppleness and plush damping quality expected from Fox. With the addition of the 38 to Fox's range, it has allowed the brand to spread the available travel across different models, meaning each individual fork now comes in fewer options — the 650b Fox 43 now provides between 130mm and 140mm travel, while the 29er fork only comes in 140mm.
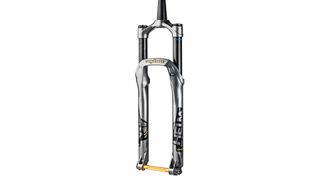
Cane Creek Helm Air MKII
Cane Creek revamped the veritable Helm Air Fork and what was already a fantastic fork has become even better. It retains the 35mm stanchions, tapered steerer and adjustable travel from 100-160mm, but the guts of the fork are all new.
Most notable is the tokenless air volume adjust, which allows riders to customize how progressive the fork is with the turn of a knob. The air-spring and dampers have also undergone a radical redesign. The new air piston has been re-engineered to reduce friction while also increasing overall air volume for improved traction and suppleness.
The damper too has been updated with new compression and mid valve circuit for increased support and control via the high/low-speed compression and rebound adjustments. Also new are the low friction SKF seals and 2.5 weight oil for a more supple feel.
Not to worry, among all the updates to the Helm, Cane Creek has retained the configurable air spring that allows riders to add or remove air from the positive and negative air chambers independent of one another.
The Helm also benefits from a unique axle system called D-LOC. Apart from keeping the wheel in place, the D-LOC axle thwarts rotational and torsional loads to the upper bushings during cornering and high-speed compression.
For more details, read our Cane Creek HELM Air fork review.
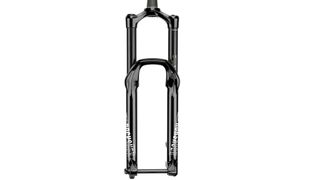
RockShox Yari RC
While the RockShox Yari shares its DNA with the Lyrik, including its chassis, travel options, offsets and 35mm stanchion structure, it differs by way of its damper system — Motion Control vs the Lyrik’s Charger 2.1 RC2 damper.
Sure, this means it is a little less refined in terms of performance and damping plushness but the Yari is a reliable and robust performer designed to be ridden hard thanks to the stiff chassis and ease with which it can be set up.
If you’re looking for a big-hitting, affordable fork with the pedigree to match it’s hard to find anything as reliable as the Yari.
Best mountain bike forks for enduro
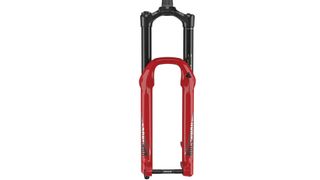
RockShox Lyrik Ultimate
Bold and expressive, the RockShox Lyrik RC2 was updated - both visually and internally - to better cope with the rigors of enduro racing. As such, the Lyrik gains a fresh lick of red paint which contrasts the black uppers quite superbly - however, it's under the skin where the biggest updates have been implemented.
The air spring shaft is now hollowed out, which RockShox claim boasts 42 per cent more negative spring volume than before resulting in better small-bump sensitivity and coil-spring-like linearity.
The updated Charger 2 RC2 damper has eschewed the three-position lever (this means no lockout) of its forebear in favor of a high-speed, five-click adjuster that is claimed to be more tuneable and responsive to trail nuances.
Find out how the RockShox Lyrik Ultimate fared on test.
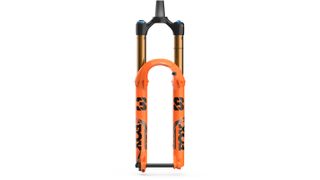
Fox 38 Factory GRIP2
Unless you are racing EWS, riding massive lines at the bike park or you just hit terrain particularly hard, Fox’s 38 platform is probably going to be a bit overkill. However, if you looking for the best mountain bike fork for enduro they don't come more capable than the 38 Factory fork.
With travel options of either 160mm, 170mm or 180mm, the stiffer structure, and superbly supple internals all work together to produce a superlative experience on the toughest trails.
It's not just a sized-up exterior either, the internals are new, too. That means the fork is better when it comes to control, consistency, sensitivity and response but still super supportive than its thinner-legged comrade, the 36. Despite being noticeably stiffer structurally when smashing through trail furniture, it’s actually more comfortable, too.
We've got more details in our full review of the Fox 38 Factory GRIP2 fork .
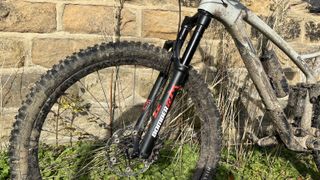
Marzocchi Bomber Z2 RAIL Gen 2
Marzocchi have based the second generation Bomber Z2 around the entry-level Rhythm version of the Fox 34. That includes the thicker walled 6066 stanchions, seals, other internal components, and Float air spring. That means you can use the same clip-in volume spacers (it comes with none fitted but has four in the box) and switchable air shafts to change travel from 100 to 150mm in 10mm increments. As you can’t even buy a Fox 34 Rhythm aftermarket, the Z2 fills that gap and also costs significantly less than the cheapest 34.
If you’re looking to upgrade the existing fork on a mid-price bike or looking at building a machine for going properly hard on without emptying your wallet or worrying about complicated setup and servicing, then the Z2 is an excellent option. A bit of tuning time definitely pays dividends to get it really snapping on the heels of forks twice its price, but even running the stock setup it’s a great option that's well worthy of consideration.
For more on this very reasonably priced option, read our full Marzocchi Bomber Z2 review .
Best mountain bike forks for cross-country
RockShox SID Ultimate SL
The RockShox SID Ultimate sits at the very top of the company’s cross-country range of suspension forks. SL denotes that this is the lightest of the SID line-up, focused on covering miles and scaling gradients with ease.
RockShox has done a superb job of dropping weight while improving suspension feel and keeping accuracy competitive for the category. It can take a few rides to soften everything up but once you’ve banked some ride time it’s extremely plush and sensitive too, boosting traction and reducing fatigue on rough terrain - although more aggressive riders will want to add spacers to the linear stroke.
We think they look great, too, plus the space for high-volume tires, competitive pricing, and lots of attention to detail means the SID Ultimate SL is our new benchmark XC race fork, especially when paired with a Torque Cap hub/wheel.
For information on how it performed, read our review of the RockShox SID SL Ultimate fork .
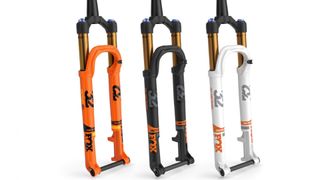
Fox Float 32 Factory Step-Cast
If it’s a high-performance, lightweight cross-country suspension fork that you’re after, there aren’t many options that can beat the Fox Float 32 Factory Step-Cast.
Compared to many of its Boost-equipped rivals, the Fox 32 is appreciably narrower when measured from leg to leg thanks to a stepped cut-out at the drop-outs. This nifty feature has not only improved lateral stiffness but considerably reduced its weight over its rivals, too.
Fox has redesigned the crown and claims improved stiffness of 20 percent, something that if true will have made the 32 as stiff as the current 34 fork, its bigger, trail-focussed cousin.
We've got the full review of the Fox 32 SC Factory fork if you want to know more.
Best mountain bike forks for downhill
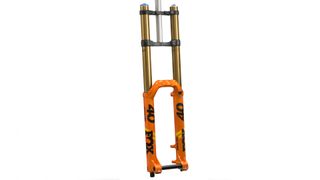
Fox Float 40 Factory
Fox’s venerable Float 40 Factory fork needs no introduction having experienced prodigious downhill mountain bike success at World Cup level over the past several years.
Built around 40mm stanchions and featuring a whopping 203mm of travel, the fork is naturally very stiff and responsive, if anything, a touch on the heavy side despite weight-saving measures around the crown and lowers.
The large volume of the air chamber means the 40 has a linear stroke, tuneable by way of volume tokens which deliver a compression stroke as plush as any of Fox’s Factory Kashima-coated forks.
Further adjustably can be made by fiddling with the four-way GRIP2 damper that independently adjusts high- and low-speed compression and rebound.
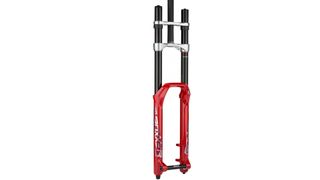
RockShox Boxxer Ultimate
As far as heavy-hitting downhill suspension forks go, the RockShox Boxxer has been a favorite in the pro rungs for years now. The latest version, the Boxxer Ultimate, has received several tweaks including updated seals and oil, and a Charger 2.1 damper system claimed to make it run smoother than before.
Furthermore, this new damper system allows the fork to stay higher in the travel, compress more linearly (like a coil spring) and rebound with more control for better landings.
A big difference between the Boxxer and its rivals has always been the 35mm stanchion tubing, which is notably slimmer than its 40mm rivals. While this does add some torsional twist, the Boxxer never feels unsettled - instead, it provides pliancy and confidence in spades.
What you need to know about the best mountain bike forks
How do i choose a fork for my mountain bike.
Owing to the fact that the sport now spans myriad disciplines - cross-country , trail /all-mountain, enduro and downhill - the best mountain bike suspension forks have become more specialized in application and function. As a result, each mountain bike discipline places a very different set of demands on the bike and rider so the modern suspension fork varies in terms of travel, spring systems and stanchion thickness. Simply by looking, its possible to see a dramatic difference between the best XC forks and downhill forks.
There are a couple of specific things you should consider before choosing the best mountain bike fork. Firstly is how much travel your bike is designed to be used with, this is important as a fork that is too long or short will upset a bike geometry . Secondly the type of riding you are planning on doing, for example there are a number of forks that cross over around the 160mm mark, some are more trail orientated while others are enduro focussed. Opting for a stronger and heavier enduro fork rather than a trail fork is going to make a noticeable difference to how your bike rides.
The modern mountain bike suspension fork is a complicated piece of kit and naturally comprises many moving parts. It’s worth familiarizing yourself with the fork’s anatomy and the various terms associated with it before making your choice.
How much suspension fork travel do I need?
Modern mountain bike geometries are specifically designed around suspension travel. For example, cross-country mountain bikes feature short-travel forks as the trails are relatively smooth and comprise lots of climbing, so they need to be light and responsive while still providing a decent range of compression. As you move through the various types of mountain biking, the weight, stanchion thickness and travel all increase so as to meet the demanding needs of each discipline.
- Cross-country: 100-120mm travel, 30-32mm stanchion diameter
- Trail: 120-150mm travel, 34mm stanchion diameter
- Enduro: 150-180mm travel, 35-38mm stanchion diameter
- Downhill: 180-200mm travel, 40mm stanchion diameter
The diameter of the stanchion tubes directly affects the fork’s lateral stiffness. The secret here is finding a balance between weight and performance, as wider stanchions are stiffer and heavier than their narrower counterparts but are more resilient to greater impacts from rough terrain and jump landings.
What size axles do mountain bike forks have?
Thru-axles are wider, stronger and stiffer than the old quick-release skewer systems of yesteryear and have been the gold standard on most high-end performance mountain bikes for some time now. The 20mm standard is generally reserved for downhill and enduro while the 15mm thru-axle is found on just about all trail and cross-country bikes.
Until Boost hub spacing came along, the standard for thru-axles was 100mm spacing in the front (110mm for downhill bikes) and 135mm/142mm spacing in the rear. The wider hub and flange spacing offered by Boost has increased the stiffness of 29-inch and 650b wheels even further with the new standards coming in at 110mm (front) and 148mm (rear).
What type of steerer should I get?
There are two steerer types - straight and tapered. A standard steerer tube is straight with a 1-1/8-inch diameter although this size is becoming increasingly uncommon. Most modern forks come standard with tapered steerers as they’re stiffer, lighter and provide a better feel and response than a regular straight steerer.
What are volume tokens/spacers?
Volume spacers or tokens allow you to fine-tune the air volume of your fork. Adding tokens reduces the volume of the air chamber causing the air pressure to ramp up quickly so the spring pressure can be set low, allowing more suspension sag without the risk of bottoming out. Removing tokens will provide the reverse effect.
Is coil or air suspension better?
There are two different spring systems: air and coil springs. Air springs have become the staple choice on modern suspension forks as they are tuneable and have a progressive compression rate — the feel is softer in the first part of the travel and then gets stiffer as more compression is applied. Coil springs on the other hand are found predominantly on downhill bikes. Linear in feel, they provide consistent impact absorption over the range of spring travel. Coil generally has a much smoother compression action too as they have less seal friction.
Aaron is Bike Perfect's former tech editor and also the former gear editor of Bicycling magazine. He's tested thousands of bicycles all over the world. A competitive racer and Stravaholic, he’s twice ridden the Cape Epic, raced nearly every MTB stage race in South Africa and completed the Haute Route Alps. Recently, Aaron has also taken up Zwift racing and competes at the highest level of eRacing, the ZRL Premier Division.
Rides: Trek Procaliber 9.9 MTB
Height: 175cm
Weight: 61.5kg
Best mountain bike clipless pedals 2024 – the top-rated clipless MTB pedals for XC, trail and gravity riding
Best MTB saddles for comfort 2024 – 6 top-rated butt-pleasing perches for mountain biking and off-road cycling
A post-apocalyptic bike, new motor systems, shapeshifting MTBs, the lightest 29er ever, and much more. 8 things that caught our eye at the Eurobike show
Most Popular
- 2 Endura Women's Hummvee shorts review – classic baggies still going strong
- 3 Shokz OpenFit earphone review – decent open-ear audio
- 4 Now could be the worst time ever to launch a new MTB, so how are bike brands handling that and should you buy one?
- 5 Cotic SolarisMax long-term review – my winter MTB companion gets a summer refresh
- Bikes / Frames
- Sealants & Flat Protection
- Tubeless Tape & Kits
- Tubeless Valve Stems
- Misc. Valve Parts
- Suspension Forks
- Rigid Forks
- Fork Parts / Service
- Rear Shock Parts / Service
- Groupsets / Drivetrain Bundles
- Cranks / Cranksets
- Crank Parts
- Bottom Brackets
- Rear Derailleurs
- Derailleur Hangers / Parts
- Chainguides
- Chainring Bolts
- Chain Tensioners
- Single Speed Cogs / Kits
- Front Derailleurs
- MTB Right Hand Shifters
- MTB Shifter Sets
- MTB Left Hand Shifters
- Drop-bar Right Hand Shifters
- Drop-bar Left Hand Shifters
- Drop-bar Shifter Sets
- Drop-bar Hydraulic Brake / Shift Levers
- Shifter Parts
- MTB Handlebars
- Drop Bars (Gravel, CX, Road)
- Handlebar Tape
- Disc Brakes
- Disc Brake Rotors
- Disc Brake Adaptors
- Disc Brake Parts
- Road Caliper Brakes
- Cable Pull Brake Levers
- Dropper Posts
- Dropper Post Remotes / Levers
- Rigid Seatposts
- Seatpost Parts / Shims / Misc.
- Seatpost Clamps
- Suspension Seatposts
- Saddles / Seats
- Flat Pedals
- Clipless Pedals
- Pedal Small Parts
- Front Wheels
- Rear Wheels
- Rim Tape & Kits
- Complete Headsets
- Headset Spacers
- Headset Parts
- Shifter Cable & Housing
- Brake Cable & Housing
- Misc. Cable Parts
- Multi-Tools
- Chain & Other Lube
- Fork Oils & Lubes
- Grease & Assembly Compound
- Repair Stands
- General Bike Tools
- Hex / Allen Wrenches
- Component Specific Tools
- Tire & Tube Repair
- Frame Tools
- Wheel Tools
- Cleaning Tools
- Degreaser / Cleaners
- Shop Supplies
- Hitch Racks
- Tailgate Pad / Bed Mounts
- Trunk Racks
- Spare Tire Racks
- Rack Accessories & Small Parts
- Frame Straps
- Floor Pumps & Parts
- CO2 Inflation Devices & Cartridges
- Shock Pumps & Tuning Tools
- Frame / Mini Pumps
- Chainstay / Frame Protectors / Fenders
- Bike GPS / Computers
- Computer Mounts / Accessories / Parts
- Camera Mounts / Accessories
- Hydration Packs / Hip Pack / Backpacks
- Top Tube / Stem Bags
- Frame Packs
- Phone / Electronic Bags & Cases
- Night Riding Lights
- Safety / Tail Lights
- Light Parts / Mounts
- Water Bottles
- Water Bottle Cages
- Gift Ideas / Novelties
- Rear Wheel Trainers
- Roller Trainers
- Trainer Accessories / Parts
- Bike Travel / Shipping Cases
- Bars and Snacks
- Drink Mixes
- Supplements / Minerals
- Cable Locks
- Chain Locks
- Folding Locks
- Storage Racks / Stands
- Knee Pads / Shin / Leg Protection
- Elbow Pads / Arm Protection
- Torso Protection
- Padded / Protective Short Liners / Chamois
- Sunglasses / Accessories
- Chamois / Short Liners / Base Layer
- Chamois Creams / Embrocations / Butt'r
- Jackets / Vests / Hoodies / Flannels
- Tees / Shirts
- Hoodies / Flannels / Jackets
- Top Secret Sales (Do Not Tell!)
- Help / FAQ's
- Contact Us / Locations
- Call Us | 1-805-375-4525
- Why Shop With Us?
Currency: USD BRL CAD EUR AUD GBP RUB CLP NZD
- Continue Shopping
- Your Cart is Empty
FREE U.S. SHIPPING ON EVERYTHING!

- USD BRL CAD EUR AUD GBP RUB CLP NZD
How to Upgrade Your Mountain Bike Fork - Everything You Need to Know [Video]
How to upgrade your mountain bike fork:.
The fork on your mountain bike has a few important jobs. First, it holds the front wheel and helps you steer the bike, helps you hit rough sections easier and keeps you in control allowing you to ride smoother and faster. So when it comes to upgrading your fork on your mountain bike, the choice of what fork to buy is very important. As with most things in the bike industry, there are a huge amount of options and also within those options, there are size variants that you need to make sure are compatible with your current bikes specifications. In this article, we are going to help guide you to the correct fork for your bike. Stick around and maybe you will learn a thing or two!
Wheel Size:
The first thing you need to find out is the wheel size of your front wheel. This is something you don't want to change and make sure is right. For the most part you will have 3 sizes, 26, 27.5, and 29” wheel options. Pretty simple. The only odd one would be a 27.5 plus fork. For this, you would use a 29” fork as the larger tire needs the extra clearance. Once you get your wheel size you can narrow down your search for forks quite a bit.

Steerer Tube Type:
Next is finding your steerer tube type. There are mainly two options for current modern mountain bikes. The majority of bikes these days have a “Tapered Steerer Tube” meaning the bottom is a larger diameter than the top, a 1 ½” bottom to a 1 ⅛” upper. If your bike does have this, that is great as you will have the most amount of upgradeable options to choose from. The next most common is an 1 ⅛” straight steerer tube, the same diameter from fork crown up to the top. While becoming less and less common, there are still options out there. It's sometimes possible to have a straight steerer bike and get a larger lower diameter headset cup so you can then make your bike a tapered headtube. While not always possible, it's worth checking out if you are looking to upgrade your fork for some serious performance improvements This is best done by doing some research and if you need some help, contact our customer service team.

Much less common and a bit old school, are threaded steerer tubes. Found on older bikes, these are pretty much impossible to find.. If you are looking to upgrade your fork on a bike that has a threaded steerer tube, it's possible you can buy a new headset for your frame and get a threadless straight steerer fork for that bike. But at that point, unless there is some emotional connection with that bike, it's likely outdated and might not be worth putting much money into.
Fork Travel:
The travel of your suspension fork is an important part to consider as well. This is one of the first options you have to change and possibly get “more” out of your front end.
Start with finding out what travel your current fork has. Once you know that (for this example let's use a 150mm travel fork). You can get a new 150mm travel fork without any issues, same travel, works great, you are not changing anything, simple. But… this is where you can adjust what your bike does a little bit and make it better suited for you.
If the bike has 150mm travel stock, you can easily up the travel 10mm, to a 160mm fork. This is a safe amount of travel to change, going up 10mm in travel doesn't change much, gives you a little more suspension to use, and normally it slackens your headtube angle about .4 or .5 degrees.
On some bikes you can bump up travel 20mm, from 150mm to 170mm, while that starts to change the original geometry of the bike, most of the time it's still a pretty safe amount to change, slackening your bike about .8 - 1 degree, the bigger change is how much it might raise your bottom bracket height. New bikes bottom bracket heights are pretty low and will still ride correctly with that much change, but it's something to consider.

Less common, is dropping your travel down 10mm. Sometimes people do this to steepen the headtube angle, shorten the wheelbase, or just have a lower front end. Dropping 10mm will do the same but it will steepen your headtube angle about .4 degrees, but it will also drop your bottom bracket height as well. As I mentioned, if you have a more modern mountain bike it's likely that your bottom bracket height is close to as low as it can be and if you are already pedal striking rocks often, this might not be the best choice for your bike. I did just see a bike check with Connor Fearon where he dropped his fork's travel from 170mm to 160mm on his Kona to better suit his local trails and make it more of a comfortable trail bike. So while it's not as common as “over forking” your bike, you still see it happen from time to time.
More options, are you ready to keep narrowing down your search? Axle type is very important because if you get this wrong your front wheel will not work. The most common axle types are: Quick Release or QR also known as 9 x 100QR, then you have Thru Axles like 15 x 100, 15 x 110mm Boost, as well as 20mm x 100mm and 20mm x 110mm Boost. Yes, lots of options but let us help you out.

Quick release axles are common on older or entry level bikes, this is the classic type of front axle. You have a lever that you open up and then normally have to unscrew it a bit to take off the front wheel. While it's been used for a long time, it's a bit flexy, inaccurate, and generally not amazing.
Next, you have thru axles. First introduced on dh bikes, but now it's common for all new modern mountain bikes to use this type of axle. A few years ago that standard was 15mm axle x 100mm width, until we changed that. Now, Boost Spacing is the most common. That is 15mm axle x 110mm width, adding 10mm do your front axle.
So, if you currently have 15x100mm spacing and are looking to get a new fork, it's a good idea to just get a boost fork with 15x110mm spacing, and you can get some hub adaptors to take up that extra 10mm, 5mm on each side. That way your fork is more “future proof” , which helps in this constantly changing industry. If you have a fork with a QR front axle, you most likely need to stick with that style of front axle to match your wheel.
However, some wheels, (Stans, maybe Chris King, Hope Tech, DT Swiss, you can get a new axle or end caps so you can make your hub from QR to Thru Axle, but best to contact an expert to know 100%), or you can also get a new front wheel at the same time. If you do this, you can get a front wheel with whatever spacing you want, and match your fork to that spacing as well, which is a more expensive route, but could be worth it if you are willing to spend that type of money on your current bike.

The other types of axles I talked about are more for older style trail and freeride bikes, some dirt jumpers as well, but most commonly for Downhill bikes. Current downhill bikes still use a 20mm axle and recently a 20mm x 110mm boost has been introduced as well. If you are looking to upgrade your fork with a 20mm axle, you might have a hard time finding anything that isn't a dual crown fork, as most trail bikes have moved to the 15mm axle standard.
Brake Mount:
More confusion on brake mounts? We got you covered. If you haven't figured it all out yet, one of the last bits you need to know is your brake mount type. Modern bikes use what is called a post mount brake mount, meaning in many cases the disc brake caliper mounts directly to the fork with some bolts, no adaptors needed. This is the most clean and easy brake type.
All post mount forks are not created equal however. It was common for all forks to have a 160mm rotor post mount, so if you had a 160mm rotor you could bolt the caliper to the fork and it will work great. That was a few years ago and if you have noticed a theme, things change… a lot. It has become much more common for trail bike forks to have a 180mm post mount rotor size on the fork, all top level RockShox forks are 180mm post mount with the exception of the new ZEB and the 100mm SID SL fork. The ZEB has a 200mm post mount while the SID SL has a 160mm post mount.
T he mid range to entry level forks will most likely have a 160mm post mount. If you have a 180mm rotor but are buying a 160mm post mount fork, you will need an adaptor so your caliper can mount and make contact at the correct spot on your disc rotor.

Older style disc brake forks have what is called an “IS” mount. IS mounts are holes drilled into the fork, this is almost not seen on any modern forks, but was more common on older forks. If you have an “IS” mount, you will always need an adapter to mount your disc caliper as the holes are perpendicular to the mounting holes on the caliper.
If your bike uses v-brakes, or rim brakes, your options might be more limited. While you can still get some suspension forks with this brake type, it's common that the fork will also be straight steerer and qr axle.
Fork Offset:
You can pretty much get all your specs down with the above sections and can probably find a fork that works with all that info. But, one of the last specs that might be important for you to look into is fork offset.
Fork offset is the distance between your steerer tube on your fork and where your front wheel axle mounts. I'm not going to explain what fork offset does as that is a whole topic on its own, one which we explained in our video on Fork Offset Explained .
For the most part, you want to match your forks offset with the stock spec of your bike. So if your fork is 51mm offset, find a 51mm offset. Recently offset became more of an option with how some new modern bikes are getting longer and slacker, changing the offset helps your bike handle better.
So if you read our fork offset explained blog and think you want to change what your bike has, great, look for a longer or more reduced option. But if you don't know or can't find the exact offset your bike has, it's likely not going to feel much different and I'd just find the fork you can afford and go that route.
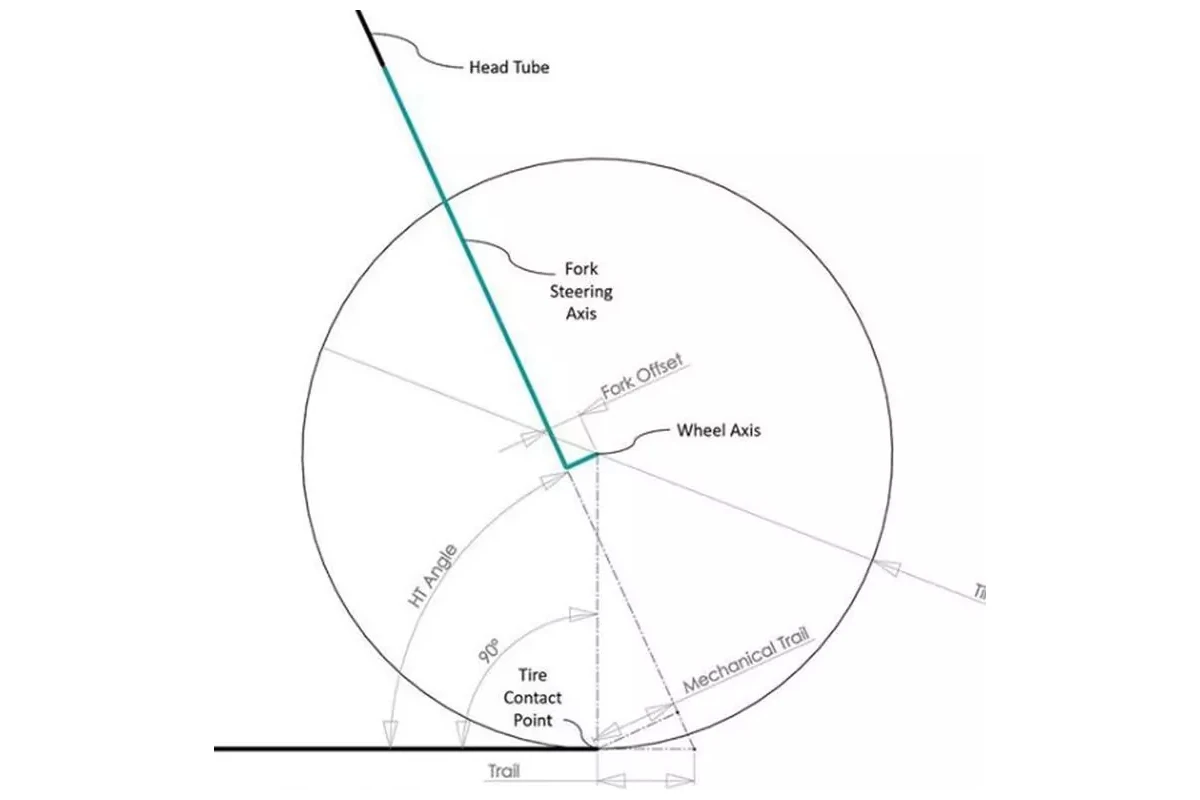
Air vs. Coil??:
Air VS Coil, the debate that still goes on everyday. When you are looking to upgrade your suspension fork, it's likely you will be looking at an Air fork. They are more adjustable, feel smoother most of the time, and normally they are the upgrade option. If you currently have a lower end coil fork, an air fork will make a huge improvement. Now, there are a few coil forks coming back to life in the mid-high end range, like MRP Ribbon Coil, CaneCreek Helm Coil, and the new Marzocchi Z1 Coil fork, are new coil options if you want a set it and forget it fork. If you are also looking to maybe turn your mid-high end fork into a coil fork, you can look at Push Industries ACS-3 coil insert kit.
How Much Should You Spend?:
The last thing to consider is how much do you want to spend? This is hard to answer as it depends on your budget, riding amount, style, as well as what bike you are putting it on.
If you are upgrading a bike that is more than 10 years old, it's likely that you might want to think about even making those upgrades. For a little bit more money, you can often get a more modern mountain bike that has newer standards and geometry.
If you have a bike that is only a few years old, it's very likely you can make some upgrades that will work for your bike and might be future proof as well if you wanted to upgrade other parts as well. It also depends what you are looking for in your fork upgrade. Do you want a better feel, more travel, more adjustments, or lighter weight? Those are all things you should consider when looking at new forks.
Generally, the more money you spend you get better performance, in trail and XC forks you get a lighter weight fork and a better feel, on trail/enduro forks you normally get better performance, stiffer chassis, and more adjustments.
So are you the type of rider that needs any of those things? Then you might want to look at the upper midrange to high end forks. If you just want something that feels a bit better than you can probably look around the entry level - mid range type of forks.

Final Thoughts:
Wow, that is a lot of information to digest and think about. Upgrading your fork can get you some major performance improvement but it’s important to understand the right model for your bike. Also consider things like your bike's age, and how much it's worth to you. Then look at Wheel Size, Axle Type, Steerer Tube Type, Travel amount, Brake Mount type, and fork offset. With so much to consider, it's a great option to contact our customer service team, the experts at Worldwide Cyclery are here to help you get the correct fork on your bike, maybe give you some options to choose from and get you the best fork for your bike.

If you're one strange human and would like to read the transcript of the video above, continue reading below!
hello mountain bike friends a little over two years ago we made a video about all of the things you need to consider when you are upgrading the fork on your mountain bike it's one of the most common upgrades there is but there is a lot of complexity there in terms of steer tube wheel size axle brake mounts all of that sort of stuff we're going to cover everything you need to know in this video to upgrade the fork on your mountain bike
Jeremy christmas! forks! [Music]
so in this video we are going to talk about all the things to consider when upgrading the entire fork on your bike obviously when you say upgrade your fork that could mean upgrading your air spring or your damper something like that that's not going to be in this video that's a little bit more technical on really high end mountain bike forks you can do things like upgrade your damper or your air spring or add tokens or things like that which could be considered an upgrade push industries make some really cool high-end upgrade dampers for very expensive forks but in this video we're going to talk about the things to consider when you're upgrading the entire fork on your mountain bike we're going to go over steer tube type wheel size offset axle brake mount and everything else so you can see right now the time stamps on the screen if you want to pan around and get to a point where you need or you can just watch the whole thing if you want to learn all about this let's jump into it [Music] the first thing we're going to talk about is steerer tubes you do have to get all of these things we're going to talk about in this video correct in order to make sure the fork you buy fits your bike but one of the key elements there that we're going to talk about first is steer tubes most modern mountain bikes all have what's called a tapered steerer tube and what that means is that the bottom is a 1.5 inch and the top is an inch and an eighth tapered so again this is the absolute most common that there is on modern day mountain bikes there of course is on a little bit older bikes or let's say cross country bikes with a steel frame or something a straight steerer which means it's an inch and an eighth all the way through like this less common but again very important to know which one you have so it fits your bike on much older bikes you can get into things that are like threaded steers jared bring in an example this is a giant sedona it has a threaded inch there's an at one point there was an inch threaded then there was an inch and an eight threaded then there was an inch and a threadless this is a quill stem if your bike has that i don't recommend upgrading your fork you should probably just ride it as it is have a great time save some cash for a whole new bike that's deer tubes help me help
[Music] you next thing here is travel um this is a very important thing to talk about travel for your bike you're basically the manufacturer of your bike specifically engineered your frame to work perfectly with a certain travel fork which means you should probably stick with that because a lot of engineers spent a lot of time designing that frame around that travel fork you can of course go a little lower or a little higher we do not recommend going more than 20 millimeters in either direction so that means if you've got a hardtail with a 100 millimeter travel fork don't go any lower than an 80mm travel don't go any more than 120 ml travel if your bike is designed for a certain travel fork and you go lower you're gonna steepen the head angle lower the bottom bracket lower the whole front end of the thing and that's going to give you a very different feel and vice versa if you go more if you add travel to what your bike is intended for it's going to lift that bottom bracket lift the whole front end of the bike and slacken out that front end front head angle so it will change how your bike works if you change the travel of your fork so definitely something to consider but again we really really do not recommend going more than 20 millimeters away either direction from what your bike was intended to use initially so keep that in mind every bike you know sort of is designed around a specific travel fork it's pretty easy to figure out you probably already have one on your bike or you can figure out pretty quickly from the manufacturer's website what bike brand you have what it's designed for there's obviously a ton of different travel forks out there all the way from 80 and 100 millimeter ultra light cross country forks like this thing to your 170 millimeter 38 mil stanchion beautiful super enduro forks to your 200 millimeter travel dual crown forks which are pretty much exclusively made for downhill bikes typically the front fork travel is going to match the rear travel on the rear end or be close to it you don't really see a huge amount of variation there again the biggest thing to keep in mind is what was that frame engineered for initially those manufacturers those engineers hopefully know what they're doing and they designed it right so don't go too far away from that that's travel
another key element to consider when upgrading the fork on your bike is what wheel size are you looking for so you want to get a fork that corresponds to the wheel size that you have on your bike for instance if you have a 26 inch wheel bike you want to go with the 26 inch wheel fork if you have a 27.5 inch wheel bike you want to get a 27.5 inch wheel fork but if you have a 27.5 plus bike you probably want to get a 27.5 plus slash 29 fork and that'll do the job for you but basically when you're looking at forks you just want to go with the fork that corresponds to the wheel size on your bike and then you'll be set
okay the next thing to consider is offset this is typically specified in the product title and in the description of any fork you're looking to buy offset wasn't really a thing until maybe a decade ago gary fisher actually came out with what they called there i believe it was g2 geometry and they pretty much just changed the offset of a fork on their 29-inch wheeled bikes when 29ers were just becoming a thing basically to make that offset work better for the larger wheel and the geometry of that bike since then it's continued to evolve different brands have designed bikes around different offsets and now forks are offered in different offsets it finally seems like bike brands are settling on what offset they want to use and what works best for 29 and 27.5 um but who knows we'll see it could change in a couple years we made a whole video called fork offset explained sort of detailing how the offset actually changes the handling of the bikes and we also wrote an article as well that showed like detailed images of how when you change the offset of a fork the trail changes and sort of the steering dynamics of the front wheel change as the offset changes but nonetheless like most things we've said in this video get the offset that your bike was engineered around so if your bike was engineered around a 51 mil offset go with that if it was engineered around a 44 millimeter offset go with that it's not necessarily something you want to mess with when it comes to if your bike was designed for a certain offset you should very likely just stick to it so keep that in mind and again most modern day mountain bikes because offsets become a much more real thing in terms of a fork attribute in the last couple years the brands will specify what offset you need hopefully on the model page of the bike that you have and then you can just upgrade your fork and get that so don't worry too much about going away from what your bike was designed for when you're upgrading your fork it's much more about weight performance adjustments feel all of that sort of stuff and then matching sort of the attributes that that bike was engineered for so there you go that's offset [Music]
okay next up is the axle on your fork this is a very important thing to also get right i wish i could say there are some common types or ones the most common but there really isn't i think probably the most common on modern mountain bikes these days is the 15 by 110 what's called a boost axle so mountain bikes originally had a quick release also known as like a nine millimeter axle um that's not a thru axle then it went to a thru axle just regular 15 millimeter by 100 then it went to 15 by 110 boost and that's probably the most common but there is also uh 20 millimeter axles for downhill bikes 20 by 100 and there's also a 20 millimeter boost axle but that's really rare um again pay attention to what axle you have most of the forks that you see laying all these forks are through axles right here and you do need to measure your hub and figure that stuff out if you want to see what a quick release axle look like that's on a little bit older bikes that's these babies right here so you could basically upgrade your fork and use a different axle standard than like what's used on there currently but you're going to have to either use adapters to modify your existing hub to get to that standard or use different front hub or front wheel as soon as jeff gets this front wheel off yeah so this is a quick release right here they're a bit older they're really flexy and there's a reason that they don't exist on high-end modern mountain bikes these days and through axles do exist so if you do have a bike with a qr axle and you're upgrading your fork two things to consider one should i upgrade the entire bike if no it's still a good frame then the next one is should i upgrade to a fork with a thru axle and then do i get an entire new front wheel an entire new wheel set or do they have available hub adapter kits for your hub may or may not happen but it is very common a lot of people run into this problem and we help people out with that situation all the time right jared that's true yeah give us a call shoot us an email ask us any questions you got
all right last but not least brake mounts this is another really important thing to figure out so your bike right now has some type of brake mounted to it if you've got a more modern high-end mountain bike it very likely has a post mount so what that means it looks like this it means that your brake caliper adapts to the fork with just two bolts that go directly into the fork right here this is a post mount these are not all created equal so most most post mounts on shorter travel forks let's say 80 to 140 mil are a 160 post mount meaning you can put a caliper on here and a 160 rotor and you need no adapter however if this is a 160 post mount for example because this particular fork is a cross country fork if you wanted to put 180 mil rotor on here um you would need a 20 millimeter adapter so keep that in mind now longer travel forks like that fox 38 right there it's got a post mount 180 or post mat 200 180 post mount 180 which means that 180 millimeter rotor goes on there and the brake caliper mounts on there no adapter again if you wanted a 200 ml rotor you need a 20 mil adapter so that's how that works figure out which post mount you have if you have post mount some of the other common types are well i don't really think they're any common post mount is the most common now years back they made what was called an is mount which is what this old guy has here that's where you have basically two bolts that go perpendicular into your adapter which goes like that then your caliper mounts to it wasn't the best design that's why they kind of got rid of it and now everything went post mount and then of course depending on the price range of your bike you might have caliper or v brakes which is what this bike has and you have mounts right here so if you do have caliper or v brakes obviously and you want to keep those brakes you got to do that or if you want to get a bike with that doesn't have those a fork without those then you need to get disc brakes and yeah a lot of things to consider here so uh hopefully that all made sense
[Music] the very last thing we have is how much should you spend in air verse coils so if you're looking at upgrading your fork there is a ton of options out there and a ton of price points we've made videos on a ton of the higher end forks we've also made a video on the best forks that you can upgrade to that are under 500 and they do change a lot so typically under 300 bucks you're going to see a lot more coil forks they're obviously going to be heavier and they're going to have less adjustments so as you sort of go up the food chain and in the price range of mountain bike suspension forks you're typically going to see them get lighter fancier in terms of more adjustments and looks and all of that sort of stuff and yeah there there could be a little bit of complexity when it comes to adjustments and which ones are necessary and which ones are not necessary but adjustments and those kind of features really do pile up on you as you get towards the higher end segment of forks and the weight typically goes down which is really cool forks have come a long way so it's definitely something to consider air versus coil that really does depend on riding style so almost everything now are air forks even a lot of downhill forks and super enduro forks up to 180 millimeters of travel like the fox 38 or air forks um coil is actually pretty common on um sort of like free ride and dirt gem forks and lesser expensive forks but mrp makes a really cool coil coil fork as well because coil is claimed to have some really interesting sensitivity features but every time coil gets really good with sensitivity the air springs kind of catch up to that sort of feature set but anyways that's that we have a lot of other videos on suspension forks comparing the different top brands and all that other stuff so check that stuff out link below in the video description thank you guys for watching hit that subscribe button and we'll see you in the next one.
June 29, 2021
Bike Knowledge › Fork › How To › Suspension › Video ›
Top Products For You...
Recent blogs.
- Turo for Mountain Bikes, Ride Saving Essentials, Storing Your Bike Upside Down?...Ep. 139 [Podcast]
- Yeti ASR T5 Ultimate - Employee Bike Check with Liam Woods
- MTB Must-Haves & Must-Knows: The Ultimate Guide [Video]
- Yeti SB140 T3 [Rider Review]
- SRAM CEO Ken Lousberg on the Future of Drivetrains, Supply Chain Issues, Innovation & More.. Ep. 138 [Podcast]
--- Shop Info ---
- Videos / Blog Articles
- Contact / Locations
- Demo Bike Program
- Custom Bike Builds
- Miles For NICA
- We're Hiring!
- Affiliate Program
- Accessibility Statement
- Refund Policy
- Terms of Service
- Privacy Policy
--- Stay In Touch ---
Newsletter signup -.
© 2024 Worldwide Cyclery

Is 80mm Fork Travel Good? (Various Biking Scenarios Explained)
You’ll see plenty of variations when looking at suspension forks on different bikes. So, today let’s take a look at an 80mm travel fork to decide if it’s any good?
80mm fork travel is good for cross country riding where you’ll face different types of terrain like singletrack, forest paths, and smooth roads. However, if you’re looking at mountain biking and you’re anything above beginner level, then 80mm will make your ride uncomfortable .
Below we’ll cover fork travel in greater depth along with other related travel suspension fork topics so you can understand everything you need to be confident in your suspension fork’s travel.
Are 80mm Travel Forks Good?
If you’re just starting to understand bike components for the first time, then one area that can get real confusing real fast is fork travel.
As we talked about above, it depends on what you’re using it for. 80mm travel is good for relatively smooth terrain with just a few bumps or uneven elements here and there – such as a forest path. It will help soften the impact of these bumps and make your bike more balanced, and easy to ride.
It’ll be a more comfortable ride, too. Essentially, 80mm fork travel is good for smoothing out imperfections, but it’s not good for dealing with big impacts .
Anything that involves any sort of air time, or any route that’s particularly rough, bumpy, or uneven, will feel uncomfortable with just 80mm of travel. In fact, it could cause an injury if you’re using a fork with just 80mm of travel for a more complex route.
Fork travel refers to how much wiggle room the wheel has with the suspension before the suspension fork stops absorbing some of the impact of the road and/or jumps, etc. With 80mm, the suspension fork can ‘travel’ 80mm before it ‘bottoms out’ and you start feeling the impacts .
Forks With Greater Travel Explained
So, if 80mm travel is good for some things, what happens when you increase the travel amount on different forks? Considering you can easily find forks with 120-150mm of travel, that’s a pretty big difference, but what do they do?

The larger the travel, the more impact the bike can take before it ‘bottoms out’ and you feel the impact yourself through the rest of the bike. That’s great, right? Well, it is for downhill riding, because larger travel equals a smoother, more controlled descent.
You’ll be able to handle really rough terrain with greater travel; just be prepared for a difference in handling and speed as a result.
But everything has a downside. Here are some of the ways greater travel can negatively affect your bikes performance :
- It’ll be heavier – because the fork is larger and so are the stanchions that stop the fork from flexing too much
- It’ll be more sluggish – the bike is slacker, and it shortens the reach when the fork has greater travel, and that means a more sluggish bike that’s slower to respond to handling, making it a less agile bike overall
- It’ll feel different – this is the most important thing of all, because if you’re used to your bike performing a certain way right now – then a bike with greater travel on the fork will feel drastically different, so you’ll need to get used to that again
Of course, those downsides shouldn’t stop you. If you head out on gnarly tracks in the mountains and need that extra cushion on descents to make your ride more comfortable, then a bike with greater fork travel is perfect.

You’ll be able to handle really rough terrain with greater travel; just be prepared for a difference in handling and speed as a result.
Can I Swap My 80mm Fork For One With Greater Travel?
With most bikes, swapping out an 80mm fork for a 100mm fork is doable , but adding a for with a longer travel isn’t practical or feasible in most cases. You’ll need to be prepared for the differences mentioned above, but also for some consequences.
When manufacturers design their bikes, they do so holistically. They make sure every part has its place, and it’s able to perform its duty for the intended use of the bike. Mountain bikes designed for advanced tracks will already have higher travel forks, and a stronger frame etc to boot.
So, if you need to upgrade your bike’s fork to one with greater travel, you can do so, but just be aware that the rest of your bike probably isn’t designed for it . That means any warranties will be void, and any problems with your bike’s performance or any damages will be completely on you.
Still, switching out a fork is much cheaper than buying a whole new bike , so if you want a fork with greater travel, switching them is possible and it’ll make your bike much more suitable to the more advanced, uneven tracks you want to try out.
Can You Use A Fork With 80mm Travel For Downhill Riding?
If you decide to give downhill riding a go, an 80mm fork will feel unsteady on the descent, uncomfortable, and outright dangerous .
Downhill bikes usually have fork travel of 160mm+ so they can handle the challenging terrain at high speeds, which makes 80mm forks mostly unsuitable, and dangerous for downhill riding. In fact, most bikes with such short fork travel are usually trekking hybrids, which don’t have the structural strength to be exposed to such forces.
Downhill bikes are full suspension bicycles, whereas bikes with only 80mm of fork travel usually only have a front suspension to dampen some road imperfections on mostly smooth forest or urban roads.
Do I Need A Fork At All If I Only Ride On Low-Quality Paved Roads?
Do you need a fork if you are simply riding on low-quality paved roads? No. Would it make things a lot smoother if you had one? Absolutely. The thing with an 80mm travel fork is that 80mm isn’t a lot of travel, but that doesn’t mean it’s useless.
It makes most journeys more comfortable, and with the condition of some of the paved roads these days, an 80mm travel fork will help cushion the impact of some of those imperfections and bumps in the road .
Of course, you could just opt to avoid forks with travel altogether, and although some low-quality paved roads are pretty rough, you wouldn’t exactly hurt yourself or feel overly uncomfortable on the road with a fork without travel.
Still, if you want a comfortable ride, even if you only use paved roads, a fork with a small amount of travel will definitely help.
Do All Forks Have Travel?
Not all forks have travel because not all bikes need that element of suspension . Road bikes, fitness bikes , fixies, dutch style bikes for example, aren’t likely to run into terrain that’s uneven enough to warrant a fork with travel, so they come without suspension forks.
Sam Benkoczy
Hi, I'm Sam. I own and maintain 6 e-bikes, 15 regular bikes (road bikes, folding bikes, hybrid bikes, city bikes among others). I learned about bikes from my local bike mechanic as well as from bike maintenance courses. I love being out there in the saddle, and using my bike as a practical means of transportation. You can also find me on my YouTube channel at youtube.com/bikecommuterhero Say hi to me at [email protected].

Recent Posts
What Bicycles Would Superheroes Ride?
Do you love bicycles and superheroes? Have you ever wondered what bicycle your favorite superhero would be riding? I asked AI to help me come up with bicycle ideas for vairous superheroes, and to...
HeyBike Sola Hands-on Review
I’m not going to beat around the bush. The Heybike Sola is SHOCKINGLY cheap. This is an electric commuter bike that is currently on sale for less than the price of most regular, non-electric...

- Help Center
- Chat with a Ride Guide
- 1-866-401-9636
- Retail Store
- Bike Services
Reset Password
We will send you an email to reset your password.
Don't have an account? Create an account
Create Account
Already have an account? Sign In
- Favorite your products & save them to your account
- Save a search & get notified when new products drop
- Be first to know about the latest events & promotions
Bike Finder
Results have arrived, why i "overfork" all my mountain bikes.
If you want to improve the downhill performance of your mountain bike, then "overforking" is one of the first upgrades to consider. I put bigger forks on all of my bikes. Here's why I like it, and the pros and cons that you need to consider.
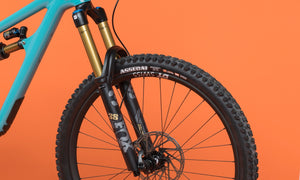
Written by: Bruce Lin
Published on: Apr 28, 2023
Posted in: MTB
I am a creature of habit, especially when it comes to building up new mountain bikes. Every bike build follows a similar pattern:
- I install a fork with the manufacturer’s recommended travel
- I do a few gnarly rides and scare the crap out of myself
- I decide to get a bigger fork
- I end up loving my overforked bike
Every time I think, “This bike is designed to run an X-travel fork, I should just ride it with X-travel.” Then, as my hunger for more downhill performance grows, I always cave and either swap air springs or get a new fork altogether.
Here’s why I overfork all of my mountain bikes, and what you need to consider if you’re thinking about overforking your own bike.
[button] Shop Mountain Bike Forks [/button]
What is “Overforking” and What Does It Do?
It should be clear, but just in case it’s not, “overforking” is installing a suspension fork on a mountain bike with more travel than the bike originally comes with . In mountain biking, this is one of the most common modifications downhill-focused riders make to customize their bikes.
When overforking, many riders will increase their fork travel by 10-20mm. This has a few key benefits:
- More fork travel helps you maintain control and go faster in gnarly terrain
- A longer fork slackens your head tube angle, increasing stability
- A longer fork raises your stack height, putting you in a better position on steep terrain
As a general rule, every 10mm change in fork travel leads to a 0.5-degree change in head angle . So bumping up to a 10mm longer fork slackens out your head angle by 0.5-degrees, and bumping up 20mm gets you around 1 degree. (Of course, this is a rough estimate and it will vary depending on specific fork and frame.)
If you not only increase fork travel but upgrade to a burlier fork with thicker stanchions, then you also get the benefits of increased fork stiffness. A stiffer fork will generally feel plusher because there’s less bushing bind, and it tracks the ground better and gets knocked off line less easily in gnarly terrain.
I’ve been overforking all of my bikes for years. Here are some of my most recent overworked machines:

My REEB Sqweeb: designed for a 150/160mm fork, but upsized to a 170mm fork.

In all these cases, I started out with the “stock” fork travel. They performed fine on my local trails, and in reality, I didn’t really NEED a bigger fork. But the upgrade bug always bites me hard, and after a couple of months, I ended up swapping air springs to get a bit more travel out of the front. It gives me more confidence on the steep and gnarly terrain I regularly ride , so I always think it’s a worthwhile upgrade.
What Are the Potential Downsides of Overforking?
Of course, no modification comes without tradeoffs. Here are the potential pitfalls of overforking your bike:
- Geometry changes: slacker seat tube angle, higher bottom bracket, higher stack
- Reduced climbing performance
- Warranty issues or broken frames

A 10-20mm increase in handlebar or BB height sounds significant, but you’re not actually raising things up that much. The fork is at an angle — these days, usually between 63-68 degrees — so when you increase its length by 10-20mm, the vertical increase in height will actually be less (you’re going to need to do some math to actually calculate it). With handlebar position, many riders remove 5-10mm of spacers from under their bars to compensate for the bigger fork .

The bigger consideration, however, is what a bigger fork might do to your bike frame. Manufacturers design their frames to work with specific fork lengths. If you’re riding a brand-new bike with a warranty, overforking your bike could void it . In a worst-case scenario, because a longer travel fork essentially acts as a longer lever, it could produce forces your frame wasn’t designed to withstand and break your frame.
This is where I need to put a disclaimer to check with your frame manufacturer before overforking your bike .
Some manufacturers might explicitly warn against it. Many, however, have no problem with it. Santa Cruz, for example, provides a fork travel range for their frames and often approve using forks that are 10-20mm longer. My current Forbidden Druid is designed for a 150mm fork, but Forbidden specifies a maximum compatible axle-to-crown length which conveniently matches a 160mm fork.
You’ll see some manufacturers overfork their own bikes too. Yeti produces a “Lunch Ride” version of its bikes that generally have a 10mm longer fork. Orbea’s longer travel “LT” models also use a 10mm longer fork.
Generally, modern mountain bike frames are extremely tough and well-designed, so they can easily handle a 10-20mm longer fork . You could go bigger than 10-20mm, but it’s rarely recommended. Of course, anytime you modify your bike, you do so at your own risk.
The Truth of Overforking: It’s Mostly In Your Head

To me, overforking has a much subtler effect. Just the knowledge that my fork is beefed up gives me a slight mental edge on descents . If you paid attention in science class, then you know the placebo effect is powerful. It’s like riding with knee pads or a full-face helmet. The extra confidence a bigger fork provides has the biggest effect on my riding .
Am I saying that overforking your bike is pointless? No. A bigger fork still does all the things I said: absorb bigger hits and slack out your head angle. I just don’t want anyone to expect it to completely transform their bike into a mini downhill bike. That’s not how it works. If you’re looking for a big, super-noticeable change in the downhill performance of your bike, you probably actually want a whole new bike.
But if you’re a tinkerer who likes optimizing your equipment and you want to make your bike's intentions a bit more gravity-oriented, then overforking your bike is one of the best mods you can do. I always recommend it because the downsides of increasing fork travel 10-20mm aren’t that huge, and the gains are well worth it .

Features, Guides, MTB Jul 3, 2024
Race Tips from Leadville Trail 100 MTB Finishers
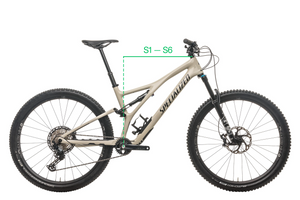
Guides, MTB Jun 18, 2024
How Specialized S-Sizing Works, and Why It's Kinda Genius
Features, Guides, MTB Jun 17, 2024
Specialized Stumpjumper by Year: How to Buy A Used Stumpjumper
Features, Latest, MTB Jun 10, 2024
Racing The First-Ever Tour Divide with Mary Metcalf

Features, Latest, Learn, MTB Jun 10, 2024
Tread Setters: A Different (and Important) Take on the White Rim
Bikes, Latest, MTB Apr 5, 2024
This Specialized S-Works Epic World Cup Is My Perfect Leadville Bike

FAQs, Guides, Latest, MTB Apr 3, 2024
FAQ: Top 5 Mountain Bikes That Hold Their Value
Bikes, Features, Latest, MTB Mar 15, 2024
Banshee Legend DH Bike Review: A Privateer’s Dream Bike
Features, Latest, MTB, Tech Mar 12, 2024
RockShox Flight Attendant: Will XC Welcome Its New Electronic Overlords?
Bikes, Features, Latest, MTB, Vintage Jan 24, 2024
The Tioga Racer: 1993 Raleigh John Tomac Signature Ti/Carbon

Features, Fun, MTB Jan 4, 2024
Rage Against the Machine Likes Mountain Biking
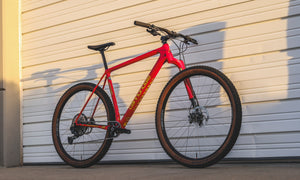
Bikes, Features, MTB Nov 29, 2023
The Cannondale F-Si Throwback Might Be the Most Beautiful XC Hardtail Ever
New arrivals.

Certified Pre-Owned
Specialized S-Works Epic EVO Mountain Bike - 2023, Small

3T Exploro Race Force AXS 2x 700c Gravel Bike - 2022, 54cm

Evil Wreckoning LS X01 AXS Mountain Bike - 2023, Large

Felt F1X Cyclocross Bike - 2019, 50cm

Specialized Turbo Creo SL EVO Large Gravel E-Bike - 2021, Large

Specialized Turbo Creo SL Expert Road E-Bike - 2022, Small

Specialized Turbo Creo SL Comp Carbon E- Road Bike - 2020, Medium

Canyon Grizl CF SL Gravel Bike - 2022, X-Small

Lauf True Grit Ultimate Gravel Bike - 2021, Medium

Pivot LES SL Mountain Bike - 2019, Large

Santa Cruz Nomad Carbon C 27.5 Mountain Bike - 2022, Medium

Yeti Cycles SB150 Mountain Bike - 2022, Medium
This store requires javascript to be enabled for some features to work correctly.
- Wheels & Wheelsets
- Axles & Skewers
- Inner Tubes
- Seat Post Clamps
- Cables & Housing
- Wheels, Tubes, & Tire Tools
- Bike Stands
- Cable Tools
- Water Bottle Cages
- Bike Mounts
- Why Buy From Us
- Ambassadors
- New Releases
Accessories
Discover Corki Cycles
Everything You Need to Know About Front Suspension Forks
The front suspension fork is one of the essential components of a bicycle. Without a suspension fork, your bike will vibrate and make your arms sore when you go through tough terrain such as jumps and drops. Furthermore, an unsuitable fork may lead to accidents and other dangerous situations. To avoid this and improve your riding preferences, you can choose the right suspension fork for your bike.
In this guide, I will go over the fundamentals of suspension forks, and how to pick the right front suspension fork for your bike. Below is the outline of what we shall cover.
What is a front suspension fork?
- Different types of MTB front suspension fork
- How to measure your mtb fork travel?
How do you pick the best suspension fork for your mountain bike?
The suspension fork is a core bicycle component. It is typically composed of springs and dampers. Front forks comprise two stanchions (or tubes) connecting to the bike's steerer tube on the front wheel. The front suspension fork's function is to absorb trail obstacles' energy through compression, making your ride experience more comfortable.

The suspension fork offers a range of adjustments on mountain bikes. Variations include the lockout, amount of travel, and rebound adjustments. We've compiled a list of some functions of bicycle suspension forks below.
A lockout is a small switch that is located on your mountain bike's front right stanchion. This lets you lock the suspension fork while riding out of the saddle on level ground. This means not engaging in suspension. If you're hanging out of the saddle on horrible ground, you'd better turn off this lock switch. Moreover, this switch, known as a remote lockout, can also be routed to the bike's handlebars.

The spring is found in the fork legs with the dampers. It absorbs the energy created by an impact. The stiffness of a spring is different and it is the spring rate, the ratio of force per distance the spring is compressed. You can adjust the spring rate according to your needs. Furthermore, the spring can store energy. Releasing it when the fork extends, while the damper converts excess energy. All suspension forks utilize a spring or air.
The damper is typically located inside the fork's lower legs. It can be found in the fork leg and consists of a piston and oil-filled chambers. The damper's function is to convert the spring's kinetic energy. It does this by forcing oil through adjustable ports. As the fork compresses and rebounds, the piston moves through the oil, creating resistance that slows down the movement of the fork. Several dampers are used, including hydraulic, pneumatic, and coil-sprung dampers. But it depends on many factors, such as the rider's weight, riding style, and terrain.
Travel refers to the distance of the compression and rebound. In other words, it means how far the fork's immersion tubes dip into the standpipes. The amount of spring or air travel in a suspension fork is determined by the design of the fork and the riding style. For example, a suspension fork's travel for cross-country riding will be less than downhill. Because cross-country riders typically encounter more minor obstacles and not huge road gaps.

The spring travel is always given in millimeters. The general MTB front suspension travel ranges from 80mm to 200mm. 150mm and above will have a crown design. With some suspension mountain bike forks, the spring travel can be adjusted. But it's worth noting that not all suspension forks use springs to provide travel. Some forks use air pressure instead, which can be adjusted to suit the rider's weight and riding style.
Rebound damping
Damping is the process of absorbing impact energy transmitted through the forks or shock during compression and rebound strokes. A set of forks, shocks, or struts are considered dampers. This damping determines the speed at which the fork extends after an impact.
Rebound damping is built into every suspension fork, and the strength of this damping can be adjusted on most forks. If rebound damping is too low (-), the suspension will extend too fast and feel bouncy and out of control. But suppose the rebound damping is too high (+). Then, the suspension will not recover fast enough after repeated impacts sinking ever lower into its travel and performing poorly. You can adjust the rebound damping according to your need and terrain you regularly ride.
Compression
The speed at which the fork compresses is controlled by the damping. For example, when a rider hits a bump on the trail, the suspension fork compresses to absorb the impact and rebounds to its original position. Compression can be adjusted on most suspension forks. It allows the rider to customize the amount of compression based on the terrain they are riding. A firmer compression setting is ideal for smooth, fast trails, while a softer one is better for technical, rocky terrain.
Different types of MTB front suspension forks
There are several mountain bike front suspension forks on the market nowadays, including coil springs, air springs, hydraulic, and so on. Each has unique characteristics and advantages. Here, we'll concentrate on coil springs and air spring forks, two of the most popular varieties.

Coil spring fork:
Traditional suspension forks are made of coil springs. To reduce shock and give a smooth ride, they use a metal coil as the spring. These forks are strong and require little maintenance. They cost less than air spring forks. Riders on a tighter budget frequently prefer coil spring forks.
However, coil spring forks can be heavy for some riders. The metal coil spring adds weight to the fork, making it more challenging to maneuver the bike. Additionally, adjusting the spring rate on a coil spring fork can be more complicated than on an air spring fork. Riders may need to swap out the coil spring for a different one to achieve the desired level of stiffness or softness.
Air Spring Forks
Air spring forks use compressed air to provide suspension. They are typically lighter than coil spring forks. An air spring is easier to set up because you only need a shock pump to make it stiffer or softer. Riders can adjust the spring rate by adding or releasing air pressure.
One potential downside of air spring forks is that they need more maintenance. Riders must regularly check the air pressure and add air as needed. Additionally, air spring forks can be more expensive than coil spring forks.
How to measure your MTB fork's travel?
Ever wondered how to measure the travel of your MTB fork? Well, in this section, I'll walk you through a couple of simple ways to measure your mountain bike fork travel. So grab your tape measure, and let's dive in!
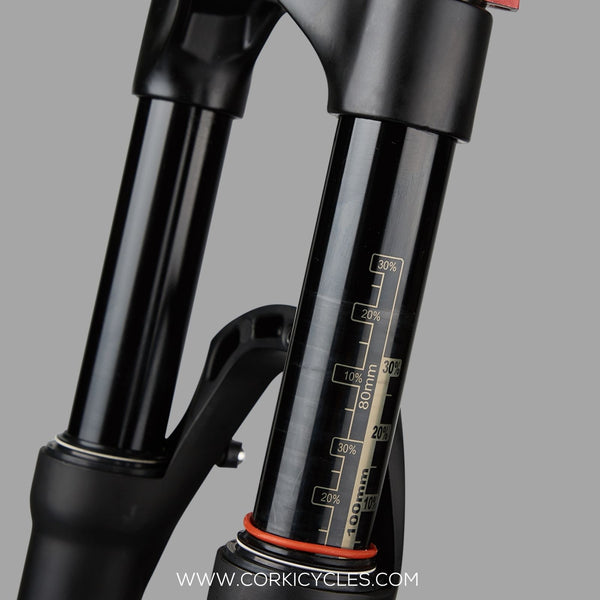
One way to find out your fork travel is by checking the manufacturer's details. Usually, they provide this information right on the fork itself. Take a close look at the fork's outlook, and you might spot the travel measurement written there.
Another way is to measure by yourself with a tape measure. If you want to be hands-on and measure it yourself, no worries! Get your tape measure ready, and let's get started.
First, slide the fork stanchions all the way down until they can't go any further. Then, measure the distance from the top of the stanchions to the fork crown with your tape measure. However, you need to pay attention to the fact that it is an approximation. You will need to subtract the compressed height of the spring for a more precise measurement. For example, if you measure 126mm but the fork's travel is stated as 120mm, you may need to subtract around 5-6mm for the compressed height of the spring. That means your mountain bike fork's travel is approximately 120mm.

Not all suspension forks will fit your bike. Thus, you must know several critical sizes of MTB forks.
Wheel size:
The suspension fork must fit the diameter of the front wheel and wheelset you ride. There are a few different wheel sizes for mountain bikes. 26 ", 27.5", and 29" are the most common. If you are still determining your wheel size, it should be found on the side of the tire or on your hub usually.
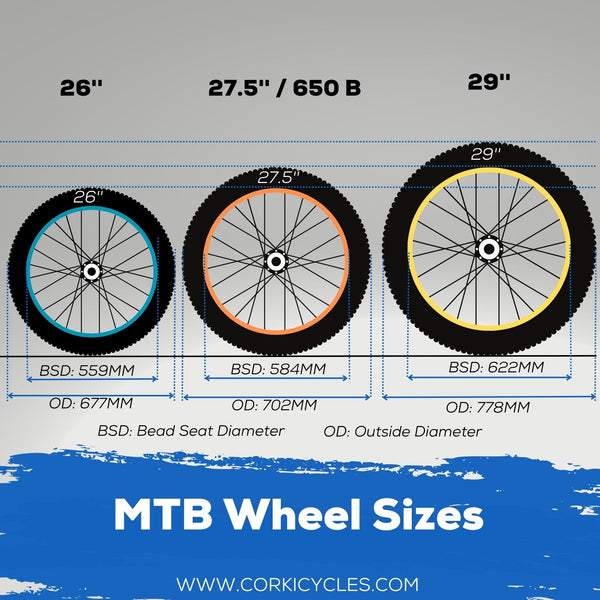
The frame manufacturer has designed the bike around a certain amount of travel. That is why the travel of the new fork should correspond to the travel of the previously mounted fork. The general MTB front suspension travel ranges from 80 mm to 200 mm. It is generally advisable to stay within this range depending on your frame. Please check your travel carefully before you buy a new front suspension fork . Because increased or decreased fork travel can damage the tube as well as affect rideability. For example, you can't mount a 200mm travel triple crown fork on a hardtail. The steer tube angle would be crazy!
Fork steerer tube diameter:
The fork steerer tube attaches to the bicycle frame and is inserted into the frame's head tube. Most modern bikes will have a tapered steerer. It usually starts at 1.5 inches on the bottom and goes from 1 to 1/8 inches on the top. This size always offers greater stiffness with minimal weight gain.
But you may find some DH bikes and older mountain bikes have straight steerer tubes. This straight steerer can connect the fork to the original frame of the bicycle directly. Again, they range from 1 to 1/8 inch in most cases. Drop the forks out of the frame if you need clarification on the size. You should be able to see immediately if the steerer is tapered or straight.
The fork end must fit the front wheel's hub and axle. Suppose the suspension fork’s installation length deviates from the axle size.
The standard size for thru-axle forks on mountain bikes is 15mm x 100mm or 15mm x 110mm with 20mm x 110mm also. They are used mainly on downhill and freeride bikes. Trail, XC, and enduro bikes are changed to the newer Boost thru-axle standard. It has increased the front axle length to 110mm. If you are not sure what the size of your axle is, you can look at the previous one. Again the fork will either be built for a QR wheelset or a thru axle wheelset. Make sure to check your bike and the new suspension fork's compatibility.
Replacing your fork can bring about some major performance benefits, but it's critical to identify the proper type for your bike. Travel, wheel size, axle type, steer tube type, travel amount, and fork steer tube diameter are all elements to consider. With so many factors to consider, you can find the best suspension fork for your bike that matches your demands and allows you to conquer even the most difficult terrain with ease.
Have fun out there on the trails!
If you have any comments or questions, please leave them below.
Suspension Fork Related Articles:
How Do I Adjust My Front Fork Suspension Quickly?
How Do You Mount an MTB Front Suspension Fork? Quick and Easy Guide
Mastering Mountain Bike Fork Maintenance: Expert Tips for Peak Performance
← Older post Newer post →
Please note, comments must be approved before they are published
THE HUCK IT NEWSLETTER
Sign up for the Corki Cycles newsletter for everything cycling. From new component releases to epic updates from the biking world.
Get 11% Off Your First Order & Join The Corki Cycles Community
Subscribe to our mailing list to get an immediate 11% discount, and first access to product promotions, videos, podcasts, and cycling news. Join our cycling community now!
This site is protected by reCAPTCHA and the Google Privacy Policy and Terms of Service apply.
Let customers speak for us
Would definitely by from Corki cycles again
I travel far on an overloaded cargo bicycle, and for the first ~50,000 miles, its stem cap was an electronic analog clock, which is to say, I’m old enough to still be an analog guy. But that clock quit working about 15,000 miles ago, because I travel in all four seasons through all varieties of weather, and — who knew? — electronic analog bike-stem clocks don’t like getting wet.
I’d been meaning to replace it, but I’d gotten used to having a stem cap that wasn’t just a stem cap, you know. So I was searching for another sacrificial electronic analog stem clock — the old one lasted years, after all — when I noticed this option, and it too is more than a stem cap. But this one serves a function I need a lot more than an analog clock. After all, there’s a bike computer on the handlebars, and it shows the current time in digits, plus much more, and I’ve also got a watch on my wrist.
But an AirTag secured in a weather-proof housing to the stem of my bike? Yeah, that I need.
Installation was as easy as the old analog clock, which I had to remove annually to replace its button battery. The AirTag even uses the same ubiquitous 2032 battery, and I always have a few of those in my backpack. Apple says the battery can last up to the same full year in the AirTag, so all that will have changed for me is that I’ll no longer be staring at an analog clock that’s only right twice a day.
This AirTag stem mount is deceptively simple — just three parts: (1) The base that accepts the included (2) countersink bolt and is capped by a threaded, well, (3) cap. I could have machined the two housing halves from Delrin using a lathe, but that would have taken a full day of trial and error, would cost me almost as much in material, and I’d end up with something not nearly as refined as this inexpensive, off-the-shelf, purpose-designed solution.
Is it indeed weather proof? I haven’t tested that aspect, but I suspect, yes, it is. The threads that join the two halves are exquisitely fine and mate perfectly. The male threads are on the base so are covered, thus shielded, by the female threads when in place, which forms an effective drip ledge. Sure, water would eventually get in if it was submerged, but if the bike and I go under, I’ve got bigger problems than a dead AirTag. But rain? Yeah, that’s not getting in.
How does it look on the bike? Kind of great, actually, as stem caps go. But I doubt you’d notice it, because its color matches the black spacers underneath. And that’s the point. If I need that AirTag, it won’t be because I forgot where I parked the bike. Okay, someday that might be the case, but today, it’ll be because some rat-so-and-so stole my bike, and if that happens, I’d prefer they not notice the stem cap sporting an AirTag. At least until the police and I get there and show them how we found them.
If you value your bike and its stem accepts this style of cap — and you do, and it does — you need this. Oh, and in case you’re wondering, I’ve hidden a second AirTag on the bike, but I’m not going to share where.
Hope this helps. Clear skies!
My wife's MTB really needed a bottle cage, but her bike's frame has a design where all of the other cages we had wouldn't work: we needed a side-entry cage. A lot of modern mountain bikes have smaller frame triangles, so I suspect we weren't alone with this issue.
Enter this side-entry cage. It's been great so far! Right hand entry works great with all of our standard bottles. I thought the aluminum construction would be great for durability, but I was worried it would be heavier... a relatively unfounded concern in the end, as the cage felt hardly heavier than plastic cages, and is still lighter than some other old-school cages we have on other bikes.
We had some cheaper plastic bottle holders that worked just fine but we wanted something better and matched the paint job on our e-Bikes.
These holders are very lightweight and look fantastic. Don't fret at first if they seem too tight on your bottles. All we had to do was bend them open a little bit to the tightness that was perfect on the bottle, allowing us to pull the bottle and reinsert it with no problem yet keeping it from grip on the bottle.
Definitely happy with these bottle holders.
These water bottle cages are a big step up from the standard wire cages, or even the step up plastic cages you see on lots of bikes nowadays. First off, they are VERY well crafted. The punched and molded aluminum feels extremely sturdy, with just enough flex to allow adding or removing a bottle. They are more than stiff enough to hold the water bottle in VERY securely, and I have no concerns of the bottle popping out on hard riding. The anodized (or is it powder coated?) finish is not only beautiful to look at, but bonded very strong as well. This will retain its luster forever. At about $8.50 each (with $4 coupon at time of writing), these are a fantastic value compared to anything you would get at a store. Very happy with these bottle holders!
- MAGAZINE OFFERS
- BIKE INSURANCE
- Best Products
- Maintenance
- Accessories
- Long-Term Reviews
- BikeRadar Podcast
- First Look Friday
- Bike of the Week
- Tech Features
- Routes and Rides
- Bike Galleries
- BikeRadar Bargains
- Buyer's Guides
- Fitness & Training
- Sizing & Fit
- Mountain Biking UK
- Cycling Plus
- Bike of the Year 2024
Best mountain bike suspension forks 2024 | Top-rated MTB forks and buyer's guide
Plus our buyer's guide to MTB forks
Looking for the best mountain bike suspension fork? You've come to the right place.
Buying a new suspension fork for your mountain bike is one of the priciest – and potentially most effective – upgrades you can make to your mountain bike . Even when buying a complete bike, the fork it comes with is a serious consideration.
You’ll want either a suspension fork that irons out the harshest of trail feedback, helping your hands to last longer whatever bike you ride, or you’ll want the fork to sit smoothly into the first part of its travel to keep your front wheel stuck to the ground.
You’ll also need enough stiffness to provide accurate and predictable steering, and enough adjustability to fine-tune the fork to your needs, but not so much that it’s a nightmare to set up .
You'll probably want it to be as light as possible too, and hopefully not cost the earth.
We’ve tested forks to suit a broad range of budgets, making sure to include some top-shelf options because these are what people tend to buy as an upgrade to their bike.
You can read our full mountain bike suspension forks buyer's guide at the end of this article.
Best mountain bike suspension forks of 2024
Rockshox sid ultimate 3p.
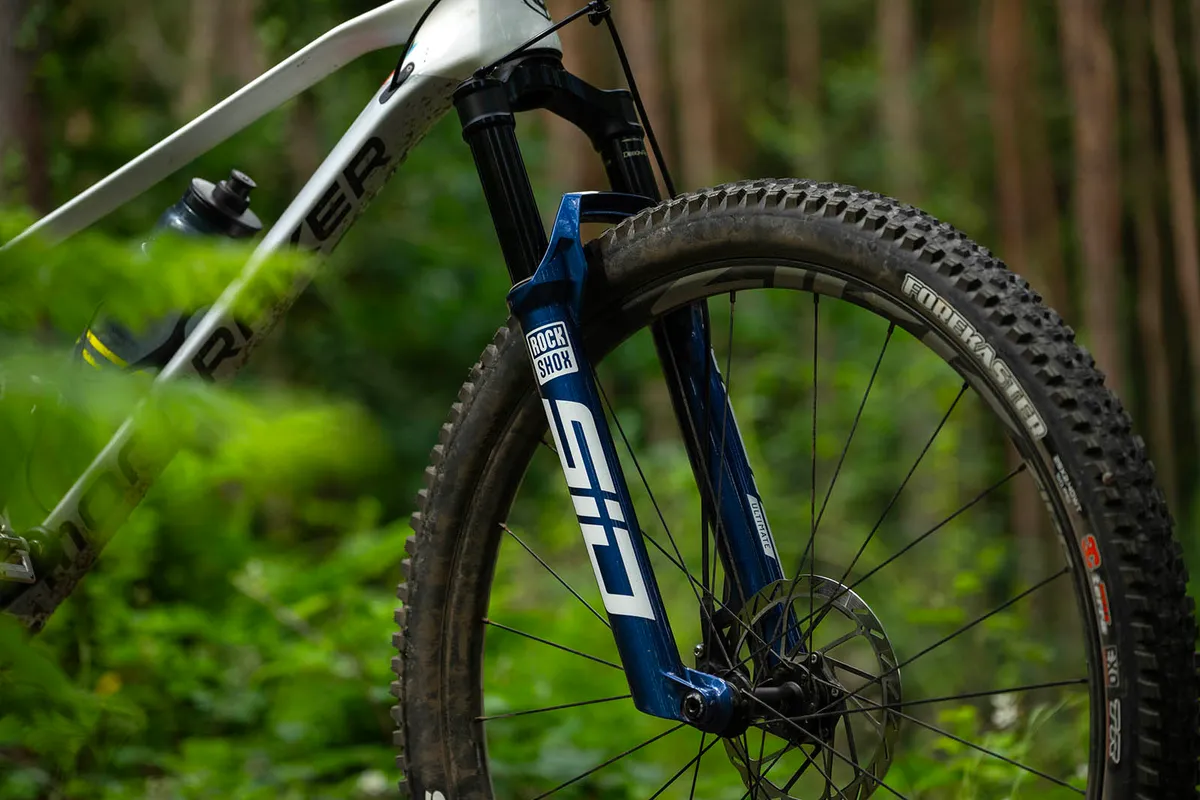
- Price: £1,069/$999/€1,199 as tested
- Wheel size/travel options : 110mm and 120mm (29in), 120mm tested
- Weight: 1,600g (29in x 120mm)
- Pros: Initially very sensitive; remains controlled in rough terrain
- Cons: TwistLoc remote grips don't have lock-on option
The SID Ultimate 3P is the latest top-level cross-country fork from RockShox, offering a more refined and capable ride feel than the fork it replaced.
Its new Charger Race Day 2 damper gives the fork three positions, which can be switched between ‘open’, ‘pedal’ and ‘lock’ modes via the crown-top lever or optional TwistLoc remote (£119/$117/€133).
We found 'open' and 'pedal' to be our most frequented modes, rarely using the 'lock' mode unless slugging up road ascents and the odd fireroad.
The SID Ultimate 3P is keen to sink into the first few millimetres of travel without hesitation, making for a supple ride with a smooth, ground-hugging feel over small bumps.
Its mid-stroke support builds progressively, with the ramp-up near the end of the travel remaining calm on big hits.
The new 35mm chassis enables the fork to attack fast, technical descents with precision, with only some flex being detected on steeper turns with fast catch berms that would challenge most trail forks.
- Read our full RockShox SID Ultimate 3P review
Fox 36 Factory GRIP2
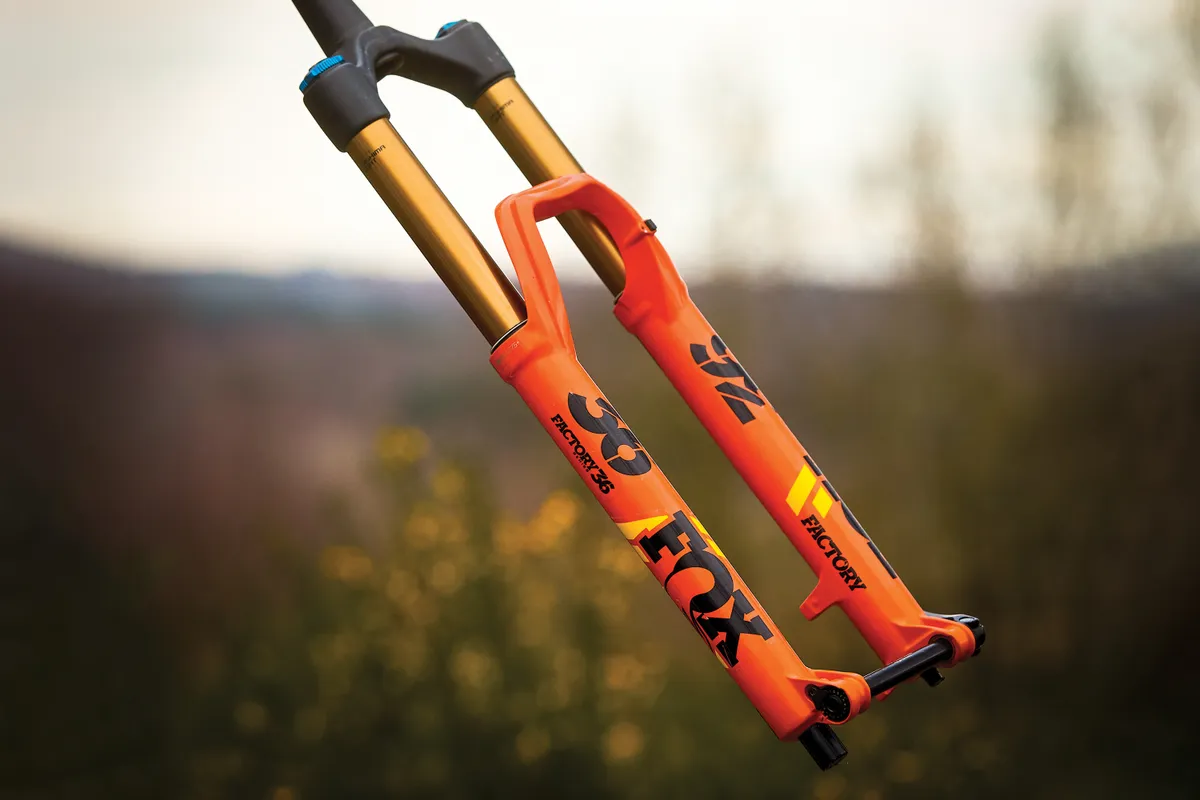
- Price: £1,139 as tested
- Wheel size/travel options : 27.5in with 160, 170, 180mm; 29in with 160 (tested), 170mm
- Weight: 2,091g (29in x 160mm)
- Pros: Impressively supple and composed over high-frequency chatter
- Cons: Firm high-speed compression damping when set to open
The all-singing Fox 36 GRIP2 Factory is one of the most expensive forks we’ve tested. Fortunately, it’s got performance to match.
Its four-way adjustable damper has high- and low-speed adjustment for both compression and rebound damping. Fortunately, Fox nailed the setup guide, so it’s one of the easiest forks to get in the right ballpark despite the vast range of adjustments.
It’s also one of the best performers, particularly over big holes and choppy unpredictable ground. The independent high-speed rebound adjustment seems to make it more controlled and calm when returning from deep in the stroke if, like us, you’re running a lot of pressure in the spring.
It’s not quite as sensitive off the top of the stroke as its rival, the RockShox Lyrik, though, so there isn’t quite as much traction in low-load situations.
While very active and supple over small bumps, it’s a little stingy with its travel over bigger impacts, even with the compression damping fully open. This isn’t necessarily a bad thing, but we would have liked the ability to run the high-speed compression a little more open for long-run comfort.
There were situations where the 36 was the best fork we’ve ever used.
- Read our full Fox 36 Factory GRIP2 review
Manitou Mattoc Pro
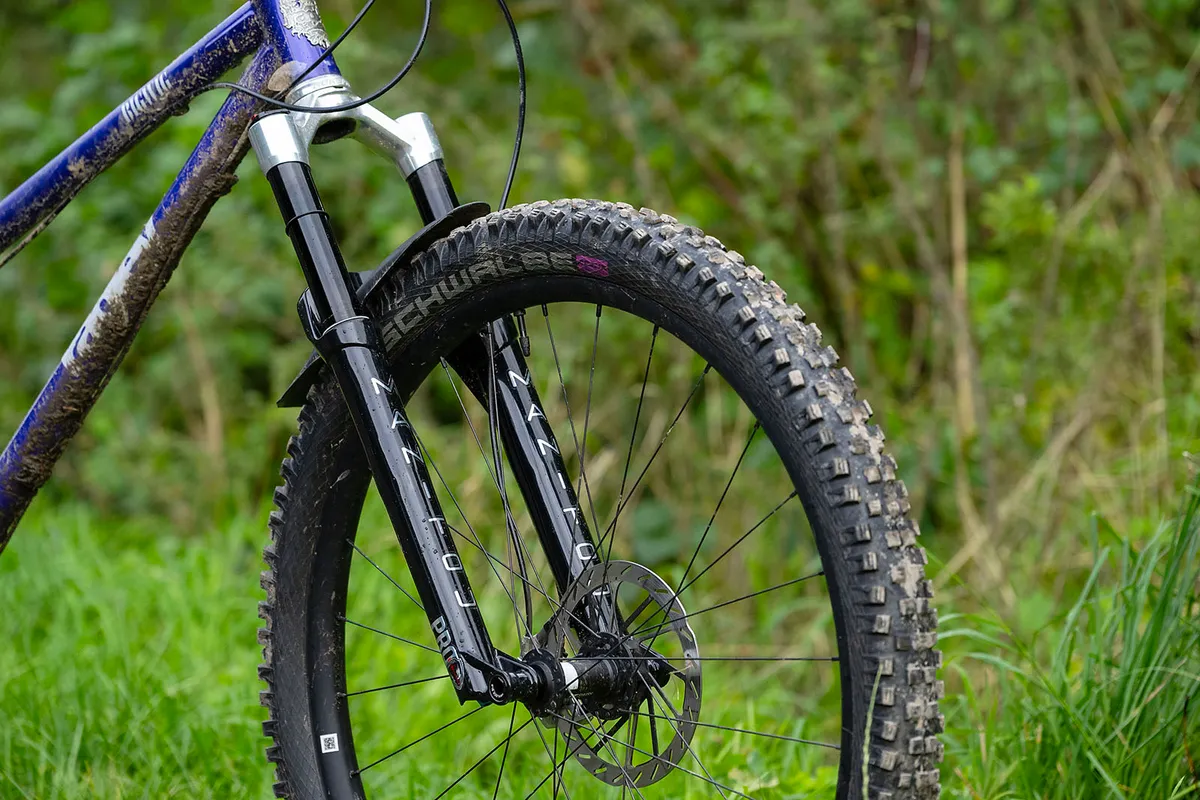
- Price: £1,323 / $1,050 / €1,260 as tested
- Wheel size/travel options : 27.5in with 120, 140mm; 29in with 120, 140mm (tested)
- Weight: 1,797g (29in x 140mm)
- Pros: Lovely feel through travel; easily adjustable; competitive weight
- Cons: Air valve access could be easier; Hexlock axle isn’t quite as intuitive as competitors
The Mattoc Pro impressed us with its impeccable suppleness and great end-of-stroke control.
Manitou has given the fork plenty of adjustment with an MC2 damper, with hydraulic bottom-out in the stanchion offering high and low-speed compression and single rebound adjustment.
All this tech pays dividends, with the Mattoc Pro offering plenty of grip and comfort, with ample control late into the stroke and plenty of usable adjustment.
The Hexlock axle is more difficult to use than other securing axles, with a hand needed to balance the bike, push the axle and turn the Allen key from the other side of the fork.
We also found the air valve to be in an awkward position at the bottom of the fork, making it difficult to use with some shock pumps.
- Read our full Manitou Mattoc Pro review
Manitou Mezzer Pro
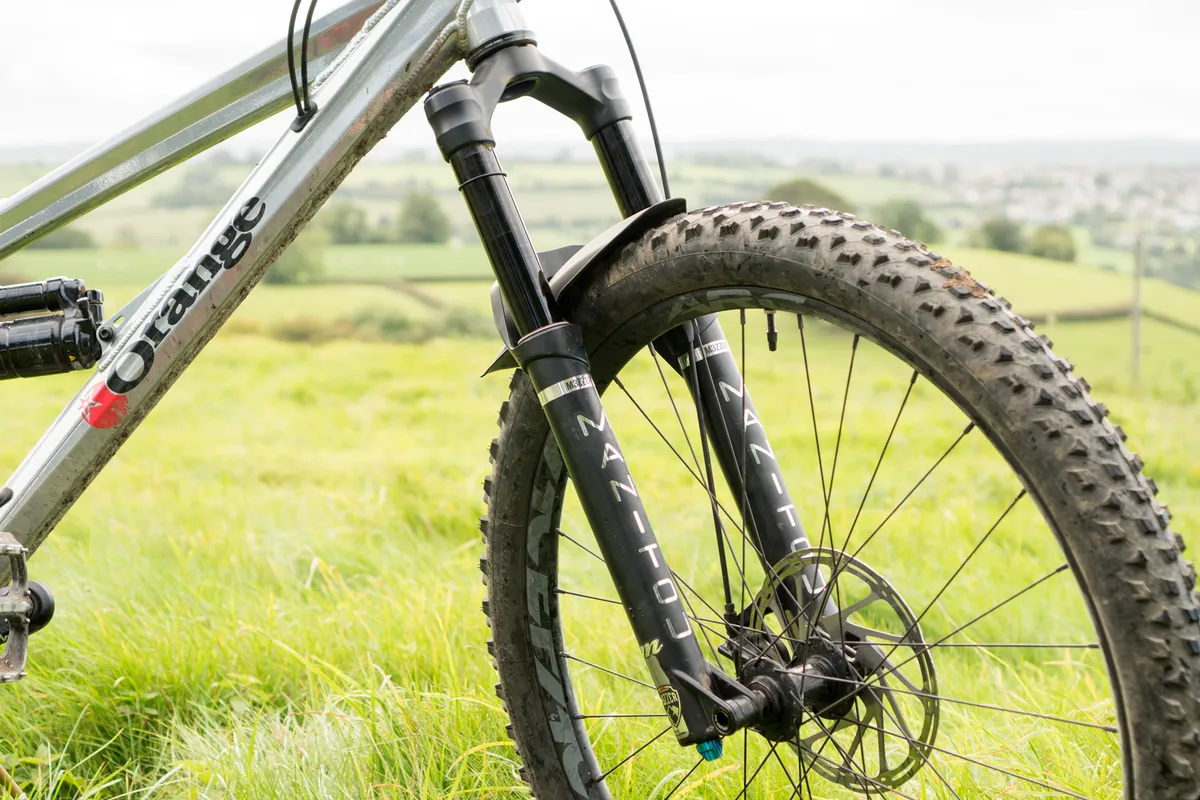
- Price: £899.99/$999.99/€1,050 as tested
- Wheelsize/travel options: 27.5in and 29in (tested), both adjustable between 140 and 180mm in 10mm increments (160mm tested)
- Weight: 2,093g (29in x 160mm)
- Pros: Very supple with great mid- and end-stroke support
- Cons: Difficult to set up
The Mezzer is a surprise performer, offering an excellent balance between small-bump sensitivity and bottom-out resistance. It’s particularly capable no matter how deep into its travel you go or how hard you push it.
The chassis also hits the perfect balance of control, accuracy and compliance, feeling stiff when it needs to – such as under corners – but didn’t cause our front wheel to bounce or judder offline, also helping to reduce hand fatigue.
The MC2 damper’s high-speed compression is light enough to absorb fast impacts and proved to be incredibly supple. Its low-speed damping gives plenty of support through turns and compressions, adding to the capabilities of the impressive air spring.
Although the air spring is quite hard to set up – and you need to follow the supplied guide exactly – once you get it right, the performance that’s unlocked is virtually unparalleled on the trail.
If you’re looking to upgrade your fork and were considering a RockShox Lyrik or Fox 36 GRIP2, the Mezzer has to be on your shortlist as well.
The Manitou Mezzer wasn’t tested as a part of our latest fork group test, and doesn’t feature in our video, but was tested and rated to the same criteria, and performed exceptionally well.
- Read our full Manitou Mezzer Pro review
Marzocchi Bomber Z1
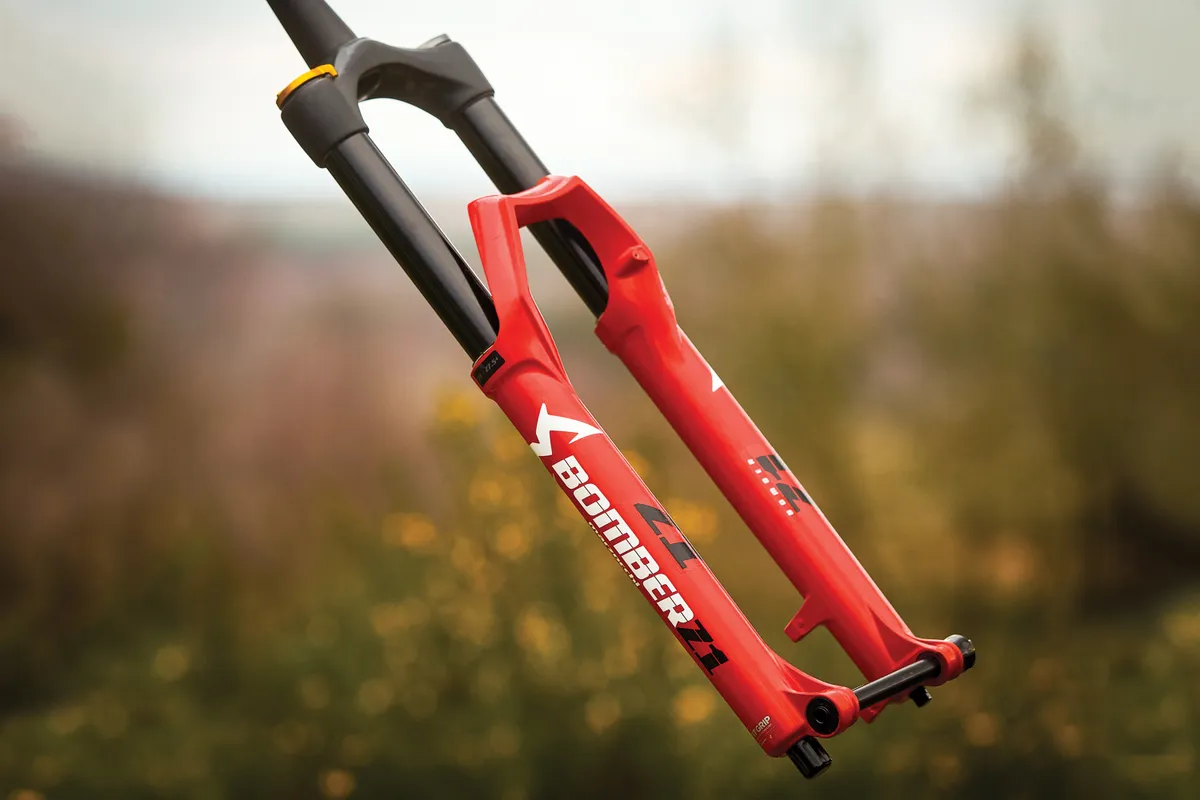
- Price: £749 as tested
- Wheel size/travel options : 27.5in with 130, 140, 150, 160, 170mm; 29in with 150, 160 (tested), 170, 180mm
- Weight: 2,249g (29in x 160mm)
- Pros: Comfortable with big-hit capabilities
- Cons: Firm at the beginning of the stroke; heavy
Marzocchi is now a sister brand of Fox, and the Z1 shares a lot of features with the Fox 36. However, it's designed to hit a lower price point.
Because it uses a lower-grade aluminium in the upper tubes, it’s one of the heaviest enduro forks around at 2,249g, but the extra weight is not noticeable on the trail.
The air-sprung Z1 isn’t as soft at the very start of its travel as the Fox 36, or the Yari and Lyrik, so it needs a lower air pressure to get it to sag properly, along with a healthy stack of volume spacers to stop it using all of its travel too easily.
It still canters through the middle of its travel a bit more easily than those other forks too, making it feel a little less predictable and refined. The flipside is it swallows kerb-sized rocks like a champ, which means good long-run comfort.
The key comparison is to the RockShox Yari (below). The Z1 is more willing to swallow large impacts, making it more forgiving in those big-hit scenarios, but the Yari is more supple at the start of the stroke, and offers more traction and more predictable support. It’s a touch lighter and cheaper too.
On balance, the Yari just edges it for us. But if big-hit capability is your priority, and you can’t stretch to the RockShox Lyrik or Fox 36, the Z1 is a good option.
- Read our full Marzocchi Bomber Z1 review
Öhlins RXF38 m.2
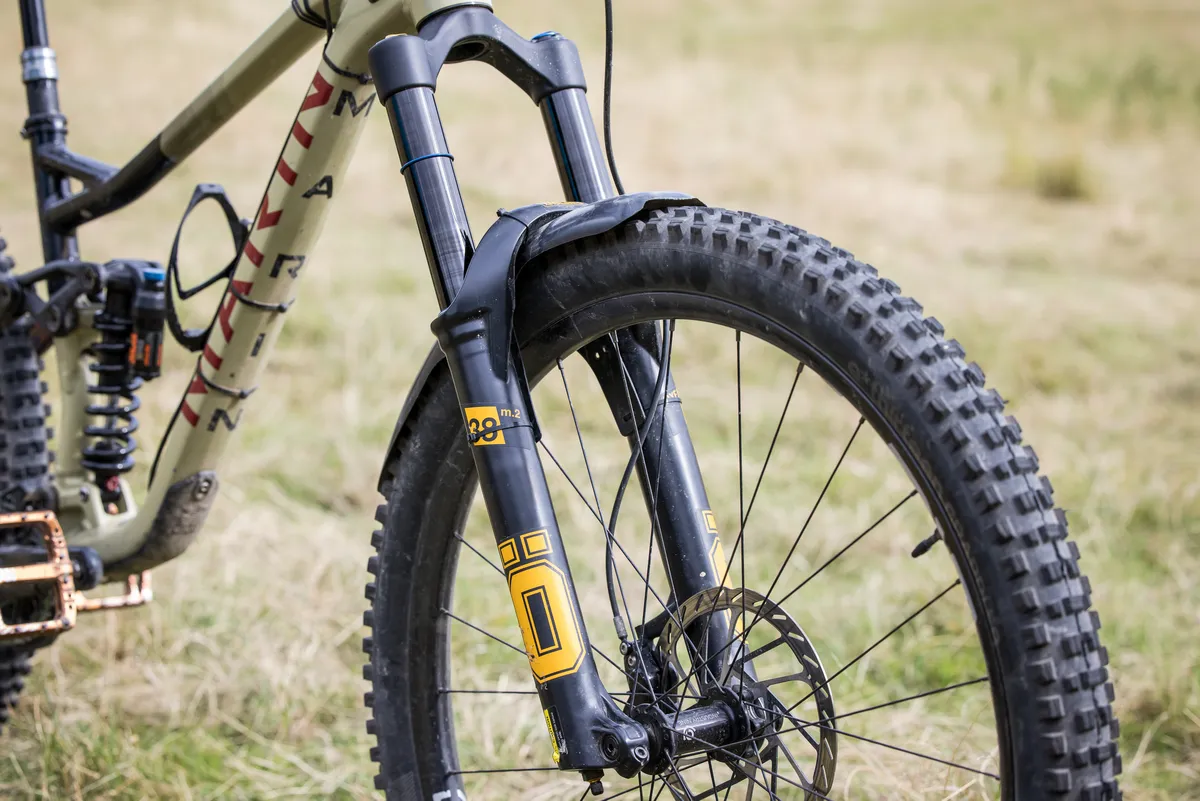
- Price: £1,45/$1,450 as tested
- Wheel size/travel options : 160-180mm (29in), 170mm tested
- Weight: 2,354g (29in x 170mm)
- Pros : Smooth and fluttery off-the-top; tunable bottom-out
- Cons: Rebound damping re-tune might be needed
The RXF38 has impressive off-the-top sensitivity, minimising trail chatter and providing huge amounts of comfort and grip.
Mid-size hits such as brake bumps are catered for with buckets of support. The damper controls the impacts with a calmness that enables you to focus on what's down the trail rather than beneath your front wheel, leading to more speed.
The fork handled compressions well, never once diving under hard braking, which gave confidence to weight the front wheel into catch berms and steep sections of trail.
The rebound damping on our test fork was a little hard, which may be a problem for lighter riders, but the brand offers various tunes, so finding the right one shouldn't be hard.
It was also a difficult fork to set up, with a negative spring volume-reducer spacer installed in the fork from the factory that wasn't mentioned in the manual.
- Read our full Öhlins RXF38 m.2 review
RockShox BoXXer Ultimate
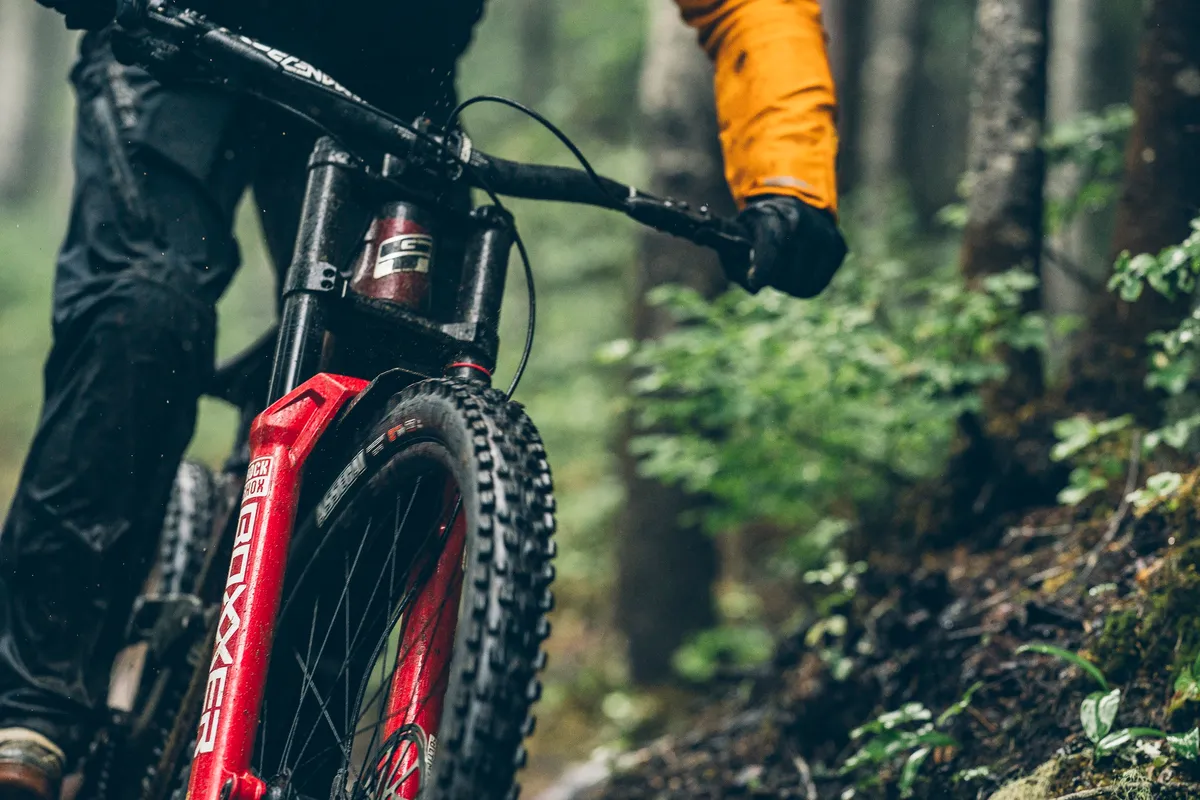
- Price: £2,029/$1,899/€2,279 / AU$3,265 as tested
- Wheel size/travel options : 200mm (27.5in and 29in)
- Weight: 2,840g (29in x 200mm) Claimed
- Pros : New chassis gives precise handling, DebonAir+ twin tube spring gives plenty of support without a firm spike or ramp-up deep in the travel
- Cons: Rebound dial stiff and creaky
The RockShox BoXXer Ultimate receives 38mm stanchions in its current guise which adds plenty of accuracy and makes the fork hold a line well, even when traversing slippery rocks after poor line choices.
A smooth and quite ride quality calms the front of the bike and makes the BoXXer feel reassuringly predictable, while the break away force of is minimal, with the fork sliding easily into its initial stoke.
The beginning of the stroke takes the sting out of small high frequency bumps impressively well, isolating your hands without losing support.
Charging through rough sections reveals how composed this fork is, with the mid-stroke soaking up big hits while delivering plenty of support to push against.
There's no harsh ramp-up or firmness present at the end of stroke, making big drops and high speed compressions reassuringly composed as the linear nature of the fork feels like it's only using the travel it needs.
After some use, the rebound dial on our early test model became stiff and creaky, but this didn't hinder performance.
- Read our full RockShox BoXXer Ultimate review
RockShox Lyrik Ultimate
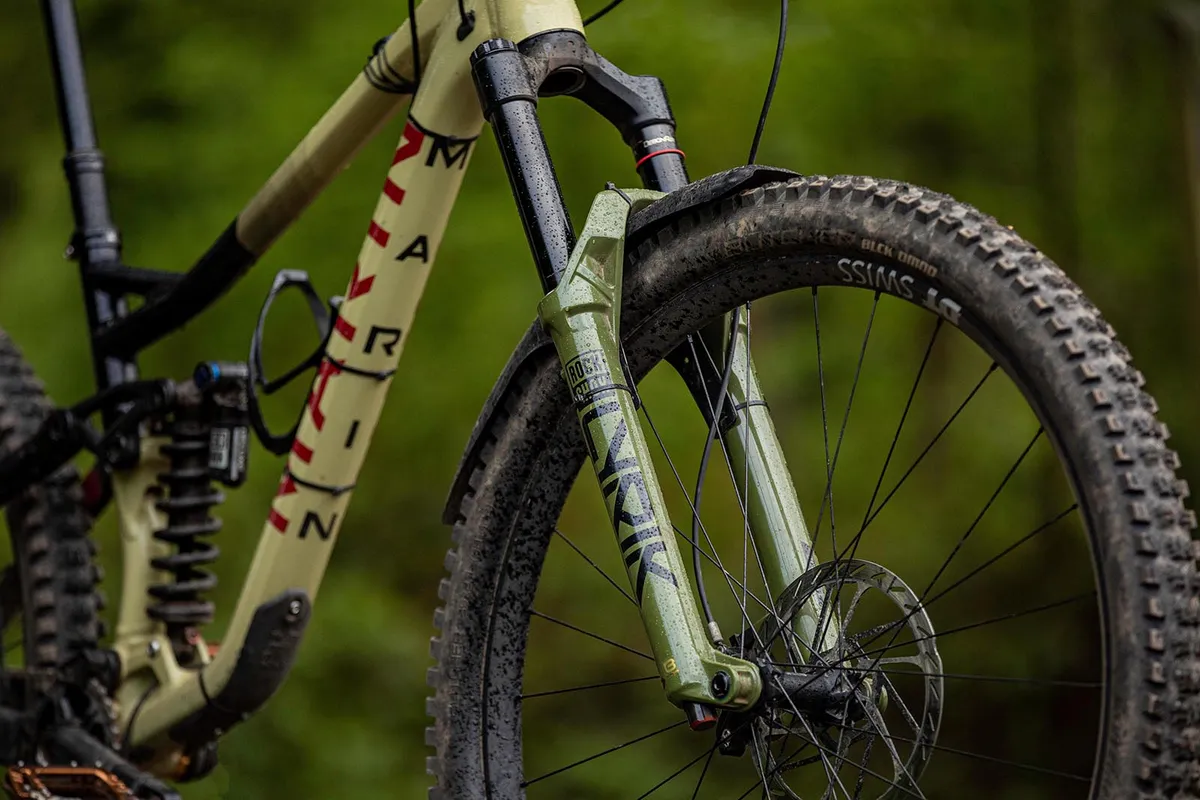
- Price: £1,013/$1,049/€1,134 as tested
- Wheel size/travel options : 150-160mm (27.5in and 29in), 160mm tested
- Weight: 2,042g (29in x 160mm)
- Pros : Unrivalled mid-stroke damper support; feature-laden additions improve performance
- Cons: Small-bump sensitivity not perfect
The RockShox Lyrik Ultimate sets a benchmark for support and height control with its Charger 3 damper and DebonAir+ spring at the sacrifice of small-bump sensitivity.
The damper enables you to confidently weight the front wheel while hammering it into gnarly sections of trail without fear of the fork diving under braking.
The DebonAir+ handles lower spring pressures with impressively supple and effective ramp-up that was helped by the damper to not blow through its travel on big hits.
Small-bump performance is the only letdown. While the ButterCups mute harsher bumps, the fork remains almost static on small jagged rock paths found at trail centres.
- Read our full RockShox Lyrik Ultimate review
RockShox Yari RC Debonair
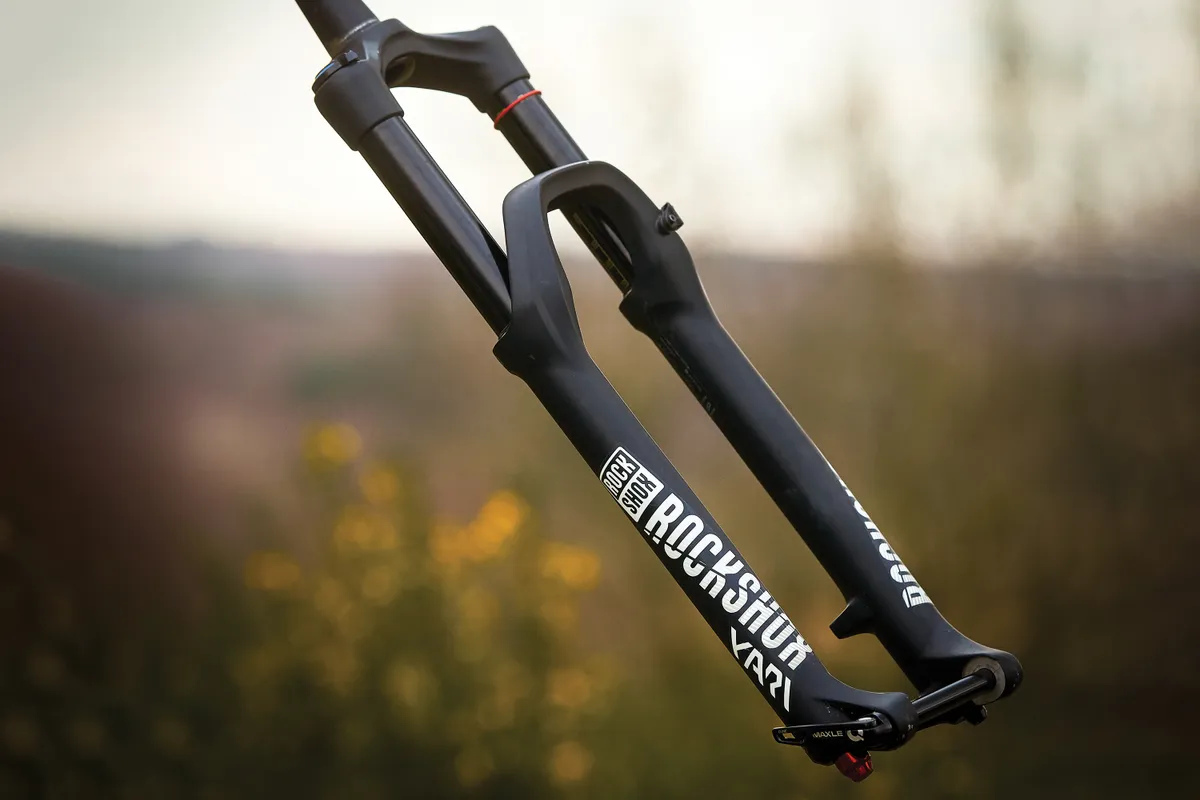
- Prize : £695/AU$1,200 as tested
- Wheel size/travel options : 150mm, 160mm (tested), 170mm and 180mm travel for 27.5in and 29in wheels
- Weight: 2,129g (29in x 160mm)
- Pros: Great off-the-top sensitivity
- Cons: Motion Control damper lacks low-speed support and is occasionally harsh over big impacts
The RockShox Yari uses the same stiff 35mm chassis as its pricier sibling, the Lyrik. It now gets the same supple, class-leading Debonair spring too.
The difference is in the damper. The Yari’s more simple Motion Control unit doesn’t provide the same digressive damping – blending low-speed support with high-speed suppleness – that you get from the Lyrik’s Charger.
As a result, it doesn’t feel quite as settled and supportive when braking, and occasionally spikes when slapping down to earth with a thud.
Realistically, though, it’s rare that the less refined damper lets the side down, and this is compared to the best mountain bike forks.
The Yari offers better long-run comfort and small-bump traction than almost anything else on the market, including forks costing several hundred pounds more.
If the slightly unrefined damper bothers you, you can always upgrade it to a Lyrik spec further down the road.
- Read our full RockShox Yari RC Debonair review
RockShox ZEB Ultimate
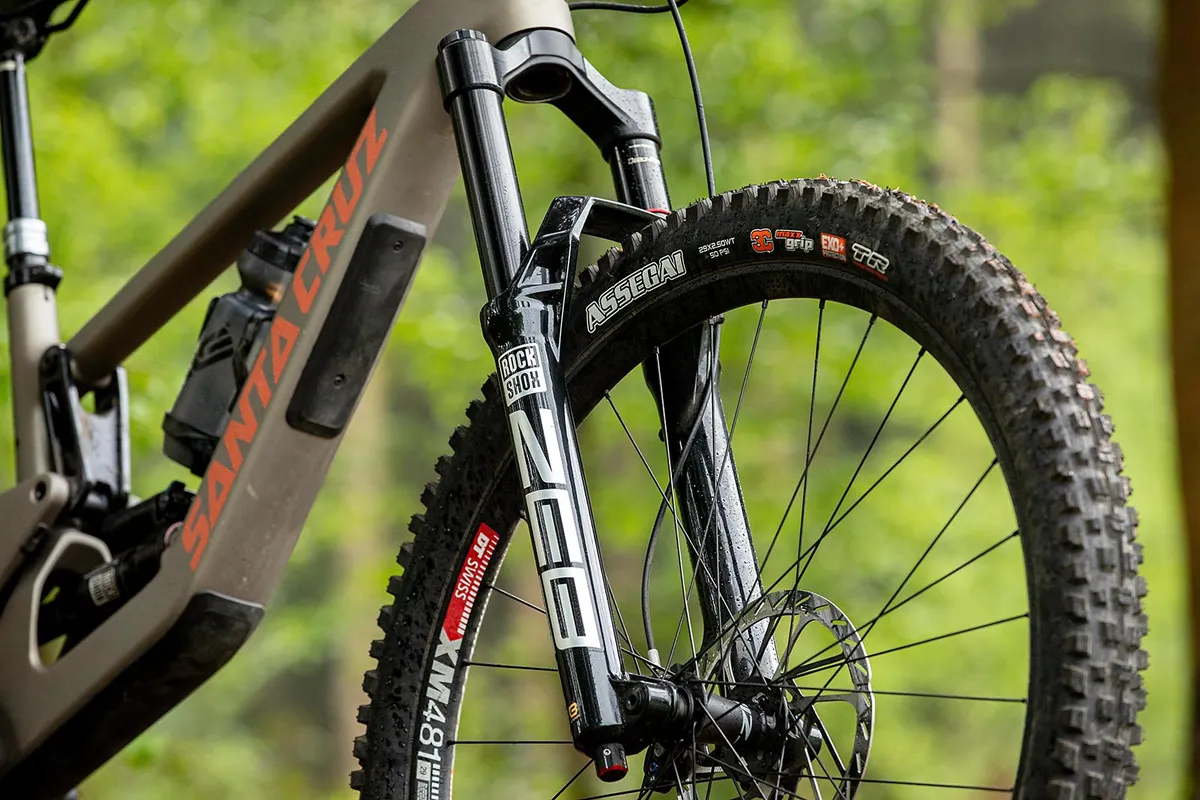
- Price: £1,119/$1,253/€1,159 as tested
- Wheel size/travel options : 150-190mm (27.5in and 29in)
- Pros: Easy to make meaningful adjustments; good mid-stroke support
- Cons: Lighter riders may need a re-tune
RockShox's ZEB Ultimate is one of the best forks on offer, with seriously impressive composure and control on rough trails.
Aimed at enduro racers, the ZEB Ultimate has best-in-class small-bump sensitivity with a supple and silent feel that does a great job of tracking trail imperfections,
There is plenty of support deeper into the travel, delivering a calm and composed ride through steep gnarly sections where your weight is over the front of the bike.
Its progression is very gradual through the entire stroke, giving confidence towards the end, where other forks can feel harsh.
The dials enable high levels of adjustment, with high- and low-speed compression all tuneable from the crown of the fork.
We found our test tune to not compliment lighter riders, with all adjustments needing to be fully open for the desired fork setup, reducing overall tunability
- Read our full RockShox ZEB Ultimate review
Cane Creek Helm MKII
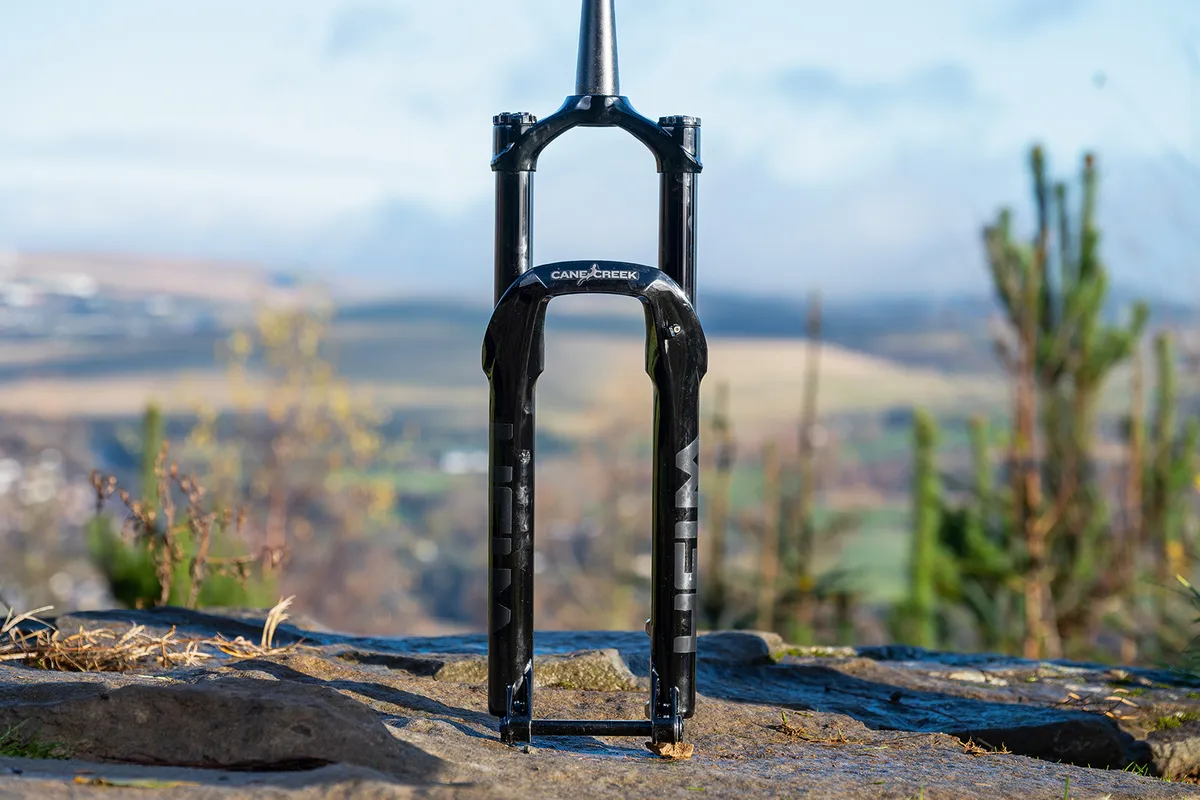
- Price: £1,100/$1,100/AU$1645 as tested
- Wheel size/travel options: 130-160mm (29in and 650b), 160mm tested
- Weight : 2.08kg (29in)
- Pros: High levels of adjustability; supple ride feel
- Cons: Not the most supportive in the mid-range
The Helm MKII has 35mm stanchions, which felt accurate through rocky sections with no significant flex or binding.
You get external low- and high-speed compression and low-speed rebound-damping adjustment.
The negative air spring is equalised manually from the positive spring, making it easy to tune the fork's progression. It takes a little figuring out to set up the fork, but once you get it dialled in, it’s an impressive piece of kit.
The Helm MKII is wonderfully supple through the initial part of its travel, so takes a lot of the sting and buzz out of the trails.
Deeper into the mid-stroke, it feels as though it relies on its spring for support more than its damping, which makes for a very plush ride.
It doesn’t have the most supportive mid-stroke, but there’s a decent range of low-speed compression damping should you want to wind some on. Bigger hits are dealt with comfortably, too.
Whether you’re hitting heavy compressions or landing massive drops, the Helm MKII’s progression builds consistently throughout its travel, which makes for a predictable-feeling ride.
Cane Creek Helm MKII Coil
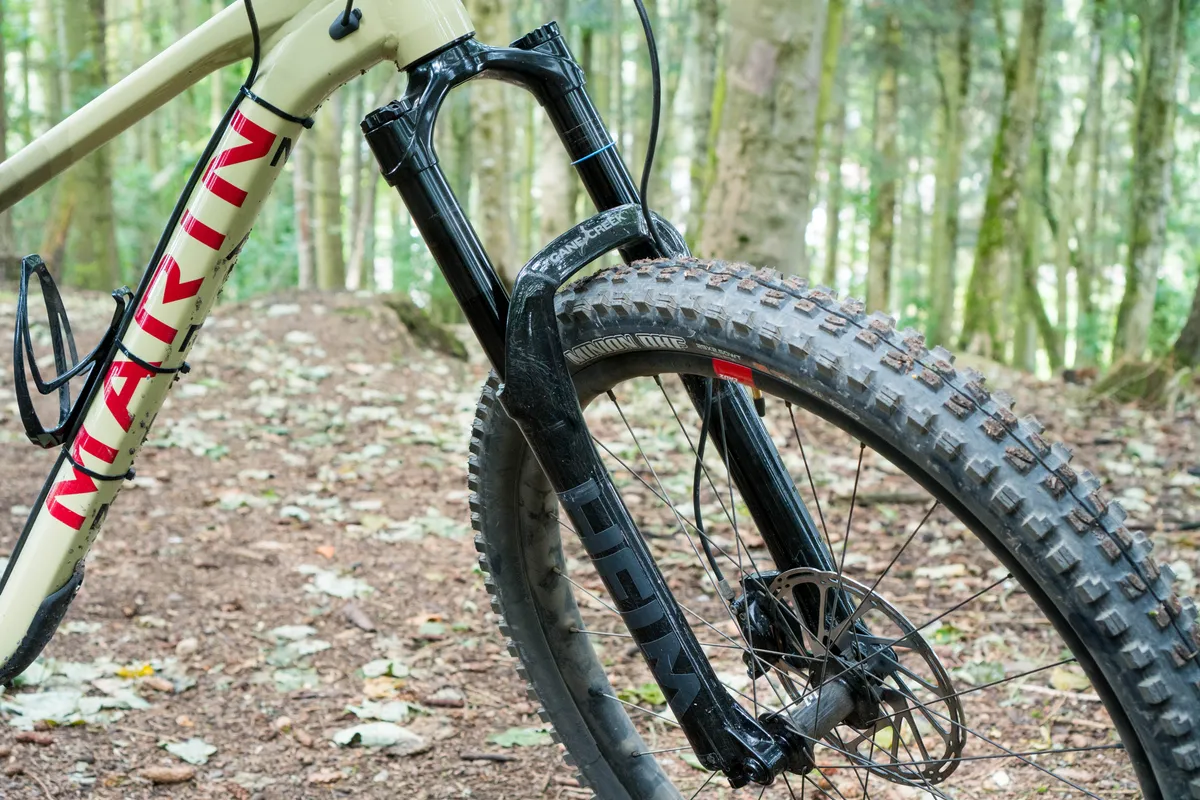
- Price: £1,049.99/$1,049.99 as tested
- Wheel size/travel options : 130-160mm, 29in and 27.5in
- Weight: 2,330g (29in x 160mm)
- Pros: Supremely supple; easy to adjust, good bottom-out resistance
- Cons: Could be overdamped for lighter riders; tyre clearance
Cane Creek's Helm MKII Coil impresses with its suppleness, ironing out small-bump chatter and isolating your hands from well-worn trails.
With four spring options to choose from for riders weighing 45 to 100kg, we found the suggested spring to be too soft, with the desired support still missing even when we maxxed out the low-speed compression.
After replacing the spring with the hardest available, the fork proved to be a top performer, responding well to being pushed hard on rough, gnarly terrain.
In its open settings, the fork becomes very firm, which limits the adjustability real-world usage.
We also found the tyre clearence to be quite tight, with Cane Creek giving the Helm a maximum tyre clearance of 2.5in on the 29in model. This made it difficult to attach a variety of mudguards to the fork.
- Read our full Cane Creek Helm MKII Coil review
Formula Selva R
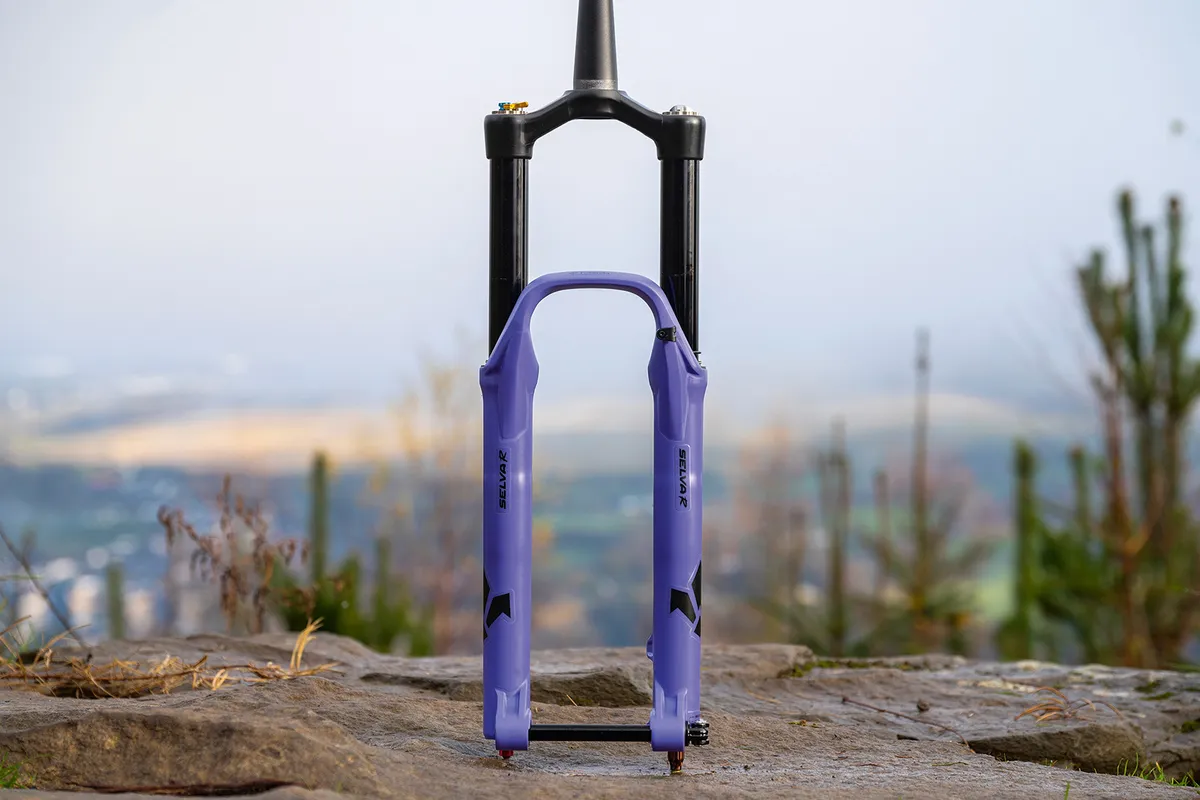
- Price: £1,200/AU$2,099 as tested
- Wheel size/travel options: 120-170mm (29in and 650b)
- Weight: 2.11kg (29in)
- Pros: Wide-ranging and user-friendly adjustability
- Cons: Narrow arch makes fitting mudguards tough with Velcro straps; 160mm brake mount
Formula’s Selva R has impressive adjustability, enabling you to tune it more than most other forks.
The positive and negative air springs are inflated independently, and you can reduce end-stroke progression with the Neopos compressible-foam volume spacer.
You also get Formula’s Compression Tuning System (CST), consisting of swappable valves that change the compression tune, giving you seven different options.
The 2Air system is useful for fine-tuning how the initial part of the travel feels. This gives the fork plenty of small-bump sensitivity, enabling the wheel to hug the ground and making it easy to find grip on slippery trails.
Suppleness over square-edged hits is impressive, too.
We found the Selva R calmed the ride and kept the front end stable, with no harsh spikes deeper in the travel. Over braking bumps, the rebound is fast enough to keep it from packing down and becoming harsh.
Even without the volume spacer, progression was impressive, and we never used full travel, so could run lower pressures to give even more bump-swallowing ability.
Don’t let the narrow 35mm stanchions deter you – whether in high-load berms or big compressions, the Selva R stays composed.
- Read our full Formula Selva R review
Manitou Mezzer Expert
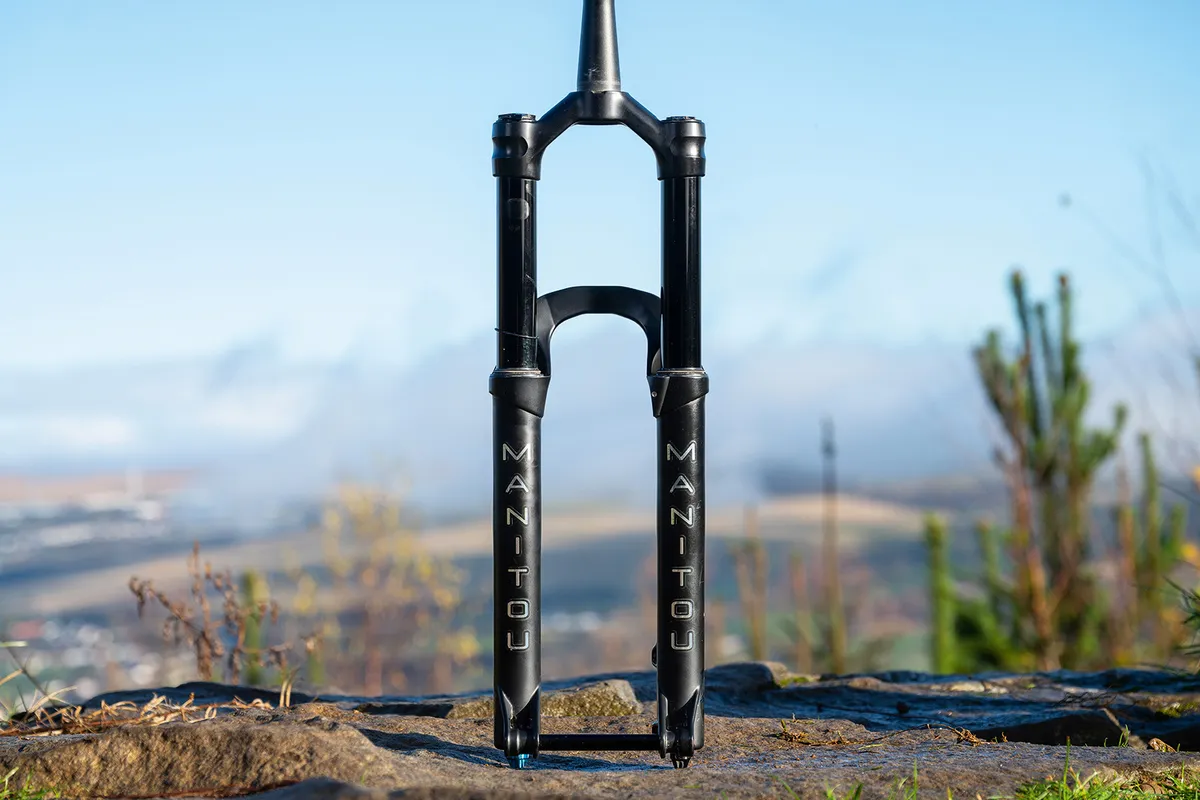
- Price: £700/$815/AU$1234/€864 as tested
- Wheel size/travel options: 140-180mm (29in and 650b)
- Weight: 2.09kg (29in)
- Pros: Impressive performance for the money
- Cons: Support mediocre; digital pressure gauge is a necessity for setup
The Mezzer Expert comes with Manitou’s ‘Reverse Arch’, which sits behind, rather than in front of, the 37mm stanchions.
External adjustment is limited to a six-position low-speed compression-damping dial, a lockout and a low-speed rebound adjuster.
There’s also a self-equalising negative spring and an ‘Incremental Volume Adjuster’ (IVA), which enables you to change the positive air chamber volume by rearranging self-contained spacers.
The Reverse Arch’s appearance may divide opinion, but it works well enough – the Mezzer Expert’s accuracy through technical sections is good, and we never noticed any binding under high-load turns or sharp direction changes, either.
The fork feels stiff, but not harsh. Blasting along chattery trails, its low breakaway force means it sits comfortably in its sag and soaks up small bumps well, providing tons of grip and confidence in corners and root or rock sections.
Support is mediocre, but it can use its travel and recover from repeated hits quickly. Progression to the end-stroke builds smoothly, with no sharp spike in ramp-up.
We were never hesitant landing drops or ploughing into deep compressions. Pummel through a rock garden and the fork lends a calmness to the front end that helps boost confidence.
- Read our full Manitou Mezzer Expert review
Öhlins RXF34 m.2
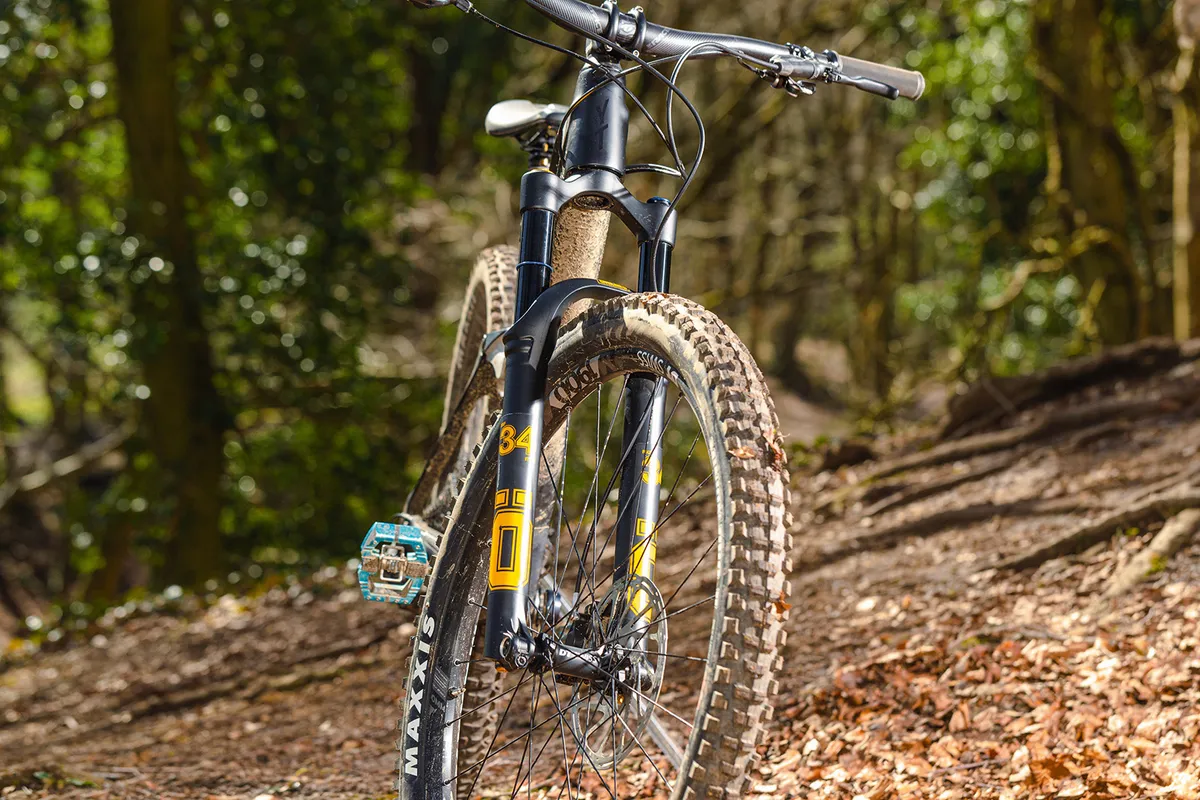
- Price: £1,185 as tested
- Wheel size/travel options: 120mm and 130mm (29in)
- Weight: 1740g (130mm)
- Pros: Usable range of adjustments; plenty of support without feeling harsh
- Cons: Pricey
Öhlins' RXF34 m.2 is aimed at downcountry riding with weight saving as a priority.
The RXF34 m.2 uses traditional positive chamber and self-equalising negative chamber in the spring, with volume spacers to increase progression, rather than Öhlins three-chamber design.
We found the chassis to deliver precise steering, with the RXF34 m.2 able to hold a line through tough rocky and rooty terrain better than other lightweight forks.
The mid-stroke has plenty of support, and even with the low-speed compression open the fork remained composed though compressions and high-load corners.
We found no harshness when using the full range of travel, with the fork remaining smooth with zero spiking.
- Read our full Öhlins' RXF34 m.2 review
How do I choose a mountain bike fork?
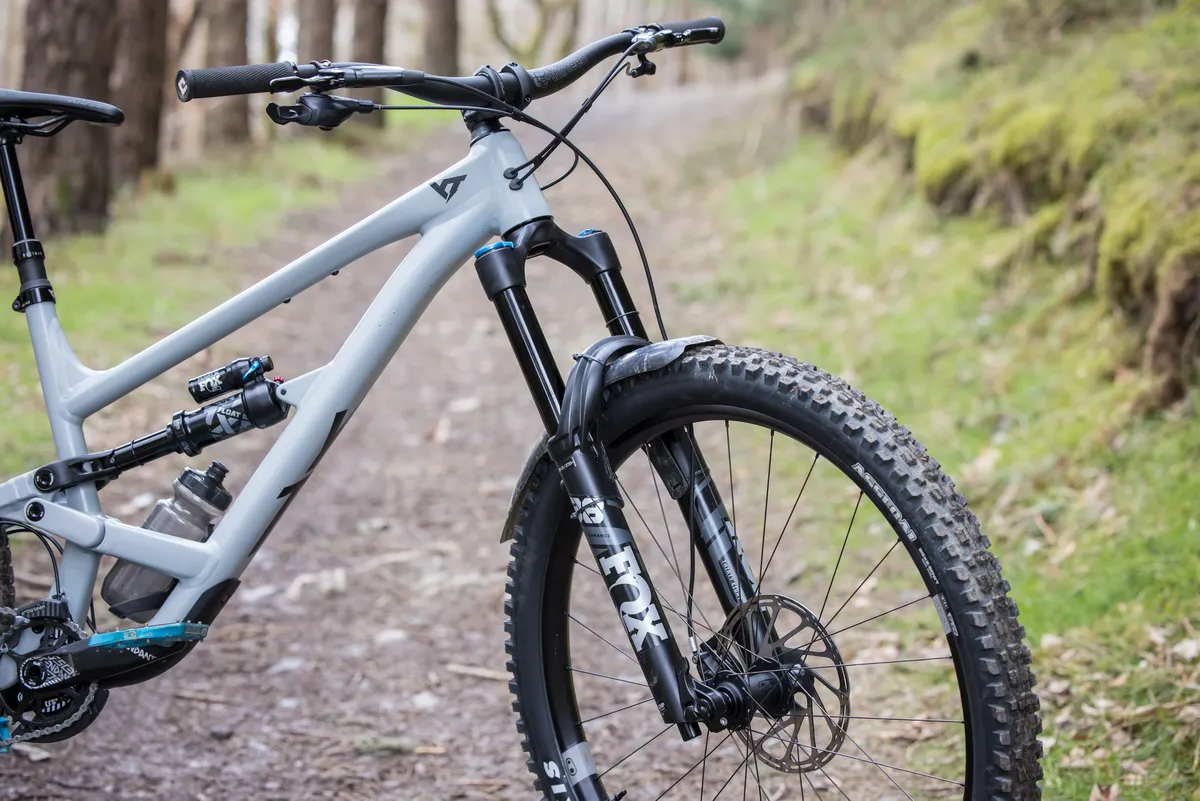
Just like your choice of mountain bike , your choice of a suspension fork should take into consideration the type of rider you are and the severity of the terrain you wish to cover.
There are a multitude of mountain bike forks on the market, from the likes of RockShox and Fox , grouped into sub-categories each intended for a specific use case.
The main differences between the categories are weight and stiffness. Heavier, stiffer forks are favoured by aggressive trail and enduro riders, while lighter forks are popular amongst those riders who value weight savings and don’t require the extra rigidity of a heavier fork, such as XC riders.
Long-travel trail and enduro forks achieve increased stiffness through an all-round beefier chassis, with thicker stanchion diameters (35-38mm) compared to short-travel forks, which commonly have smaller stanchions (32-34mm diameter).
While the chassis often remains similar throughout the price range, the internals housed within vary greatly, with high-end options offering improved performance and tunability over their budget counterparts.
Do all suspension forks fit all bikes?
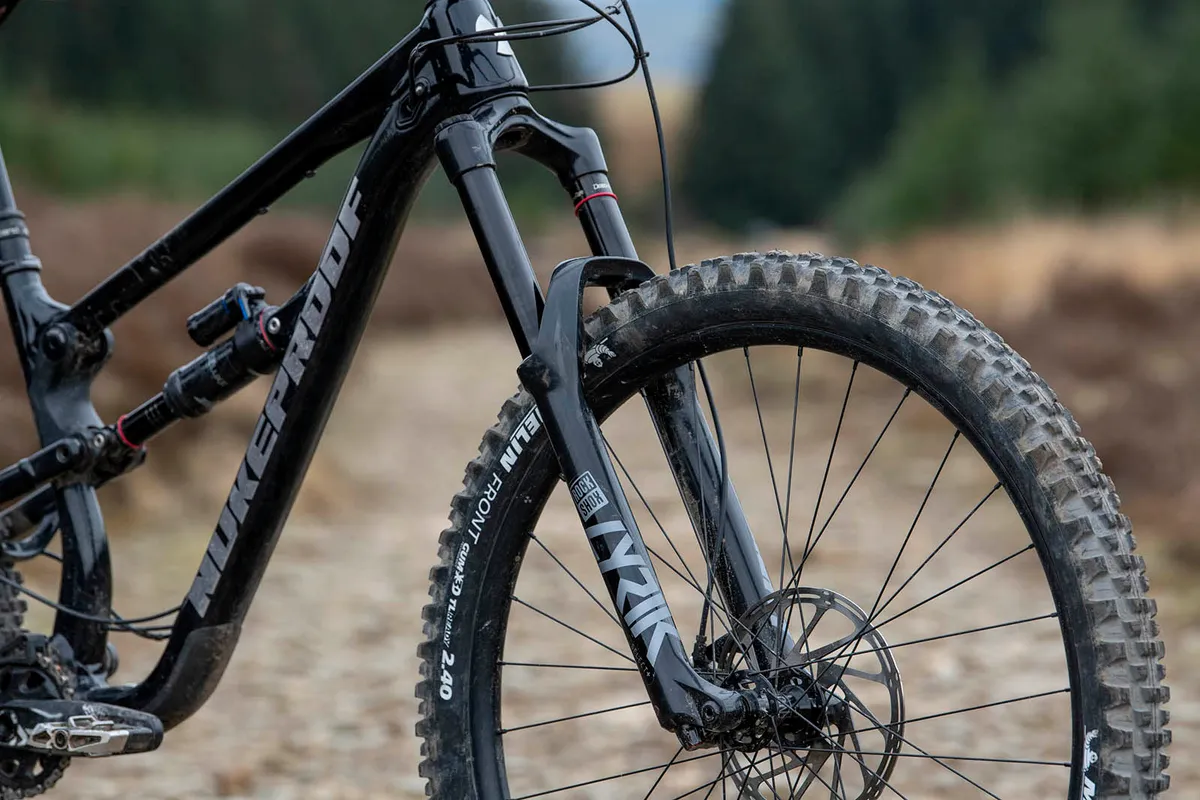
Based on their intended use, mountain bike frames are designed with a specific suspension fork travel in mind.
Retrofitting a longer or shorter-travel fork can have a big impact on a bike’s geometry, potentially putting excessive stress on the frame. Therefore, it is not uncommon to see brands stating a maximum fork travel for their bikes, a breach of which could impact your warranty.
Increases of 10mm, swapping a 150mm fork for a 160mm option, for example, won’t usually compromise your frame’s geometry too drastically. However, we recommend you check with your frame manufacturer’s guidelines before committing to a fork swap.
How much suspension travel do I need?
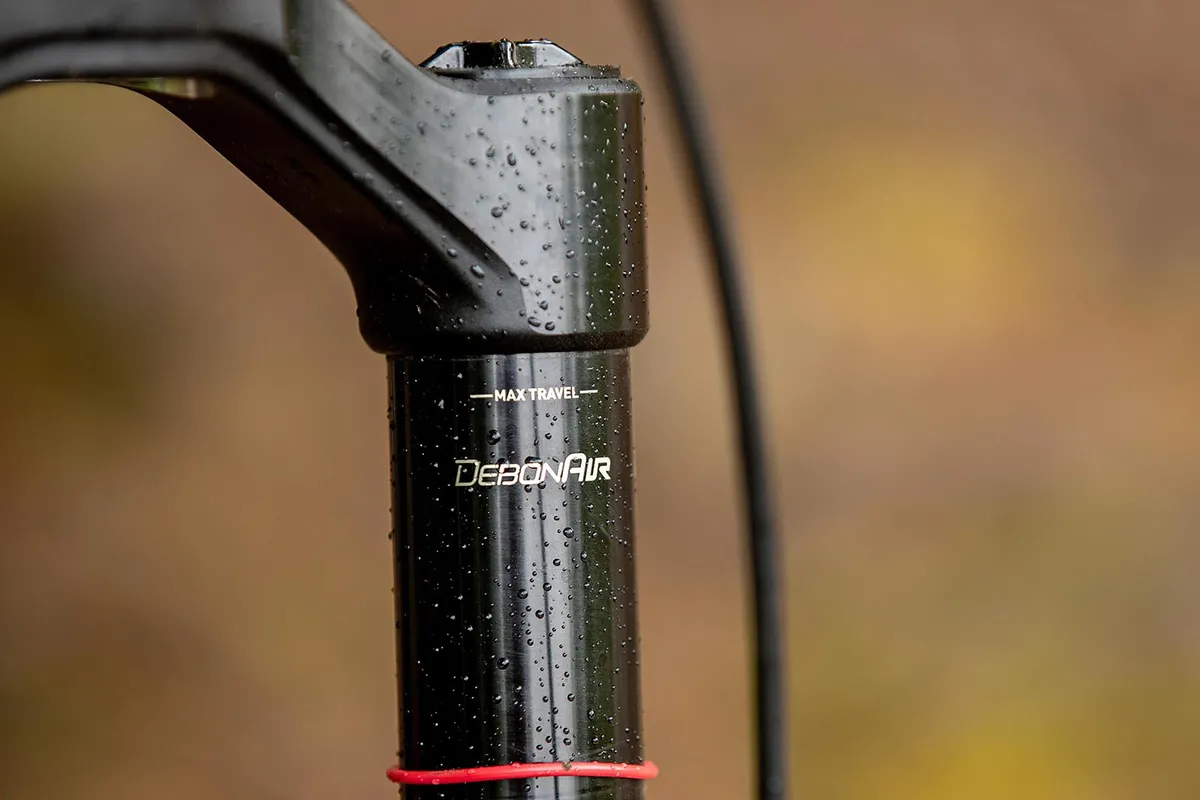
How much suspension travel you need depends greatly on your riding. If you would describe yourself as a cross-country rider, enjoying big days out on relatively tame paths and trails, you will find the best balance of weight and comfort in a fork with 80 to 120mm of travel with 30 to 34mm wide stanchions.
If you love riding trail centres, with the occasional day out in the mountains thrown in, a suspension fork with 120 to 150mm of travel and 34 to 36mm width stanchions will offer you a good level of comfort and grip at a manageable weight.
If you are an enduro rider and love tackling the steepest and roughest trails around, an aggressive fork with 160 to 180 mm of travel and thick 35 to 38mm width stanchions will offer the best grip, stiffness and comfort at the cost of weight.
If you ride a freeride or downhill bike , you'll want as much travel as possible to deal with high speeds and gnarly terrain. You'll likely already be running a suspension fork with 180 to 200mm of travel with 38mm to 40mm width stanchions.
Air vs coil suspension
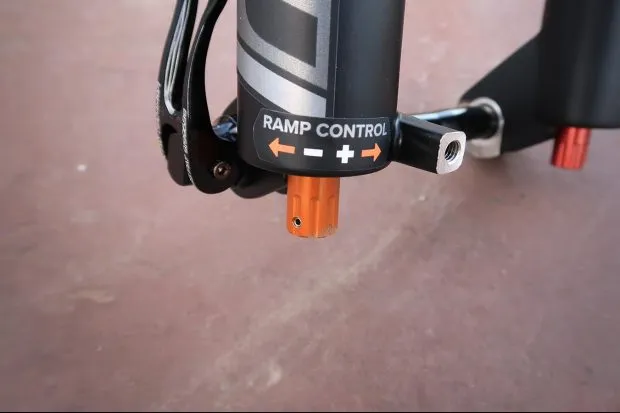
The spring in a suspension fork enables the fork to absorb bumps and impacts from the trail. It is usually housed inside the left leg of the fork and can be an air spring or a coil spring .
Coil springs are linear, which means there’s a direct relationship between how much force it takes to compress the spring and how compressed the spring is. For example, a 200lb/in spring will take 200lb of force to compress one inch, 400lb to compress two inches, 600lb to compress three inches, and so on.
They are also linear, meaning that no matter how deep it is in its travel, a coil spring will always compress the same amount under a given load.
An air spring is a sealed cartridge with an internal piston that moves as the fork absorbs an impact, reducing the volume and increasing the pressure in the chamber. Air springs are progressive, meaning that the load required to compress them increases the deeper they sit into their travel.
On modern mountain bikes, air-sprung forks are by far the more popular choice. They are a lot lighter than their coil counterparts and can be easily and accurately adjusted by raising or lowering the internal air pressure with a shock pump to find the perfect setup .
Coil-sprung forks on the other hand can only be adjusted by swapping the coil for another with a heavier or lighter spring weight, which is both costly and time-consuming.
Straight steerer vs tapered steerer
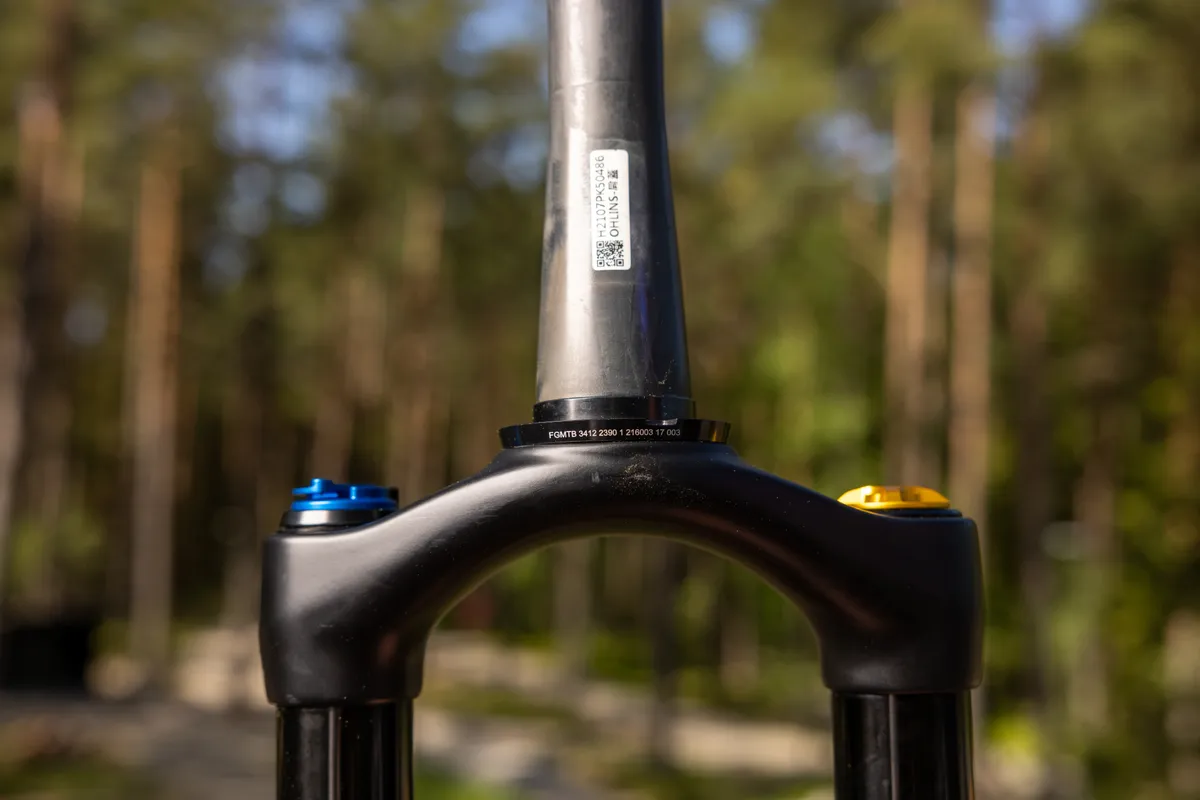
The steerer is the tube that connects the fork to the bike, fitting through the bike’s head tube before being clamped by the stem and top cap. There are two standards for suspension fork steerers.
The old steerer standard featured a 1 ⅛-inch diameter from top to bottom. These are called straight steerers.
As the name suggests, tapered steerers have a 1.5in diameter at the bottom and taper to a 1 ⅛-inch diameter at the top. Most modern mountain bikes now feature this standard, which is claimed to improve stiffness between the frame and the fork.
A couple of brands have strayed from these standards. Giant ran its Overdrive2 fork steerer system, which tapered from 1.5-1.2in for a number of years, and Cannondale (plus a few other small ebike brands) have run straight 1.5in steerer tubes.
While few bikes deviate from the regular tapered standard, if you have a Giant or a Cannondale, it might be worth checking.
If you have a bike with a tapered head tube, it is possible to fit an older fork with a straight steerer, providing you source an adaptor for the lower headset cup . Unfortunately, the same does not apply to fitting a new tapered fork to an older frame with a straight head tube.
Volume tokens/spacers
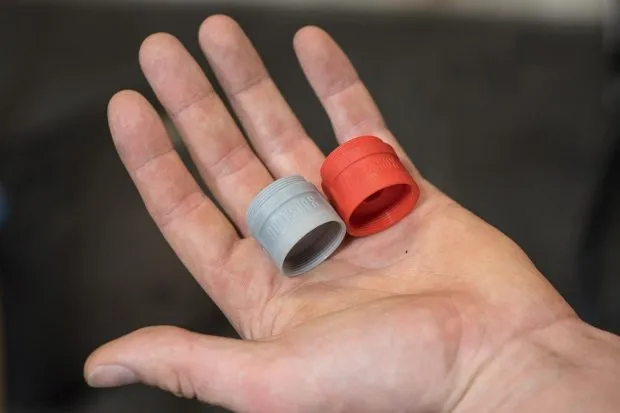
Another benefit of air-sprung suspension forks is their ability to be tuned with volume spacers, sometimes called tokens. These spacers are an inexpensive way to tune the progression of your fork.
By adding volume spacers, you effectively reduce the size of the fork’s internal air chamber, increasing the progressivity of the spring. This enables you to reduce your overall air pressure, increasing the fork’s sensitivity at the start of the stroke without compromising support and ramp-up deeper in the travel.
By removing volume spacers, you can make your fork more linear. This is especially useful for lighter riders who are struggling to use all of their travel and bottom out their fork.
What are compression and rebound damping?
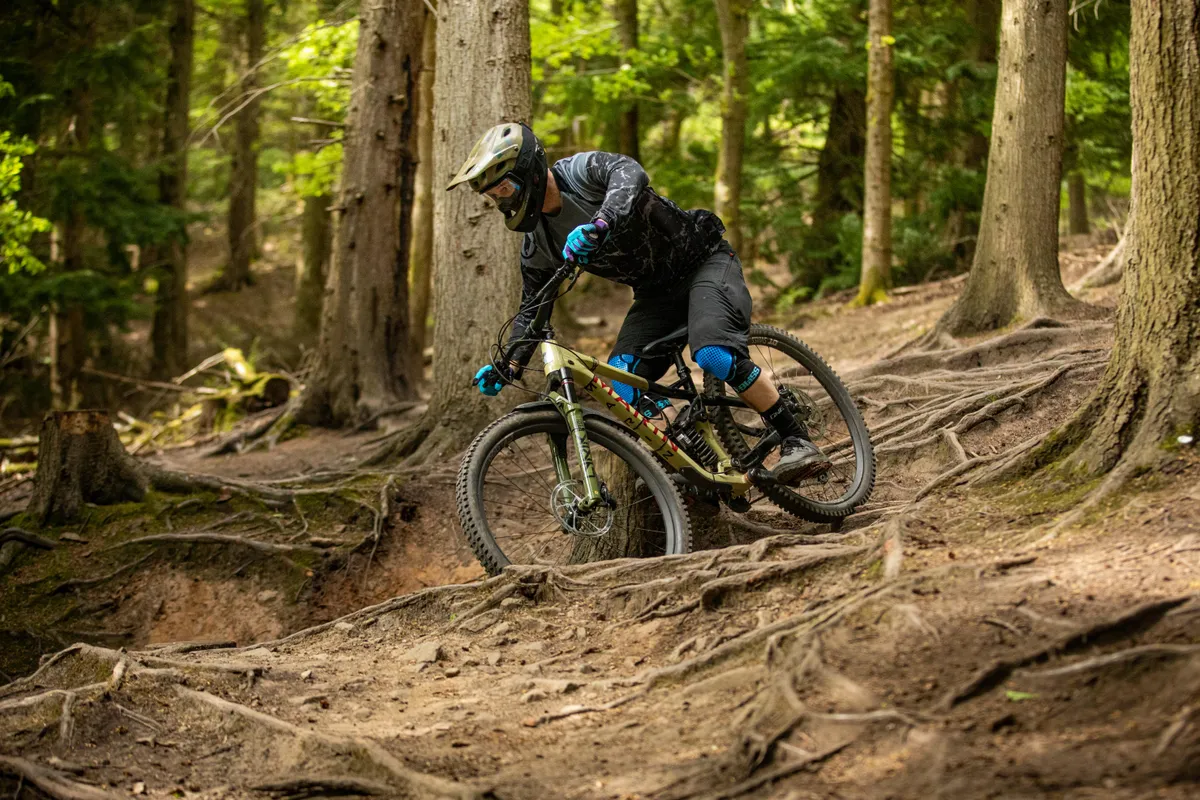
Regardless of whether you have an air or coil spring, the spring itself does a fairly simple job – it absorbs an impact and then returns to its original position.
However, without damping, it is essentially a pogo stick and not very good at delivering a controlled and predictable ride.
This is where rebound and compression damping come into play. Usually housed in the right leg of the fork, the damper is adjusted by dials at the top and bottom of the fork leg.
Rebound damping
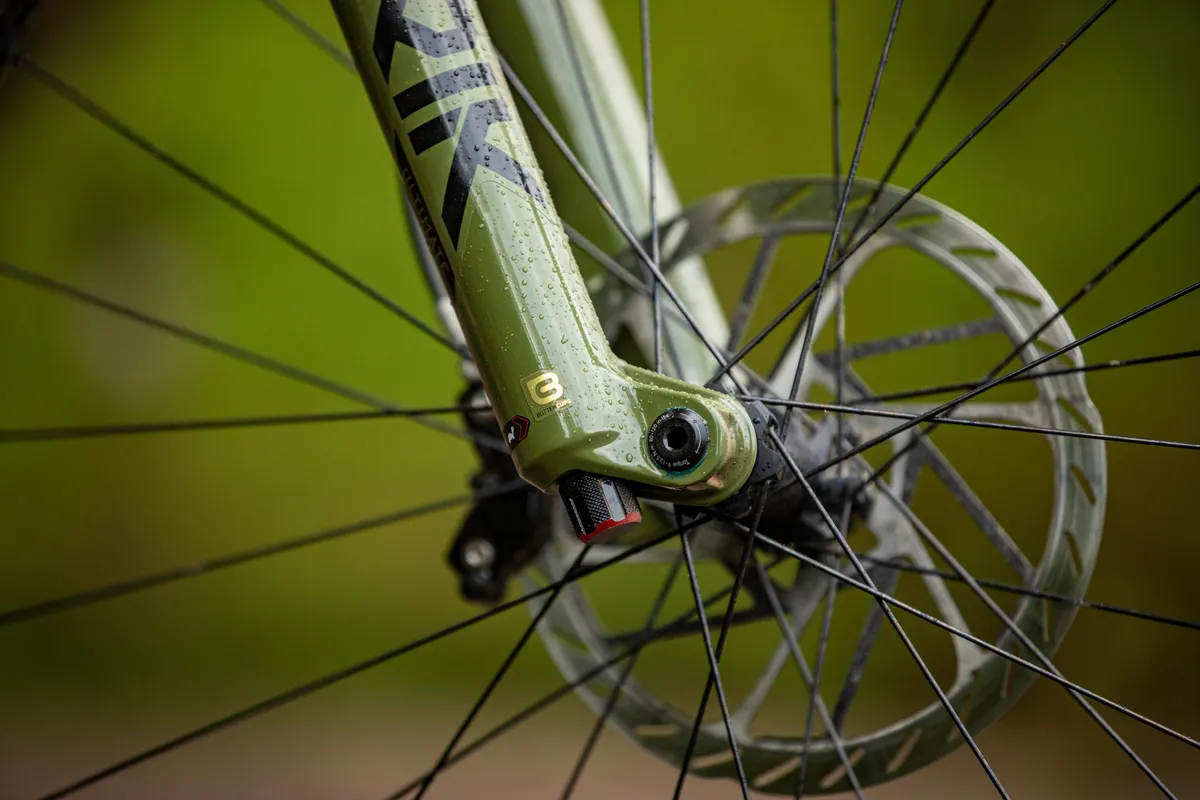
Rebound damping controls the speed at which the spring returns after absorbing an impact. Too fast and the fork will bounce uncontrollably. Too slow, and it won’t extend in time for the next impact, making for a very harsh ride and compromising grip.
High-speed rebound damping controls how fast your fork will rebound from a big hit that uses most of the suspension travel, while low-speed rebound controls the speed through the rest of the travel.
Luckily, rebound damping can be adjusted on most quality mountain bike forks. Adding rebound damping (often marked '+' on the fork dial) slows down the return rate of the fork. Reducing rebound damping (often marked '-' on the fork dial) speeds up the return rate of the fork.
Low-speed compression damping
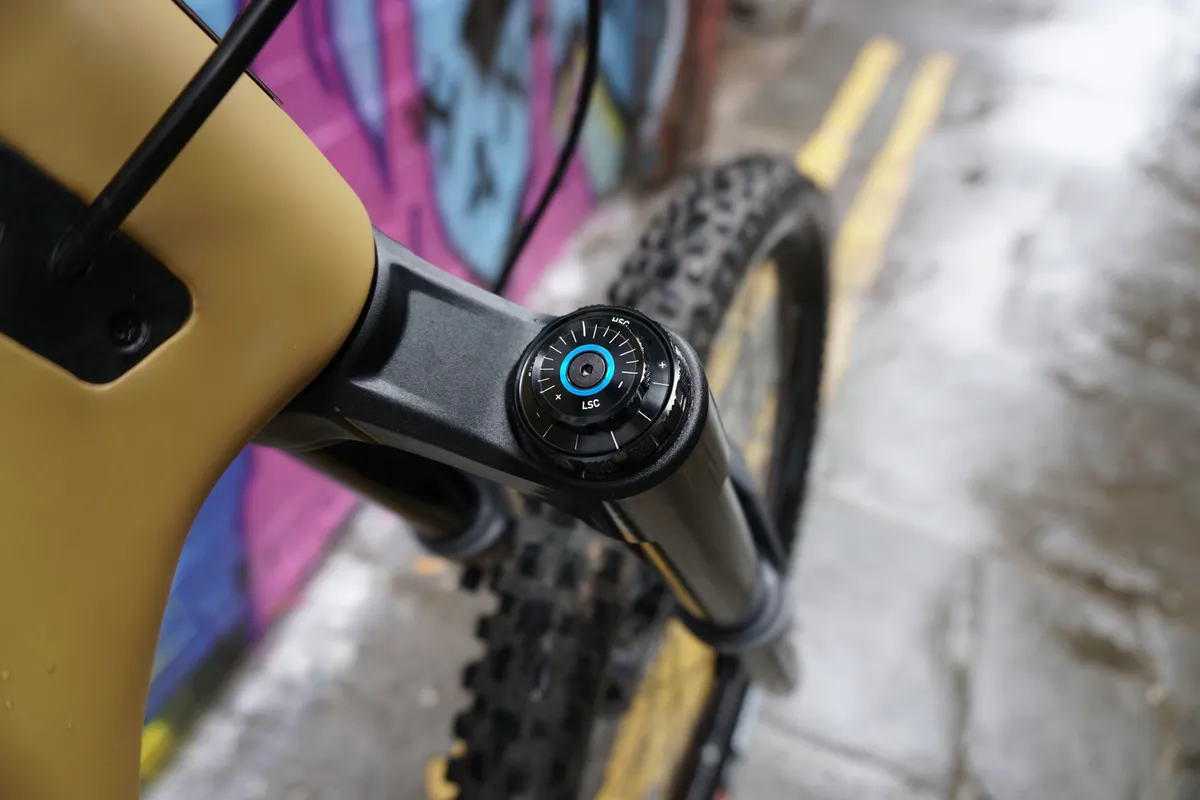
Low-speed compression (LSC) damping influences how the fork responds to impacts where the spring compresses slowly – think pushing into a take-off or around a berm.
Adding low-speed damping makes the fork firmer in these instances, using less travel, and can make for a more supportive and stable-feeling fork at the cost of some sensitivity on small bumps.
High-speed compression damping
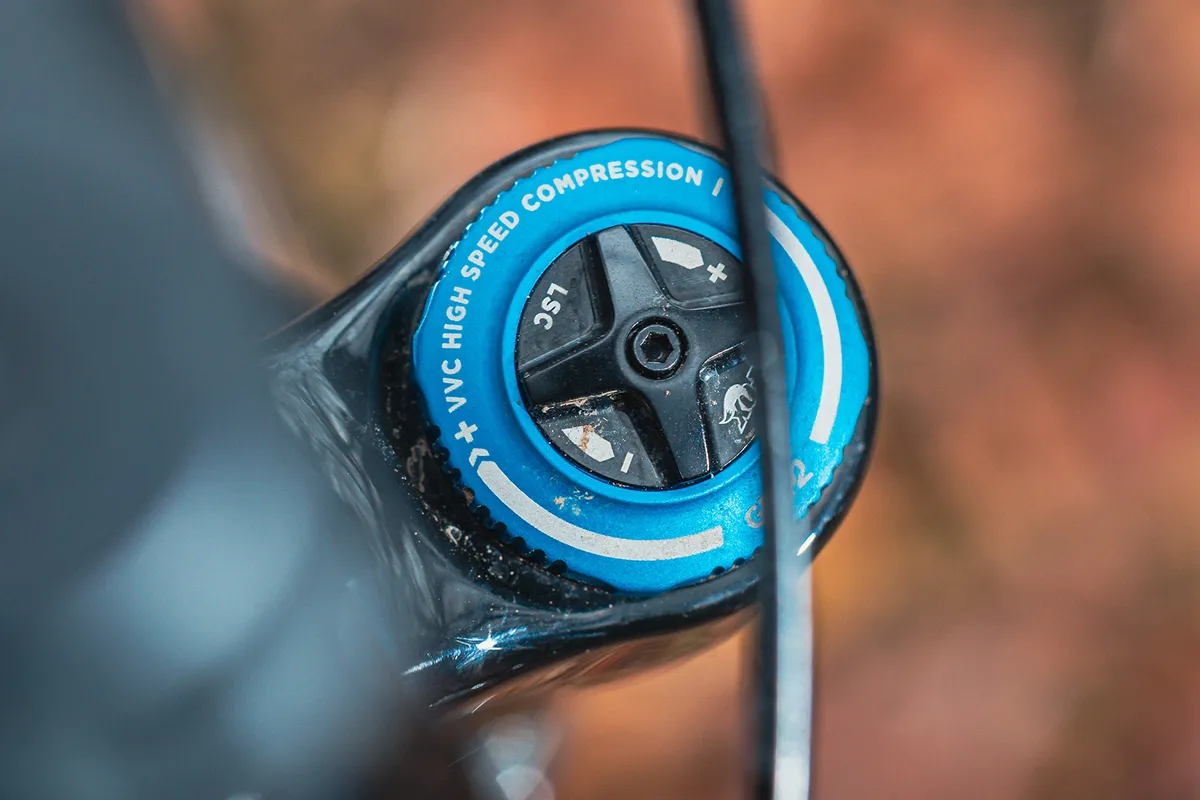
High-speed compression (HSC) damping is usually only available on high-end forks. It influences how the fork responds to impacts that make the spring compress rapidly, such as sudden compressions and big hits.
Adding high-speed compression damping helps to stop the fork blowing through all of its travel and bottoming out.
How do I know my fork size?
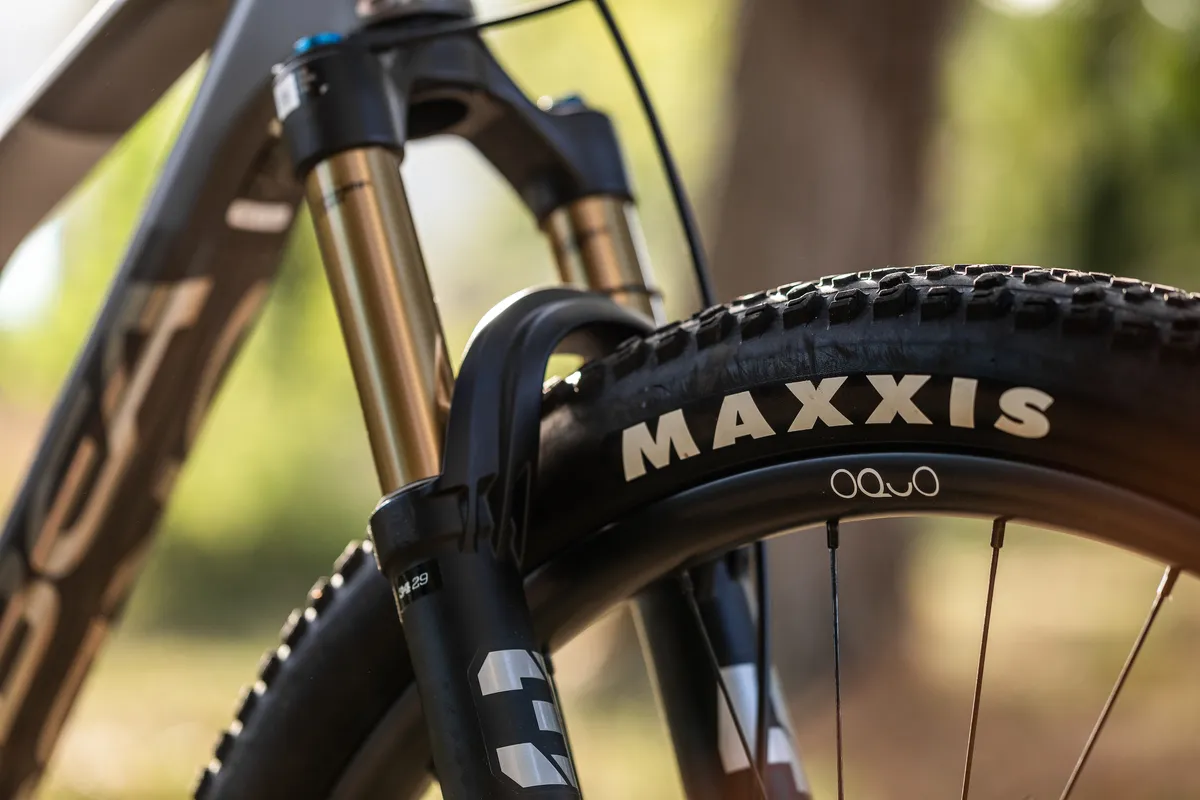
When considering a fork upgrade, it’s important to know the travel and size of your current fork because replacing it with something outside your frame manufacturer's parameters could void your warranty.
Suspension travel is often displayed on the rear of the fork legs, just beneath where the stanchions meet the lowers. If this isn’t the case on your particular fork, you can find the serial number under the fork crown.
The length of the stanchions can also be an indicator of how much travel a fork has. However, it isn’t always reliable because some forks don’t use their full stanchion when compressed.
Another important measurement is the axle-to-crown distance. This is measured in a direct line from the fork crown to the axle.
When measuring this distance, it's important that the fork is unsagged, so make sure the stanchions are fully extended before you grab your tape measure.
Share this article
Contributor

- Terms & Conditions
- Subscribe to our magazines
- Manage preferences

- Forum Listing
- Marketplace
- Advanced Search
- MTBR Discussion Forums
- Beginner's Corner
How do you actually measure the travel of the fork?
- Add to quote
The maker will quote the amount the fork CAN travel - which doesn't necessarily mean you will get all the available travel. How stiff the spring is, the terrain you ride, your weight etc, all affect how much travel you can get out of the fork. If you are curious, you can loosely fit a zip tie temporarily around one of the the uppers to see how much travel you are using on a ride.
You can measure the distance from the wheel axle to the crown race(where the bottom of the head tube meets) and then subtract a certain distance(I forgot what the value was). The result is the travel rating for that fork which may not necessarily be the actual amount of travel that you experience while riding. I used to keep a zip tie on one of my stanchions to measure sag, but I heard that the hard plastic can actually scratch the stanchion which can't be good.
If the zip tie is pretty loose it can't be more damaging than debris flying up from someone else's bike and onto your stanchions, so I wouldn't worry about it. A good way to measure travel is to ride in dusty terrain so that dust settles on the stanchions, you can then measure the distance from the seal to the "dust ring" and thus get the amount of travel you use. Another great way is to find the model, make, and year of your fork and go to the manufacturer's website for info. Which fork do you want to measure travel on?
dude I have a "loose" zip tie on everyone of my forks. its the easiest way to see the max travel the fork has used on a trail or jump. and as for scratching the stans. well are you telling me that plastic is harder than alum. or steal? I dont think so, it might wear the anodizing but then the seals do that to so big deal. or even better if i could get a fork to last that long to acutally see wear that would be nice. just put one on the stan. as said and let all the air out of the fork (if you can) and the fully compress it. then measure from the dust/dirt seal to the bottom of the zip tie. very easy and accurate
Merkyworks said: dude I have a "loose" zip tie on everyone of my forks. its the easiest way to see the max travel the fork has used on a trail or jump. and as for scratching the stans. well are you telling me that plastic is harder than alum. or steal? I dont think so, it might wear the anodizing but then the seals do that to so big deal. or even better if i could get a fork to last that long to acutally see wear that would be nice. just put one on the stan. as said and let all the air out of the fork (if you can) and the fully compress it. then measure from the dust/dirt seal to the bottom of the zip tie. very easy and accurate Click to expand...
Hmmm, I had a zip tie on my Marzocchi fork for over a year - look mah, no wear! Like I said, leave it a little loose and it won't hurt. Once you have worked out how much travel you are getting, cut it off if you are worried. Snaky 69 also mentioned having a look after a ride in dusty terrin - works too.
I meabt how the manufacturer sais this fork is 100mm or 80mm etc. Is it the measurment of the plush part (the part that "goes in") on the fork? Thanks.
Markleo said: I meabt how the manufacturer sais this fork is 100mm or 80mm etc. Is it the measurment of the plush part (the part that "goes in") on the fork? Thanks. Click to expand...
BraveHeart said: It has more to due with the distance between the crown race and axel when uncompressed. The actual "part that goes in" will be a little different for every 80mm fork out there but the distance from crown race to axel will be the same for all 80mm forks. This is how and why the frame manufacturers are able to design a frame for a specified XXmm travel fork. What they are really saying is that the bike is designed for a fork with a particular overall length. If you deviate from that recommended length, the handling of the bike will be affected. Click to expand...
snaky69 said: You are not correct. Many forks with the same amount of travel have different axle to crown heights due to the crowns, exposed stanchion, drop-out configuration and all. The 80mm is nothing more than a general recommendation to make sure the bike handles like it's meant to. 80mm of travel means exactly that, when fully compressed, the fork will have traveled 80mm. Which means the exposed part of the stanchion will be 80mm shorter and the fork will have an 80mm shorter axle to crown height etc. Click to expand...
BraveHeart said: If that were true than frame manufacturers would have to suggest a crown to axle spec to match a fork to their frame, which they do not. Only the travel. Its a lot more than a general recommendation, it has to do how the bike sits in the neutral postition. If you put a 100mm fork on a bike spec'd for 80mm, you are raising the front of the bike which will slow steering and cause wheelies on climbs. The same would happen if different manufacturers used different crown to axel lengths for an 80mm fork. Click to expand...
snaky69 said: A 100mm Manitou gold label has a 475mm axle to crown height. A rock shox pike at 100mm will have a 470mm axle to crown height, a marzocchi dirt jumper('06 and later) at 100mm will have a 486mm axle to crown height, a rock shox argyle at 100mm will have a 491mm axle to crown height(a difference of 21mm or almost an inch, that is almost 1 degree in head angle difference compared to a gold label). I used dirt jumping forks as an example as those are the forks I know best, but this goes for any and all forks. As you can see, no fork with the same amount of travel has the same axle to crown height unless it comes from the same manufacturer, get your facts straight. Frame manufacturers design a frame according to a certain axle to crown height, and usually a bike using a fork within plus or minus 15-20mm of that will handle the same way it should. Also, usually, the manufacturers assume that most forks in the same travel as the fork they designed the bike around have approximately the same axle-to-crown height. The '04 and '05 marzocchi 888's we're insanely tall and choppered out bikes and made them handle like pigs, and people complained that they were the tallest 200mm fork out there. Marzocchi redesigned their crowns so that the axle to crown height was nearly 25mm shorter, and guess what, they are still at 8 inches of travel(200mm). I'm not trying to bash on you but to make you better informed, I hope I didn't come off as harsh. Click to expand...
BraveHeart said: Not harsh at all snaky69. I can't dispute your numbers since manufacturers don't seem to publish them. Plus or Minus 15-20 seems a little steep though, and people would complain as they did in the case of the 888, and rightly so. What you are effectively saying is that there are some 80mm forks that are taller than some 100mm forks on the market, I can't honestly say that I would buy that. On another note, of all the forks you mentioned, which I assume you own, do they really travel 100mm or is there some variation there also? Click to expand...
- ?
- 15.5M posts
- 520.1K members
Top Contributors this Month
Gear-obsessed editors choose every product we review. We may earn commission if you buy from a link. How we test gear.

Does the Specialized’s New Stumpjumper and Its Genie Shock Change Trail Bikes Forever?
The 15th generation of the iconic Stumpjumper mountain bike is the best trail bike you can buy today.
The Takeaway: The 15th generation of the Stumpjumper is Specialized at its very best. It is a superb, highly refined bike featuring unique ride-enhancing technology in the deceptively simple Genie shock. This bike does everything it is supposed to do and does it extremely well. The Stumpjumper is the new benchmark trail bike.
Features and Details
Models and prices, ride impressions, notes from the field, q&a with chance farro.

.css-uyz68u{display:-webkit-box;display:-webkit-flex;display:-ms-flexbox;display:flex;font-weight:inherit;font-style:inherit;-webkit-box-pack:start;-ms-flex-pack:start;-webkit-justify-content:flex-start;justify-content:flex-start;-webkit-align-items:center;-webkit-box-align:center;-ms-flex-align:center;align-items:center;cursor:pointer;scroll-margin-top:0rem;background-color:#ffffff;color:#000;width:100%;border:0;border-top:0.0625rem solid #E5E5E5;text-align:left;padding-top:0.3125rem;border-bottom:none;padding-bottom:0.3125rem;}@media(min-width: 64rem){.css-uyz68u{scroll-margin-top:3.375rem;}} .css-b4ahb2{border-radius:50%;width:1.875rem;border:thin solid #737373;height:1.875rem;padding:0.4rem;margin-right:0.625rem;} .css-jlx6sx{display:-webkit-inline-box;display:-webkit-inline-flex;display:-ms-inline-flexbox;display:inline-flex;width:0.9375rem;height:0.9375rem;margin-right:0.625rem;-webkit-transform:rotate(90deg);-moz-transform:rotate(90deg);-ms-transform:rotate(90deg);transform:rotate(90deg);-webkit-transition:-webkit-transform 250ms ease-in-out;transition:transform 250ms ease-in-out;} Stumpjumper 15 Pro Details ( Click to expand )
Specialized’s Stumpjumper is iconic. As the first production mountain bike , the Stumpjumper started a revolution in cycling when it debuted in 1981. As mountain biking developed and progressed over the decades, the Stumpjumper changed along with it. Specialized reinvented the Stumpjumper many times with different materials, new wheel sizes, disc brakes, and front and rear suspension to meet mountain bikers’ riding wants and needs.
Today, we see the launch of the latest generation of Stumpjumper, featuring an interesting new shock technology called Genie. By Specialized’s count, this new bike is the fifteenth generation of the full-suspension Stumpjumper platform (hence, it is dubbed Stumpjumper 15). The new bike is the best and most capable Stumpjumper the Morgan Hill, California-based brand ever produced.
And the Stumpjumper 15 is, so far, the best trail bike you can purchase in 2024.
What is Genie?

It’s not immediately apparent, but something interesting is happening inside the new Stumpjumper’s shock. As Specialized states in the bike’s press kit, “Compared to other air shocks on the market, Genie allows for a lower spring rate earlier in the stroke, with a higher ramp later in the ending stroke.”
It attains this with a custom two-stage air spring developed in-house at Specialized. While Fox manufactures the shock, Specialized has patents pending on this system. This allows Specialized to potentially have the Genie spring built into any brand’s air shock.

Specialized isn’t the first to tinker with a multi-stage air spring. Trek’s DRCV (dual rate control valve) from more than a decade ago was a two-stage air spring built into some shocks and even a few forks. But the DRCV air spring volume was initially smaller before switching to a larger-volume air spring partway through the stroke: Genie is exactly the opposite.
For the first 70 percent of the shock’s travel, the Genie air spring consists of the volume inside the main air chamber plus the air sleeve volume surrounding the shock body. This air sleeve is also referred to as the XV (eXtra Volume) sleeve.
At 70 percent travel, a ring on the air piston blocks off the ports that allow the main air chamber to communicate with the sleeve’s air chamber, reducing air volume to only what remains in the eyelet.
And…that’s really it. The Genie’s air spring volume is extra-extra-large for this first 70 percent of travel but reduces to that of a standard air shock for the last 30-percent.

It’s hardly even more complex with just a few more parts than a standard air shock. But while it’s a somewhat basic idea executed rather simply, Specialized is making some very grand claims about Genie’s benefits.
The short version is Specialized claims Genie offers the best of both shock worlds: The sensitivity of a coil spring but with the ease of setup, progression, low weight, and air volume tuning options of an air spring. The long version is found in a 15-page white paper that lays out—in great detail—how Specialized says Genie is better-er than any other shock.

The white paper states that, compared to a standard air shock, the Genie’s benefits include:
- 11.3 percent less bottom-out event time. (Defined as “The sum of all time spent with the shock fully bottomed out while riding.”)
- 57 percent less traction loss time. (Defined as “The sum of all times the rear wheel is slipping with respect to the front.”)
- 27 percent less traction loss intensity. (Defined as “The difference in the front and rear wheel speed when a slip occurs.”)
- 10.5 percent less chassis pitching. (Defined as “The speed at which the front triangle is bucked back and forth.”)
- 11 percent less uncomfortable vibration exposure. (Defined as “The amount of vibrations reaching the rider, specifically focusing on the range of frequencies that have been proven uncomfortable for humans to experience.”)
Another benefit of the Genie’s two-stage air spring is that it provides riders with a second tuning tool not available with a standard air shock. Not only is the end-of-stroke progression adjustable with volume spacers like most air shocks, but riders can also independently tune the air sleeve volume, influencing the feel of the spring in the initial stages of travel.
This adjustment allows riders to make the suspension initially supple or poppy without influencing the progression at the end of the travel. Likewise, riders can make the end-of-stroke progression soft and linear or ramp aggressively without altering how the suspension feels at the beginning of its travel.
For more insight into the Genie shock, see my Q&A with Chance Farro, Specialized’s Suspension R&D Manager, below.

For this generation, Specialized not only made a new bike, but the brand also reoriented its trail bike lineup. The outgoing Stumpjumper line consisted of two bikes: the Stumpjumper with 130mm rear travel (with a single pivot/flex stay design) mated to a 140mm fork and the Stumpjumper Evo with 150mm rear travel (using a four-bar Horst Link design) and a 160mm fork.
The new Stumpjumper 15 has 145mm of rear travel via Specialized’s signature four-bar Horst Link system, mated to a 150mm fork. This model supplants the 130/140mm Stumpjumper and the 150/160mm SJ Evo.
“The goal was to take the best attributes of Stumpjumper (snappy and nimble) and Stumpjumper Evo (capable and adjustable) into one platform that catered to a wider range of riding styles and terrain,” said Todd Cannatelli, Specialized’s mountain program manager.

I asked Cannatelli how Specialized settled on the 145/150mm combo. He responded, “The rear travel number can be a bit deceiving [on Genie-equipped bikes] as we are using more travel than a standard shock for a given force in many instances. The total travel of the bike is 145mm, but that number is not an apples-to-apples comparison to a bike without Genie.” Cannatelli added, “We of course tested with different fork travels, but we ultimately felt the bike was the most balanced with the Genie shock and a 150mm fork.”
Despite featuring less travel front and rear, the SJ 15’s geometry changes little from the outgoing Stumpjumper Evo (more geo details below).
For riders who crave a lighter trail bike—like the old 130mm Stumpjumper—I suggest checking out the new Epic 8 Evo. For riders craving the more gravity-oriented vibe of the old Evo, Specialized offers one Evo-ish model—the SJ 15 with a 160mm fork and a burlier build (see the models and prices section below for more info).
Cannatelli said the new Stumpjumper 15 frame is about 15 grams lighter than the old Evo (so, it’s closer to the Evo than the weight of the outgoing 120mm Stumpy) while maintaining the same stiffness and strength properties as the Evo frame.

Unlike many Specialized models, the S-Works Stumpjumper 15 is not a wholly different frame. It gets the same FACT 11m carbon designation as the less-expensive models, but the S-Works model uses a carbon link that saves a handful of grams.
Specialized claims the complete, ready-to-build SJ 15 frame with Genie shock in size S4 weighs 3,007 grams (6.6 pounds), which is quite light for a trail bike frame. The carbon link on the S-Works frame saves about 60 grams (0.13 pounds).
My second-from-top Pro model in the S3 size weighed a hair over 30 pounds without pedals, which isn’t bad for a modern trail bike with an SRAM Transmission and Maven brakes .
One of the most obvious visual changes is the elimination of the “sidearm” of the old frames that bridged the top tube and seat tube. This results in a cleaner and more traditional-looking frame. The seat tube was also reshaped—it now has a more abrupt and lower kink that increases the length available for seat post insertion. This should allow many riders to use a longer-travel dropper post.

Specialized also graced the new SJ with its latest execution of SWAT in-frame storage. Like the new Epic 8, the Stumpjumper gets a flush-mount, more waterproof door with a finger-friendly release lever.
Most models and sizes run 29-inch wheels front and rear. For riders who want to run an MX setup (see exception below), Specialized sells an aftermarket link ($75) that corrects geometry and kinematics to match the bike with dual 29-inch wheels.
All sizes of the Ohlins Coil model come from the factory with a 27.5-inch rear wheel and conversion link installed. If you buy one of these MX bikes and want to swap to a larger rear wheel, Specialized also sells the 29er link for $75.
The wheel size story for the two smallest sizes—S1 and S2—is somewhat different. These sizes are “only compatible with a 27.5 [inch] rear wheel so we could optimize the rear center and geometry for shorter riders to maintain the ride quality we wanted,” said Cannatelli.

As for kinematics, Specialized made a few refinements compared to the outgoing Evo. Some of them relate to optimizing suspension performance around the Genie shock (see the Q&A section below for a bit more on this), but it also decreased anti-squat slightly compared to the old Evo.
Putting a bow on the details, the SJ 15 runs a 34.9mm seatpost, BSA bottom bracket, ISCG ’05 tabs, and a UDH (universal derailleur hanger). Also note that this frame is only compatible with electronic drivetrains: If you prefer to ride battery-free, you’ll likely need to wait until the inevitible aluminum frame Stumpy 15 appears.
The new SJ also gets protected by Specialized’s new “lifetime, no-questions-asked, bearing replacement policy.” So feel free to ride through all the streams and blast it with a pressure washer.

I won’t get much into the weeds with specific numbers because most of them are in the geometry tables (one for SJ15 with a 150mm fork and one for the Ohlins Coil model with a 160mm fork) I’ve pasted here. However, although it runs slightly less travel front and rear, the SJ 15’s geometry is almost identical to that of the outgoing SJ Evo.
All SJ 15 bikes and frames ship with an accessory drop-in upper headset cup. This alternate cup provides +/- 1.0 degrees head tube angle adjustment (the geometry table shows the bikes as shipped with the middle cup installed).
Meanwhile, flip chips in the chainstay links offer +/- seven millimeters of bottom bracket height adjustment and +/- 0.5 degrees head and seat angle adjustment (bikes ship in the high mode). All told the head angle ranges from 63 degrees (slack cup and low BB setting) to 65.5 degrees (steep cup and high BB setting).

The seat angle is size-specific, but the geometry chart for the bike with a 150mm fork listed above is incorrect. When I questioned why the S3 was steeper than both the S2 and S4, Cannatelli confirmed it was an error on Specialized’s part and sent over the correct effective seat angles, along with the saddle height those angles are taken from (Lower saddle heights result in a steeper effective angle, while taller yields a slacker effective angle).
The correct seat angles are:
S1 - 78 degrees at 645mm saddle height (center of bottom bracket to the top of saddle) S2 - 77°, 690mm S3 - 77°, 735mm S4 - 76.5°, 780mm S5 - 76.5°, 825mm S6 - 76.5°, 870mm
There are four chainstay lengths for the six frame sizes. The S1 gets 430mm stays, while the S2 runs 432mm. Sizes S3 and S4 share 435mm stays, while the S5 and S6 share 445mm stays.

Note that geometry is largely the same whether the bike runs a 27.5- or 29-inch rear wheel, so long as the frame is fitted with Specialized’s wheel-size specific upper suspension link.

The new Stumpjumper arrives in five complete variants priced from $5,500 to $12,000. Specialized also offers the Stumpjumper 15 as an S-Works frameset.
S-Works Stumpjumper 15 - $12,000 Stumpjumper 15 Pro - $9,000 Stumpjumper 15 Öhlins Coil - $8,500 Stumpjumper 15 Expert - $6,500 Stumpjumper 15 Comp- $5,500 S-Works Stumpjumper 15 Frameset - $3,500
While the outgoing Stumpjumper was offered in both carbon and aluminum frames, the new generation, at launch, only comes in carbon. However, there are strong hints that an aluminum frame might arrive later this year.
Specialized Stumpjumper 15 Models and Prices

Four of the five complete bikes run a 150mm Fox 36 fork (the smallest S1 size uses a 140mm fork) with the Fox Float Genie shock. All Genie shocks have a climb switch and three-position open mode damping adjustment. These models also feature 29-inch wheels front and rear, SRAM Maven brakes (200mm rotors front and rear for most sizes; the two smallest sizes run a 180mm rear), SRAM Eagle Transmission drivetrain (the least expensive Comp model gets the new, OE only, S1000 Transmission rear derailleur), rims with 30mm internal width, and a Specialized Butcher front tire with the sticky T9 compound mated to an Eliminator rear tire with faster rolling T7 compound.

The remaining variant is for riders who want something more gravity-oriented. The Stumpjumper 15 Ohlins Coil features an Ohlins TX 22 M coil shock with a 160mm Ohlins RXF38 M.2 29 fork. This model also has a 27.5-inch rear wheel wrapped with a heavier-duty Grid Gravity casing tire, TRP DH-R Evo brakes with 220mm front and 203mm rear rotor, plus a 35mm long Deity stem. This model is not offered in the S1 size; it is only in sizes S2 to S6.

I found Genie’s performance impressive. It is extremely—and remarkably—sensitive. And it is supple exactly when you want it, yet with superb support and plenty of bottom-out progression.
All the potential drawbacks I fretted about—Would it feel too soft? Would it wallow and feel like it sits in the middle of the travel? Would it feel like the suspension hits a wall when the sleeve volume gets cut off?—never materialized. Props to Specialized, Genie is sorted. And the resulting performance of the new Stumpjumper is superb.
But Genie’s performance isn’t in your face. Overall, the bike doesn’t feel radically different from a well-executed and properly set up suspension bike. But you will notice that the rear suspension has all the benefits of really plush suspension without the drawbacks.
While the Genie effect may be subtle, it feels like Specialized comes closer than any other brand in realizing the suspension feel and performance that we’ve chased since, well, since suspension bikes were invented. And that’s essentially the ride of a coil-over shock initially with the performance of an air shock in the later stages of the travel.

It’s not just that the Genie is only great at smoothing chunder and sucking up big bucks, either. It works great everywhere: More traction, more control, a more stable chassis, and a smoother ride. It simply works. And it’s not fiddly, complex, or heavy either.
Plus the Genie doesn’t require proprietary mounting bullshit or a weird frame design. It hardly looks different than any other shock. It’s hard for me to think of a technology I’ve found so impressive on the trail yet has so little extra baggage.
However, based on a quick spin around the parking lot, many riders' first impressions will be that the Genie shock is too squishy and linear. Therefore, riders will assume it to be wallowy and bottom easily on the trail. The danger is these riders may feel that the suspension is “too soft” and try to air it up or reduce air volumes to make it feel more like a traditional air shock.
But don’t—leave the stock volume spacers in place, set the shock at 30 percent sag (16.5mm on the shaft), and ride a favorite trail. You’ll be surprised at how supportive and bottom-out-resistant the “too soft” shock is on the trail.

Many of the claimed benefits of Genie are the same as those of Cane Creek’s Tigon hybrid coil/air shock (about $1,000 with spring and hardware). In Specialized’s favor, though, the Genie is realized in a much lighter, more tunable, and sleeker package. Plus, it is custom-tuned specifically for the Stumpjumper. But if you can fit a Tigon on your bike, you should experience at least some of the performance benefits of the Genie-equipped Stumpjumper 15.

Between the lower anti-squat and the softer spring of the Genie, I expected the Stumpjumper’s pedaling performance to go out the window, and I imagined using the shock’s climb switch often. But that wasn’t the case at all. I was quite impressed with how efficiently the new SJ pedaled and how little bob I experienced. Much like its performance over bumps, this bike is settled and quiet when pedaling.
However, it is not an especially fast climbing bike, and it doesn't feel particularly swift on flatter trails (I suspect at least some of this is due to the sticky rubber front tire). The Stumpjumper pedals along well enough, but it doesn't have the crisp acceleration of a Pivot Switchblade , for example.
While the Genie shock is the Stumpjumper 15’s biggest story, there is much more to this bike. To be clear, this is not a great bike because it has Genie; it is a great bike, and it has Genie.
The chassis is superb. It feels robust and well-tuned, stout but not overly stiff. The geometry works well for a wide range of trails. The geometry (and shock) have enough adjustment options to fine-tune the bike for many types of riding—even occasional visits to the bike park. (However, the SJ 15 would not be my first choice if I knew I would be riding in a bike park a lot.)
Notably, the Stumpjumper 15 is a better daily driver than the old (and very good) SJ Evo. The old Evo’s vibe is enduro-adjacent and needs a bit of speed and steepness to feel its best. The new SJ has almost the same capability on the most challenging trails but feels faster and more agile when riding less extreme terrain, which makes the new bike more entertaining to ride across a wider range of trails.
If you find the new Stumpjumper is not quite enough bike for your steep and challenging terrain, it can be easily optimized for rowdy trails with its geometry adjustments. Riders can use a 27.5-inch rear wheel and drop in a new air spring to bump fork travel to 160mm. But if that’s what you need for your daily driver, buy the SJ 15 Ohlins coil model—it’s basically an improved version of the old Evo.

And since the new Stumpjumper has no weird standards, this bike will be easy to live with for a long time. Even if the future reveals some huge flaw with the Genie shock (I don’t see that happening, but who knows?) it has standard dimensions and mounting eyelets. So, owners can easily source a different shock for this frame.
I’m annoyed at Specialized because the Stumpjumper 15 is so well executed that it’s giving me nothing to complain about. All I got is that the textured finish honestly looks like there was an error when the painter tried to apply the clear coat.
Is the new Stumpjumper 15 with Genie the best trail bike available today? I don’t think one needs to try hard to make that case. This bike is dialed. But there are many great trail bikes on the market from brands big and small. I could list a dozen or more other trail bikes I’d happily ride. However, if you forced me to pick a single bike today, I’d go with the new Stumpy.
Random observations and reports from my time testing the bike.

• The Pro model I tested features a textured finish that I’m unsure about. It looks like the painters messed up the clear coat or the frame is covered in dried drink mix. No joke: One of my riding buddies asked if a soda can exploded and sprayed the bike. When covered with a clear frame protector, it looks like hell, with bubbles everywhere.
• I’m, again, going to mention the super long saddle clamp bolts employed by Bike Yoke. It’s extra concerning in this case because Specialized’s saddles are quite low profile, and the top of the bolts sit mere millimeters under the saddle shell. I’d suggest everyone (carefully) find shorter bolts or chop the stock bolts. I love the function of the Revive dropper, but Bike Yoke needs to refine its saddle clamp.

• The headtube angle adjustment system consists of just a drop-in upper headset cup and requires no tools to change. It’s extremely easy to swap—easy enough to be done trailside if you’re so inclined.
• Swapping the air sleeve and eyelet volume spacers can be done with the shock installed in the bike. However, I found the air sleeve very difficult to slide off the first time I tried—I needed to remove the shock from the bike to get a good enough grip to dislodge it. However, I successfully removed the sleeve with the shock mounted in subsequent attempts. Accessing the eyelet volume spacer may require a strap wrench.

• The Roval Traverse wheelset on my Pro test bike is very good. I’ve had a pair in for long-term testing before I received this test bike, and they’ve been trouble-free. I like their blend of lateral stiffness and vertical compliance. They also appear to be very good at warding off flats: I’ve rimmed out multiple times on both wheelsets with no flats (so far).
• The Traverse rims on my Pro test bike are laced to Industry Nine’s 1/1 one hubs (lighter than i9’s top-of-the-line Hydra but with slower but still speedy four-degree engagement). A US-made machined i9 stem complements the hubs. Both are nice little premium touches.

• Specialized launched the Mimic saddle padding in 2018 as a product specifically designed for women’s anatomy. Specialized has since found that all riders, no matter their anatomy, find the padding comfy and specify Mimic saddles more broadly. The Stumpjumper 15 Pro model I tested has Specialized’s Bridge saddle with Mimic, and damn, is it comfortable.
• SRAM’s Maven brakes are heavy and ultra-powerful. Are they too much brake for this bike? I’m sure some riders will think so. But while the SJ would be marginally lighter with a less powerful brake, I loved having the easy-to-modulate power and consistency of the Maven.
Specialized’s Suspension R&D Manager

This interview was edited for clarity.
Matt Phillips : I'm going to start with: Briefly explain Genie.
Chance Ferro : I guess the brief answer is what actually the technology is: A dual stage air spring. On the positive side, we have one large volume that we then cut into two chambers, basically creating a secondary spring ramp.
Matt : What are the benefits to the rider?
Chance : It started with playing with really [air] large volume, and really, the benefits were basically taking progression out of the spring, flattening out the spring curve, getting more usable travel, and kind of exploring that side of things. But then, of course, running into bottoming issues and lack of support and all that that you have with less progressive bikes and springs.
And then that’s where the Genie technology comes in to allow us to have the big volume, but then also get the progression and spring ramp back that we needed.
Matt : And what is the benefit to that big volume?
Chance : So the big volume provides more suspension used per bump, giving us more traction, more better bump compliance. It's a softer spring in that earlier part of the stroke that just tracks better. [It] acts like a longer travel bike in those zones, just overall smoother ride.
Matt : Okay, so all air springs are progressive. So how is Genie different than a standard air spring?
Chance : The Genie air spring is basically both linear and progressive, I guess you could say. And it's broken into different portions of the travel. From that sag point to 70%, we’re very, very linear.
It is kind of flat [like] a coil spring. It's not very progressive. And that’s what the big volume gives us, and that's kind of where we're getting those benefits and traction and all that.
And then at about 70% of the stroke, we create uber progression. It's even more progressive than your typical air spring at that moment where we need it. It’s giving us a Jekyll and Hyde kind of air spring.

Matt : Why is this approach better than using damping or kinematics to achieve a similar end result?
Chance : We’re using kinematics as well to kind of, like, blend it. So it definitely plays in with the bike. The bike is less progressive as well.
It’s pretty easy to make a less progressive bike or shock. But what was hard to do is create that Jekyll and Hyde feel. So we could either have progression or no progression. We couldn't have both with kinematics. All the kinematics are kind of on a swooping trend. Like, you’re gonna either kind of have a progressive setup or a linear setup. We couldn’t have one that aggressively changes. So that’s where this technology allowed us to do that.
Matt : It seems like Cane Creek's Tigon shock is touting many of the same benefits as Genie. What are your thoughts on this shock and why not just specify it on the new Stumpy?
Chance : Yeah, I’d say the Tigon's actually a really close reference to what Genie is doing. The idea of this secondary spring ramp using air springs is a similar idea, for sure.
Obviously, the big difference just being they’re using a coil, we're using complete air. I’d say, for what we're doing, [the Tigon is] quite heavy. It’s even heavier than your standard coil shock. So especially for a Stumpjumper, you know, it’s really important for us to have a lightweight shock.
So that’s probably one of the biggest differences. There’s also tunability. We love air springs for that. And then I will say, when you go to a shorter travel shock, coils actually become kind of challenging for some reasons.
On a short travel bike, you end up actually running a pretty stiff coil spring. So on short travel bikes, you can almost have a coil shock that’s too progressive, if that makes sense. So the combination of, say, like, a coil shock [with a secondary air spring] could be overkill. So, with, with what we’re doing, we're able to kind of maintain that sag and then still flatten out that spring curve with the big volume and then get the ramp so it plays well with kind of short to mid travel bikes.

Matt : Is Genie compatible with different wheel travels. Would it work on a 130mm travel Epic Evo or a 170mm travel Enduro?
Chance : Oh, for sure. Yeah. We’re definitely looking at things on our end. We’re excited about the technology.
We developed it for Stumpjumper in this mid-travel range. And we’re exploring where else it can go. We see a lot of potential for lots of different wheel travels, for sure.
Matt : How many extra parts in a Genie compared to a standard Float shock?
Chance : So we’ve added one sleeve, and then beyond that, it’s a piston band that lives on the main piston. That and a couple seals.
It might not be more than five parts with O-rings included, and most of those parts are: they’re kind of a reuse. There's already a seal head there, and we just modified it and made it work for us. So it’s a pretty surprisingly simple shock in that way.
Matt : The Genie is not a reservoir shock. Should riders have any concerns about heat fade?
Chance : Yeah, that was something that we wanted to check off. It’s a conversation even in our office. And so we actually did a study on heat fade between a lot of different rezi [resevoir] shocks and this inline shock.
And we did find that the [Genie] shock gets about 10% hotter. But when we actually measure the effect of the fade, it was actually no difference. So, essentially, if the [Genie’s] max temp was 180 degrees, the other shocks were at 170. But on the dyno, they didn’t fade any different based on that ten-degree difference.
So we feel really confident this thing will hold up against big rezi shocks and all that.
Matt : Is the suspension setup procedure any different when you get your new Genie-equipped Stumpjumper versus one fitted with a standard Float shock?
Chance : No. If you didn’t know this was a unique shock, you’d set up exactly the same way. Set your sag about 30%, and it’ll work great.

Matt : All right, so the Genie offers ability to independently tune initial spring feel and then end of stroke progression. How should riders use these tools to help dial in their shock based on rider weight, experience, and terrain.
Chance : I think it’s really more the latter. The kind of terrain they’re riding and the experience they want.
I don’t see people needing to change too much: The spring scales really well. It’s actually one of the benefits of this shock. The secondary ramp, it scales in accordance to the spring rate that you put in there. So heavy riders and light riders will have the same ratio of mainspring to the secondary ramp, which is not the case with hydraulic bottom outs or bumpers and things like that, where that secondary spring is kind of, you know, always set. So that's one benefit in terms of how you'd set it up for your riding style and terrain.
That’s where it gets pretty fun. We have a lot of cool adjustments. We now have two chambers that we can dial in the volumes of. The [outer air chamber volume] bands will affect the middle part of the stroke, and then the eyelet independently affects the end of the stroke. So really depends on what you want.
If you want, like, say, the most plush feel, you’re at a bike park or something, or really rough trails, you can take all the volume spacers out of that outer sleeve, and it’ll just feel really, really plush. That's the really big volume.
But you can still be a really aggressive rider with that setting. You can even then put the larger [volume] spacer in the eyelet. We've even seen some of our most aggressive riders loving that setup.
You can put that [outer] sleeve completely full and get a more poppy, snappy feel. It really does change the perceivable travel bike has.
Matt : Sort of related: What rider weight range is the stock tune designed for.
Chance : I’d say it’s no different than pretty much all of our bikes. From like 125 to 300 pounds. And a lot of that really is like dialing in the rebound range, making sure that we have a rebound setting that works well. The spring will scale even beyond that.
Matt : Are there different tunes for different rider weights or different size bikes?
Chance : Nope, they all come with the same tune. In the past we have done some size specific tuning. It was always on the rebound side just to make sure we can fit that in. But we were able to get a really nice broad range rebound adjustment so we're able to kind of fit it all in.
Matt : Shock service and service intervals: Are these any different with the Genie versus a standard Float?
Chance : Nope, it’s 100% the same. The procedure is slightly different, but if you know how to do an air spring service, it’s going to be a shoe in.
And yeah, as far as like who can service it? The same people that can service a normal shock. If you do it at home, you can do that. Shops and Fox will service them as well.
Matt : Is Genie suited to a suspension fork?
Chance That’s a great question. That's something that we're looking at right now. So I’d say it probably is.
Matt : Okay, cool. Will you offer Genie as an upgrade to other Specialized models? Like previous generation Stumpjumpers?
Chance : Like I said, we are still looking at it for other models and things like that. As far as aftermarket stuff, there’s no plans currently, but I think maybe some of the product managers and things, they’re looking at that because they’ve got a lot of questions. If there’s a demand for it, there’s potential for sure.
Matt : And what about riders who might not have a Specialized bike? And like, hey, I’d really like Genie on my bike. Is that, is it too bad: Gotta buy Specialized?
Chance : That's the current setup. But I mean, I would love to see if someone wanted to pull this off and put on something else. I'd be flattered.
Matt : All right, so this is kind of my final question. It’s got a bit of a long preamble. Stay with me here.
I feel like, as an industry, we’re still trying to educate riders on how to set sag properly and how to dial in rebound.
I’ve ridden Genie and I think the effects are there, but they’re pretty nuanced and subtle. And I think it'll take a somewhat savvy rider who's attuned to the finer points of suspension to really feel those differences on the trail. And it’s not something you’ll feel on a parking lot test ride.
Do you at all worry that Genie’s performance differences and benefits might be lost on some riders?
Chance : I don't think so.
If you’re looking at the tuning aspect of it, I think that's something that we're not really pushing. The tunability. I think the tunability we look at kind of like the head angle adjust on Stumpjumpers and all that. It's there for the really discerning riders that want to get into that level. But we basically wanted the shock to be as good as it could be out of the box.
So, like, the way it comes is our preferred tune. It’s really the point of view of the bike, and we feel it just basically is a holistic, great ride as a whole bike. So I don’t think you really need to get into the nuances to appreciate it and just basically have the best Stumpjumper we can have.

A gear editor for his entire career, Matt’s journey to becoming a leading cycling tech journalist started in 1995, and he’s been at it ever since; likely riding more cycling equipment than anyone on the planet along the way. Previous to his time with Bicycling , Matt worked in bike shops as a service manager, mechanic, and sales person. Based in Durango, Colorado, he enjoys riding and testing any and all kinds of bikes, so you’re just as likely to see him on a road bike dressed in Lycra at a Tuesday night worlds ride as you are to find him dressed in a full face helmet and pads riding a bike park on an enduro bike. He doesn’t race often, but he’s game for anything; having entered road races, criteriums, trials competitions, dual slalom, downhill races, enduros, stage races, short track, time trials, and gran fondos. Next up on his to-do list: a multi day bikepacking trip, and an e-bike race.

.css-1t6om3g:before{width:1.75rem;height:1.75rem;margin:0 0.625rem -0.125rem 0;content:'';display:inline-block;-webkit-background-size:1.25rem;background-size:1.25rem;background-color:#F8D811;color:#000;background-repeat:no-repeat;-webkit-background-position:center;background-position:center;}.loaded .css-1t6om3g:before{background-image:url(/_assets/design-tokens/bicycling/static/images/chevron-design-element.c42d609.svg);} Member Exclusive

The Best Mobility Exercises for Cyclists

All About E-Bike Tax Credits and Rebates

6 Benefits of Riding Outside

The Cheapest and Most Expensive Bikes at the TDF

How to Do These 5 Common Bicycle Repairs

10 Underrated Strength Exercises for Cyclists

The Best Yoga Poses for Cyclists

All About Cycling Economy

Tested: Trek’s Eighth-Generation Madone

Is Visma-Lease a Bike Good Enough for Vingegaard?

How to Master Your Zone 2 Rides
VIDEO: KOKOPELLI STRONG – HANNAH OTTO’S ALL-NEW FKT
REVIEW: TREK SUPERCALIBER SLR CROSS COUNTRY RACE BIKE
BC BIKE RACE MID RACE HIGHLIGHTS AND GC RESULTS
WORLD CUP UPDATE, WITH OLYMPIC NEWS, TOO
- FEEDBACK SPORTS INTRODUCES UPDATED MOUNTAIN BIKE STORAGE SOLUTIONS AND NEW TOOLS
- FIRST RIDE IMPRESSIONS: WTB’S ALL NEW MACRO CROSS-COUNTRY RACE TIRE
- “THE SPRINT RACE” DOWNHILL EVENT AT SNOW SUMMIT
VIDEO: TRANSITION GOES TO PSYCHOSIS
- SRAM RELEASES S-1000 EAGLE TRAMSMISSION AND STEALTH DB8 BRAKES
- FIRST RIDE IMPRESSIONS: THE ALL-NEW SPECIALIZED STUMPJUMPER 15

THE TEN BEST TRAIL BIKES FOR 2024
From climbing to descending, these all-around versatile mountain bikes can shred on almost any trail.
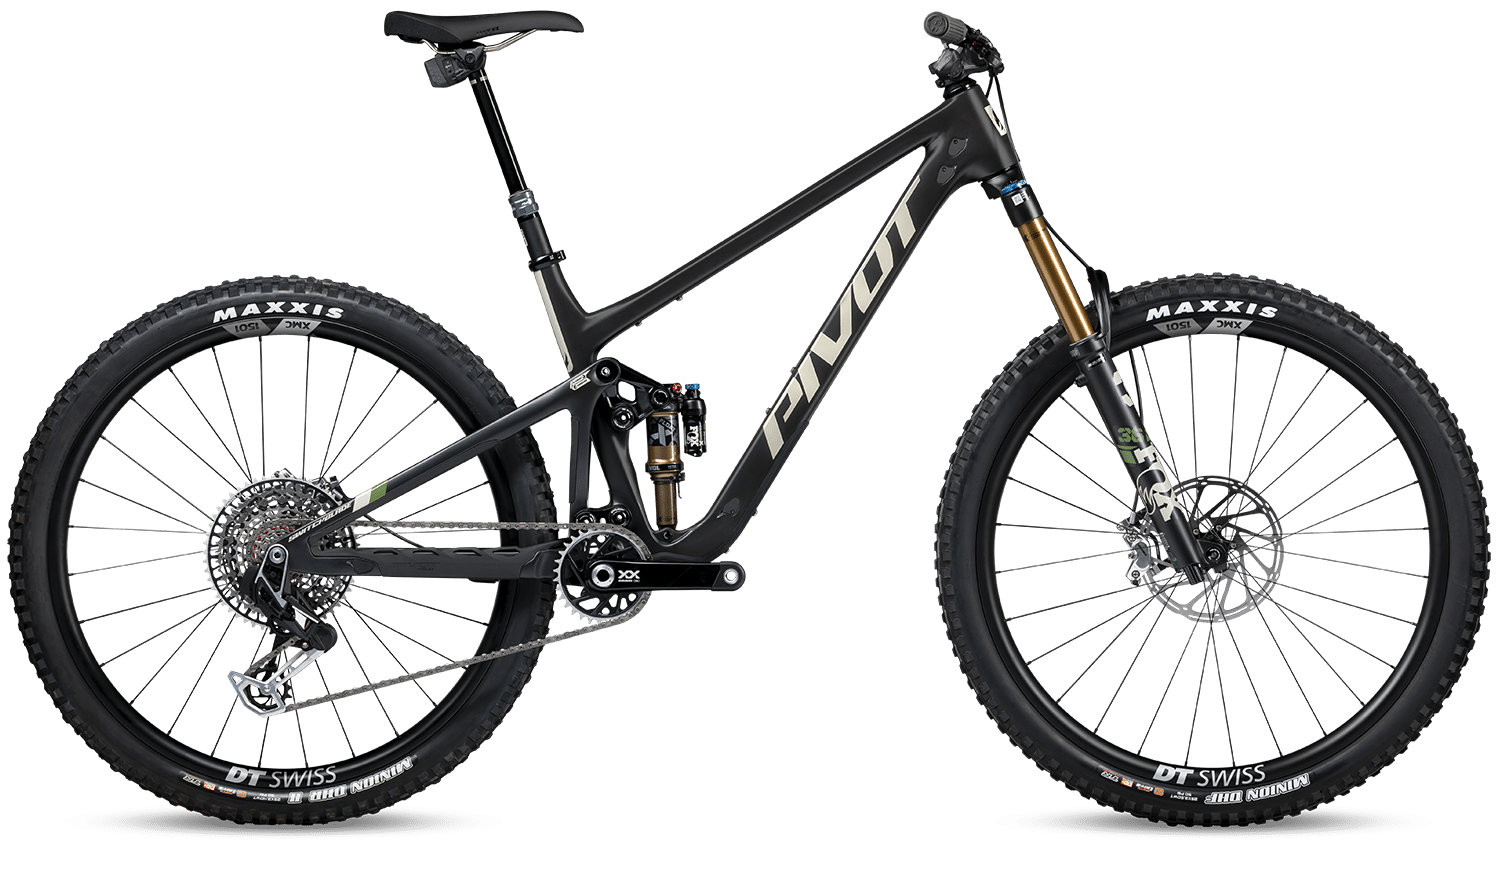
Trail bikes need to be versatile and capable machines, both uphill and downhill. They are designed to handle anything from a quick afternoon flow ride to all-day epic pedal missions and everything in between.
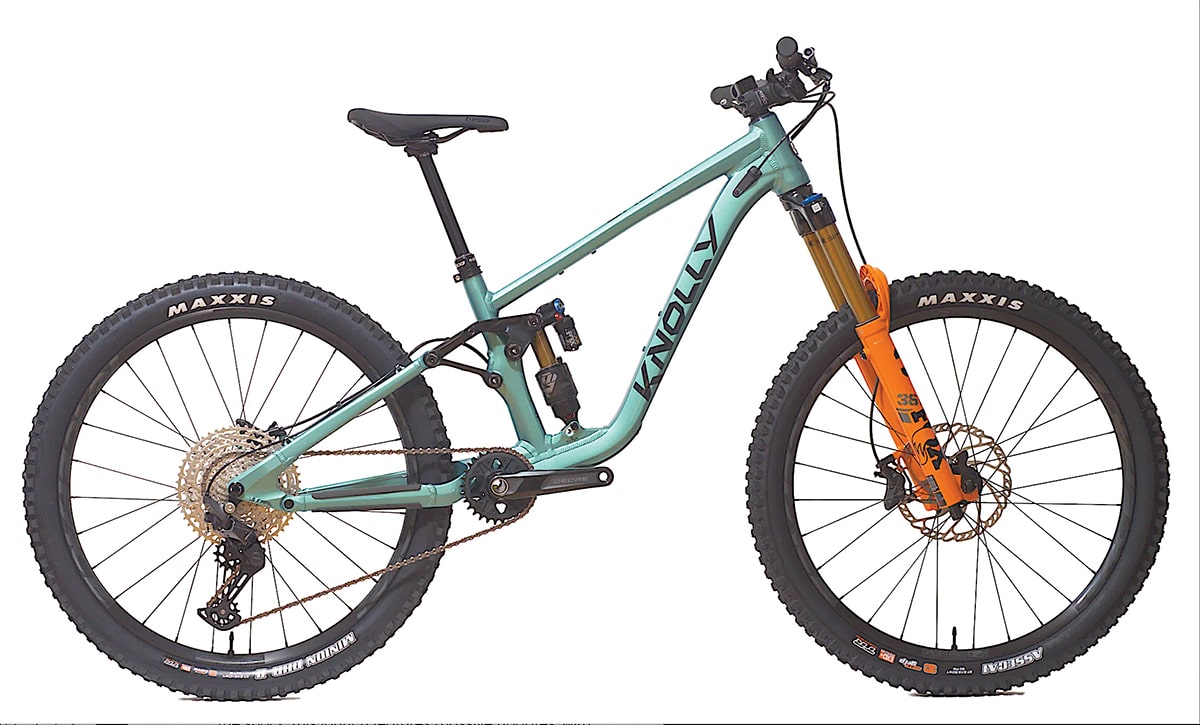
KNOLLY ENDORPHIN 6.0
Featuring an all-new design and frame aesthetic, Knolly aimed to improve on all aspects of the Endorphin lineup over the previous generation. The Trail version of the Endorphin 6.0 has dedicated mixed wheels to keep things agile and 135mm of rear-wheel travel, along with SuperBoost (12x157mm) spacing for the rear wheel. Cables are routed through the head tube (not headset routing) on the aluminum frame, and there is now an extra-small option to help suit riders with a shorter inseam. With a 29-inch front wheel, the Endorphin 6.0 is spec’d with a 140mm fork, a 64.5-degree head tube angle, and chainstays that grow from 428mm to 436mm. There is a flip chip at the lower shock mount that allows for a Neutral or Slack mode, slightly altering the geometry to prioritize either agility or stability. Price: $2,499–$5,499 Contact: www.knollybikes.com

Yeti Cycles has been a staple in the high-end mountain bike community since 1985 and show no signs of slowing down. There’s a dwindling desire for 27.5” trail bikes, but Yeti isn’t letting them fall with the tide. Their new SB 135 has now replaced the SB 140 27.5”, bringing with it all of Yeti’s most recent innovations in suspension and geometry. Yeti always marketed the 27.5” SB 140 as a bike meant to hit every transition and jib every feature and with the SB 135, that mantra hasn’t changed one bit. The SB 135 has a 14% progression rate and Yeti paid more attention to the tune on the Fox Factory Float X to help that 135mm of travel to be as smooth as possible. Even with only 135mm of rear wheel travel, Yeti spec’d a 160mm travel Fox Factory 36 fork with the GRIP 2 damper to lead the charge. Fpr all the details and ride impressions, check out our long term review of this super fun bike here.
Price: $6,000–$10,000
Contact: https://yeticycles.com/

CHROMAG DARCO
Building on over 20 years of knowledge and experience hand-crafting hardtails, Chromag Bikes designed the Darco to draw upon these roots and become a “hardtailer’s full suser”. The 120mm-travel frame is built from 4130 chromoly steel, with the linkage being made of 6061 aluminum, and it is spec’d with a 150mm fork, though a 140mm or 160mm can be used depending on the terrain you ride. A slack 64-degree head tube angle is paired with a fairly steep 78-degree seat tube angle , making this an effective climber and descender on paper. It is available in five frame sizes, with longer-than-average reach numbers ranging from 450mm to 530mm. Price: $3,450–$5,860 Contact: www.us.chromagbikes.com

FORBIDDEN DRUID
Forbidden Bikes took their highly successful first-generation Druid and made it even better for the second generation . Built to be a modern and capable carbon trail bike, it is designed around 135mm of frame travel with their high-pivot Trifecta suspension system and a 150mm fork, with either dual 29-inch or mixed wheels. Forbidden specs three different build kits with either SRAM’s GX or XO Transmission along with a frameset option. There are four different frame sizes to choose from, with the reach numbers growing from 440mm to 500mm with a 65-degree head tube angle and 77-degree seat tube angle. The Druid is truly a versatile machine capable of racing the Enduro World Cup under Rhys Verner to an afternoon at the dirt jumps. Price: $3,799–$8,899 Contact: www.forbiddenbikes.com
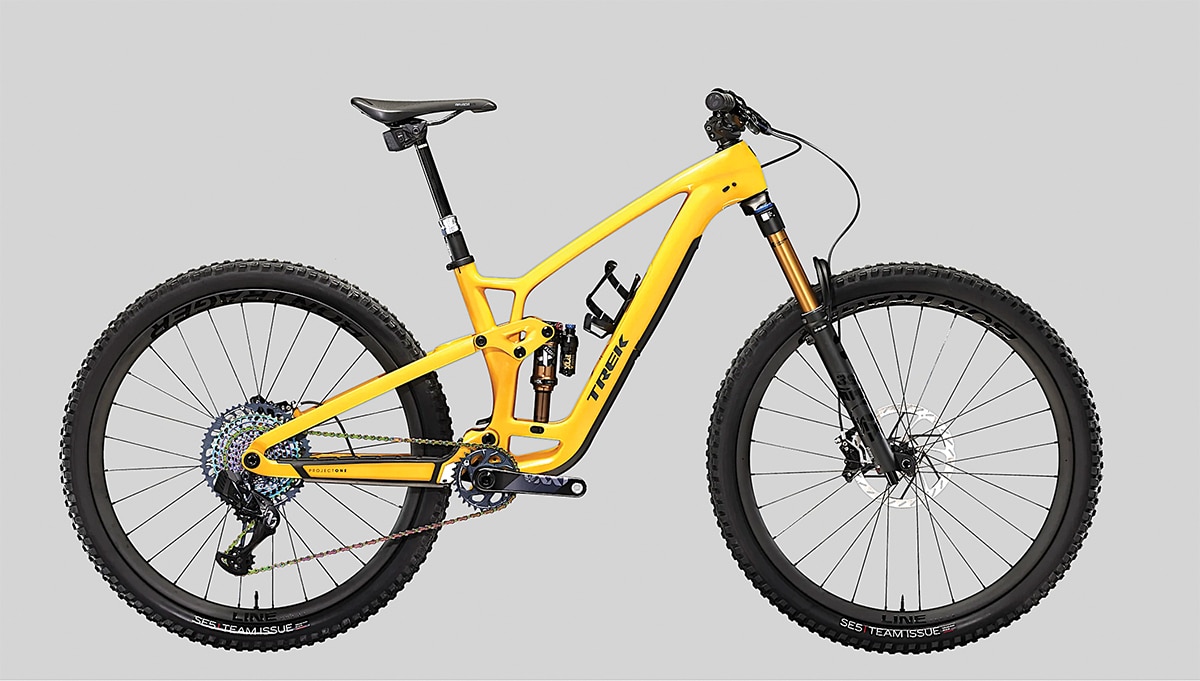
TREK FUEL EX
Now in its sixth generation, the Trek Fuel EX is built to be more capable than ever with more suspension travel and more adjustability. While it comes with dual 29-inch wheels on all builds, the Mino Link allows for a mixed-wheel configuration without the frame geometry being affected, and a flip chip at the lower shock mount lets the rider alter the progressivity of the rear travel. The Fuel EX is built around a 150mm fork and 140mm of frame travel with the ability to run up to a 160mm fork for more aggressive riding and can handle an air or coil shock. Aftermarket headset cups allow the head tube angle to be slackened or steepened by a degree from the neutral 64.5 degrees. The effective seat tube angle slackens slightly across the six frame sizes, from 78.6 degrees on the XS to 76 degrees on the XXL, and chainstay length grows proportionally from 435mm to 450mm. Price: $4,999–$10,999 Contact: www.trekbikes.com
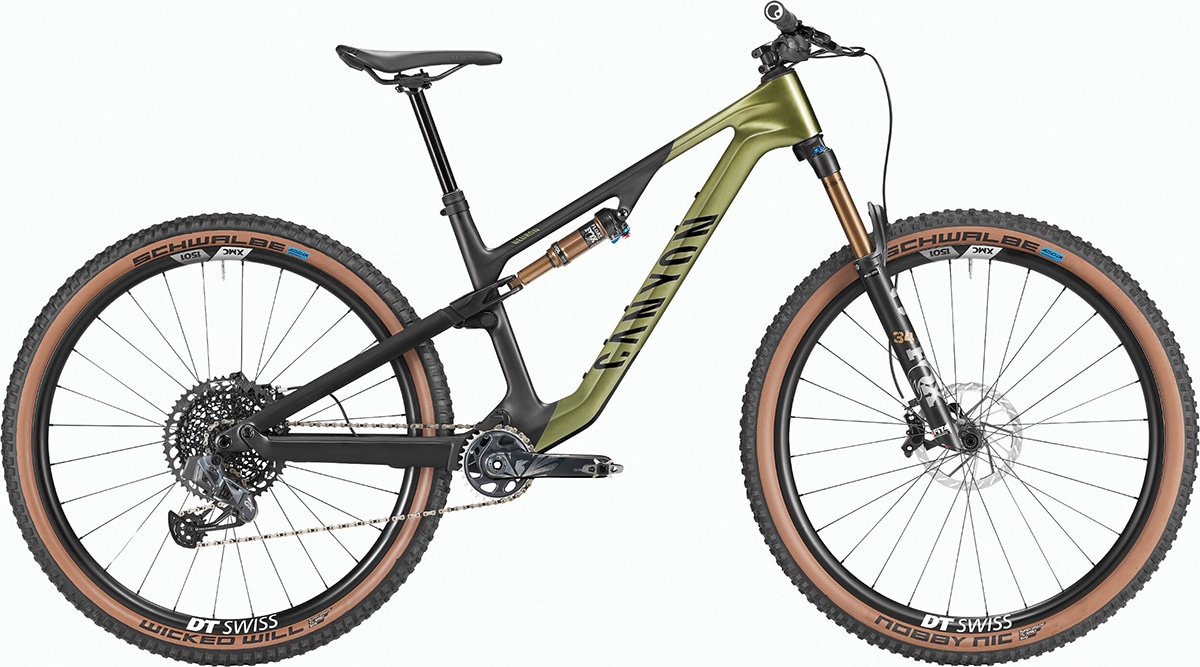
CANYON NEURON
From multi-day bike-packing trips to afternoon party laps, the Canyon Neuron is built to be the ideal all-rounder. It is available with either an alloy or carbon frame with 130mm of travel and a 140mm fork. The 66-degree head tube angle and 76-degree seat tube angle make this an efficient pedaler and agile descender, and the chainstay length sits at either 430mm or 440mm depending on the frame size. The cable routing goes through the headset, with tube-in-tube internal routing to protect the frame and keep rattling to a minimum. Canyon offers the Neuron in five different frame sizes and four different build kits to suit a wide range of riders and riding styles. Price: $2,099–$4,999 Contact: www.canyon.com/en-us

NORCO FLUID FS C
The aluminum version of the Fluid received high praise for its versatility and performance out on the trail, so Norco made this same platform with a carbon frame. They built it to be a durable all-around trail machine, emphasizing that the Fluid wants to have fun just as much as it wants to go fast. The 130mm of rear-wheel travel is custom-tuned to maximize small-bump sensitivity while still being a supportive and progressive platform for bigger hits, and there is a 140mm fork up front. The frame is available in four sizes and has a Universal Derailleur Hanger, which is compatible with SRAM’s Transmission system. The head tube angle sits at 65 degrees, while the effective seat tube angle is between 76 and 77 degrees, depending on which size you are on. Check out our review of Norco’s Fluid FS A1 here to get an idea of how the Fluild FS C might perform. Price: $2,599–$5,999 Contact: www.norco.com
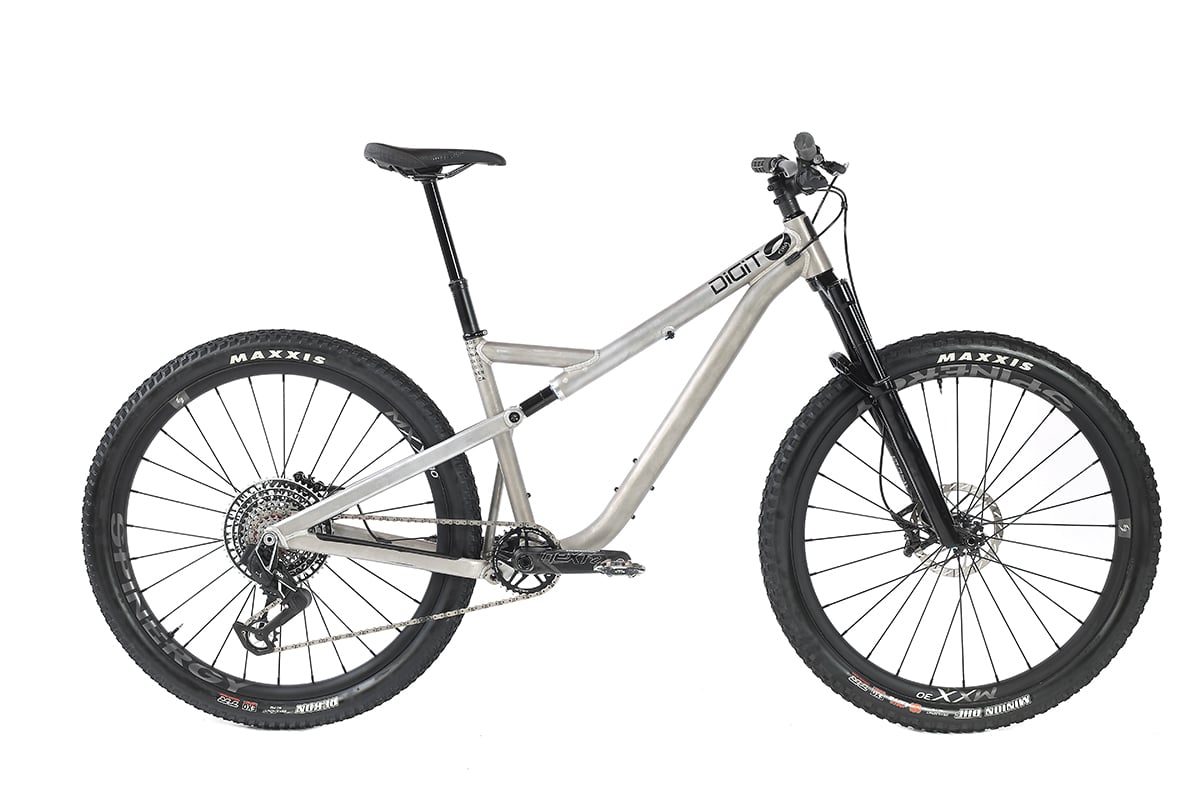
Digit bikes shook up the industry when they launched their Datum frame design with its integrated analog rear shock and domestic manufacturing ethos. All frames are designed and manufactured in Southern California by the man himself, Tim Lane . The shock is really a strut since it is designed to take on side loads like the stanchion and leg on a fork. The newest offering from Digit Bikes, the Ring , brings this same design and philosophy into a shorter-travel trail package with 127mm of rear travel paired with a 140mm fork and 29-inch wheels. There’s room for three water bottles on the frame and a straight seat tube, which can accommodate virtually any length dropper post. The claimed weight for a complete bike is approximately 30 pounds, depending on the components used. Price: $10,895 Contact: www.digitbikes.com
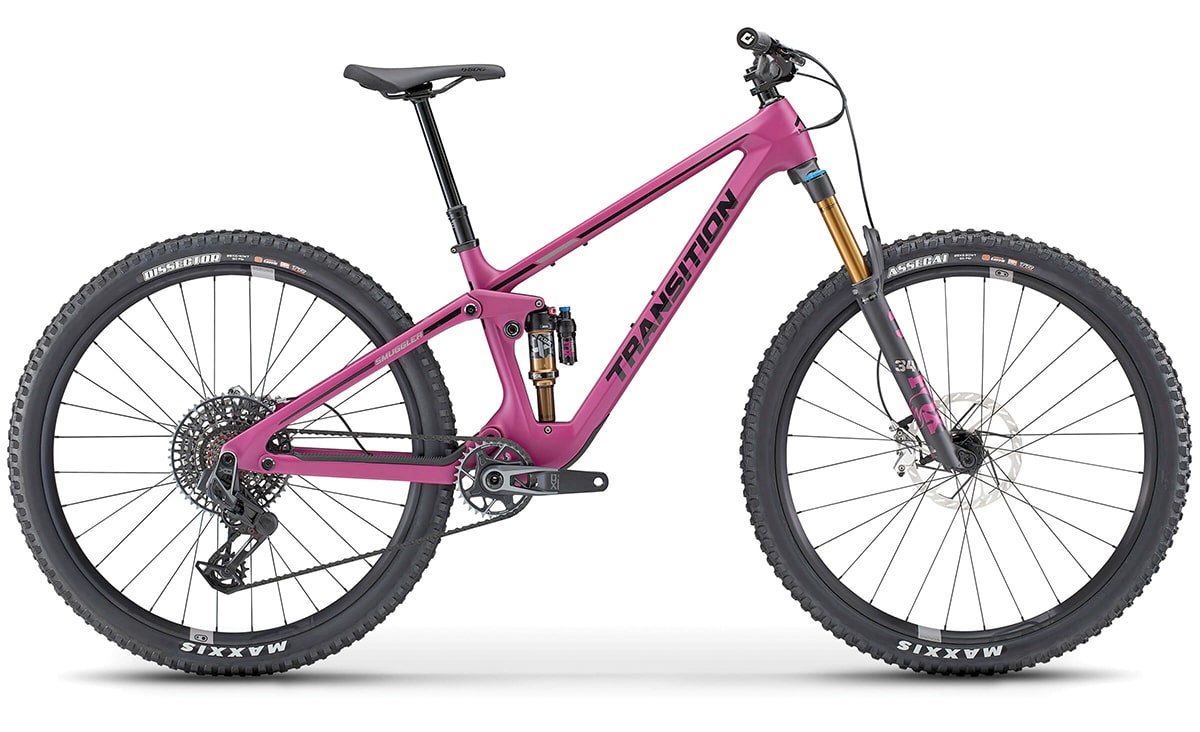
TRANSITION SMUGGLER
Transition insists that the Smuggler is the “go-to bike for any trail pointed up, down and all around,” and on paper that seems to fit the bill. They integrate a fairly progressive leverage curve to get the most out of the 130mm of rear travel, and a 140mm fork is burly enough for aggressive riding yet efficient enough for long days in the saddle. Five different frame sizes allow the Smuggler to fit riders from 5 feet to 6-foot-8, and there are four different complete build kits to choose from, with either an alloy or carbon frame, along with a carbon frameset option. All frame sizes have a 65-degree head tube angle, and the effective seat tube angle ranges from 79.3 to 77.3 degrees depending on the frame size. For more details see our first look story here. Price: $3,699–$8,499 Contact: www.transitionbikes.com
PIVOT SWITCHBLADE V3
Pivot’s third-generation Switchblade is set to build on the model’s reputation as a do-almost-anything mountain bike. According to Pivot, the new model excels in an even broader range of terrain and that’s saying something because it’s that versatility that MBA test riders have loved ever since the model was first released in 2016 . At a casual glance, the new Switchblade frame does not look all that different from the V2 model. Its carbon front and rear triangles have very similar lines and shapes overall but the top tube is a bit thinner. A significant update on the frame comes in the form of new geometry. In the low flip chip setting, its head angle is .8 degrees slacker at 65.2 degrees, the seat angle a half-degree steeper at 76 degrees, and the reach is about 10mm longer. Perhaps the biggest update on the new Switchblade comes in the form of all-new suspension kinematics. Wheel travel is still the same at 142mm but it now features a longer lower link that is more like what you see on the Firebird model. For more details, check out our first ride impression story here. Price: $2,199–$10,799 Contact: https://global.pivotcycles.com
mountainbikeaction
- Since 1986 - Covering All Aspects of ⛰🚲 #MBAmagazine

- Bike Builds
- Cross Country Bikes
- Downhill Bikes
- Enduro Bikes
- Hardtail Bikes
- Trail Bikes
ENDURA MT500 MIPS HELMET REVIEW
100% SLING MOUNTAIN BIKE GLOVE REVIEW – PERFECT SUMMER HAND PROTECTION?
GIRO MERIT SPHERICAL HELMET REVIEW
BONTRAGER KOVEE RSL CROSS COUNTRY WHEEL REVIEW
TOM VAN STEENBURGEN’S X-GAMES-WINNING VIDEO
VIDEO: JUST GETTING STARTED EP3 – GET BACK UP AGAIN – LEOGANG AND VAL DI…
ASK MBA: WHY DOES MY NEW TIRE WOBBLE ON A PERFECTY TRUE RIM?
ASK MBA: HOW OFTEN SHOULD I GREASE MY BIKE’S SUSPENSION PIVOTS?
ASK MBA: ARE CARBON WHEELS WORTH THE EXTRA MONEY?
ASK MBA: HOW DO I REPLACE A BROKEN SPOKE?
HOW TO INSTALL A TUBELESS TIRE AT HOME WITHOUT A COMPRESSOR
INTERNAL ROUTING THE EASY WAY – CHEAT CODES FOR CABLE AND HOSE ROUTING
THE INS AND OUTS OF FRAME PROTECTION – THE BEST WAYS TO KEEP YOUR FRAME LOOKING…
HOW TO SERVICE A PRESS-FIT BOTTOM BRACKET
BIKE CHECK: MARK WEIR’S VERY CUSTOM CANNONDALE MOTERRA
BIKE CHECK: BRYN ATKINSON’S PIVOT SHUTTLE LT E-BIKE
MATHIEU VAN DER POEL TELLS US ABOUT HIMSELF AND HIS MOUNTAIN BIKE, MBA SEPTEMBER 202O
BIKE CHECK: LARS FORSTER’S THÖMUS LIGHTRIDER WORLDCUP
- Mountain Bike Action
- Digital Mountain Bike Action
- Back Issues
- NICA Team of the Month
- B’s Buzz
MASTER BIKE BUILDERS SHOW IS RETURNING TO BENTONVILLE IN SEPTEMBER
DESTINATION: CAPPADOCIA, TURKEY – ICY TRAILS AND FAIRY TALES
VIDEO: HANS REY EXPLORES THE NEXT FRONTIER OF RIDING IN NORWAY
LOAM PASS ADDS 12 NEW DESTINATIONS JUST IN TIME FOR SUMMER
ELITE MEN’S AND WOMEN’S RESULTS FROM THE UCI ENDURO WORLD CUP IN FRANCE
READER SENDS: THIS MONTH’S BEST READER-SUBMITTED PHOTOS
READER SENDS – THIS MONTH’S BEST READER SUBMITTED PHOTOS
READER SENDS – THIS MONTH’S BEST READER SUBMITTED PHOTOS
- Anneke’s Blog
- Down The Trail
SORT CONTENT BY LOCATION
CLICK TO DRILL DOWN BY COUNTRY/PROVINCE
Your browser is ancient! Upgrade to a different browser or install Google Chrome Frame to experience this site.
Inspiration
- Bikepacking 101
- Join/Support

- View Latest/All
- Bikepacking Videos
- Your Stories
- Rider's Lens
- Field Trips
Popular Tags
- #bikerafting
- #Tour-Divide
- #family-bikepacking
- #winter-bikepacking
- #1Q5V (1 Question 5 Voices)
Gear/Reviews
- Bikepacking Bags
- Camping Gear
- Accessories
- #Editors-Dozen (Our Favorite Gear)
- #Gear-of-the-Year
- #MYOBG (DIY)
- #Decade-in-Review (Best of All Time)
The Gear Index
Latest indexes.
- Mini Panniers
- Saddlebags & Top Openers
- Cargo Cages & Anything Bags
- Gravel Bars
- Drop Bar 29ers
Bikepacking Bikes
- Rigid & Plus Bikes
- Drop-bar & Gravel
- Full Suspension
Rigs & Roundups
- Rider & Rig
- Race/Event Rig Roundups
- Worthy Builds
Handbuilt Bikes
- #29+ (29-plus)
- #vintage-mountain-bikes
- #cargo-bikes
- Readers' Rigs (Dispatch)
- New Bikes (Dispatch)
Plan Your Trip
- Bikepacking Guides
- Bikepacking Food
- Gear & Pack Lists
- Bike Photography
Essential Reading
- Leave No Trace (for Bikepackers)
- Guide To Bikepacking Bags
- Bikepacking Gear That Lasts
- #Bikepacking-Awards
- Power Of An Overnighter
- Advice For New Bikepackers
- Our Favorite Bikepacking Routes
-
Where to Begin
We have over 300 original and curated bikepacking routes in our global network spanning nearly 50 countries.

Start at our worldwide routes map to dig into our detailed guides with GPS maps and inspiring photography.
By Location
- The United States
- Latin America
- Middle East
By Length (days)
- Overnighters & S24O
- Weekend Routes (2-4)
- Week-long Routes (5-10)
- Odyssey Routes (11-30)
- "Freakouts" (31+)
Local Overnighters
The Local Overnighters Project is a unified effort to document and map one-night bikepacking routes all over the world—by locals, in their own backyards.
The Bikepacking Journal is our biannual printed publication. Each issue features a collection of inspiring writing and beautiful photography. Find details on the three most recent issues below, join the Bikepacking Collective to get it in the mail (anywhere in the world), or click here to find a collection of selected stories in digital format.

The special edition 10th issue of The Bikepacking Journal is one you won’t want to miss! It features 25% more pages with extra stories, bonus art and maps, and much more...

Issue 09 takes readers on trips through time—one to the early days of bicycles—and offers several reminders to be grateful for supportive friends and family, and strangers we meet along the way...
For Issue 08, we invited several contributors to return and pick up where earlier trips and ideas left off and also feature a handful of first-timers whose perspectives we’ve long been eager to share...

Bikes and Builders of 2024 Bespoked UK (Part 3)
By Logan Watts
Founding Editor & Routes Director
2,063 Posts
In the third and final installment of our 2024 Bespoked UK coverage, we learn why ferrous steel is the most environmentally friendly bike frame material and take a look at nine more bikes and builders, including the titanium beauty awarded “Best Mountain Bike,” an interesting Pinion steel hardtail from Ted James, a 29+ ATB from Olsen, Drust’s drop-bar 29er, the mighty Titanosaur, 3D-printed bike bling, and more…
PUBLISHED Jul 9, 2024
Wrapping up our coverage of Bespoked UK 2024, held at the end of June in Manchester, England, I take you behind the curtain of seven more bikes and their builders, as well as look at a classic Curtis frame that found a new home. Plus, find some insight into why ferrous steel is more environmentally friendly than titanium or stainless steel. If you missed parts one and two, you can find them linked at the bottom of the post under Further Reading.
Craft Titanium Hardtail V1.1 link
Kent, england.
On day one of the show, I ran across James and Chloe of Craft Bikes, a small frame builder from the southeast corner of the UK in Kent, England. The first thing that caught my eye in their booth was the Craft Titanium Hardtail V1.1, as James referred to it. Specifically, my eyes zeroed in on its beautiful 3D-printed headtube, straight tubing, and clean aesthetic. It looked unadorned and austere compared to many of the bikes on display at Bespoked, due in part to a lack of paint, subdued graphics, linear tubes, and inconspicuous welds.
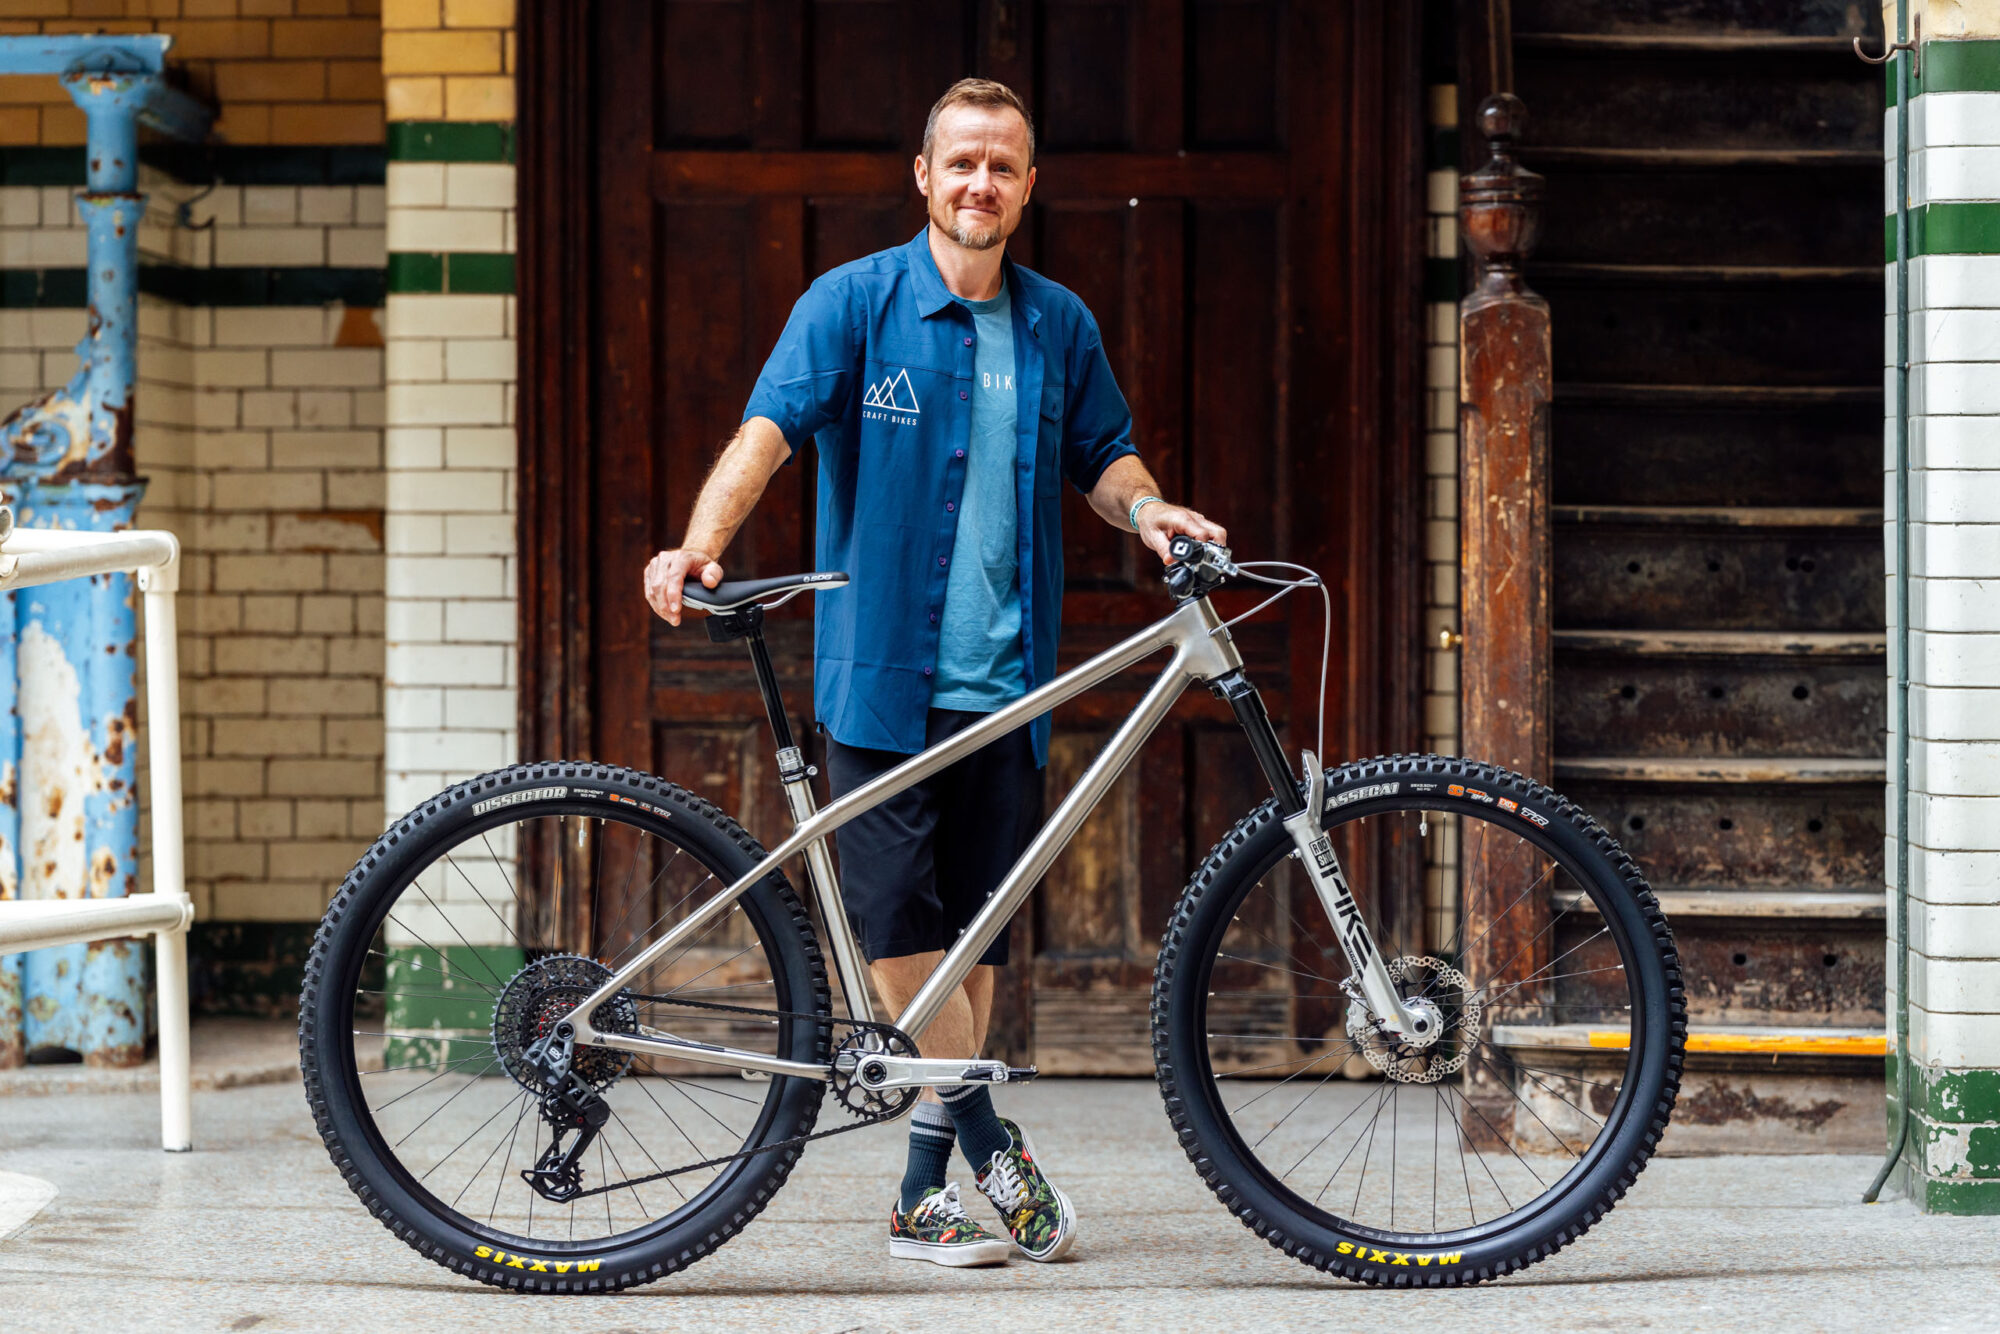
Part of what contributed to those elusive welds is Craft’s use of 3D-printed frame junctions. That included the sleek headtube, upper seat tube and seat stay junction, chainstay yoke, UDH-compatible driveside dropout, rear brake hose port, and the non-driveside rear dropout with an integrated brake caliper mount that allows a rotor up to 200mm and has replaceable bolt sleeves. Each of these parts pushes the welds outward from the junctions, which James explained moves them away from the higher-stress areas.
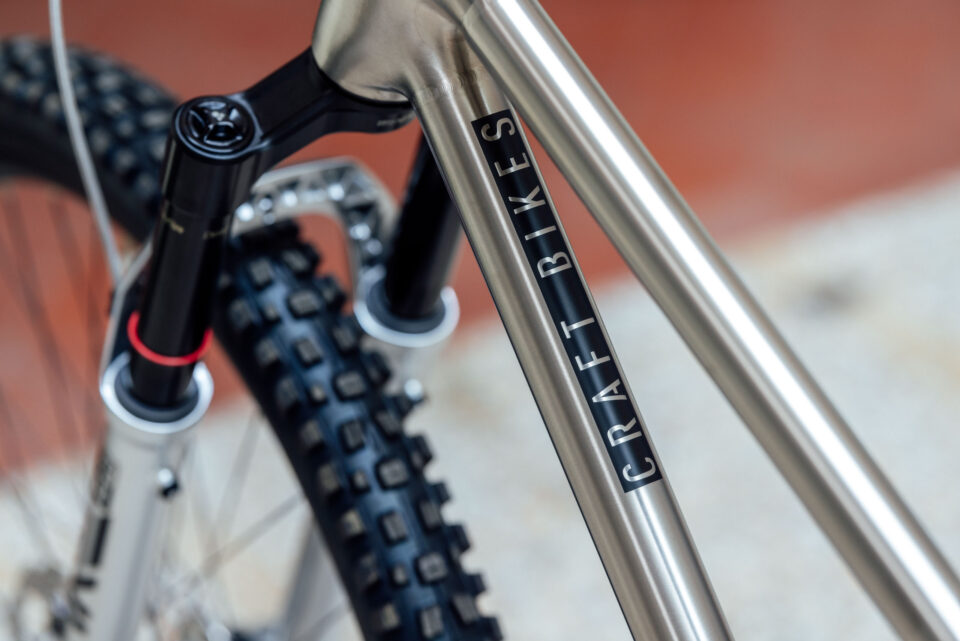
The Craft Titanium Hardtail V1.1 is the magnum opus of James’ frame building efforts thus far. With 25 years of metal fabrication experience, he started building bike frames in 2017. He mentioned that it was born mostly out of curiosity and desire to make something from materials he was familiar with for himself instead of clients. He started making frames from steel, and once he had a couple of years of steel frame building under his belt, he started researching methods and equipment that would allow him to work in titanium, which James admits is what drew him into making bikes in the first place.
“I knew I would need to adjust the process and increase precision and cleanliness, but titanium is next level, which probably suits my obsession with the details,” James explains, “The TIG welding process is quite different to steel, and things like back purging the frames with argon shielding gas are of vital importance… attention to detail is everything.” His description of working with titanium certainly matched the near perfection of the Hardtail V1.1 frame. He also mentioned that this level of detail made them decide to only work in Ti and not mix materials in their small shop. He also described the build process that uses some of their tooling for very tight tube mitering tolerances. I won’t go too far into it, but the level of detail in his description is reflected in the intricacy of the frame.
The Craft Titanium Hardtail V1.1 is made from straight-gauge 3-AL-2.5V (Grade 9) titanium tubing with each of the six additive parts printed from 6-AL- 4V (Grade 5) titanium. This size medium-ish bike has a nice and long backcountry trail geometry with a 1,205mm wheelbase, 60mm BB drop, 450mm reach, 75° seat tube angle, and a 65° headtube angle when measured at 20% sag with a 140mm fork. It clears tires up to 2.5″ in width, but Craft recommends 2.4″ for riding in the mud to allow plenty of room. Accent graphics are painted with Cerakote coating by JMJ Designs.
The Craft Titanium Hardtail V1.1 not only won Best Mountain Bike at the show, but it also was the co-winner of the Peers Choice award alongside Clandestine’s Pinion Carrier, which we featured in part 1 of our coverage. For more on Craft Bikes, check out their website here .
Ted James Pinion Hardtail link
Gloucester, england.
The formidable Ted James, aka SuperTed, got into BMX and skateboarding when he was 14 years old and tried all forms of racing and riding in the years following. In the early 2000s, Ted found a niche within fixed-gear freestyle and was sponsored by Charge Bikes, working with brands like Vans and Fixed Magazine. The now 42-year-old Ted has been going full steam ahead ever since, and recent images capturing bearded Ted mid-air wearing bibs and Vans pretty much fit his vibe.
Like many characters in the bike business, Ted started working as a mechanic in a local bike shop. Through a few twists and turns, including an apprenticeship with Dave Yates for welding and fabrication, Ted began his life-long ramble as a frame maker. Ted started repairing steel frames by fillet-brazing on a homemade jig he cobbled together from a discarded printing press. Later, in 2008, he made his first completely self-built bike frame, a fillet-brazed fixed gear, in collaboration with Fixed Magazine for Vans shoes. Three years later, he began TIG welding, and 10 years ago, he added titanium to his repertoire, which you can see in the off-road touring bike we captured in 2018.
Ted also got into building his own tooling and machining parts along the way, which enabled him to bring some wild ideas to life, such as the 29 Gnar that he showed me a photo of, a hardtail featuring an Alfine internally geared hub built into the frame triangle. “I have tried to tame it down over the years so I can make bikes faster and maybe make some money too, but you can’t suppress the ideas for too long,” Ted told me.

The steel Pinion elevated stay hardtail I photographed has some clever and creative elements, but it’s also not too over the top, “As with most of my builds, it’s a bespoke one-off for a customer, although it’s a design I’d like to offer as a model,” Ted added. “I have one half-built for myself with a slightly different geometry, and I’m thinking about building a titanium version.” In summary, it’s a short-travel hardtail designed to work on a variety of trails and terrain but mainly to tame the trails around Gloucestershire and Wales, where the bike’s owner lives. “Tom mainly rides it on super steep technical track, hence the steep seat tube angle for going up and the slack head angle for descending,” Ted said. “But in the last six months, it’s been in the Italian Alps.” And it’s been dogpacking, as evidenced by this photo that Tom sent Ted mid-ride.

The Pinion hardtail was TIG welded from T45 tubing (similar to 4130 chromoly). “We went with a 44mm headtube for the option of running an angle-adjust headset,” Ted explained. “On mine, I went for an integrated headset design.” It has internal downtube cable routing for the rear brake and dropper seatpost that exit over the top of the gearbox to keep things tidy and provide a clean run into the seat tube for the dropper. The Pinion mounting plates allow the gearbox to slide fore and aft to tension the chain and lock into place. Another eccentricity is the elevated chainstay that offers extra mud clearance, room for up to 3.0″ tires, and the option for belt drive without a splitter in the seat stay.
When I asked Ted what other bikes he had in the works, he mentioned a stainless steel 20″ wheeled tourer with a Rohloff and Gates belt drive, and, “A design I’ve had in my head a while, which was re-ignited from the show, is merging the Pinion hardtail with the high-pivot dual-chain singlespeed downhill bike to create a low-maintenance trail/enduro bike.” As you can see in the photos above, that bike was also a sight to behold.
HEX Components link
North yorkshire, england.
Rounding the corner from Collins Bikeworks, who I wrote about in part two of this coverage, I was mesmerized by the intricate patterns and textures on display at Hex Components, a one-man brand based in North Yorkshire. Founder Ben Tew started the venture about a year ago and now makes 3D-printed top caps, seat post clamps, brake levers, and bar ends. I was pretty smitten with Ben’s creations and had to inquire further.
It seems like common story is that all the best bike gear comes from riders who apply skills and expertise they acquired elsewhere to make things they want for their bikes. That pretty well sums up the story behind Hex Components. Ben has two decades of experience in industrial design and mechanical engineering, including work in everything from experimental aircraft to high-end lighting to sustainable sneakers. Ben’s not new to bikes, either; he recalls his first mountain bike in the 1990s, a Bridgestone MB-1 that he desperately wishes he still had.
Hex started as a personal passion project. Ben had just left a design job where he was regularly using metal 3D printing, and he started making 3D-printed stainless accessories for his trail bike. The motivation was that he wanted parts that were more interesting and aesthetically pleasing than what was available, so he just made them. Ultimately, his friends took notice, and he made more to sell to them.
The process behind these components is pretty interesting. Ben usually starts by sketching ideas and patterns. “I take a lot of inspiration from patterns in nature but also mathematical patterns,” Ben describes, “I then quickly move into 3D modeling, where I like to create several early prototypes on our resin printer to see how the patterns might look.” Once he narrows down the designs, he has them made using SLM (Selective Laser Melting) metal 3D printing in both the USA and France. The stainless parts are finished elsewhere, but Ben hand-finishes the titanium parts in his North Yorkshire workshop.
Ben’s now about a year into Hex Components and has gotten serious about it over the last six months. He started with stainless and titanium top caps that were rather simple and very labor intensive to finish but has since evolved the designs into parts that can be made in small batches and finished at a much higher level. At the same time, he expanded his offerings to include bar ends and seat post collars. Find all the Hex offerings over on their website here .
Olsen Bikes Swan Pinion link
Newhaven, england.
Steve Olsen is another mainstay in the UK frame building scene. Steve made his way through the industry working with several bike brands as a product designer, but he ultimately left to start his own gig and founded Olsen Bikes in 2013. He admitted part of the reason for this move was frustration that bike designs were being driven by marketing decisions and mass market drivetrains.
Influenced by UK mud and rain, Steve started developing bike designs around the Gates Carbondrive. This led onto a tensioning dropout system that works with Pinion, Rohloff, singlespeed, or a derailleur. “Most other countries have adopted the Gates and Pinion for its low maintenance and the fact that it simply keeps you going,” Steve explained. “Derailleur drivetrains are getting more fragile, especially for off-road use in the UK, where mud grit and water is always involved, plus a lot of roads are salted in the winter. We’re being pushed into an open drivetrain system, which is not really solving the biggest problem—it’s open to the elements.” Needless to say, Olsen now builds Pinion/Gates bikes almost exclusively.
This fine specimen is the Swan Pinion, which features a splatter anodizing job as a nod to Klein and a beautiful titanium fork. The Swan is named after Swan Inn in Lewes, a pub just off the South Downs Way (SDW). As a matter of fact, all Olsen bikes are named after pubs along the SDW, paying homage to the fact that they’re based in the foothills of this iconic 100-mile neolithic trade route. “The SDW will kill you on a gravel bike as the flint and chalk is the size of your fist and will give you a battering, so 50mm tyres are a minimum,” Steve described. The SDW has been the inspiration to all of Steve’s bikes.
The frame itself is TIG welded from plain-gauge titanium and has a 3D-printed chainstay and seat stay yokes, which Steve said speeds up production, is more accurate, and allows clearance for tires up to 29 x 3.0″. That beautiful titanium fork is merely a prototype, and it will be replaced on this model with a truss fork.
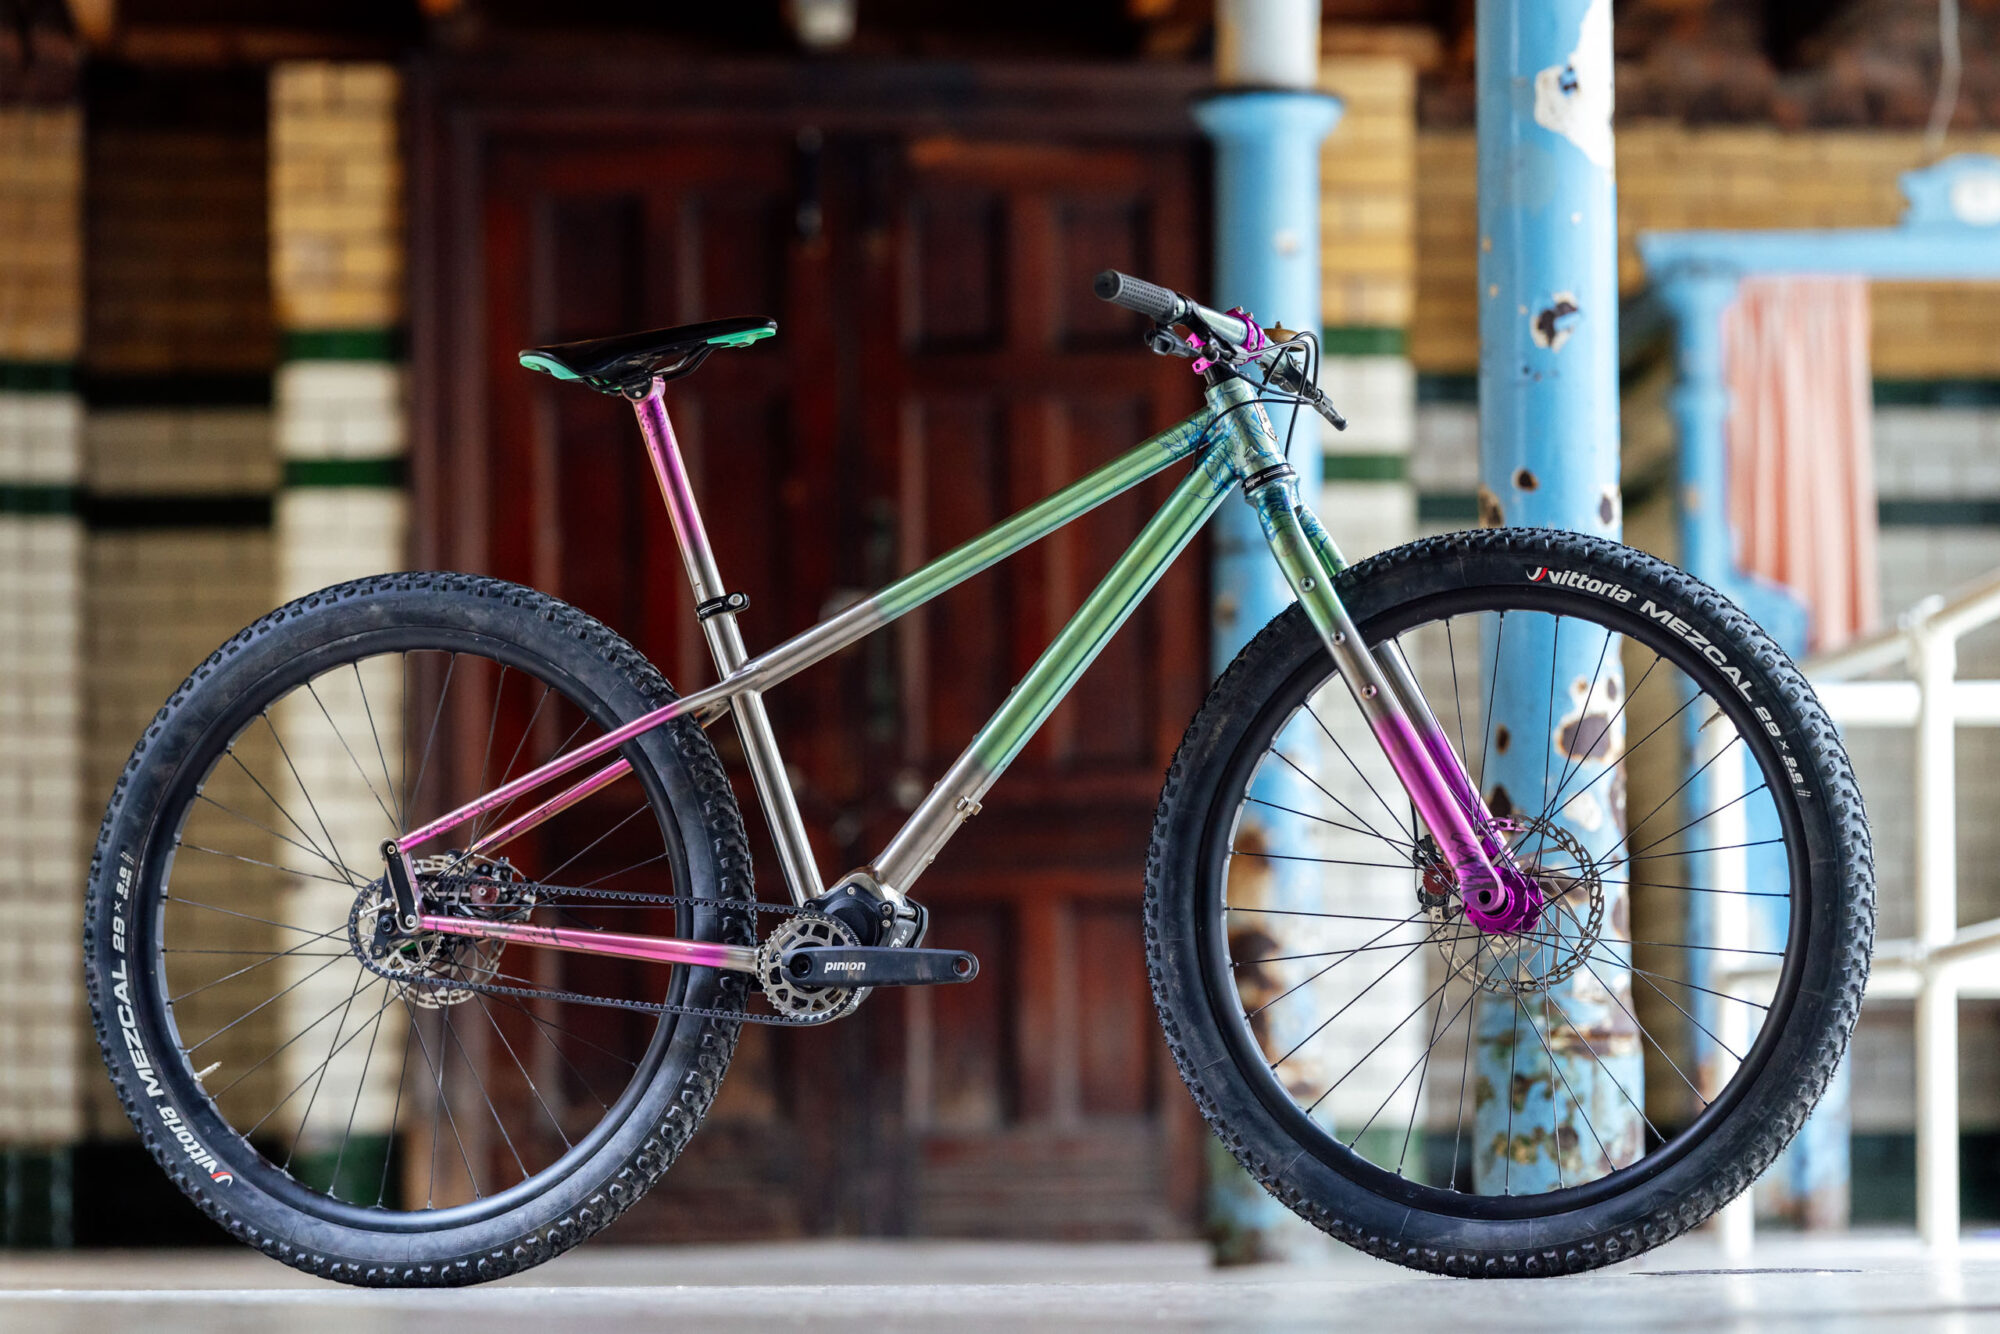
The other bike Olsen had on display was the CargoN. Olsen is looking to focus more and more on urban utility and mobility. He explains, “The UK Cargo Bike market is really small at the moment, however it is growing fast 30-40% each year. We have research from three universities who have worked with the public over the last few years to identify barriers to the market.” Part and parcel, Olsen started the CargoN project two years ago with weekly zoom calls to brainstorm and develop an alternative to the White Van for last-mile deliveries. Their research provided similar findings to the university research, and they combined the two to design and create a modular platform for both commercial couriers and families. “We are trying to resolve all of the barriers to market and think front loaders are the best option for all of us all transition to net-zero,” Steve added. Learn more about that here .
Drust Drop-bar 29er link
Berlin, germany.
Yes, more Drust! If you missed the beautiful Drust Cycles cargo bike in our Eurobike coverage yesterday, be sure to check that out. And for some background on Drust, you can dig into our Field Trip to their Berlin workshop to learn more about frame builder Konstantin Drust and how he got started. In a quick nutshell, he was floating around in life and ultimately washed up at Big Forest Frameworks, where took a class and got hooked. The rest is history, and a lot of exceptionally beautiful bikes have followed. When I approached Konstantin about photographing this particular bike, he modestly said he wasn’t too excited about it. However, I thought it was quite impressive and insisted.
“I guess I would call this bike a monster gravel gravel bike for rough terrain or a drop-bar touring mountain biking,” stated Drust when I asked if it had a name. “It’s a customer’s bike built for traveling on a mix of rough, loose, or sandy terrain.” It has a high stack geometry to give it a comfy perch and steering geometry designed to be ready for more easy trail riding. Bikes like the Salsa Fargo and Tumbleweed Stargazer have proven that there is a demand for bikes like this and people who prefer drop bars, but, “I don’t think this type of bike can truly replace a real mountain bike,” Konstantin added, “In the end, it’s the riders and their skills who decide what’s possible and what isn’t.”
Like almost all of Drust’s creations, it’s fillet brazed with silicone bronze using a oxyacetylene flux brazing set up using mostly mis-cut tubes from earlier mountain bike builds. It has a Reynolds 853 down tube, a Columbus Zona top tube and seat tube, and Dedacai seat and chainstays. The frame has clearance for 29 x 2.6″ tires and a 38-tooth chainring, internal dropper cable routing, and a Syntace 148 x 12 rear axle. The build sports a really nice-looking crankset from Cyber Cranks, the new Seido Boost carbon fork, and Gramm bags, complete with their new fork packs.
Unlike a lot of show bikes, this one’s powder coated instead of finished with wet paint. It has a matte rust color that keeps it pretty subdued but also looks nice in natural light. “I consider powder coating a very good alternative to wet paint,” Drust explains. “I don’t think it can replace it in terms of possibilities, but for bikes which will be well used, powder (if done right) is more durable, cheaper, and more environmental friendly.” But he also mentioned that wet paint offers way more design possibilities.
Currently, Drust has a few new bikes in the works, including working on his cargo bike. He also has a foldable/collapsible bikepacking machine and a cycle-truck in the hopper. “I enjoy building bikes that will be in regular use and not spending their life as a trophy in the garage,” Drust added. “Mainly, what I want to ride myself: bikepacking mountain bikes, utility bikes, cargo bikes, and all the weird stuff.” Find more on at DrustCycles.com , and check him out on Instagram @drustcycles .
Curve Titanosaur link
Melbourne, australia.
Our friends from Curve Cycling were also at Bespoked, which was a cool turn of events based on the final stop in their “UK Bikepacking Tour,” a ride series they put on through England throughout the month of June. It was great to catch up with Ryan, Jimmy, and Gus, and they had a few bikes on display, including a lovely Belgie road bike and the venerable and unmistakeable Titanosaur. Yeah, most of us have already seen the Curve Titanosaur online, but peeping it in person was something else. Plus, the project may have wind in its sails.
Long story short, when Curve ran the numbers on the Titanosaur project, the tooling and costs associated with it were going to require about AU$280,000 ($188,500 USD). The initial crowdfunding campaign, which we shared at the time, only got to about 30% of the target. Curve had planned on fronting 50% of the financing, but there was still uncertainty about interest from the general public. However, there’s renewed interest. As Ryan summed it up, “After five years of bringing this beautiful beast into existence, I think we just ran out of steam, but bringing it over to Europe renewed my enthusiasm, and I think a lot of the team’s enthusiasm for the project… it really captured the imagination of so many who rode it, not only tall riders but also 175-185cm extroverts!”
At this point, Curve needs about 20 confirmed sales with deposits to help complete the tooling needed for the carbon fork, as well as investment in the production run of components that turn the Titanosaur into a complete bike. Obviously, as a small brand, cash flow is king, so that’s part of the stumbling block.
This particular demo model or prototype is essentially a 56cm frame designed for its creator, Dr. Jesse Carlsson (Ph.D. theoretical physics and ultra-endurance phenom), “Don’t tell him I said that. He’s a humble guy but should be celebrated for his contribution to cycling and especially adventure cycling,” Ryan added. “Although, we do have a range of sizes modeled from medium, which would suit a rider from 175cm, all the way up to a XXXL, which would work for a 225cm rider.”
Another hurdle is tires. Most of the tires they’ve tested are good but very heavy at 1.2 kilograms a piece. “I think our dream tire would be anything that resembles a modern gravel or mountain bike tire. The ones that are currently in existence are for unicycles, and the technology there unfortunately isn’t in the same league as what we’ve come to enjoy with modern tubeless tyre technology,” Ryan explained.
Other than the Titanosaur, Curve has a lot going on, including a redesigned Uprock hardtail with sliding dropouts, an update to the Kevin gravel bike, and several expeditions. They’ll be in South Africa, Mongolia, and then Argentina in February 2025. Check out CurveCycling.com to stay in the loop.
Curtis Bikes Singlespeed link
Somerset, england.
Curtis Bikes has been around for a while. Brian Curtis started hand brazing at age 17, and in 1972 at age 31, he was making motorbike frames under the brand Curtis Bikes. He’s been the head brazer for Curtis ever since. Gary Woodhouse came on board in ’79 and persuaded Brian to start making BMX frames as the sport was on the rise. That changed everything and the company pivoted entirely to bicycles. Gary took over the company in ’96, but Brian remained the head brazer. Today, all Curtis frames are made by Gary and Brian using hand cut and shaped tubing, tacked together in a jig, and fillet-brazed by Brian himself. In fact, to this day, every Curtis frame in existence has been brazed by Brian.
I wasn’t sure what the origin of this particular bike was, but I knew I wanted to photograph it when I saw it in the Reynolds booth. The upside down 13 and singlespeed champs shingle was another motivating factor. But truly, those beautifully slim 853 tubes and visible fillet brazing reeled me in. After shooting it, I reached out to the owner Jim Davage to learn more. Jim is a postman and bike mechanic in Somerset who’s been riding for Curtis since the late 90s. This particular frame wasn’t made for Jim, but as he explained, “This early model frame was on the wall in the Curtis workshop for years, and after looking at it for all that time, I asked Gary if I could have it. Luckily for me, he said yes.”
The frame is actually eight or nine years old, but it certainly doesn’t look like it. Jim’s only had is set up as a singlespeed, “I love the simplicity of it… no frills or gimmicks. It’s my go to bike if I want to just go straight out the door and go for a blast, just get on and ride.” Jim’s never raced it, but said he’s, “Very tempted to ride the singlespeed champs though, just for a laugh.”
Steel is Real (by Reynolds) link
Birmingham, england.
Another highlight of Bespoked UK for me was the Talks series lecture by Reynolds General Manager, Martin Shepherd. Martin started this presentation with a history of Reynolds, highlighting how steel fell by the wayside when aluminum and carbon overtook the bike world, and how steel is seeing a resurgence. He then went on to provide a brief history of steel, what makes it special, and how it’s a unique material that can be melted down, endlessly recycled, and made into something else time and again, suggesting that your bike might contain steel once used in an ancient Roman dagger. He then went on to talk about Reynolds’ different tubing types, and the properties each one has. All this was fascinating, but it was their environmental study that I found particularly interesting.

In summary, Reynolds carried out an internal study to assess their carbon footprint and how they could reduce it. In doing so, they also gathered metrics on the different frame tubing they produce to determine how much CO2 is created during the full manufacturing process, including raw material production, inbound logistics, gas and power used during production, and other forms of overhead.

As you can can see in the slide above, ferrous steel (such as Reynolds 525, 725, 853, and 631) is hands down the most environmentally friendly material based on this study, proving to have less of a carbon footprint than their stainless or titanium. The numbers at the bottom of the chart are kilograms of CO2 per frame tube: 1.9kg for ferrous steel, 5.1kg for stainless, and 6.75 for titanium. To put this in terms we could all understand, the final slide compared those emissions to driving a common British automobile: Making the tubes for a single steel frame creates the same amount of CO2 as driving a Range Rover just 32 miles.
Further Reading
Make sure to dig into these related articles for more info...
Bikes and Builders of Bespoked UK 2024 (Part 1)

Bikes and Builders of 2024 Bespoked UK (Part 2)
12 Stunning Bicycles from Bespoked 2023
Bespoked UK: Ted James and his Ti MTB Tourer
Filed in (categories & tags).
Please keep the conversation civil, constructive, and inclusive, or your comment will be removed.
Rad Companies that Support Bikepacking
You need to be logged in to use these features. Click here to login , or start an account if you’re not yet a member of the Bikepacking Collective…
3 WA islands you can get to without a WSF ferry
When standing on the deck of a ferry as the telltale rumble of the engine kicks into gear and the water below begins to churn, I always feel a sense of escapism kick in. The expansive views unencumbered by tiny windows, the chance to gulp fresh saltwater air and the simple freedom to walk around something far more spacious than an airplane, train or car all contribute to the thrill.
Unfortunately, Washington State Ferries have seen better days . Chronic delays, short staffing, underfunding, deferred maintenance and broken-down vessels have all made ferry trips become less the stuff of romance and more the stuff of annoyance. While there are signs that the agency’s leadership is working to right the ship , WSF is still years away from resuming normal service .
Even when state ferries were running more smoothly, summertime gets extremely busy. Routes that take reservations like the San Juan Islands and Port Townsend-Coupeville require planning well in advance to secure your preferred time slot. Crossings from Kingston to Edmonds or Bainbridge Island to Seattle can see multihour waits at the dock during peak times.
PNW travel ideas and itineraries for 2024
- Why Richmond, B.C., is the dim sum capital of North America
- 4 floatplane destinations for your summer getaway
- Soak in 5 Canadian hot springs on 1 epic road trip from Seattle
- 5 best day trips from Seattle, chosen by our food and film critics
- 8 unique PNW lodges, from historic hotels to restful resorts
- WA’s 10 most popular state parks in 2023 — plus some hidden gems
- Visiting Mount Hood this summer? Here’s where to stop on the way
Below, find a primer on Western Washington’s lesser-known and less-of-a-hassle ferries. They are run by county governments — and so less prone to the systemwide issues plaguing WSF. While the crossings are shorter and the destinations are smaller, the end result is the same: whether for a few hours or a few days, an island getaway.
Anderson Island : South Sound island life
Make your way to Steilacoom, where Pierce County operates a model ferry route in miniature: a two-boat service boasting a 100% on-time percentage and no canceled sailings, according to county data. (Some residents, however, dispute Pierce County’s on-time performance claims.) Both the MV Steilacoom II and MV Christine Anderson hold 54 cars for the 20-minute crossing. When the mountain is out, she looms large in all her glory — this ferry ride is the closest one in Washington to Mount Rainier.
You can drive Anderson Island from end to end in about 10 minutes, but there are several worthy stops along the way. The Johnson Farm , established in 1896, is a preserved slice of frontier-era Puget Sound currently operated by the Anderson Island Historical Society (free, open Saturdays 10 a.m.-4 p.m. and Sundays 12-4 p.m.).
Make your way to Jacob’s Point Park for a 2.5-mile forested loop hike that includes several viewpoints and beach access. Don’t miss the spur trail to see the remnants of a brickyard that once helped Seattle rebuild after the Great Fire of 1889, and the interpretive signs about Peter Puget’s landfall here in 1792. Afterward, change into your bathing suit and dive into Florence Lake at the Old Swimming Hole in Lowell Johnson Park (free but limited to 15 cars, no groups over 10 permitted).
Adjacent to the general store in case you forget any essentials, the Anderson Island Café serves up passable comfort food — on a recent visit I tried fish and chips and beef stroganoff — as well as coffee and ice cream (salads, burgers, entrees $13-18). For more elevated fare, try the Riviera Lakeside Restaurant (lunch and dinner items $14-$27).
Getting there: Peak-season car and driver round-trip fares start at $30.75 depending on vehicle length (from $25.75 for ages 65 and older or with disability permit). Additional or walk-on/bicycle passengers $7.50 for ages 19 and up, $4 for ages 65 and up. There are 13 sailings Saturdays, 14 sailings Tuesday-Thursday, 17 sailings Sundays, 18 sailings Fridays and Mondays. See schedule and buy tickets at piercecountywa.gov/1793/ferry .
Guemes Island: The other Anacortes ferry
Driving to Anacortes can be a borderline stressful experience when a WSF trip to the San Juans is on the line. Didn’t make it through the toll booth 30 minutes before your scheduled sailing? Tough luck, you’ve lost that reservation booked sometimes months in advance. There is, however, another ferry terminal in Anacortes that will not send your blood pressure spiking on a hot summer day: the Skagit County-run Guemes Island Ferry, smack dab in the heart of the small city.
The five-minute crossing on the M/V Guemes transports up to 21 vehicles and 99 passengers to Fidalgo Island’s quieter cousin. While the topography is a bit less rugged than the island you left behind, spare an hour for the 2.5 mile round-trip hike to the 688-foot Guemes Mountain . The summit rewards with panoramic views across to the San Juan Islands, Mount Baker and the North Cascades. Bring a bike for a casual 10-plus mile jaunt around the sleepy island, where cars are likely to number in the dozens, at most.
At the northern tip, beachcomb at Young’s Park and contemplate staying the night at neighboring Guemes Island Resort , which offers more than a dozen and a half cabins, cottages, tiny houses and yurts (from $166 per night, two-night minimum). The resort has a sauna, kayaks, paddleboards, aluminum rowboats, and clamming and crabbing gear for guest use.
When you get peckish, the Guemes Island General Store — immediately next to the ferry terminal — embraces its Skagit Valley terroir by sourcing local and organic cheese, meat and produce to bake in-house bread and serve up farm-fresh salads, sandwiches, burgers, soup and fish (9 a.m.-7 p.m. daily for groceries, full menu noon-3 p.m. Wednesdays and noon-8 p.m. Thursday through Sunday). On weekends, the store regularly hosts live music from piano to rock ‘n’ roll, country to reggae.
Getting there: Peak-season car and driver round-trip fares start at $16.75 depending on vehicle length (from $13.50 for ages 65 and older or with disability permit). Additional or walk-on passengers $5.50 for ages 19 and older, $3.25 for ages 65 and older. Bicycle and rider $6.75 for ages 19 and up, $4.50 for ages 65 and older or disabled. There are 20 sailings Monday to Thursday, 19 sailings on Saturdays, 17 sailings on Sundays. See schedule at guemesislandferry .com .
Lummi Island: a five-minute trip to the San Juans
Tell your friends you traveled to the San Juans in five minutes from the mainland and they might wonder if you somehow found a supersonic seaplane . But Lummi Island is both very much part of the San Juan Island chain and very much only a five-minute sailing from the Lummi Reservation north of Bellingham. (To be fair, Guemes is also part of the San Juan archipelago, so this parlor trick equally applies.)
The M/V Whatcom Chief zips back and forth ferrying 20 vehicles and 100 passengers, though a new electric ferry is on the horizon thanks to $25 million from the federal Department of Transportation. There are also plans to electrify the Guemes route , although the state’s $14 million allocation for a new boat will be in jeopardy if voters choose to repeal the Climate Commitment Act this November.
As my colleague Bethany Jean Clement ably chronicled on a summer visit nine years ago , Lummi Island has about five fun things to do — but that doesn’t make it any less charming. Her list included seafood at the Beach Store Cafe (chowder $13), biking the quiet roads or hiking the Lummi Island Heritage Trust preserves , hunting down an ancient petroglyph on Sunset Beach, taking a contemplative stroll in the Lummi Island Congregational Church labyrinth or at Windy Hill Sculpture Park , and touring Nettles Farm . All of these attractions persist even after the demise of the globally lauded Willows Inn , one of the destination dining establishments that inspired the dark restaurant satire “ The Menu .”
To Bethany’s list I would add one more for aspiring Robinson Crusoes: Paddle five miles from the ferry terminal to the southern end of the island where the Department of Natural Resources manages 661 acres of conservation land. Clinging to the steep headlands — at points, Lummi rises a dramatic 1,500 feet from sea level — are five boat-only campsites maintained by the Whatcom Association of Kayak Enthusiasts. At night, Bellingham’s lights twinkle in the distance, but nestled in a cove surrounded by ferns and forest, the campsites feel like you’re a castaway by choice.
Getting there: Car and driver round-trip $15 for vehicles under 11,000 pounds. Additional or walk-on and bicycle passengers $8 for ages 19 and older. There are 36 sailings Monday to Friday, 19 sailings on Saturdays, 18 sailings on Sundays. See schedule at lummi-island.com/ferry .
Editor’s note: This story has been updated to correct the round-trip cost for a driver to bring their vehicle on the Lummi Island ferry, and to note that some Anderson Island residents dispute Pierce County data regarding its ferries’ on-time performance.
Most Read Life Stories
- Why these tourists don't want anyone to know they're American
- Answers to your questions on multivitamins, Mediterranean diet and more
- Best pizza in Seattle? Vote here to support your favorite slice
- Great Wolf Lodge completes $40M renovation of Centralia-area resort
- 10 great summer travel ideas from Seattle for 2024
The opinions expressed in reader comments are those of the author only and do not reflect the opinions of The Seattle Times.
Browser not supported
This probably isn't the experience you were expecting. Internet Explorer isn't supported on Uber.com. Try switching to a different browser to view our site.
Home > Ride > Airports > GFK > Car service
Request a car to or from Grand Forks International Airport
Tell us about your trip, and we’ll let you know what your best options are for getting to or from the airport.
Car service and transportation options at Grand Forks International Airport (GFK)
Get to and from the airport with the Uber app. Choose from various ride options. Avoid crowded and slow airport shuttles, and make your connection if you need to transfer between airports.
Average travel time to/from Grand Forks
Average price to/from grand forks, average distance to/from grand forks, uber takes the stress out of airport pickups and dropoffs.
Instead of waiting in a long line at the taxi stand, you can request a trip now. Whether you’re flying out of or just landing, Uber provides access to vehicles for several passengers (and luggage). Get started now to see your available options.
Car service options for airport travel
Get directions to your ride.
Already scheduled your ride? Open the Uber app for accurate step-by-step directions to meet your driver outside.
Top questions about GFK car service
Wait times depend on demand in the area, traffic conditions, the type of ride you request, and other factors. We recommend checking the booking screen for estimated pickup times.
We recommend getting to the airport 3 hours early for international travel. Be sure to check estimated travel times when you request your pickup so that you get to the airport on time.
The grace period for you to meet your driver depends on the ride option you choose. For UberX, Uber Comfort, and UberXL, you can avoid wait time fees by meeting your driver within 2 minutes of their arrival. For Uber Black, Uber Black SUV, Uber Premier, and Uber Premier SUV, you will have 5 minutes to get to the vehicle. You will be assessed per-minute wait time fees beyond that. Riders with a disability can request a wait time fee waiver. Get more information here.
If you’re unfamiliar with the layout of the airport or where the rideshare pickup point is, we recommend requesting a ride when you’re closer to exiting the arrivals gate.
The luggage capacity varies by Uber ride type. For example, an UberX ride can usually hold 2 suitcases while an UberXL ride can usually hold 3 suitcases.**
The availability of ride options will vary by time of day, region, and airport guidelines. The best way to get an accurate list is by searching for a ride in the Uber app.
All drivers using the Uber app get background checks, and their vehicles undergo inspection. In addition, drivers and their vehicles must adhere to city and airport-specific airport operating procedures and regulatory guidelines. If you have any safety concerns, please visit our safety page .
By law, small children are required to be in a car seat. Get more information about our safety policies .
Service animals are allowed, and Uber app drivers may not refuse a trip because of the presence of one. For pets, however, it’s recommended that you select Uber Pet when choosing your ride option. Otherwise, it is up to the discretion of the driver; once a driver is assigned, you can message them in the app to make sure. Get more information on animal-related policies .
*Luggage space is not guaranteed and depends on the number of passengers in your ride and the type of vehicle. Once you’re matched with a driver, we recommend contacting them through the app to confirm.
- Our offerings
- How Uber works
- Diversity, equity, and inclusion
- Sustainability
- Investor relations
Sign up to drive & deliver
Create a rider account, order delivery with uber eats, sign up for uber for business, sign in to drive & deliver, sign in to ride, sign in to order delivery with uber eats, sign in to your uber for business account, drive & deliver, ride with uber, uber for business, manage account.
- Car front Ride
- Steering wheel Drive
- Restaurant Eat
- Wine Restaurants
- Truck Freight
- Bike jump Bike & scoot
- Train , Transit
- Briefcase Business
- Money Money

IMAGES
VIDEO
COMMENTS
We recommend that a trail fork ideally have 34mm stanchions, at 130-140mm, for a 29er - possibly, up to 150mm, for the smaller 27.5in wheel size. As fork travel increases with trail bikes, the latitude of responsiveness from your damper becomes more complex. You will see premium trail bike forks offering high- and low-speed compression ...
In case you're new to riding, mountain bike suspension travel is a measurement of how much a wheel can move to absorb bumps. On the front, mountain bike travel comes from your suspension fork. At the rear, MTB travel is provided by some configuration of frame pivots that compress a rear shock. Going big is easier on my 150mm enduro bike.
The maximum vertical movement of the fork. Longer travel means your fork can eat up bigger hits without barfing control or breaking your wrists, but that also means more weight. That's why downhill forks run 200-220mm of travel, but lightweight cross-country forks run 100-120mm. Travel adjust. The ability to change the travel of the fork.
How much suspension travel do I need on my mountain bike? | BikeRadar.
Travel is simply the maximum distance that either the front or rear suspension of the Mountain Bike can compress, when absorbing force, before bottoming out. The higher the travel the more force the suspension can comfortably absorb. The lower amount of travel the lower amount of force absorbed. Specialized FSR Suspension.
A bicycle fork is a part of the bicycle on which the front wheel is mounted and which is turned via handlebars in order to steer the bicycle. Bicycle fork. It consists of a steerer tube, crown and fork legs and dropout for receiving wheel axle. It usually has brake mounts as well. Fork parts.
Moreover, 200mm-travel forks on some of the best downhill bikes have a dual-crown design to increase stiffness for the extreme demands of this discipline. Front travel - Front travel is the distance the wheel moves when the fork reaches full compression. Wheel travel and fork travel are equal. Lowers - The outer tubes into which the ...
Mountain bike fork anatomy. The above diagram identifies the basic components that make up a mountain bike fork. The main focus for this guide is the stanchions. The amount of travel can be thought of as the amount of exposed stanchion. Stanchion diameter also affects weight, stiffness, and performance.
A general rule of thumb is to set the travel to about 25-30% of the fork's total length. For example, if your fork has a total length of 100mm, you should set the travel to around 25-30mm. Bike suspension systems, including suspension forks, are designed to work best when properly lubricated and clean.
Can You Increase Fork Travel? Travel is the most important feature to consider when changing forks. Ideally, you should keep the same travel distance your bike came with. You probably already know there are several commonly used suspension travel distances for all the bike types but here are the examples. XC/Cross country - 100-120mm of travel
As a rough estimate, each 20mm of travel added will correlate to a one-degree difference in the head tube angle. Instead of the stock 150mm fork, I opted for a 160mm Pike on this Giant Trance Advanced frame build. [offer keyword='ROCKSHOX PIKE'] Similarly, the wheelbase of the bike will increase, and the bottom bracket will be raised slightly.
Firstly is how much travel your bike is designed to be used with, this is important as a fork that is too long or short will upset a bike geometry. Secondly the type of riding you are planning on doing, for example there are a number of forks that cross over around the 160mm mark, some are more trail orientated while others are enduro focussed.
This can almost always be determined by the travel of the fork. If you've got 80-100mm travel, odds are you've got an XC bike or general light trail bike; 120mm-140mm, you've got a modern-day trail bike; 150-170mm, it's probably a modern-day enduro bike; and 200mm, you've most likely got a downhill bike. You always want to keep the ...
Less common, is dropping your travel down 10mm. Sometimes people do this to steepen the headtube angle, shorten the wheelbase, or just have a lower front end. Dropping 10mm will do the same but it will steepen your headtube angle about .4 degrees, but it will also drop your bottom bracket height as well.
Bikes like the Transition Sentinel (of course) spec a reduced 43mm offset. The 162mm travel Pivot Firebird 29 and Yeti SB150 debuted last year are sold with a 44mm offset. Another interesting bike to mention is the 27.5+ Whyte 901. The hardtail has a 64.5-deg. head angle, and a very short 37mm fork offset to compensate how far the wheel is in ...
Downhill bikes usually have fork travel of 160mm+ so they can handle the challenging terrain at high speeds, which makes 80mm forks mostly unsuitable, and dangerous for downhill riding. In fact, most bikes with such short fork travel are usually trekking hybrids, which don't have the structural strength to be exposed to such forces. ...
In mountain biking, this is one of the most common modifications downhill-focused riders make to customize their bikes. When overforking, many riders will increase their fork travel by 10-20mm. This has a few key benefits: As a general rule, every 10mm change in fork travel leads to a 0.5-degree change in head angle.
Axle size: The fork end must fit the front wheel's hub and axle. Suppose the suspension fork's installation length deviates from the axle size. The standard size for thru-axle forks on mountain bikes is 15mm x 100mm or 15mm x 110mm with 20mm x 110mm also. They are used mainly on downhill and freeride bikes.
Best mountain bike suspension forks 2024 | Top-rated MTB forks and buyer's guide. We put the most popular mountain bike suspension forks head-to-head in a gruelling test to find out which are ...
aireeek. • 8 yr. ago. Danger: there shouldn't be any danger, your frame won't imminently fail because you went with a slightly longer fork. Consequences: you will slacken out your head angle, bump up your bb height, shorter your reach, slacken out your seat tube angle. The higher bb should help with your pedal strikes.
To reduce travel , you simply add donuts to the plunger on the left leg. I don't think you even need to take the whole fork apart to do this, but I was changing legs too. Tech manuals and instructions are readily available at the SRAM website. No donuts = 120mm, 2 donuts = 100mm, 4 donuts = 80mm, etc.
Frame manufacturers design a frame according to a certain axle to crown height, and usually a bike using a fork within plus or minus 15-20mm of that will handle the same way it should. Also, usually, the manufacturers assume that most forks in the same travel as the fork they designed the bike around have approximately the same axle-to-crown ...
The outgoing Stumpjumper line consisted of two bikes: the Stumpjumper with 130mm rear travel (with a single pivot/flex stay design) mated to a 140mm fork and the Stumpjumper Evo with 150mm rear ...
FORBIDDEN DRUID. Forbidden Bikes took their highly successful first-generation Druid and made it even better for the second generation.Built to be a modern and capable carbon trail bike, it is designed around 135mm of frame travel with their high-pivot Trifecta suspension system and a 150mm fork, with either dual 29-inch or mixed wheels.
The fork has internal dynamo and brake routing, three-pack mounts, a 483mm axle-to-crown, and is backward compatible with all Cutthroat frames. ... news, and events that make our community thrive. We believe travel by bicycle has the power to encourage conservation, inclusivity, and respect for all people and cultures.
The first bike that will be released later this year is Victor, an evolution of Project12's successful XC+ bike. Victor looks like a great bikepacking bike featuring 99mm (or less) of rear travel, a 130mm fork, and progressive downcountry geometry.
This size medium-ish bike has a nice and long backcountry trail geometry with a 1,205mm wheelbase, 60mm BB drop, 450mm reach, 75° seat tube angle, and a 65° headtube angle when measured at 20% sag with a 140mm fork. It clears tires up to 2.5″ in width, but Craft recommends 2.4″ for riding in the mud to allow plenty of room.
Six Forks Station Apartments apartment community at 8501 New Brunswick Ln, offers units from 780-1430 sqft, a Pet-friendly, In-unit dryer, and In-unit washer. ... Travel times. Walk, Transit & Bike Scores. Walk Score ® 68 / 100 (Somewhat Walkable) Transit Score ® 26 / 100 (Some Transit) Bike Score ...
PNW travel ideas and itineraries for 2024. Why Richmond, B.C., is the dim sum capital of North America; ... Bicycle and rider $6.75 for ages 19 and up, $4.50 for ages 65 and older or disabled ...
Average travel time to/from Grand Forks. 13 minutes. Average price to/from Grand Forks. $19. Average distance to/from Grand Forks. ... We recommend getting to the airport 3 hours early for international travel. Be sure to check estimated travel times when you request your pickup so that you get to the airport on time. ... Bike & scoot, Transit