
Travel Trailer Setup Checklist: Setting Up an RV Campsite for Beginners

As an Amazon Associate, we earn from qualifying purchases. We also earn from other affiliate websites. See our full disclaimer .

When setting up your RV travel trailer as a beginner, it’s essential to take your time and do it correctly. You don’t want to rush through the setup procedure and wind up with an RV that isn’t set up safely or prepared for an enjoyable camping experience.
We’ll cover everything you need to know – from unhitching the trailer to RV hookups, and give some helpful tips that took us a while to learn!
Below we’ll take you through a step-by-step travel trailer setup, so you are fully prepared to take your RV to a campsite. You can also download our travel trailer setup checklist below.
Arriving at Your Campsite
The first thing you want to do before pulling into a site is to inspect it. If you can choose your spot, drive around until you find one that suits you and ask yourself these three questions.

- Is it level?
- Does it have any obstructions for backing in, putting out the awning or slide outs, or using the solar panels?
- Where are the hookups?
You can usually inspect the site from the driver’s seat on a flat, pull-through, concrete pad campsite. However, getting out and surveying the area on foot is best for anything more complicated. We still follow this process at almost every site. It doesn’t pay to be in a rush.
Let’s break down what to look for when answering the above questions.
Is the Campsite Level?
Picture where your RV camper will be in your mind. Take note of sloping and where you might need leveling blocks. Look for bumps and dips to avoid. If a campsite is too crooked, it may be best to drive on or ask the campground if you can be reassigned to a different spot.
Obstructions
Trees, large rocks, camping tables, hookup pedestals, or any other obstructions make it hard to get into a site and can damage slide-outs and awnings. Trees cast shade that can help keep an RV cool but also significantly reduce the output of solar panels and dirty the RV’s roof.
Hookup Locations
Ideally, a campsite will have water, electrical, and sewer hookups on the driver’s side of the RV centrally located where you will park. The passenger’s side is left with room to set up camping gear.
In reality, there isn’t consistency with hookup layouts between campgrounds or even campsites within some campgrounds. Sometimes the hookups can be spread out so far that extra hoses or electrical extensions are needed. We have experienced campgrounds with water and electricity on the driver’s side and the sewer right in the living space on the passenger side.
Try to line up the RV’s sewer connection with the campsite’s. Sewer hoses tend to be the shortest hookups and the most cumbersome to set up. Bends in sewer hoses accumulate particulates and make them harder to keep clean.
RV Leveling and Unhitching
Once you’ve pulled or backed into your campsite, it is time to continue the RV checklist by leveling.
A device like the Levelmate Pro can speed up the leveling process by telling you exactly how many inches one side needs to be raised in real-time, but an RV level or a level from your toolkit can do the job with some patience.
Leveling Side to Side
If you have a towable RV such as a fifth wheel or travel trailer, it is crucial to level the rig side to side across the wheelbase before unhitching.

Looking at your leveling device, determine which side needs to be lifted, and place a lifting device such as Lynx Levelers or an Anderson Leveler under the downhill wheels.
Pulling the RV onto Levelers in 3 Steps
- Ensure your vehicle has its parking brake on before getting under the tires.
- Pull forward or reverse onto the leveler slowly. (This is where a spotter comes in handy to let you know when you are on the blocks.)
- Check your level and add or remove blocks until level.
Chock Wheels
Before unhitching, it is imperative to place wheel chocks under the RV wheels. The potential of an accident from a moving RV is not worth skipping this step that only takes a few seconds.

The heavy-duty rubber chocks are more sturdy and grip well. Two sets are recommended on extreme slopes or wet/soft ground conditions.
Unhitch RV and Level Front to Back
Now that your RV is level side to side, it is OK to unhitch the RV from the tow vehicle. Follow these five steps to unhitch and finish leveling your travel trailer.

- Extend the tongue jack until pressure begins to be taken off the hitch ball. (Use a tongue jack stand or support block to protect the pad of your jack and reduce the amount of extension required.)
- Unplug the 7-pin electrical connector.
- Remove all equipped weight distribution or sway stopping devices, emergency breakaway brakes, and safety chains.
- Release the hitch ball lever and extend the tongue jack until the tow vehicle can be safely pulled forward.
- Using your leveler again, extend or retract the tongue jack until the RV is level front to back.
Put Down Stabilizers
When level, the stabilizer jacks (sometimes called scissor jacks) are extended to reduce the rocking that occurs in RVs from walking, wind, and other shaking. Stabilizers minimize strain on the frame of an RV when a slide out is moved in or out. Always put the stabilizers down before putting the slide out.

It is important to note that these are not the same as the automatic leveling systems in some motorhomes. If the stabilizer jacks are lifting the RV, you risk damaging the jacks and the RV. Stabilizing jacks support the RV by being pressed firmly to the ground, and no more.
Many RVs come with electric stabilizers that can be raised or extended with a switch. Manual jacks use a turn handle, but this drill adapter makes it less strenuous and speeds up the process. Jack pads are recommended to keep jacks from sinking and reduce exposure to dirt and moisture.
Connect Power
The electrical power cord is usually the first on the list to get attached. Often the slide needs to go out, or the air conditioning needs to come on. Plugging into electrical keeps those bigger loads from hitting the batteries.

Your RV will require 30 or 50 amp service, but the campground may not have a site with your particular circuit. The good news is that an adapter easily connects a 30 amp plug to a 50 amp outlet or a 50 amp to a 30 amp , allowing you to stay in any available electrical spots.
Using a Surge Protector
You also will want to protect your RV from electrical disturbances with an RV surge protector. There are several types of surge protectors. A basic model surge protector plugs into the power pedestal and is the most affordable. Other versions of surge protectors are installed permanently in the RV , so you don’t need to set up anything at camp.
The pedestal’s breaker should be off until the RV is plugged in securely. Once the breaker is on, the surge protector will take a few seconds to examine the incoming power for problems like bad wiring before allowing electricity to flow. If there is a problem, the surge protector will display an error code and block the electricity.
Connect Water
If your site has a water spicket, a hose can plug directly into the RVs city water inlet or fill up the water tank. Use a hose rated for drinking water . Green water hoses have dangerous chemicals like lead, so skip those.
High water pressure can burst an RVs plumbing. Protect your RV with a water pressure regulator . A basic one does the job but can leave you with poor water flow. An adjustable water regulator set around 45 PSI protects most RVs and keeps the shower flowing nicely.
PRO TIP: Adding a Y-adapter at the spicket is a good tip for several reasons. One, it gives you a place to quickly wash your hands or hook up a black tank flush hose. Second, the lever is much more convenient to turn off and on when filling the water tank.
Water filtration.
Water filtration is a big topic and can be approached in many different ways. At a minimum, protect yourself with an inline one-micron water filter to reduce harmful contaminants, reduce odor and improve the taste. Add a pre-filter for two-stage filtration to reduce sediment, rust, and other particulates.
Advanced Water Filtering
It is debated if water passed through only inline filters is suitable for drinking. There are more advanced and expensive water purification systems if you plan to regularly drink from the RV water tap.

- If you have the countertop space, many people swear by the Berkey system .
- Advanced water filtration systems that can be installed in storage areas are available from companies like Clearsource .
- Acuva systems use UV light to kill bacteria and viruses and are more compact and mount under the sink.
Connect Sewer Hose
Connecting the sewer at arrival can be a convenient way to dump as needed. If your sewer connection significantly intrudes on another camping spot, try to be courteous and wait until you’re not disturbing your neighbor. A pair of waterproof gloves is recommended to use while setting up your sewer connection.

Setting Up the Sewer Hose Support
Use a sewer hose support to slope away from the RV to keep things moving and prevent build-up in the sewer hose. Lay out the support evenly, avoiding low spots and turns in the hose to make things clean when it comes time to disconnect.
Connecting the Hose
Attach the hose to the RV first, then lay the hose across the support. Remove the cap from the ground drain, quickly screw a clear elbow adapter into the threads that held the cap, and connect your hose to the adapter.
You’re ready to dump your tanks!
READ NEXT: For a complete list of travel trailer equipment to outfit your RV for travel, check out this list of travel trailer must-haves .
Finish setting up your camper trailer.
There may be items specific to your RV to complete your setup. You may have a slide that needs to come out, a satellite TV to set up, or an internet antenna.
Make your RV campsite setup feel like home with tables, chairs, lights, etc.
If you use your RV’s stove, you’ll also need to open the exhaust vent cover outside the RV.
We hope this guide and checklist will help you feel confident setting up your site. Now, sit back, relax, and enjoy your campsite, knowing it is ready to go!
Want more beginner tips on RVing and how to get started?
Check out our guide to preparing for full-time RV living, including info on choosing an RV, pros and cons of the lifestyle, RV gear lists, downsizing for RV life, and more.
Like this post? Save it on Pinterest for later.

Morgan, the founder of The Home That Roams, has been living nomadically for over five years. She began her journey traveling across the U.S. in a motorhome and cruising on a liveaboard sailing catamaran. Currently, she lives full-time in a travel trailer, sharing resources on RV living and boat life to help others downsize their lives and thrive in an alternative lifestyle.
Leave a Reply Cancel reply
Your email address will not be published. Required fields are marked *
Sign Me Up!
Learn how to live in an rv.
Get weekly tips on how to start traveling full-time in an RV.
View our privacy policy .
Privacy Overview
Ultimate RV Setup Checklist (Printable PDF)
Read this page without ads! Go Ad-Free
Our comprehensive RV setup checklist will guide you step-by-step, ensuring a seamless arrival and setup at your campground.
Tip : Download our Printable RV Arrival & Departure checklists and check off each of these steps as you complete them for a stress-free setup and teardown – no WIFI needed!
Arrival at Your Chosen Campground
Upon reaching your destination, follow these steps:
- Check-In and Get Your Campsite Number : Register at the campground office and get your assigned campsite number.
- Use Discount if Possible : If you have memberships with RV clubs like Good Sam, take advantage of these offered discounts.
- Confirm Campsite Has All Requested Amenities : Double-check that your site is equipped with the amenities you need for your stay, such as electricity, water, and sewage connections.
- Get a Map and Rules List for the Campground : Familiarize yourself with the campground layout and its regulations to ensure a smooth and respectful stay.
- Inquire About Points of Interest in the Area : Ask about local attractions, hikes, or events to make the most of your trip.
Arrival at Your Designated Campsite
Once at your site, run down this campsite setup checklist:
- Visually Confirm Site Has Needed Amenities : Do a quick visual survey of your campsite to ensure it’s equipped with all the necessary facilities, like power or sewage hookups.
- Plan Your Entry Path : Plan how you’ll maneuver your RV into position, be it pull-through or back-in.
- Inspect Campsite for Hazards or Obstructions : Check for potential obstacles like tree branches or rocks that could interfere with parking or setup.
- Park Your RV : Position your RV on the site, allowing enough room for slideouts and the awning. Be sure to keep kids and pets in your vehicle when you park, use a spotter to help guide you safely, and take it slow!
- Turn on Your Emergency Brakes if Driving a Motorhome : Secure your vehicle by engaging the emergency brakes.
- Check to Make Sure You Can Reach Hookups : Verify that your RV’s cords and hoses can comfortably reach the site’s water, electrical, and, if applicable, sewer hookups.
- Level RV : Use leveling blocks or your RV’s built-in leveling system to ensure a stable and even living area.
- Connect to Shore Power : Plug in your electrical cord to the site’s power supply to run your RV’s electrical systems.
- Connect Water Lines : Hook up your water lines to access fresh water.
- Connect Sewer Hose : Attach your sewer hose to properly manage waste.
- Turn on the Propane : Turn on your propane supply to power your gas-powered appliances.
- Roll Out Awning : Unroll your awning, taking care to secure it safely.
- Lower Handrails and Entry Steps : Ensure safe entry and exit by lowering the handrails and steps.
- Campsite Setup : Arrange your outdoor furniture and accessories to create your perfect outdoor living space.
Unhitching (If Applicable)
- Chock Tires : Secure your RV from moving unintentionally by placing chocks around the tires.
- Put Support Blocks Down & Lower Jacks : Establish further stability by using support blocks and lowering the RV’s jacks.
- Disconnect the Electrical Cord from the Tow Vehicle : Detach the electrical connection from the tow vehicle to the RV.
- Disconnect the Breakaway Cable from the Tow Vehicle : Unhook the safety breakaway cable from your tow vehicle.
- Unhitch RV : Detach the RV from the tow vehicle.
Now, let’s prepare the inside of your RV:
- Extend Slideouts : Extend any slideouts your RV has to increase living space.
- Turn on the RV Refrigerator : Start cooling your refrigerator to store food safely.
- Turn on A/C or Heater : Based on weather conditions, turn on either the A/C or heater to maintain a comfortable temperature.
- Open Roof Vents : Promote good air circulation by opening your roof vents.
- Light Pilot on the Oven : If your stove has a pilot light, make sure it’s lit and ready for cooking.
- Turn on the Water Heater : Activate your water heater for warm showers and dishwashing.
- Extend Antenna : Raise your antenna for better TV or radio reception.
- Test Water Lines : Turn on faucets to ensure all water lines function properly.
- Set up Furniture : Arrange interior furniture as desired for your comfort and convenience.
- Unpack Items : Remove items from storage and place them in their designated spots for easy access.
Using these steps as your guide, you can ensure that your arrival and setup at any campground go smoothly and efficiently. Combine this with our RV Departure Checklist , and you’ll have your entire camp setup and teardown process completely covered!
Better yet, we have put all of these steps into a simple-to-follow printable RV setup checklist that you can download, print, and reuse over and over as many times as you want!
These PDF checklists are easy to use and come with blank copies, so you can make them work for you and your RV. Get your RV Arrival & Departure Checklists today and take the hassle out of the setup and teardown process!
Common Setup Issues and Troubleshooting
No matter how well-prepared you are, unexpected issues can arise while setting up your RV.
Wrong Electrical Connection
In some instances, your RV’s electrical system might not match the site’s power source, which could lead to power issues. Always carry adapters for different types of electrical connections. Be aware of your RV’s power requirements to prevent damage to your RV’s electrical appliances and systems.
High-Pressure Water
An unexpectedly high water pressure can lead to damaged plumbing within your RV. To avoid this, always use a water pressure regulator when connecting your RV to a water source. This will ensure that the water pressure stays within a safe range.
Power Cord Doesn’t Reach the Pedestal
In certain situations, you might find that your power cord isn’t long enough to reach the campground’s power pedestal. Always carry an extension cord suitable for your RV’s power requirements to avoid such issues. Be aware that using extension cords can lead to power loss, so use them sparingly and only when necessary.
Uneven Leveling
An uneven RV can lead to unstable walking conditions inside and can even affect the functioning of some appliances. Always carry leveling blocks or consider investing in automatic leveling systems to deal with uneven terrain. Should your RV not appear level even after your initial setup, re-adjust and use your leveling system to correct this.
Water Leakage
Water leaks can cause significant damage to your RV. Always check your water system during the setup process to prevent leakage issues. Ensure all connections are tight and the seals are in good condition. If you detect a leak, turn off the water supply immediately, identify the source, and repair it. For securing the connections, consider using plumber’s tape for a more secure fit.
Slide-out Issues
Slide-out rooms in your RV can occasionally encounter problems. Whether they refuse to extend or retract, such issues can be caused by several factors, like low battery voltage, blown fuses, motor failure, etc. Understanding your slide-out mechanism and maintaining it properly can prevent such problems.
Leave a Comment Cancel reply
We highly encourage discussion on our posts and in our RV Community Forums . The most helpful comments are those that you can learn from or that help others out. Please refrain from insults, complaints, or promotional material. See our community guidelines for more information.
Save my name and email for the next time I comment.
Notify me of follow-up comments via e-mail.
Home » Guides » How To Set Up A Travel Trailer
How To Set Up A Travel Trailer

- Last Updated: Jun 14, 2024
Are you thinking about hitting the open road in a travel trailer? If so, you’re in for a fun and rewarding experience! Travel trailers are a great way to see America, and they provide all of the comforts of home. But before you can start enjoying your travels, you need to set up your trailer properly.
In this blog post, we will walk you through the process of how to set up a travel trailer. By following our simple steps, you’ll be ready to hit the road in no time!

What Is A Travel Trailer And What Are The Benefits Of Owning One:
It is a type of RV that is towed behind a car or truck . It is typically much smaller than a motorhome and offers a more flexible and budget-friendly option for experiencing the joys of camping and road tripping . While travel trailers come in many different shapes and sizes, they all offer several advantages over traditional RVs. For one, travel trailers are typically much easier to maneuver and park than larger RVs. Additionally, they can be backed into tight spaces and parked without the need for a spacious RV lot.
Travel trailers also tend to be more affordable than motorhomes, making them a great option for budget-minded campers and road trippers. Lastly, travel trailers offer more flexibility when it comes to where you can camp; unlike motorhomes, which must be parked at an RV park or campground with hookups, travel trailers can be towed to nearly any location. Whether you’re looking to save money or have more freedom on your camping trips, owning a travel trailer may be the right choice for you.
Tips For Setting Up A Travel Trailer For the First Time:
If you are new to traveling in a travel trailer, there are a few things you should know before hitting the road. Here are a few tips to help you get started:
Choose Your Spot:
If you want to make sure you have a level spot to set up your trailer. You may also want to make sure that the surrounding area is clear of any large rocks or roots that could damage your trailer. If possible, find a spot that is already graveled or paved. This will make the setup and take it down much easier.
Jacks And Leveling Blocks:
Once you have found your spot, it’s time to get your jacks and leveling blocks out. You will want to place the leveling blocks under the trailer’s tires. This will help keep your trailer level and prevent it from shifting during setup. Once the leveling blocks are in place, you can begin to jack up the trailer. If you have a large trailer, you may need to use multiple jacks.
Hook Up Utilities:
Now that your trailer is level, it’s time to hook up the utilities. If you are hooked up to city water, simply connect your house to the water hookup on your trailer. If you are using a holding tank, fill the tank with water before connecting it to the trailer. Next, connect your power cord to the power hookup on your trailer. If you are using an RV generator, make sure it is full of fuel before starting it up.
Set Up Awnings and Slide-Outs:
Most RVs come equipped with awnings and slide-outs. These can be great features, but they also add a lot of extra work when setting up your RV. To set up your awnings, simply extend them out until they are fully open. For setting your slide-outs, first extend them out fully, then use a manual crank to lower them down into place.
Hook Up TV and Internet:
If you plan on spending any type of significant amount of time on your RV, you will probably want to hook up a TV and Internet connection. To do this, simply connect an HDMI cable from your TV to the HDMI port on your RV’s control panel. If you don’t have an HDMI port, you can use an adapter to connect to another type of cable. For the internet, there are a couple of different options available. You can either use a mobile hotspot or connect directly to the campground’s WiFi network (if available).
Stock The Fridge :
One of the last things you’ll want to do before heading out on your trip is stock the fridge with food and drinks. This way, you’ll have everything you need once you arrive at your destination.
Load The Beds :
Another thing you’ll want to do before hitting the road is to load the beds with sheets, pillows, and blankets. This way, you’ll be able to relax as soon as you arrive at your campsite.
Check All The Lights:
Before driving off, take a walk around your RV and make sure all the lights are working properly. This includes both the interior and exterior lights.
Test The Brakes :
Before pulling out of your driveway, test the brakes by depressing the pedal firmly several times. This will ensure that they are working properly and help prevent any accidents while on the road.
Enjoy The Ride :
Now that everything is all set, it’s time to sit back, relax, and enjoy the ride! These tips should help make setting up your RV for the first time a breeze. So get out there and explore all that nature has to offer!
Some Essential Steps Before Driving Off:
Check all the systems in your travel trailer before setting off on your trip. This includes plumbing, electrical, and propane systems. Make sure everything is in working order and that you understand how to operate each system.
Practice setting up and breaking down your travel trailer in your driveway. This will help you get familiar with the process and give you a chance to work out any kinks. When you do set up camp, take your time and be patient. Read all the instructions carefully and double-check all your connections before turning on any switches or opening any valves.
By following these simple tips, you can ensure that your first experience traveling in a travel trailer is a positive one.
How To Store And Maintain Your Travel Trailer:
If you’re planning to take your travel trailer on the road, you’ll need to know how to properly store and maintain it. Make sure to clean the trailer before storing it. This will help prevent mold and mildew from developing. If possible, store the trailer in a covered area. This will protect it from the elements and keep it clean.
Level the trailer before storing it. This will help prevent structural damage and tire wear. Finally, check the trailer’s tires and brakes before each trip. By following these simple tips, you can ensure that your travel trailer is safe and ready for adventure.
Wrapping Up:
So, there you have it! Everything you need to know to set up your travel trailer. By following these simple steps, you’ll be on your way to enjoying the great outdoors in no time. Now that you are an expert on setting up a travel trailer, what are you waiting for? Get out there and explore!
Other Related Posts:
- How Tall is a Travel Trailer? (And Why You Need to Know)
- Best Bike Rack For Travel Trailer
- What Size Generator For A Travel Trailer

Leave a Comment Cancel reply
Recently published guides.

Buying a Generator for RV Life

RV Refrigerators: How Do They Work?

How to Repair Norcold Fridge Flap
- Books & Merch
- Gear We Use
- National & State Parks
- Best RV Campgrounds in New Hampshire
- Best RV Campgrounds in NC Mountains
- Best Florida Beach RV Campgrounds
- South Dakota
- The Great Lakes
- Campers Swear By This Portable Device That Keeps Dogs Safe -The Best Portable Dog Fence for Camping (2024)
- Mosquitos and bugs
- Camping Clothes
- Camping Gifts
- Camping Internet
- 5 Best RV Backup Cameras for RV & Trailer
- 7 Best Screen Tents for Camping (2024)
- Best RV Campgrounds in California
- 5 Best Key West RV Parks
- 9 Best RV Campgrounds in New Jersey
- Camping Reservations
- Campground Comparisons
- Cheap or FREE RV Camping Sites
- Best RV Campground Memberships & Clubs
- Boondocking 101
- Boondocking Adventures
- RV Internet
- What Do Flamingos and Upside Down Pineapples Mean?
- Where to Find FREE or Cheap RV Sites Camping
- RV Winter Camping
- RV Show List for 2024
- 17 Best Camper Vans 2024 (New Class B RVs Available!)
RV Setup Checklist: 15 Tips on How to Setup Your RV
Every rv setup checklist is a little different. but here are the 15 things you need to do to setup camp on your next rv trip….
- 1 Every RV setup checklist is a little different. But here are the 15 things you need to do to setup camp on your next RV trip…
- 2.1 1. Check Campsite Before You Back In
- 2.2 2. Use a Spotter to Back In
- 2.3 3. Set the Emergency Break
- 2.4 4. Secure Your Pet
- 2.5 5. Hook up Electricity
- 2.6 6. Connect Water
- 3.1 7. Coil Hoses & Conceal Sewer Hose
- 3.2 8. Level Your RV
- 3.3 9. Turn On Hot Water Heater
- 3.4 10. Roll Out Your Awning
- 3.5 11. Setup Your Outdoor Living Space
- 3.6 12. Tend to Your Trash
- 3.7 13. Know Where You Are!
- 4 Nifty RV Setup Checklist System
- 5 Explore Florida's Gulf Coast with our RV Adventure Guide
When you arrive at camp, the last thing you want to do is waste too much time setting up camp. That's why it's important to have a solid RV setup checklist that outlines everything you need to do when you arrive at your campsite.
By having a system in place, you can ensure that everything gets done every time and that your trip goes smoothly.
In this blog post, we'll discuss some tips for setting up your RV when you arrive at camp. Stay tuned for our next post, where we'll talk about breaking down your RV before leaving!
If you buy something through our links, we may get a small commission at no extra cost to you. It helps keep our lights on so we can continue to provide helpful resources for RVers. Read our full affiliate disclosure here.
RV Setup Checklist
Like what you see in these videos? We'd appreciate it if you would Subscribe to our YouTube Channel ( easy to do right here ) and consider “ringing the bell icon” to be notified of any new video from us. 🙂 Thanks!
When you first start RVing, you can feel overwhelmed by how much you need to setup when you arrive. Don't worry, it gets easier and faster with time and practice.
This RV setup checklist will help you get started.
**By the way, if you want a free packing list, you can sign up for our newsletter at the end and we'll send you one!

1. Check Campsite Before You Back In
Before you back into your site, look up! Make sure there are no low-hanging branches or other obstacles that could damage your RV.
Then take a walk around to make sure there are no nails, glass, or other sharp objects that could puncture your tires.
2. Use a Spotter to Back In
Use a spotter to help you back in. Station them off the back corner of your RV so you can see them in the side mirror. Make sure they stand to the side, not behind the RV!
If you're new to backing up, check out our “Backing Up an RV” Learner's Kit: Everything You Need .
I also have 14 RV Pro Tips for Backing Up a Travel Trailer .

3. Set the Emergency Break
Always set the emergency brake as soon as you park!
If your RV or travel trailer doesn't have an emergency brake, use wheel chocks on both sides of the wheels.
4. Secure Your Pet
I recommend making sure you secure your pet as soon as you park. It's very easy to leave your RV door open or lose sight of your pet when you're running around setting up camp.
Confine them inside your RV, leash them to a shaded area, or put up their portable fence.
Check out the 10 Best Dog Accessories for Camping or 10 Purrfect Cat Travel Accessories to help.

5. Hook up Electricity
Once parked, we recommend hooking up the electricity first. If you're staying at an RV park with full hookups, this will be easy. If not, it's a good idea to have a portable generator on hand.
Make sure you check the receptacle for the correct amps for your RV. If your RV runs on 30 amp shore power but there's only a 50 am plug, you can use an adapter.
Old electrical receptacles or bad connections can damage your RV and appliances. I recommend using a surge protector, like the Southwire Surge Guard, model 34930 .
If you're boondocking, be sure to conserve your battery power. Use a solar panel or generator to recharge your batteries as needed.

6. Connect Water
If your campsite has water hookups, go ahead and connect your hose. If not, you can fill up your fresh water tank before you leave or bring along a portable water container.
If you're boondocking, be sure to conserve your water usage. Use it for drinking, cooking, and washing dishes only.
We recommend that you always use a water filter between the spigot and the freshwater hose that connects to your RV. We use a system called Clear20 that consists of an inline water filter and the Dirtguard pre-filter that removes the sediment and particulates before they go through the inline filter.
Mike and Jennifer's Summer T-Shirts for your next adventure

7. Coil Hoses & Conceal Sewer Hose
Coiled hoses look nicer but that's not the only reason I recommend this. When you keep them coiled, you'll “train” them to stay coiled for easy storage.
Concealing the sewer hose is for your neighbor's sake. Sewer connections are often right next to your neighbor's outdoor living area. It's actually one of the RV Park Deal Breakers RVers complain about most.
So, do your neighbor a favor and conceal the sewer connection. That'll help improve their RVing experience.

8. Level Your RV
We are big fans of our automatic leveling system but not every RV has one. If your RV doesn't have an automatic system, you'll need to level it manually.
You can use leveling blocks or ramps. Just make sure they're big enough to support your RV. Do not use cinder blocks!
If you have a bigger RV, like a fifth wheel, you might need to use leveling jacks or stabilizing jacks.
Here are some helpful articles:
- How to Level a Pop-Up Camper
- Should We Level First & Then Do Slide Outs, or Vice Versa?
- Leveling Blocks and Campervans
*Note that when you extend slide outs depends on your manufacturer. You'll need to consult your owner's manual to see when you should extend and retract your slide outs.
9. Turn On Hot Water Heater
It's better to do this sooner rather than later so you can take a hot shower after setting up camp.
If your RV has an electric/propane switch, make sure it's in the “propane” position.
If you're boondocking, you might want to turn off the water heater when you're not using it to conserve propane.

10. Roll Out Your Awning
Now that your RV is level, it's time to roll out the awning.
If you have an electric awning, extend it all the way. If you have a manual awning, extend it about halfway.
Make sure the awning is locked in place and that the arms are secured.
If you have an awning topper, put it on now. It'll help keep your awning clean and provide some extra shade.
11. Setup Your Outdoor Living Space
Everyone has their own setup for the outdoor living space, but I do recommend a few things for everyone.
First, lay out a large outdoor rug . This will cut down on the amount of dirt and mud you and your pets trek inside.
Second, set up your portable camping grill (if you have one) and your foldable tables and table accessories , too.
Then, it's time for your favorite camping chairs .
Lastly, you can set up you portable camping fire pit , if you have one and want to use it this trip.

12. Tend to Your Trash
You never want to leave trash lying around your campsite. Of course, this is especially important if you're camping in bear country .
Locate where and how you can dispose of trash .Some campgrounds pick it up each morning. Others expect you to take it daily to the garbage bin or dumpster.
13. Know Where You Are!
This is a VERY IMPORTANT SAFETY MEASURE that most people overlook. You need to write down the official name of the campground, its address, the office phone number, and your site number.
I recommend noting this all on a paper that you stick to your fridge or easily accessible place.
In an emergency, having this information within reach is a huge help. It'll help emergency services reach you quickly and find you easily.
Be sure that everyone traveling with you also knows where the RV fire extinguishers and first aid kit are located.
And since we're talking about safety measures, read about the Biggest Pitfall of Splitting RV Duties Down the Middle . Dividing your RV setup checklist is efficient, and how you'll setup camp most the time.
However, it's important that you and your travel companion know how to do everything on the RV setup checklist.
Nifty RV Setup Checklist System
Ever drive off from a campsite forgetting to close the vent lid? Or leaving outdoor chairs behind? Or the TV antenna up? Well follow the foolproof reminder system Sharon shows Jennifer in this RV Quick Tip and those problems will be a thing of the past.
Explore Florida's Gulf Coast with our RV Adventure Guide

We RVers may wander far and wide, but it’s true for most of us that we end up with some favorite “Go-To” places – places that draw us back again and again.
Stretching from the Gulf Islands National Seashore near Pensacola to the west and going all the way up along to Clearwater, Naples, and beyond – this is an area of contrasts.
There are more upscale shopping centers, fine restaurants, and busy little chic boutiques along the Gulf Coast than you will find just about anywhere else.
But just off those main drags and highways are quiet, tranquil places and the most glorious sugar-sand beaches we’ve found anywhere in America.
And, of course, the ocean water. Crystal-clear, turquoise, and emerald-colored. In some places, it looks like you are in the Caribbean.
We’re confident you’ll find a little slice of paradise here to call your own.
This guide is a seven-day guided exploration of Florida’s Gulf Coast!
Published on 2022-09-20
Mike Wendland is a multiple Emmy-award-winning Journalist, Podcaster, YouTuber, and Blogger, who has traveled with his wife, Jennifer, all over North America in an RV, sharing adventures and reviewing RV, Camping, Outdoor, Travel and Tech Gear for the past 12 years. They are leading industry experts in RV living and have written 18 travel books.
2 Responses to “RV Setup Checklist: 15 Tips on How to Setup Your RV”
September 20, 2022at7:54 am , Ron Yanuszewski said:
The biggest mistake I see people make is not leveling side to side before they unhitch. I try to remember to do that first.
September 21, 2022at12:51 pm , Team RV Lifestyle said:
Good thing to stress – thanks for sharing, Ron! Team RV Lifestyle
Leave a Reply Cancel reply
Your email address will not be published. Required fields are marked *
Related Posts

Top 10 Tips for Buying the Best RV for Tall People

Why We Should Not Trust GPS Completely

A Universal Toll Pass in the U.S. for RVers?! Does It Work?
RV Set Up Guide Step by Step (And Everything You Need)

This article may contain affiliate links . We earn a small commission (at no additional cost to you) if you make a purchase through these links. As an Amazon Associate I earn from qualifying purchases.
When I think back to the first time we set up our RV at a campground, I remember how overwhelming it all seemed. Did we bring everything we would need? And more importantly would we remember how it was all supposed to work. Now that we have been full-time traveling RVers for 9 years we have our RV set up process down to a science.
Here is a step by step guide to everything you need to know to set up your RV at a campsite for the first time . From making your reservation and choosing the best campsite, to parking your RV and setting up all of your hookups. Each section includes a list of all of the gear used so you’ll be ready to set up your RV when you arrive. Feel free to print the guide or checklist and adjust it to your own RV setup process. Enjoy!
TLDR – For the Cliff Notes version, jump to the RV Set Up Checklist .
Reservations (and how to get the best site!)
Whether or not you need a reservation really depends on your travel style and when or where you are traveling. Often we don’t make reservations at all. On the other hand, sometimes you absolutely need a reservation. If you are visiting during the high season, during an event or have your heart set on a particular campground you’ll want to make a reservation.
Reservation tips:
- Check for discounts and specials. These can be via membership clubs like Good Sam, Passport America, Escapees or even campground specific specials, for example stay 6 nights and get 1 night free. It is always worth asking. For more about RV club discounts check out our article about the 6 best membership clubs for full-time RVers.
- Find out the cancellation policy just in case you need it.
How to get the best site.
Take a look at the campground map and determine which area of the campground you would like to be in. You’ll have to decide what is important to you. What you want in a site for a quick overnight stop will probably be different than what you want for a longer stay. And everyone has a different rig and different preferences so my best site is probably not the same as your best site.
Here are a few things to consider:
- Do you need a 30 amp or 50 amp site?
- A shady site or full sun?
- Would you like to be close to the pool or playground or as far away from them as possible?
- Full hook ups, partial hookups or none?
- Back in site or pull through?
- A site that faces your neighbor so that you can share common space with your camping buddies?
- What size site?
- How long are you staying?
- On a corner where you can watch the world go by and say hi to all of your neighbors? Or more tucked in for privacy?
Do a little research.
Next, check out Google and Bing maps satellite views of the campground. You’ll be able to see if there are areas with lots of trees or that are adjacent to railroad tracks or a busy road. You should also be able to see if some sites are more spread out than others. Streetview can be helpful too.
For even more information take a look at the reviews and photos of the campground at Campground Reviews and Campendium . They are both great resources. You can gather a lot of information from the photos and you may even find tips about specific sites.
Need network? Check the coverage map for your provider, sometimes coverage is better in certain sections.
Now that you have an idea of the campground, when you make your reservation ask for the site or area that you think is best for you. If the site is available, most campgrounds are perfectly happy to accommodate your request. If there are sites that you do not want make sure to let them know that too!
Pre Check In
Confirm your reservation: It is a good idea to call and confirm your reservation prior to arriving. If you requested a specific site, confirm that too.
Late arrival: If you know that you will be arriving late in the day or are delayed on the road, call the campground and find out the procedure for an after hours check in. Many campgrounds are happy to leave you a check in packet with directions to your site to pick up when you arrive. Others have someone on call to help you and still others simply do not allow check in after dark.
Early arrival: If you plan to be early, ask about early check in or a parking area to wait in. Again, policies will vary, some parks let you check in early if your site is available. Others charge a small fee for early check in. An early check in fee can be worth it depending on the situation.
Tip : If you are very new to RVing, plan your route to the campground ahead of time. Include good places to stop, stretch your legs and take a break. Google and Bing satellite maps are great for this! We still do this whenever possible. Having the route planned out, including stops, just makes everything easier on travel day.

When you arrive at your campground you’ll need to check in. If you have any questions now is a good time to ask them. For example, if you travel with dogs you may want to ask about the dog walk area.
You will need some or all of the following to check in.
- Payment . Be aware of any campground specific restrictions on cash or credit.
- Membership discount card. Such as Good Sam, Passport America, Escapees, or Thousand Trails. Some campgrounds will be fine with just the membership number or a soft copy of the information but once in a while you’ll come across one that requires the actual physical card.
- Registration information & license plate numbers.
- Proof of insurance.
- Proof of pet vaccinations.
Make sure you get a campground map and the best route to your campsite. This is usually standard operating procedure but sometimes they forget. Campground maps usually list local attractions and services.
Note about Thousand Trails: Most Thousand Trails campgrounds let you choose you own sites! We absolutely love this option because we can choose a site that works best for us. You’ll check in with the ranger then drive around the campground and choose a site. Once your RV is set up you go back to check in and let them know which site you are in. Tip: If there is a place to park our rig we like to scope campsites on our bikes. When we find the site we want, one of us stays there while the other brings our RV back. If you drive a rig with a toad, that works too. If you have a portable EMS, bring it with you so that you can check the power post in the sites you scope.
For more about Thousand Trails check out how we traveled the country, camped with hookups for $5.01 per night and saved $28,992.19 in 6 years with our Thousand Trails membership.
Campsite Walk Through
Before you pull into the campsite do a quick walk through..
- Nails, screws, dog doo or other debris.
- Branches or other obstacles.
- Location of services. Do a quick visual inspection- water, electric sewer.
- Size – verify that you fit in the site. For an easy way to do this check out Neat Tricks to Measure Your RV & Slides – Without Tools!
Tip : Wear gloves and be aware the spiders love to hide inside RV power posts. No big deal if you are paying attention but you may need to provide umm… spider relocation services.
If you are parked in a location that is not blocking the road now is a great time to take a closer look at your campsite. If you are blocking the road, pull into the site first.
Next, check out the campsite a little more closely.
- Turn on the water for a second.
- Find the sewer hookup. (If it is a FHU site)
- Make sure the power breakers are off.
- Plug in your EMS.
- Turn on the breaker.
- Let your EMS check the power. If the power is good carry on with your RV set up. If not head back to the office and have them check and fix the power or switch you to another site.
Note the boundaries of the site and the surroundings and decide exactly where you want to park.
Make sure that:
- RV will be close enough to the utilities.
- Slides (if you have them) have room to extend.
- You will have room to navigate around your rig once your RV is set up.
- Leave room for your tow vehicle or toad.
- Awning has room to extend.
- Stairs have room to open properly.
- Fire pit, if there is one and you plan on using it, is appropriately distanced from your RV.
- Ants – Be aware of anthills do not park where your tires or stabilizers will be on an anthill. (And….yup… we did that once and it resulted in what we still refer to as the great ant attack!)
If you encounter an issue you can call or return to the office and have them resolve the issue or move you to another site.
Park Your RV in the Site

If you have a spotter – and if at all possible you should – make sure to use them and have a communication plan. Cell phone, walkie talkies, hand signals, whatever works for you. As a spotter, stay clear of the rig until the vehicle is in park and you have an all clear signal from the driver.
Back In Tips:
- Backing up a trailer can be confusing if you are not used to it. Try holding the steering wheel at the bottom, the trailer will move in the same direction as your hands.
- Whether you are an old pro or a newbie, it can be very helpful to put an orange cone in the site to give you a target to aim for while parking.
Once the rig is parked where you want it, you’ll need to make sure that you are level.
Level and Stabilize
This will vary between RVs. Some RVs, like our travel trailer need to be manually leveled. Some rigs have an automatic leveling system that will do all of the work for you! *This section details manually leveling a travel trailer but the general idea is applicable to all RVs – you’ll want to level and stabilize.
What you need to level and stabilize your travel trailer.
- Leveling pads . To raise one side of your RV so that it is level. Also handy to put under stabilizers.
- Coupler lock. To lock your travel trailer once it is unhooked.
- Long bike security cable with looped ends and lock. Optional. To run through your tires for an added layer of security.
- Tire Covers. Optional. To protect your tires from the sun.
Before you unhook level from left to right.
- Check the level on the front of your RV. If the bubble is not in the middle of the level it is time to pull out your leveling pads.
- The leveling pads need to go under the tires on the side of the RV that you want to raise. This is also the direction that you want the bubble to go. In other words, remember that the bubble will move towards the side with the leveling pads .
- Place the leveling pads on the ground next to each of the tires. Have the driver pull forward slowly until there is room to slide the leveling pads in to the space where the tires were.
- Once the vehicle is in park, slide the leveling pads into place.
- Have the driver back up slowly onto the leveling pads. Check the level again.
- If the site is a little larger you can just put the leveling pads in front of or behind the tires and pull onto them.
- Adjust if necessary. You may need to add or remove leveling pads to get your rig level.
- If you need to add leveling pads it will be easier to drive onto them if you build a ramp or pyramid.
Tip: Stay away from the tires until you are sure the vehicle is in park.
Here is a quick video from Lynx Levelers showing how to place and pull on to your leveling pads.
Next, unhook and level front to back.
- Chock your tires.
- Unhook – this will vary between rigs. Follow the procedure for your particular equipment.
- Check the level on the side of your RV. Then raise or lower the front of your RV using your tongue jack until the level bubble is in the middle. Again, remember that the bubble will move towards the side that you raise.
- We use stacks of leveling pads under each of our stabilizer jacks. It makes it easier to extend them because they don’t have to go down as far. It also helps keep our RV more stable.
- Remember the stabilizer jacks are meant to stabilize, not lift your RV . They should be lowered until they are snug.
- Go back to your chocks and make sure that they are snug.
- Lock travel trailer with coupler lock.
- Run bike security lock through both tires on one side of travel trailer and lock looped ends together.
- Put on tire covers.
- Insert wheel stop chocks if you are using them.

Congrats! Your RV is parked, level and locked! Time to set up the rest of your RV campsite.
Power Connection
The next step in your RV set up is to connect your rig to the campsite power.
What you need to set up your RV power connection.
- Electrical Management System (EMS). An EMS protects your RV and appliances if you encounter poor power from the campground. Your EMS needs to match your RV power, 30 amp or 50 amp.
- Lock. Only if you have a portable EMS – if you have an onboard EMS you won’t need the lock. We use this lock for our EMS – the length is easily adjustable so it locks to just about any power post.
An important note about campground power. You will want to use an Electrical Management System (EMS). This is a device that protects your RV from a variety of possible power problems. For example, a mis-wired electrical post, low voltage, power surges and so on. Basically an EMS scans the power source for issue before it allows any power through to your RV. Once you have power, it scans continuously. If the EMS encounters a power problem, it cuts the power before your RV or appliances can be damaged. Think of it as insurance, you can protect your (expensive) RV and appliances from damage due to poor campground power with an EMS. For more information about how an EMS works in general and a review of ours, check out EMS-PT30X – Can You Afford Not to Have One?
How to connect your RV power.
- By now you have already checked the power post with your EMS and removed any resident spiders.
- Make sure all power breakers are all set to the OFF position.
- Plug your EMS into the 30 or 50 amp socket.
- Plug your RV power cord into the EMS.
- Flip the breaker on.
- Once the EMS has finished checking the power, it will allow it through to your RV.
If it’s very hot out now is a great time to turn on your AC to start cooling down your RV. Turn on your refrigerator and anything else you want to run while you are inside. Open up your stairs on the way in.
RV Water Hookup

What you need to set up your RV water connection.
- Fresh water hose. Not just any garden hose. Fresh water hoses are made to be drinking water safe. We had this basic fresh water hose for years and recently upgraded to the light and easier to handle Zero G RV/Marine Fresh Water Hose . (It is one of my favorite upgrades!)
- Inline water filter. Even if you do not drink your water directly from the tap. Campground water varies widely and the filter helps to keep your water system clean. We do drink our water but we use a Travel Berkey to filter it first. This Camco inline water filter has worked well for us over the years. The first time you buy one, you’ll want to get the version with the flexible hose connector. When it is time to replace the filter, keep the flexible hose connector.
- Water splitter. Optional. The splitter has one outlet that attaches to the city water connection and splits it into two water outlets. It is very convenient to have an extra water connection at your campsite for your black tank flush.
- Extra fresh water hose. Optional. Just in case the water connection is very far away from your RV and for a back up. Two 25 foot water hoses is what we have found works best.
- Ball bungee or carry strap. Optional. To hang your water hose once it is connected so that it is neat and off the ground.
If you have never hooked your RV to a water connection before – set up your RV “fresh water kit”.
This is how to do it with the Camco Inline water filter, if you are using another water filter follow the instructions for your water filter. I find it is easier to connect all the pieces together on a picnic table and then bring them all to the water spigot together.
- Start with the pressure regulator.
- Connect the flexible hose connector to the Pressure Regulator.
- Next, connect the water filter to the flexible hose connector. It has an arrow on it to tell you which way the water should flow.
- Finally, connect your fresh water hose to the other end of the water filter.
- The first time that you use your water filter and every time you replace it, it will need to be flushed before use. We’ll get to that in a minute.
Now you have a “fresh water kit”. All of these pieces will stay connected together and you will use them to connect to city water every time you set up your RV at a campground.
How to hook up your RV to city water.
Clean the water spigot. Trust me, you want to clean it before you connect to it. I have seen people put their sewer hose over the water spigot to rinse it out. Gross!
- Connect a splitter to the water spigot. You only need to do this if you want to have an outdoor water connection available.
- Connect the pressure regulator on your “fresh water kit” to the splitter.
- If this is the first time you are using your water filter it needs to be flushed. Turn on the city water and run water through the filter and your entire “fresh water kit” until the water runs clear. It will start out black, don’t worry, it is just the charcoal being flush out of the filter.
- Turn the water off again.
- Connect your hose to the fresh water inlet on the side of your RV.
- Turn the water on and check for any leaks or drips.
- Now go inside and run the cold water. It will probably spit and spurt a few times. Run until it stops spitting. Do the same for the hot water.
- That’s it! Your water is connected.
When you disconnect your water, leave your “fresh water kit” connected together and store it that way. It will save you a few steps the next time you connect to city water.
RV Sewer Hose Hookup
The last thing you’ll need to connect in your RV set up process is the sewer hookup. You’ll already have running water inside so you can wash your hands when you are done.
A quick overview of how RV sewer systems work.
RVs have two separate tanks for waste water, a grey tank and a black tank. The sinks and shower drain into the grey tank. The toilet drains into the black tank. Both tanks have separate outlets that run to a single sewer connection on the outside of your RV.
When the tanks are full they need to be emptied. This is done by connecting one end of a sewer hose to your RV sewer connection and the other end to a dump station or campground sewer connection. Once the sewer hose is connected each tank is emptied separately.
The black tank is always emptied first. Pulling the lever that opens the tank allows the contents to flow through the sewer hose and into the dump station or campground sewer. Once the black tank is empty, the lever is used to close the tank again. Next, the grey tank is emptied in the same manner. The contents of the grey tank wash away any bits from the black tank that may be left in the sewer hose as the tank empties.
It actually works pretty well and is not nearly as gross as you might think. Now, on to how exactly to hook up your RV sewer connection at a campground.
Tip: Please use RV toilet paper in your RV. Yes, it is more expensive but It is made to dissolve very quickly and prevent clogs in your black tank.
What you’ll need to set up your RV sewer connection.
- Sewer hose and adapter. We have used a version of this Rhino sewer hose since we started full-time RVing and it works well.
- Hose to flush your tanks. Not your fresh water hose. It is nice if the hose is lightweight and easy to store.
- Sewer hose supports. To hold the sewer hose at an angle so that the tank contents flow downhill. And to keep it off the ground.
- Disposable gloves. You can buy them online but stopping by Harbor Freight is the cheapest option we have found. Look for the 100 packs of nitrile gloves. Make sure to download a 20% off coupon & check for freebies.
- Clear sewer extender for the RV end of the sewer hose. Optional. Helpful for emptying and flushing your tanks. A short one is fine, you just want to be able to see what is going on as you empty your tanks.
- Sewer hose caps. Optional. To put on the ends of your sewer hose for transport or storage. Caps make it easier to handle and put away because you don’t need to worry about drips.
- Extra length of sewer hose. Optional. In case the sewer connection is far away from your RV.
- Bin or storage container. Optional. It is a good idea to have a bin that closes so that you can store all of your RV sewer accessories together. Personally, I don’t want this stuff in contact with anything else in my RV.
How to set up your RV sewer hose.
- Put on disposable gloves.
- Remove your sewer hose from it’s storage location. Most RVs have a designated place built-in for sewer hose storage.
- Verify the black and grey tank release valves are closed. Then remove the RV sewer outlet safety cap.
- If you use caps on your sewer hose remove them now. If you don’t, your sewer hose won’t expand easily due to the suction created by the caps.
- Connect your sewer hose to the RV sewer outlet. The outlet will have small raised knobs on it. Slip the sewer hose on, then turn to lock in to the knobs. Make sure it is securely connected.
- Remove the sewer cover from the campground sewer hookup.
- If the campground sewer hookup is not threaded use your (no longer optional) flexible sewer adapter. Push it into the sewer connection so that it is secure.
- Screw your sewer adapter into the Flexible Adapter so that it is secure.
- Insert the elbow end of your sewer hose into the sewer adapter.
- Your sewer hose should now be securely connected to your RV and to the campground sewer hookup.
- Next, set out your sewer hose supports and run your sewer hose so that it slopes downhill towards the campground sewer hookup. (Because we all know what flows downhill.)
- P-trap. You can build a P-trap into your sewer hose by creating a U in the hose so that it fills completely with liquid.
Tip : If you are concerned about your sewer run, test it with grey water before dumping your black tank. Note, you will need more grey water to flush the hose after you empty the black tank.
A note on P-traps.

We build a P-trap into our sewer hose when we are connected to a campground sewer for two reasons. First, it mimics a traditional P-trap, like the ones under your sink, and helps keep sewer odors out of our RV. Second, it stops sewer flies from getting into your RV tanks through the sewer hose. It does not affect the emptying of our tanks as the pressure of the liquid coming out of the tanks pushes everything through the hose. You do need to empty it when you disconnect the sewer. If you plan to leave your grey tank open at all during your stay I would suggest creating a P-trap in your sewer hose.
Dump Your RV Black and Grey Tanks
OK, dumping your tanks is not really part of RV set up, but you are going to need to do it while you are there. Here are step by step instructions: How to Dump RV Waste Tanks: Easy (No Mess) Guide
Now back to your RV campsite set up!
Slides and Inside
Now that you are connected to all of the utilities, it’s time to put out your slides if you have them. It is a good idea to have someone outside watching for obstacles just in case. Hopefully you have already measured them to make sure they fit as outlined above.
Also turn on your refrigerator and set up anything else you need inside your RV.
Campsite SAFETY
In our 9 years of full-time RV we have always felt safe. We read reviews of every campground we stay at before we arrive and if we see anything in the comments that makes us nervous we just choose another place to stay. Generally, we are more concerned about tripping or twisting an ankle than any kind of crime. That said, because we are traveling, we are always in new and unfamiliar locations so it is always good to be aware of your surroundings.
A few safety considerations around the campsite.
Note your location..
Campground or RV Resort Name Address County Your SITE number Office and Emergency Phone Number Local Sheriff phone number (Remember 911 may not work very well with cell phones.)
We write our site number on the campground map next to the address and tack it up on a cork-board. Any other information that we may need is also tacked to the cork-board so that we always know exactly where to find it quickly in the case of an emergency.
Important documents.
Keep any important documents in a specific location so you will always know where to find them. Things like emergency contact information, medical insurance card, prescriptions, copy of driver’s license and so on. It may be easier to keep these things in a secure cloud location so that they are always accessible from anywhere that you have a secure network connection.
Weather radio.
These days weather forecasts and warnings are readily accessible on your cell phone. A weather radio is still a good idea for RVers because they are not dependent on cell phone data or the campground wireless network. Data service and campground wireless networks can be unreliable. Also, if there is a storm and the power is out, the campground wireless is probably also off.
A weather radio works on radio waves and service is available in a wider range of locations. In 9 years of full-time RVing we have always been able to receive a signal to our weather radio.
In areas of the country where weather events can happen suddenly, like tornadoes and tsunamis, being notified of a weather event before it happens is critical.
Tip: Make sure to get a weather radio with S.A.M.E technology. This will allow you to set the specific types of events you want to be alerted to. For example, we turn off the Tornado Watch category and turn on the Tornado Warning category. I am happy to be woken up for a warning, not so much for a watch. We have been using this weather radio by Midland , for 9 years and counting. It is a basic model with S.A.M.E. technology and battery backup.
It is not a bad idea to have a go bag ready just in case. You’ll need to decide what to put in yours. Check out the suggestions at the American Red Cross for ideas.
Google maps offline.
You can download a self selected area of Google Maps for offline use. This is a great idea if you do not think you will have data service or if you will be in an area for a length of time. Also useful when traveling through an area without data service. Check out Google’s instructions for iPhone and Android if you are not sure how to download maps.
Some slides seem to be magnets for hitting your head or clipping your arm while walking around the outside of your RV. There are two things you can do about this.
- Put a piece of pipe insulation or a pool noodle over the corners of your slides.
- Place a small orange cone on the ground just below the corner of the slide.
Tree roots or other tripping hazards.
- Place a small orange cone next to the root or tripping hazard.
Flashlights.
Keep a few flashlights around just in case you need them. We recently got a few of these rechargeable flashlights . They are incredibly bright, recharge via USB and even have a strong magnet built in so they can be attached to a metal surface.
- First Aid Kit.
It is a good idea to have a first aid kit in your RV. You can purchase a pre-made First Aid Kit or put on together yourself.
Drinking water.
Campground water sources are all different and you really have no way of knowing how safe the water is. We filter all of our drinking water with a Travel Berkey and it is one of the most used RV accessories we have.
If you decide not to drink the campground water you can:
- Bring bottled water.
- Use refillable water containers. Drinking water fill stations are common at grocery stores and Walmart. Some campgrounds have drinking water fill stations on site.
- Use a filtration system like a Berkey or a Lifesaver Jerrycan.
Lock up bikes and other toys.
I don’t want to give you the impression that theft is rampant at campgrounds, it is not. But it does happen sometimes so it is just a good idea to lock up items like bikes, generators etc.
Patio or Yard

Outdoor living spaces vary widely from person to person so we’ll just share some of our favorite basics.
Door mat . These actually make a huge difference, they stop you from tracking most of the outdoors into your RV.
Wrap around step rugs . These help keep dirt and dust out of your RV. We have one on every step. They are nice because they stay on your steps during travel so you don’t even need a place to store them. Tip: The front edge of the step rugs wear the fastest so if you flip your step rug around when the front edge is close to wearing out they will last almost twice as long.
RV patio area mat. Yet another way to keep from tracking dirt into your RV. Are you sensing a theme here? They also add a little ambiance to your outdoor area and make it feel like you have another room outdoors. On the other hand, they are large and need to be put out and stowed away every time you move. A mat with a bag is handy.
Folding table. Most campsites will have a picnic table but some do not. Convenient for extra food prep space, working outside or any projects.
Bug repellent. No one likes mosquito bites.
Solar lanterns. A peaceful soft light for evenings at the campsite. Our friends have a few of these inflatable solar lanterns . They are on my wish-list.
Chairs. A camping chair is a must. Our Kijaro Dual Lock chairs are sturdy and comfortable. On average they seem to last us about two years of almost daily use.
Screen room. These really are another room and a great way to make the most of your outdoor space.
Solar lights. Great for lighting your stairs and the entryway to your site at night. We use these solar garden/pathway lights and they work well for us but I can not entirely recommend them. They do have an on/off switch which is nice but they do not always last through the night. Sadly, we haven’t found anything better yet.
Small propane tank. These are great for gas grills and propane fire pits. They are small enough to be easy to handle around the campsite and a much cheaper way to buy propane than the disposable green canisters. Plus, you can help the environment by not using disposable canisters. If you want more detail read our review of the Worthington 1 gallon propane tank.
RV Set Up Checklist
- Confirm reservation and site type prior to arrival.
- Early or late arrival. Let the campground know and find out the check in procedure.
- Payment. Be aware of what payment types are accepted.
- Membership discount card.
- Registration info and license plate number.
- Get a campground map with the route to your site.
- Check the site for nails, dog doo or other debris before you pull in.
- Check for branches or other obstacles.
- Test power post with EMS.
- Run water for a second.
- Visually inspect sewer hookup.
Parking your RV in your campsite.
- RV is parked close enough to connect the utilities.
- Slides have clearance to open.
- Leave room to walk around the outside of your RV once you are set up.
- You have a spot in the site to park your tow vehicle or toad.
- Awning has space to extend.
- Stairs have room to open properly.
- Fire pit is appropriately distanced from RV.
- Ants. If there are anthills do not place your tires or stabilizers on them.
This section is tailored to a travel trailer. The idea is the same for all RVs, you’ll need to level and stabilize.
- Level RV Left to Right – Before you unhook.
- Place leveling pads next to your tires.
- Pull RV forward or back so that you can slide in leveling pads.
- Slide leveling pads into the spot where your tires will go.
- Pull RV on to leveling pads.
- Check levels and adjust until level.
- Chock tires.
- Unhook tow vehicle.
- Level Front to Back – Use tongue jack to do this.
- Lower stabilizer jacks and stabilize RV.
- Tap in wheel chocks again.
- Run long bike lock cable through both tires on one side and lock loops together.
- Insert wheel stop chocks or X-chocks.
RV Power Connection Set Up
- Verify breaker is in the OFF position.
- Plug EMS into the power post.
- Plug RV power cord into EMS.
- Flip breaker to ON position.
RV Fresh Water Connection
- Sanitize water spigot.
- Screw on splitter. (If using.)
- Attach pressure regulator.
- Connect inline water filter.
- Attach fresh water hose.
- Run a little water through the hose. (To fill and flush the hose.)
- Connect the other end of the freshwater hose to your RV fresh water inlet.
- Turn on water.
- Hang your water hose off the ground if possible.
- Run a little water inside to clear any air from water lines.
- Put on your disposable gloves.
- Verify that black and grey tanks are closed.
- Remove safety caps from RV sewer outlet and sewer hose.
- Attach sewer hose to RV sewer outlet. Make sure it is secure.
- Use the flexible sewer adapter.
- Push it into the campground sewer connection until secure.
- Thread the normal sewer adapter into the flexible sewer adapter.
- Insert elbow end of sewer hose into sewer adapter. Make sure it is secure.
- Set out sewer hose supports.
- Run sewer hose along supports so that it runs downhill.
- Add P-trap to sewer hose. (If desired.)
- Test sewer run with a little grey water.
Slides & Inside
- Extend slides.
- Set up anything you need inside your RV.
Campsite Safety
- Campground name, address, county, site number and after hours contact number.
- Add any other info you want to have on hand. For example, local sheriffs number and so on.
- Set weather radio to current county.
- Lock bikes and toys.
- Make sure flashlights are charged and accessible.
- Set out small orange cones by any tripping hazards.
- Download offline google maps. If desired.
- Put pool noodle or pipe insulation over any slide corners. If desired.
- Access to important documents. eg prescription info, medical insurance card etc.
- Go bag. If desired.
- Drinking water or filtration system.
Set Up RV Patio/Yard Area
The outside area will vary widely from person to person so here are a few of our favorite basics. Thinking about how you plan to use your outdoor area will help you decide what to include at your campsite.
- Wrap around step rugs.
- RV patio area mat.
- Camping chairs
- Bug repellent.
- Propane fire pit.
- Folding table.
- Solar lanterns.
- Solar walkway lights.
- Screen room.
- Small refillable propane tank. For your grill and fire pit.
Enjoy your campsite!
That’s it. Your RV is all set up. It may seem overwhelming at first but you will get used to it. After you have done it a few times it will become second nature. Until then, slow down and take it step by step.

Enjoy This Article? Share It!

How to Calculate Gas Mileage & Easy MPG Calculator

Zero G RV Fresh Water Hose – Still Great After One Year?

5 Best RV Sewer Hoses – 2024 Buying Guide

THANKS FOR READING!
We’ve been full-time RVers since 2012. Over 127,000 miles and 47 states later, we are still towing our home around the United States.
On TowingHome we share what we have learned along the way; what we love (and what we don’t) about the RV lifestyle, tips and tricks, our favorite campgrounds, places and gear.
We hope that it makes your journey a little bit easier.
Complete RV Checklists That Works! (For Beginners)

Checklists are the greatest, aren’t they? They make packing and setting up before, during, and after a trip much easier.
In this post, we’ll give you 3 separate checklists.
- One for packing
- one for setting up,
- and one that lists the absolute essentials needed for a successful RV trip.
Table of Contents
Packing List Details Before We Start…
There are many items you’ll need to consider taking when packing for an RV trip. Some of these items are RV or vehicle specific and others are just a part of everyday life. Other items are purely for fun but are still a very necessary part of packing up for an RV trip.
I organized the RV checklists by category so you can go through each checklist in order to make sure you have everything you need.
The Vehicle and Trailer Checklist
The first checklist has all of the items you’ll definitely want to have for taking care of your vehicle and your camper. This list includes emergency roadside items like air compressors and battery jumpers as well as the tools you’ll need to complete these tasks.
It also includes the items you’ll need to successfully set up your RV on-site and while on the road. Forget any of these items and you may not be able to get all of the functionality from your RV. These items include things like leveling blocks, drinking hoses, and electrical adapters.
The adapters you need will vary depending on what type of RV you have. For example, people with a 50-amp electrical system may want to bring a 50-amp to 30-amp plug and people with a 30-amp electrical system may want to bring a 30-amp to 50-amp plug. You may even want to bring a converter that converts these plugs to standard 15-amp electrical outlets.
Daily RV Life Checklist
The next checklist goes over the items that you’ll need on a day-to-day basis. These items include food, water, clothing, medicine, personal hygiene items, and anything else you might use while living in your RV.
I went over the basics with these items and listed items out generically but you should make them more specific to your needs when applicable. For example, if you take two types of medicines each day, instead of listing them as medicine, you might want to write out the name of each specific medicine so you won’t forget either one.
The same idea applies to personal hygiene items as well. If you know you need a WaterPik or some other personal cleaning item then you’ll want to write it in under personal hygiene. I’ll add some of these items under the Daily RV Life Checklist to give you some inspiration.
Fun RV Checklist
Not all places end up being fun. This is especially true when it rains. Just because you end up stopping someplace where there aren’t a lot of fun activities, doesn’t mean you can’t have fun.
I created a short RV checklist of fun items that you might want to bring to keep yourself occupied during short stays at locations without much to do or during prolonged periods of being stuck in the rain.
If you have specific games you like to play then you might want to add them underneath of games. I’ll add some camping equipment suggestions but you may want to add your own specific camping equipment as well.
Checklist for Setting Up
The checklist for setting up will give you a step-by-step guide to setting up your RV. It is a printable RV checklist that you can take with you to help you get set up quickly and easily. Use it at the campsite or even while stopping for a few hours while out on the road.
Do the checklist in reverse when you want to break camp. This checklist is short enough that you can print it out and tape it to the inside of your RV door to use as a reference.
RV Essentials Checklist
The RV essentials checklist lays out the bare minimum you need to have a successful RV trip. Take these items and you’ll at least be able to get to your destination and set up without any trouble.
This checklist includes RV-specific items like leveling blocks, water hoses, and sewer hoses. It also includes the very basics of everyday living like food, water, and medicine. These are all of the items that you’ll want to double-check to make sure you have before you leave for your destination.
For the Vehicle and Trailer
- Roadside emergency kit.
- Chock blocks.
- Leveling blocks.
- Stabilizer jacks.
- Towing equipment.
- Portable battery jumper and jumper cables.
- Extra vehicle fluids. (windshield wiper fluid, oil, etc.)
- Jack and lug nut wrench for changing tires.
- Air compressor.
- Tire pressure gauge.
- Lift mechanism – (for popup camper owners)
- Electrical adapters.
- Drinking water hose.
- Water pressure regulator.
- Sewer hose.
- Black water tank cleaning tools.
- Fire extinguisher.
- Extra light bulbs.
- Bungee cords.
For Daily Life
- Medical equipment.
- Vitamins and supplements.
- Cell phone.
- Animal-proof food storage.
- Generator fuel.
- Kitchen utensils.
- Can opener.
- Bottle opener.
- Trash bags.
- Toilet paper.
- Paper towels.
- Washcloths.
- Personal hygiene items.
- Cleaning tools.
- Sheets, blankets, and pillows.
- Battery chargers.
- An extension cord.
- A first aid kit.
- Flashlights and lanterns.
- Sunglasses.
- Wet-weather gear.
Kitchen Suggestions
- Coffee maker.
- Coffee mugs.
- Coffee filters.
- Water strainer.
- Forks, spoons, and knives.
- Large spoons.
Personal Hygiene Suggestions
- Conditioner.
- Toothbrush.
- Toothpaste.
- Water flosser.
- Moisturizer.
- Campfire wood.
- Camping gear.
- Fishing gear.
- Toys for the kids.
- Sports equipment.
- Games for rainy days.
- Playing cards.
- Televisions.
Camping Equipment Suggestions
- Sleeping pad.
- Sleeping bag.
- Camp stove.
- Hiking boots.
- Water bottles.
- Flotation devices.
- Cross-country skis.
- Make sure the vehicle is parked close enough to the RV hookups. (sewer, water, and electric)
- Level the RV from side-to-side.
- Unhitch your RV.
- Level the RV from front-to-back.
- Place chock blocks behind your tires.
- Stabilize your RV.
- Make sure everything inside is safe and in place.
- Hookup your electrical connections.
- Hookup your sewer connections.
- Hookup your water connections.
- Turn on your propane tanks.
- First-aid kit.
How to Pack for Your Next RV Trip
These lists wouldn’t be any good if you didn’t know how to pack all of the items that we just listed. In this section, I’ll give you detailed information on how to pack everything up. Here is what we’ll cover.
- Where to put your belongings.
- How to store your belongings.
- Securing your items.
Where to Store Your Belongings
An RV needs to be loaded appropriately for it to be safe. For most trailers, this means that 60% of the weight should be in the front half of the RV and about 10% of this weight should be on or near the tongue of the trailer.
Because of this fact, you need to be careful where you put your gear and other items. For example, many people store their batteries and propane tanks on the tongue of their camper. This may not be a great idea as you might end up going over the 10% weight limit for your tongue.
To find out how much weight you have on your tongue, it may be a good idea to buy a hitch scale. These scales help you determine how much weight you actually have loaded up at the tongue.
You have to be careful how you load your camper from side-to-side as well. Too much weight placed on one side of the camper will increase trailer sway. This is true for people with motorhomes as well. You don’t want to drive a motorhome with all of the cargo loaded into one side of it.
For rear-wheel drive motorhomes, you’ll want to place the weight centered on or just in front of the rear axle. This will help give you more traction and will improve your motorhome’s handling.
See my post on “ How to Keep Your RV from Swaying “.
How to Store Your Belongings
One great tip for storing belongings in RVs and anywhere else is to use clear containers. Clear plastic bins give you the ability to see what’s in the bin at a glance. Even better, if the lid for the clear bin is also clear.
You can even place smaller clear bins inside of larger ones to help keep everything organized and in one place. I’ve even seen some larger clear bins with built-in wheels and a handle. Bring along a thick sheet of plywood and you’ll have a ramp to roll your wheeled bin down.
Items placed in the refrigerator may need to be padded. Soft fruits and vegetables might roll around in an RV refrigerator and we all know that bruised fruit spoils faster and doesn’t taste nearly as good as fruit that was well cared for. Wrap your fruits and veggies in paper towels and place them securely in bags so that they don’t move around while in transit.
Securing Your Items
An item placed inside of a camper or motorhome must be properly secured. This is especially true for dangerous kitchen items as well as fragile appliances, dishware, and camping gear.
For starters, make sure everything is in a cabinet, drawer, or bin. Make sure items in drawers and cabinets don’t have a lot of room to move around and secure them inside when necessary. You wouldn’t want to get to your destination only to have everything fall out of your cabinet as soon as you open it would you?
Once everything is securely in place, make sure that the drawers and cabinets will stay shut during transit. In some cases, this may mean you have to tie the cabinets up or place straps around the drawers. Keep them from opening up while driving and you won’t have a mess to clean up when you get to your campsite.
Other Considerations to Think About When Packing
- Dual-purpose items.
Weight Limits
Campers and motorhomes literally allow us to bring everything, including the kitchen sink. However, there weight limits to consider when packing for an RV trip.
Your camper or motorhome will have a GVWR number that you’ll need to abide by. This number includes the weight of your trailer or motorhome so keep this in mind as you tally up final weights to see what you can bring.
Also, keep in mind that every ounce of weight you add to your camper or motorhome will reduce your gas mileage and make your RV more difficult to travel with. Reduce the total weight of your RV and you’ll save money as well as the environment.
Size Restrictions
An RV doesn’t have an unlimited amount of space. Overpack and you may find yourself walking around objects in your RV all day long. This can quickly get frustrating and it can make it more difficult for you to get to the items you actually need.
Only bring the items you’ll actually need for your trip and leave the rest at home. Doing so will save you time, money, and a lot of frustration. After all, you’re on vacation, why not take a break from some of your stuff?
Dual-Purpose Items
A great way to reduce the amount of gear you need to bring with you is to buy items that can serve more than one purpose. On a very basic level, this could be a can opener that also works as a bottle opener. Or a fork that also works as a spoon.
On a more advanced level, you might get a convection oven instead of a toaster and a microwave. An appliance like this will save a lot of space as you’ll be able to completely eliminate the need to have two appliances.
If you need inspiration, look at ultra-light camping gear. I have seen radios that also act as emergency beacons as well as handheld flashlights. A tool like this turns three different pieces of gear into one.
Dual-purpose items save space, reduce weight, and reduce the total number of items you have to pack – it’s a triple win.
What NOT to Bring On Your Next RV Trip
We talked about what to bring when taking an RV trip but there are also items that you shouldn’t bring as well. Here is a quick list of items for you to consider leaving behind. I’ll explain the list in more detail afterward.
- Kitchen equipment.
- Pepper-spray.
- Recreational drugs.
When you first look at this list it might seem crazy not to bring food, water, and other essential items. However, if you’re traveling across borders you may not be able to transport some of these items. Even food needs to be discarded when traveling from the United States into Canada.
Some items can’t even legally be transported across state lines. For example, it is technically illegal to bring alcohol purchased in one state into another state. While you’re unlikely to get in trouble for doing so it is something you might want to consider.
If you’re traveling to another state or country, pick up your food, alcohol, and tobacco products when you get there.
Some items may not even be legal to use in some areas. For example, people living in Colorado can legally use marijuana. In other states, you can get put in jail for having too much of this substance on your person. The same holds true for pepper-spray. It is perfectly legal to carry pepper spray around with you in Pennsylvania but it is illegal to do so in New York. If you’re traveling through New York, it might be a good idea to buy pepper spray when you get closer to your final destination.
In most cases, you’ll want to leave most of your water tank empty as well. Driving with a full water tank puts additional strain on the holding tank and adds significantly to your RV’s weight. Put about 5 gallons of water in each of your tanks and fill the rest up when you get close to your destination. In most cases, you’ll be able to fill-up on-site anyway.
Finally, decide what you’re going to eat before you head out on your trip. This will eliminate the need to take kitchen appliances and utensils that you know you will not be using on your trip.
So now you know what to bring on your next RV trip and what not to bring on your next RV trip. Use these checklists as a guideline and refine them to meet the particular needs of your family and you’ll never forget anything again.
Click to share...

First Time RV Setup. A Step-by-Step User’s Guide
Around the world, more people are purchasing RV campers for their idea of a perfect getaway. Approximately 8.9 million households own an RV, and millions of other campers have rented them for their extended camping trips. However, the process of setting up an RV at a campsite can be tricky for those who are camping with an RV for the first time. For those who are new to RV camping, here is a step-by-step RV setup checklist to properly set up a camper for your next camping vacation.
Pick a Site
The key to a successful camping trip is a good campsite. You’ll want to set up your travel trailer at a campsite with the proper hookups that is relatively flat. Check each camping spot for easy access to water and electricity hookups, and check for other utilities such as a sewage system. Before parking the RV, clear the area of any low hanging branches, or obstacles on the ground.
Hit the Brakes
No matter where you are, it’s always advised that you apply the parking break before you begin to set up your RV. This is to ensure that the wheels will stay locked, preventing the RV from rolling away. RVs can be huge vehicles, with motorized RVs weighing tens of thousands of pounds. In addition, some travelers carry thousands of pounds of cargo. The larger the RV, the more stabilization and ground support it will need. Once you’ve parked the RV, place quality rubber truck wheel chocks in front of the wheels to ensure they are properly secured.
Level the Ground
Since the ground is not always flat, you may need to level it, to ensure that the utilities will work correctly, and the camper won’t sway in heavy winds. Remove stones or other protrusions, fill in small depressions and pack them tightly.
Support the RV
It is recommended that RV owners invest in supporting pads for RVs, commonly known as RV jack pads or camper jack pads. Quality RoadWarrior RV Jack Pads by DICA provide five major benefits:
- Guaranteed unbreakable support
- Safely distribute the weight of the jack supports over the ground
- Protect surfaces like asphalt, concrete or soft soil from being damaged by the jack foot
- Protect the jack foot from being bent and/or becoming stuck if it were to push into the ground
- Provide ease of placement and retrieval with an handle design.
Place your RV jack pads under your RV jacks as seen in the below video. Lower the jacks, checking to ensure that the jack will be centered in the middle of the jack pad. Once you’re on target, repeat the process for the remaining jacks on your RV.
If you have a leveling option for your RV, use it to ensure your hookups will function properly. If your RV is un-level and you don’t have an automatic leveling mechanism, you may need to add cribbing to your jack pad setup, or adjust your camping location. The cribbing option DICA recommends is additional jack pads that can increase height under the RV jack.
Once the RV is supported and leveled, it’s time to connect it to the services provided by the campgrounds. This most common includes electric and water services, but the exact hookup varies from campsite to campsite. Switch on any appliances that need to be running, such as a refrigerator or A/C unit.
Finishing Touches
Once the RV is secured and set up, it’s time to add the finishing touches of your travel trailer setup. This checklist includes setting up the interior and exterior of your RV. Stock your cabinets, store your food, and set the beds. For the outside, set up an outdoor camping mat, picnic table, or lawn chair. Many RVs also come equipped with awnings, which can be used to help create a simple but cozy environment during your trip.
Congratulations, you’ve learned how to set up a camper! Enjoy your well supported, level and comfortable RV campsite. For additional information beyond this RV camper checklist, see the following sites:
- Trailer Life
DICA is a family-owned and operated company that specializes in building high performance engineered rv jack pads, outrigger pads, crane pads, and cribbing blocks that are lightweight, easy to use, and long-lasting.
DICA products are proudly Made in the USA, ASME B30.5 compliant and used by operators in 40+ countries around the world.
Call Us Toll Free: (844) 286-7899
Company Headquarters 4101 120th Street Urbandale, IA 50323
Email Contact Form [email protected]
OTHER LINKS
- Privacy Policy
- Payment Policy
- Shipping Policy
- Return & Refund Policy
- Warranty Info
The Savvy Campers
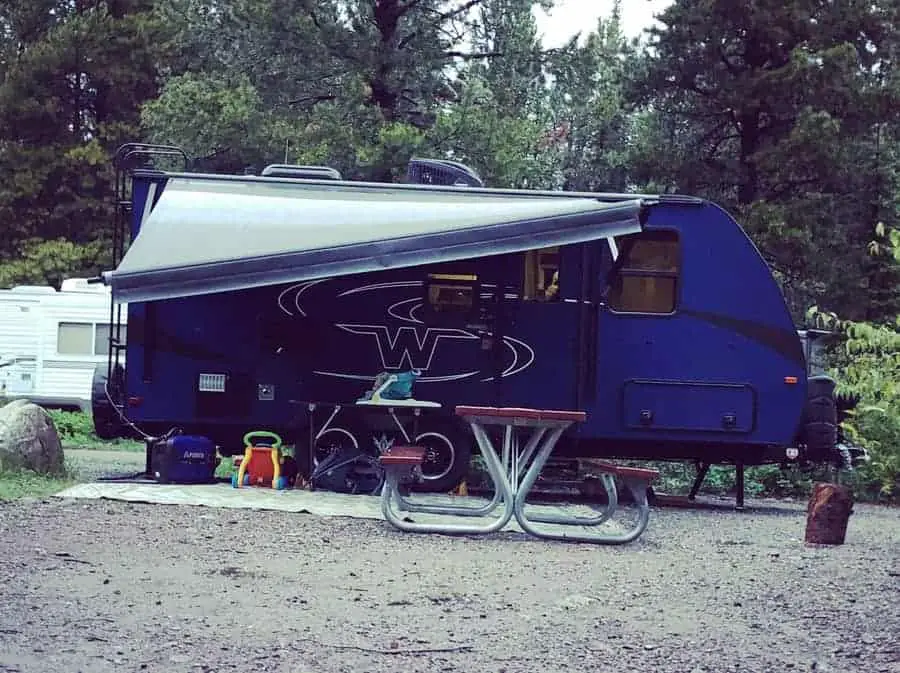
How long does it take to set up a travel trailer?
Setting up your travel trailer at a campsite is a process that largely depends on your trailer, amenities, location, and experience. On average, it should take around 30 minutes to an hour to completely set up your trailer.
Here is a guide to setting up your travel trailer, with all the steps you need and approximate times each step should take. Keep in mind that setting up your travel trailer will get easier over time, so don’t be discouraged if it takes you longer on the first try! The process will also go faster if you have family or friends who you can delegate to help.
Tip: It’s helpful to create a checklist for yourself so you don’t forget anything, and to make the process quicker!
Steps to set up your travel trailer:
Here are the steps to setting up a travel trailer. Please note, these steps are meant for travel trailers- RVs that are towed behind a vehicle (as opposed to motorized RVs, truck campers , etc.). Fifth wheel trailers will have similar steps, but may have a few differences (especially when it comes to unhitching).
Arrive at your campground / Park in your campsite
What you need: A good driver! Possibly a campsite reservation.
Time it takes: 10 minutes or less
Once you reach your destination, you may have to check in with the campsite owners to confirm your registration and get your site number. The size of your campsite will determine the flexibility you have for parking and picking a good, level parking spot. Having a campsite map can come in handy. Booking in advance will speed up the process and avoid disappointment. Here’s a guide for booking your campsite.
Once you’ve got your site, pick your parking spot and use your tow vehicle to drive or back in. It’s helpful to have another person spot you while doing this! Make sure your trailer is close to power/sewage/water facilities (if you have these amenities). You don’t want to get set up and then realize you need to move. Other factors to consider is space needed for pop-outs (if applicable) and areas of sun/shade (for comfort). Make sure to mind your neighbors!
Got a tricky spot? Check out our guide on How to Backup a Travel Trailer in a Tight Spot.
Tip: Setting up in the daylight will make this whole process MUCH easier.
Level your trailer side to side
What you need: Blocks and/or wedges, portable level (the kind with liquid and bubbles)
TIme it takes: 5 minutes or less
After you’ve parked your travel trailer, it’s important to get it at level as possible. Not only will this make your stay more comfortable, it will also allow your amenities (such as your fridge, water, etc.) to function effectively. Leveling side to side is done BEFORE unhitching (you’ll level front and back later).
Use your bubble level to check if your trailer is level. If it’s not, you’re going to use your blocks/wedges to raise up whichever side is lower. Do this by putting them in place and driving your trailer on top of them (with the wheels on the wedges/blocks). Make sure to check the level again, and repeat this process if necessary. There are a lot of block and wedge options available for purchase, including these Lynx Levelers. You can also take a look at our list of Best RV Leveling Blocks.
Tip: This step will be much easier if you pick a good, flat parking spot.
Unhitch your tow vehicle
What you need: Tongue jack (crank or electric), wheel chocks or x chocks, rubber block/pad, towel
TIme it takes: 10 minutes or less
Take your time when unhitching your travel trailer, especially when it’s your first time. You don’t want to get this part wrong, or hurt yourself! Also, purchasing an electric tongue jack costs more but is a great option for people with back problems.
First, use your chocks to prevent your trailer from rolling or wobbling. Here are some great options if you need to purchase chocks. It’s also helpful to get locks for your chocks! Start cranking to lower your tongue jack. It’s a good idea to put a rubber pad or block under your jack to prevent it from sinking into the ground. Release tension and put on your parking brake (for your towing vehicle). Take off any safety chains and/or emergency cables.
Release your hitch ball and use your tongue jack to lift the trailer until the hitch clears the ball. Disconnect wire harnesses, and then move your towing vehicle away (don’t forget to take off the parking brake!). Use your towel to wipe away grease, if needed.
Tip: Check your manual for hitching and unhitching instructions and warnings! Also, pick a jack based on the weight of your travel trailer. This option is electric and has a weight capacity of 3,500.
Level Front to back with Tongue Jack
What you need: Tongue jack (crank or electric), portable level
Use your level to see if your trailer needs to be leveled from front to back. Once again, make sure your tongue jack is on top of a mat or blocks (so it doesn’t get stuck in the ground) and use it to level your trailer. Periodically double check the level this with your bubble leveler! Use blocks to maintain level. Repeat this process until you’re level.
Tip: Some newer models of RVs come with auto leveling systems that use hydraulics to level your trailer.
Put out Stabilizer Jacks
What you need: Stabilizer jacks (manual or electric)
Stabilizer jacks help to keep your trailer safe and comfortable. After you’re level, set up your stabilizer jacks on the ground or on blocks or pads (like with the tongue jack, this is preferably because it will avoid sinking or unstable ground). One stabilizer should be placed on each corner of your RV under the frame.
Do not use stabilizer jacks to level. This can be dangerous and can damage both your trailer and the jacks. Putting on chocks or x chocks will also help with this process and general stability. For the best tools to stabilize, check out our complete guide to How to Make a Travel Trailer More Stable.
Put slide outs out
What you need: Nothing really, possibly lubricant
Before sliding out the pop out section of your trailer, go back to step one and double check that there’s nothing in the way! Most trailers have electric, hydraulic, or tip out slide outs. Once you’re ready, you really only need to flip a switch and your pop outs will pop out! If your slide out is stuck, you may need to use a lubricant. Please note that for electric slide outs, you’ll need to be connected to battery power.
If you have an awning, release the locks and loosen up the awning arms. Put the ratchet into roll out position (if applicable) and use a rod to grab the strap. Slide out arms and tighten knobs, then lift handles to place your awning at the height you want. Lock in place by releasing the levers. You may need a lubricant if you have issues with the awning mechanisms sticking.
Hook up power or set up generator
What you need: Plugs, extension cords, adapters, surge protector
To set up your electrical connection, plug in your surge protector to the campsite power dock. Having a surge protector can really be a life saver and is highly recommended, click here for more information and surge protector recommendations. If needed, add a power adapter and then your extension cord. Connect your electric cord to your trailer, and lock it (if applicable), then connect your power cord to the extension cord, completing the circuit. Check to make sure the power is working!
If you’re hooking up to a generator, take out your generator and set it on the ground near your trailer. Connect your generator to the fuel supply (usually the RV’s fuel or a separate propane tank) if you are running on propane, or fill it up with gas if not. Next hook up your power cable from the generator to the trailer and you are ready to start if you need power right away.
Tip: Need to buy a generator? Here are our recommendations.
Hook up water and sewer (if available)
What you need: Water pressure regulator, extensions, hoses (including a potable drinking water hose)
Don’t mix up your hoses! Connect your potable drinking water hose to your tank to the campground’s water spigot. Turn the spigot on and check the water level and pressure on your trailer’s gauge. If the pressure is too high, then you need to add a regulator to the spigot. Test your water to make sure it’s running.
If you are at a campground that provides a sewage facility, connect your black sewage hose. It’s best to use gloves for this process. Many campgrounds have a central dump facility, so you’ll dispose of waste at the end of your trip or whenever you need to (but this will require moving your trailer to the dump site).
Set up any outdoor rugs, tables/chairs, bbq’s, etc.
What you need: The sky’s the limit!
TIme it takes: Varies, around 10 minutes or less
Once your travel trailer is properly set up, you can bring out all your fun camping equipment. Build a fire, put out your chairs, or spend time assembling your cooking station and your pink flamingo decor- this step really depends on your personal interests and camping needs!
Tip: A rug right outside your trailer door(s) is a good idea to prevent dirt and leaves from tracking in.
Relax and Enjoy You Home Away from Home!
It should take between 30 minutes and one hour to set up your travel trailer. With practice, the right tools, a good checklist, and helpful friends or family, this time can be significantly shortened. Make sure to read any necessary manuals before you go, and try to set up in during dry weather (if possible) and during the daytime!
Be the first to be notified about FREE tips, hints, coupon codes, and email-exclusive information. All for FREE!
Related Posts:

Similar Posts

What is the difference between a 30 amp and 50 amp RV?
A 30 and 50 amp system both have the same purpose, to power the RV. However, they are very different and are used in different types of RVs. What is the difference between a 30 amp and 50 amp RV? The difference between 30 amps and 50 amps is how many items you can run…

Do Travel Trailers have Inverters?
When you are out camping, it is always nice to have power and still feel connected to civilization whether that is through a TV, microwave, cell phone, or other 110 volt devices. If you are off grid, you cannot use these devices as you only have 12v battery power. But wait, there is a product…

What to do if your Travel Trailer Smells Like Sewer
There’s a saying that if you love something, you have to accept its flaws, and everything has flaws. Unfortunately for those of us called unto the RV life, this saying quite literally applies. We love our RVs, but sometimes that love comes with a smelly price. How to get rid of the sewer smell in…

Does the Heat Actually Work in a Popup Camper?
Heating is an essential factor to consider when purchasing a popup camper. The fun of these campers is their versatility; so, a reliable heating system can help you get the most out of your investment, and get you on the road for more adventures. You’ll want to be able to use your camper in a…

9 Reasons Why Your RV Fridge Isn’t Working and How to Fix it
The fridge is one of the most important appliances in an RV, and it keeps your food fresh and drinks cold. However, even the best ones can run into problems, but this is no reason to panic. What are common reasons an RV fridge isn’t working? Common reasons for an RV fridge not working is…

How To Test If Your RV Fridge Is Working On Electric?
Most RV fridges are absorption refrigerators designed to run on 12V direct current or 120V alternating current electricity or propane gas heating. The absorption fridge is designed to be able to switch between any of these three supply settings. If your fridge is not working, no display lights will light up inside the fridge or…
Join our Newsletter to stay up to date on the latest RV topics and receive our FREE RV Inspection Cheat Sheet Today. Use this tool to inspect new or used campers you are looking at purchasing.
No thanks, I’m not interested!

How to Set up your Travel Trailer (8 Easy Step by Step Guide for first-timers)
Does it make you nervous thinking about your first trip with your new to you Travel Trailer? You are not really sure about how to set it up because you have never done this before? Yes, the dealer showed you how to do it, but you can’t really remember every step?
Here is a step-by-step guide ‘How to set up your Travel Trailer’, just follow these easy steps and print out the checklist for your convenience. (You can also find a lot of helpful tips in the Resource Library. )

Our first trip was very stressful to us, because we didn’t really know what to do or how to start. We thought learning by doing is great, but this is not really the best thing you should do when you are out in the woods.
Yes, the guy we bought the TT from did explain some things to us, but we couldn’t remember everything 2 months later. ( Good idea to take a video while you get an introduction).
Also, some things are just pretty new and odd to do. Have you ever dumped a black tank before? Right, and actually what is a black tank? And do you know what a surge protector is? A lot of new things will come up and you don’t know what and how to do it.
This is why I wrote the checklist ‘How to set up your Travel Trailer or RV’.
Being prepared before you leave is always good, therefore check out the ‘Must-haves ‘ for your RV. Just make sure you are not missing anything important for the inside or outside of your camper. We didn’t know anything about a surge protector or a water filter, but it is definitely recommended to have:

How to set up your RV or Travel Trailer
- level and chock wheels
- hook-up electricity (watch the video)
- hook up water
- hook up sewage
A step-by-step guide to set up your TT
- Before you pull into a site, check for low-hanging branches or big rocks on the ground. Try to find an even ground for parking your RV.
- Where are the hook-ups, electrical, water, and sewage hook-ups? Park your RV close to them so you don’t need an extension cord, but far away from it, if you have a slide-out on this side.
- The first thing after you parked your RV/TT is to level and to chock the wheels with blocks or stabilizing jacks. Check the levels on the side and the back of your RV/TT to be sure it is parked even.
- Drop the legs to stabilize it.
Set-up Basic Checklist
- Connect the electricity (I suggest you use a surge protector and check if everything is good) and plug your RV cable into the surge protector. Flip the breaker (watch the video below).
- Attach your water pressure regulato r and the water filter to the water faucet and add your drinking water hose. Turn the water on.
- Turn on the propane if it was turned off during the drive.
- Attach your sewage hose to the waste-water outlet. Use hose support for the black water.
- Keep the valves closed until you drain. Drain your tanks every 2-3 days (depending on usage). Always open the black tank (toilet tank) valve first, then the grey water tank valve (sink tank). Doing this will clean out the hose with the grey water tank water.
- Let the slide-outs out after the RV is leveled.
- Open your awning, but check the wind forecast for heavy winds.
- Place your outdoor rug in front of the entrance.
And now you can just relax, get your comfy chairs out and have fun with the family until it is time to pack up and go.
Here is your printable Checklist How to set up your Travel Trailer/RV
Watch this short video on how to set up your surge protector step by step.
Here are the steps again:
- plug the surge protector into your electrical cord
- plug the surge protector into the electrical campsite outlet
- turn on the breaker switch
- check if the light is blue = for on and we have 2 yellow lights for o.k.
- turn off the breaker switch
- plug the electric cord in your camper outlet and secure the plug by turning it to the right
- go back to the campsite electrical box and turn the breaker switch on
If you are not sure what to pack for your trip, what type of tools you need to bring and all the checklists you need, go to my Etsy Shop and get the bundle.
Step by Step guide packing up your site Travel Trailer
- Dump the black and grey tank. Put the suggested chemicals in your black and grey tank “ Happy Camper from Amazon ” or something similar. Or add half a cup of Dawn dishwasher detergent, add about 3 gallons of water, let sit for half an hour and then dump it. Add a bio pod before storing the camper.
- Disconnect sewer hoses, wash them out and pack them away. We put the sewer hose in a trash bag and into the outside compartment.
- Dump your freshwater tank, you don’t need the extra weight driving.
- Bring the slides in.
- Make sure all windows are securely closed and the antenna is in.
- Disconnect the electricity.
- Pack away your surge protector.
- Hitch the car to the trailer.
- Connect camper brake lights.
- Attach the anti-sway bar and weight distribution unit.
- Make sure the parking brake is on.
- Then take chalks and levels off and pack them away.
- Close and lock all storage hatches.
- Bring the steps in.
- Make one last inspection tour around car and trailer before you drive home.
- Leave the fridge and freezer doors open, otherwise, the seals get moldy and the inside smells bad.
Watch this short video to explain all the steps again, how to set up your Travel Trailer the right way:
What you can do while you wait for your RV to arrive:
If this is your first RV and you are very excited and a little scared about the whole RVing thing, rent an RV similar to yours before you actually get yours and go on a short weekend trip close to home. Try it out, and make yourself feel confident. It is definitely not rocket science, but good to know what you are doing. Check out RV share or Outdoorsy for the best deals near you.
Don’t make these RV mistakes.
This is what happened to us on our first travels:.
We had so many incidents happen to us on our first trips. The last one occurred while driving on the Highway a window opened up and flew wide open. Not a good thing to happen, because you have to stop right away otherwise the window is gone.
Or the antenna was still out while driving from the campground and people waving at us. We also had the steps still out while driving away, or left the surge protector plugged in at the campground and noticed that at the other campsite…(costly mistake).
RV 101 inside your RV
Of course, make sure that everything inside the camper is securely stored away and not flying around while you are driving.
Also, don’t use glasses and ceramic dishes, things break easily especially when cabinets open up while driving. I only use plastic dishes.
Check if all the cabinets are closed and you have nothing heavy stored on top of a shelf. Read also about Storage Ideas .
After 3 or 4 trips, we had it down. Now setting up the Travel Trailer or bringing it down runs like a well-oiled machine. But it definitely took us some time until we actually knew what we were doing.
So just take it easy, one step after the other. Take your time and don’t let yourself get stressed out.
Summary of How to set up your RV or Travel Trailer
It can be stressful if you don’t know what you are doing, but setting up an RV or Travel Trailer will get easier after every trip. And the good thing is, 95 % of the campers are friendly and help you out with whatever your issue might be.
To make your life easier, print out the downloads and check off each point to be sure, everything is done. Especially when you are just starting and you are not sure what are the right steps.
And now enjoy your adventures but don’t forget the packing and tool list:

Planning the first road trip can get overwhelming. How long shall we drive, where to park the Travel Trailer, shall I make campground reservations and so many more questions.
This is why you should read the step-by-step guide for planning a road trip

See you on the road,
Want to remember this ‘How to set up an RV/Travel Trailer’? Pin this image to your favorite board.

Similar Posts

What States have RV Lemon Laws in the US?
Did you buy a new RV and have nothing but issues with it? The dealer from which you bought your RV is not really helpful. What can you do to get all the issues solved and actually start enjoying your travels? What Stated have RV Lemon Laws? What is the Lemon Law? The Lemon Law…

5 bad weather RV travel tips you need to know
Well, it is no fun driving a car in bad weather but it is totally dangerous driving a big RV or Motorhome in bad weather respectively a storm. You need to know how to behave while driving a Motorhome, a 5th Wheel, or when pulling a travel trailer. Therefore it is mandatory to know the…

A Step by Step guide for buying an RV or Travel Trailer
A step by step guide for buying an RV or Travel Trailer is so essential if you don’t want to end up buying a lemon. Take your time and do the research and your RV adventure will start great. When we decided to buy an RV or Travel Trailer, we didn’t know anything about how…

Boondocking – everything you need to know and 8 must-haves
So, you are tired of paying an insane amount of money for overcrowded campsites, bad amenities, and bad service. The freedom of happy camping is not happening on overfilled parking lots. This is why you are researching boondocking as an option for you. Yes, good choice, but make sure you know the basic tips before…

Best and most useful 9 Shoe Storage Ideas for Your RV
Ever wonder where to store your shoes inside your camper? Find out the Best and most useful 9 Shoe Storage Ideas for Your RV right here: When it comes to shoe storage in RVs, maximizing space and keeping things organized is essential. Therefore, you need to make an easily accessible area for everybody to store…

Van camping for women – 35+ best tips if you don’t know how to start
Best tips on how women start with solo van camping if they have never done anything like this before but desperately want to start. Van camping for women – 35+ best tips if you don’t know how to start with this lifestyle. I can hardly wait, I have been dreaming about it for so long….
I need all the help I can get with Rving information. I am a first time camper trailer owner and need your steps. Rving for beginners rv set up guide Please 🙂
Hi Lisa, oh just start easy and slow as everyone started and ask a lot of questions. It will be so good. Follow the steps, one after the other. Here to help.
Leave a Reply Cancel reply
Your email address will not be published. Required fields are marked *
This site uses Akismet to reduce spam. Learn how your comment data is processed .
- Find a Location
RV Hitch and Tow Basics for Travel Trailers and Fifth Wheels

Conventional hitches are grouped into classes specifying a trailer weight range. The class of hitch you select is mostly determined by the tow vehicle and its towing capacity.
Class of Conventional Hitches and Towing Capacities
- Class 1: up to 2,000 pounds
- Class 2: up to 3,500 pounds
- Class 3: up to 8,000 pounds
- Class 4: up to 10,000 pounds
- Class 5: up to 12,000 pounds
- Most cars and crossovers come equipped with Class 1, 2, or 3 hitches.
- Larger trucks and SUVs can be equipped with Class 3, 4, or 5 hitches.
- Class 3, 4, or 5 trailer hitch receivers are rated for use with weight distribution components
Conventional Hitch Components
Each conventional hitch has a different sized receiver tube . This is where the ball mount and hitch ball go. Ball mounts come in 2 types: adjustable or non-adjustable. Adjustable ball mounts lower or raise the ball height as needed to help your fully loaded trailer sit and ride as level as possible.
Hitch ball sizes are determined by the weight of the trailer. Incorrect hitch ball size is a leading cause of trailer accidents. The correct hitch ball size for your trailer should be stamped on the trailer coupler in accordance with Department of Transportation (DOT) regulations. The hitch ball and coupler size classes must match.
The trailer hitch coupler is bolted or welded onto the end of the trailer frame . The hitch coupler mounts onto the hitch ball and pivots on the hitch ball during trailer operation.
Frame Mounted Receiver Hitch
If your tow vehicle is not equipped with a rear receiver hitch, Camping World can install one, manufacturer guidelines permitting. There are aftermarket frame mount hitches designed to fit motorhome and vehicle chassis. The frame mounted receiver hitch is an attachment you can either bolt-on or weld to the tow vehicle frame. For safety and towing capacity, trailer hitches should be mounted to the tow vehicle’s frame instead of its bumper.
RV Hitch Mount
RV hitch mounts , also referred to as accessory adapters , are aftermarket components attached to the RV bumper or the RV frame. RV hitch mounts are sometimes confused with frame mounted receiver hitches because of the similar design. So, verify the manufacturer designated usage rating if you’re unsure which one you’re looking at. RV bumper hitch options fasten to the bumper, either clamp or bolt-on, and provide a hitch mount attachment point for you to haul bicycles, cargo, or another accessory. RV bumper hitches are NOT rated to tow a trailer or vehicle.
Weight Distribution Hitch
This brings us to the weight distribution hitch , also called an equalizer hitch . A weight distribution hitch mounts to the rear hitch of the tow vehicle. This kind of load equalizing hitch redistributes the tongue weight, which removes weight from the rear of the tow vehicle allowing a more leveled trailer.
Level trailer operation is essential whether the RV is traveling down the road or parked at a campsite. As the driver, what you feel is greater steering control, improved braking, and better fuel economy. What’s more, your vehicle’s headlights are pointed in the correct direction instead of skyward—less squatting. Level trailer towing makes for an all-around safer towing environment.
Too much weight on the hitch will make steering difficult because of the drag on the rear wheels of the tow vehicle. Too much weight on the rear of the towed vehicle could cause the trailer to “fishtail.”
Sway Control

Quick RV lingo lesson: weight distribution hitches are incorrectly interchanged with the term “sway control.” Weight distribution hitches improve sway control; however, not all sway control systems provide weight distribution.
Sway control , without weight distribution, still helps you maintain control of your tow vehicle. Also called anti-roll bars or sway bars , the sway control keeps your trailer following along behind the tow vehicle through turns and quick lane changes.
Trailer Sway Mythbuster!
Accelerating will NOT reduce trailer sway. Just the opposite, accelerating elevates the danger level. Instead, if your RV hitch and tow setup uses a weight distribution hitch, then start braking softy using your trailer brake and vehicle brakes. This will pull the trailer straight behind you while you safely decelerate to a stop. Then, once at a safe stopping point, inspect and rebalance the RV’s load to reduce trailer sway. Keep heavy items closer to the RV’s axle, and don’t overload the rear.
A weight distribution hitch and sway control systems are an optional upgrade. When determining whether to invest in either, consider the length of your trailer and the towing capacity of your tow vehicle. For many RVers, the extra peace-of-mind and smooth drivability are worth the upfront investment of these systems.
Fifth Wheel Hitch

The fifth wheel hitch receiver is mounted in the tow vehicle truck bed above the rear axle. Compared to the rear receiver hitch, this hitch mounting location allows for longer, wider, and heavier RV trailers without destabilizing the tow vehicle.
A fifth wheel trailer has a king pin that connects to the fifth wheel hitch with a jaw mechanism coupler . There are sliding and fixed fifth wheel hitch options to match your tow vehicle capabilities. Sliding hitches can help avoid damage to the tow vehicle if you have a short bed truck and can help maneuver in tighter spaces.
There are optional king pin box upgrades, too.
Towing Capacity
Now that we’ve covered compatible RV hitch and tow configurations, the other half of the equation is compatible towing capacity .
Easy Towing Math
Know your weights, actuals, and limits. At the component level, every component of your hitch and tow configuration will have a weight rating. Refer to the hitch class list above.
At the vehicular level , both your RV and tow vehicle will have ratings for Gross Combination Weight Rating , Gross Vehicle Weight Rating , and Gross Axle Weight Rating . The tow vehicle Rear Axle Weight Rating in conjunction with the trailer Tongue Weight or fifth wheel Pin Weight are also important to know.
For each of these weight rating categories, you need to know the maximum weight rating and the actual weight, or a close educated guess. Knowing these numbers will make driving with a towable safer as well as help you feel more comfortable towing. You can weigh your vehicle and trailer at a truck stop weigh station.
Gross Combination Weight Rating (GCWR) is the total amount of weight of everything moving down the road. This includes the RV, tow vehicle, gear, supplies, fluids, and passengers. This is essential for the braking system. Staying within spec means the brakes can slow the whole rig down appropriately.
Your fully loaded “wet” weight with fluids onboard must not exceed the Gross Vehicle Weight Rating (GVWR) , which is the maximum allowable weight of that vehicle, its cargo, and its passengers. When towing anything, it’s recommended to stay within 75% of your tow vehicle’s GVWR to provide a cushion for a safer towing experience.
Mythbuster: You cannot change the vehicle GCWR or the GVWR by upgrading the trailer hitch. Upgrading the hitch configuration optimizes the carrying capacity of your tow vehicle as well as improves towing safety, fuel economy, braking, and load stabilization.
When loading and packing your RV and tow vehicle, take note of the Gross Axle Weight Rating (GAWR) . This is the amount of weight each axle is designed to support—including the weight of the axle itself. This rating assumes the loaded weight is balanced on both sides of that axle. As you pack, also keep in mind the impact of the trailer Tongue Weight , fifth wheel Pin Weight , and tow vehicle Rear Axle Weight Rating (RAWR) limit . As you drive, you will feel even as well as uneven weight distribution in the performance of the tow vehicle.
BONUS TIP: When pulling out for your road trip, stop at a certified scale or weigh station to weigh both your fully loaded trailer and tow vehicle. Most scale operators are willing to help in the interest of safety and will instruct you through their scale process. If you can’t find a public scale, call a local trucking company—they will know where to find one.
How to Correctly Hitch Up
Next, it’s essential to connect correctly and make sure everything works. Correctly hitching up your towable RV ( travel trailers and fifth wheel trailers ) is straightforward.
- First, you need to use the correct hitch compatible for your setup .
- If desired, install the optional weight distribution hitch or sway control .
- If needed, reposition the tow vehicle— Remember to set the emergency brake on the tow vehicle .
- Next, connect the hitch and latch the hitch coupler using the appropriate mechanism.
- If your coupler uses a pin-style mechanism, be sure to fully engage the pin by pushing it all the way in .
- Then, if you have an optional weight distribution hitch or sway control, adjust those attachments according to the manufacturer’s instructions in the technical manual.
- Next, electrically connect and secure your RV and tow vehicle using the manufacturer provided cables and chains for your hitch and tow configuration.
- Test the brake lights on your trailer to make sure they’re functioning.
- For a rear receiver hitch, hook up your safety chains by crisscrossing them under the coupler . The crisscrossed chains form a “cradle” for the trailer tongue to fall onto if anything caused the trailer to disconnect from the tow vehicle. The chains should have slack, but they should not drag. The slack allows sharp turn maneuverability.
- Always attach the breakaway brake cable or chain . This activates the trailer brakes if the trailer unexpectedly disconnects from the tow vehicle in transit.
- Do a walk-around touch inspection before pulling out. Each hitch and tow configuration has specific touch points.
Touch points to remember: All hitch pins and electrical connections are fully pushed in all the way. All bolts are tightly secured. Double-check to make sure your tongue jack and any stabilizer jacks are completely up. Remove the wheel chocks last—Remember to remove these.
You can also download or print and laminate this fifth wheel hitch checklist for reference.

Leave Your Comment Cancel Reply
Save my name, email, and website in this browser for the next time I comment.
Shop By RV Type

Your Adventure Awaits
Copyright © 2023 cwi, llc all rights reserved.
- RV Glossary |
- Privacy Policy |
- California Privacy Rights |
- Do Not Sell or Share My Personal Information |
- Targeted Advertising Opt Out |
- Terms of Use

How To Set Up The Perfect RV Campground
B efore you can relax and enjoy camping in the great outdoors, you'll first need to set up camp. In this case, we mean setting up your RV at a campsite. If you're a first-timer, it's quite understandable how this can seem intimidating or overwhelming. When you're confused or unsure of what to do, having a checklist will be handy.
While RV veterans may have their campground routine to a tee, beginners can go through their RV setup checklist to make sure nothing's left out. The checklist below will outline the general steps of setting up your RV campsite, but you might need to do more, depending on your RV.
In any case, make sure to arrive at your campground with plenty of time to set up properly. You don't want to rush these things. (The 3-3-3 rule is a good one to follow.) Everything should be set up correctly so you don't have any unexpected issues popping up in the middle of your RV trip .
Parking Your RV
If your campground allows you to pick a site, drive through the area first to find a suitable location. When deciding on a spot, think about three key issues: ground level or unevenness, obstructions, and hookup access. If the campground is uneven, i.e., features slopes or holes, you might need leveling blocks to stabilize your RV. Obstructions include low-hanging branches, hookup pedestals, or any objects that can make it difficult to position your RV or possibly damage it. Keep in mind also that while trees might provide shade from the sun, they can block solar panels and leave dead leaves scattered on the roof. You should also have enough space for your awning and slide-outs. In addition, look for a spot that's near hookups for easier connections to your water, electricity, and sewage.
When it's time to park, have someone become your lookout unless pull-through parking is available at your campsite. Pull-through parking features an entrance and an exit, requiring no backing in, so you can easily do this on your own. Otherwise, a parking lookout can help you maneuver into your spot without hitting anything. They can also make sure that your slide-outs and awnings have space to spread out and that hookup connections are accessible or close by. It's important that you don't rush your RV parking. Take your time and communicate with your lookout buddy all throughout to ensure smooth parking.
Leveling Your RV
Once you've parked in your spot, it's time to level your RV. First, ensure you apply the parking brake or emergency brake. Always do this no matter the size of your mobile unit. A parking or emergency brake ensures your wheels are locked and your RV stays put. If you forget to put your brakes on, you face the risk of your RV rolling away while you're busy setting up your hookups, for instance.
Then it's time to check that your RV is level left to right or side to side. If your RV has its own auto-leveling system, use that. If not, you can use a bubble level or other manual leveling tool, which you can either position outside or inside the RV. Some RV campers recommend investing in a leveling device called the LevelMatePRO. It uses Bluetooth technology and comes with an app, so it's fairly easy to use. Just open the app and it will tell you exactly how much your RV is off to one side or the other.
To level your RV front to back, you'll need leveling jacks. Check your RV if it has leveling jacks already installed. If not, you can buy portable jacks from Amazon and other retailers.
Securing And Stabilizing Your RV
After leveling your RV, it's time to chock the wheels. Some leveling blocks come with interlocking pads that you can stack. There are also plastic ones but these aren't advisable as they can sink into the ground and should you forget about them, the RV wheels just roll over them when you leave. If you can, invest in heavy-duty rubber chocks. Place your RV chocks under a pair of wheels to help ensure your RV will not move or roll away. Wheel chocks are your third level of security to keep your RV in place. They'll work even when your brake or leveling jacks don't.
Once the chocks are in place, it's time to put down your RV's stabilizer jacks. Unlike leveling jacks, stabilizer jacks are not meant to level the RV. Instead, you use them to stabilize a slide-out or other portions of the vehicle. This means that when you're walking inside the RV, you won't feel it swaying too much because of the movements.
Connecting To Utilities
Assuming you're not dry camping, your campsite should provide you with a partial hookup (water and electricity) or a full hookup (water, electricity, and sewage). One of the reasons why you have to level your RV is so that you can connect to these utilities more easily. RVs use 30 or 50 amp and campsites may offer any of these, so it's good to have an adapter on hand as well as a surge protector that you can plug in at camp or install in your RV. With the breaker turned off, plug in the surge protector and adaptor. Then connect to your RV and turn on the breaker. This is the best time to set up your slide-outs to avoid using the battery or solar power.
For your water connection, check to see that water is running before hooking up with a hose that's good to use for drinking water. Then attach a filter and a pressure regulator. The Home That Roams advises using a Y-adapter for hooking up another hose or washing your hands.
Set up your sewage connection last, if it's available. Put on a pair of sturdy waterproof gloves to protect yourself from any mess or spills. Before connecting, check your RV's monitoring system, if available, and make sure both black and gray water lines are closed. Then open the campsite's sewage cap and make the hookup. It's essential that your hose is sloped to avoid any build-ups, so consider using a sewer hose support to keep the flow moving naturally.
Finalizing Your RV Setup
With your water, electricity, and sewage connections all sorted out, it's time to make the campsite feel like home. This most likely means making it comfortable during your stay and making it look pleasant to your eyes. You can set up your satellite TV or internet, bring out the tables and chairs, and put down your carpet or mat by the door.
This is also the time to tend to your pets, if you brought along any. You can keep small pets in their portable pens, while you can tie larger pets to a tree or the rear trailer hitch. You'll also want to sort out where and how you can throw away the trash. Some campsites have a dumpster where you can dispose of your trash, while others might pick it up every morning. Aside from trash issues, you should also ask campground staff for some important info that you'll need in case of emergencies. These include your site number, the campsite's name, and its phone number.
Read this next: The 75 Top RV Parks In America With The Most Amenities

6 steps to planning a successful RV road trip
Whether you’re an experienced RVer or just starting out, these tips will help make sure you have an amazing RV road trip
By Roadtrippers
When I bought my first RV more than a decade ago, it wasn’t because I loved camping. Rather, I was a dedicated roadtripper who spent all my vacation time driving along the Blue Ridge Parkway in the east, the Pacific Coast Highway in the west, or any scenic byway in between. As I entered my 30s—with a couple of babies in tow—I still desperately wanted to be a road warrior. However, I also wanted to bring some of the creature comforts of home along on the adventure. Enter the RV road trip.
Why road trip in an RV rather than a car?
Eleven years after that first RV purchase I can say the big bet paid off. My family has spent hundreds of days roadtripping around the country exploring national parks , historical landmarks, kitschy roadside attractions , urban destinations, and beach resorts. Here are the reasons why I choose to plan RV road trips more than any other type of travel.
You can travel more and spend less
It is easier for us to control costs when we travel in an RV than when we take other types of road trips. Spending less on a campground does not mean sacrificing natural beauty or comfort. State and national park campgrounds offer some of the most scenic places to park your rig with a price tag ranging from 20 to 40 dollars per night. Feeling more adventurous? Find Bureau of Land Management (BLM) land where you can boondock for free. Another option is purchasing a Harvest Hosts membership, which will allow you to camp for free at wineries, breweries, and farms around the country.
You can prepare your own food in an RV
An RV kitchen allows travelers to eat healthier and spend less money while on the road. This can be particularly helpful for anyone with special dietary restrictions and food allergies, or for picky eaters. We love picking up regional specialties at farmers’ markets and then preparing dinner at the campground.
You get your own (clean) bedroom and bathroom
No matter where we are in the country, we love ending the day by falling asleep on our own custom memory foam RV mattress. Our kids have their favorite blankets and stuffed animals. The bathroom is always well-stocked with our favorite toiletries, and the medicine cabinet has all the necessary first aid supplies we might need in a pinch. We are able to stock up on cleaning supplies and control the cleanliness of our environment more easily when traveling with an RV.

Plan on renting an RV?
The RV rental industry has been growing rapidly over the last decade. If you plan on renting an RV for your next road trip, don’t wait to make that reservation. I highly recommend renting a motorhome that is 30 feet or less, which will enable you to fit into almost any RV campsite out there—public or private.
Related Renting an RV for the First Time
A Class C RV rental will feel similar to driving a U-Haul truck and is fairly easy to maneuver on highways and in parking lots. Smaller Class Bs—think #vanlife—are even easier to drive but offer very little storage or sleeping space. Class As are more like buses and may be intimidating to first-time RVers. You will also be relegated to big-rig-friendly campgrounds and oversize parking spots.
Shopping for your first RV?
If you are currently in the market for your first RV, make sure you purchase a rig that will fit your traveling style. There is no shortage of massive RVs out there with residential refrigerators, massaging recliners, and king-sized master beds. However, these types of RVs are not well suited for roadtrippers who aim to easily move from place to place and stay light on their feet.
Consider set up and break down times. Be aware that gas stops and quick roadside breaks will be more challenging. Also figure out what kind of campground experience you want. Rule of thumb is to purchase an RV under 30 feet long in order to fit into most state and national park campgrounds.
If you would like to boondock or park overnight in free locations, make sure you look for large fresh water, gray water, and black water tanks as you shop. You may also want to look into solar panels or an onboard generator to power your off-grid adventures.
Already own an RV?
If you recently purchased your RV and are itching to hit the road, take a breath and get comfortable with your new home on wheels first. Head to an empty parking lot and practice backing up, parking, and turning. Create personalized checklists for campground departure and arrival. Measure and record the length and height of your rig (including air conditioner). Load your RV with all your gear and head to your local CAT scales to make sure it’s not overweight.

Despite all the compelling reasons to road trip in an RV, this mode of transportation does not come without its own unique set of challenges and concerns. No matter how experienced of a roadtripper you are, you’ll need to make some adjustments when planning an RV road trip.
1. Choose the right RV for the road trip you want to plan
Don’t expect to take the scenic route and play your campground stops by ear in a 40-foot Class A motorhome. On the other hand, you may not be able to stock up on groceries and prepare your own gourmet meals in a 16-foot Class B van. Matching up your rig with your desired adventure is the first step in planning a successful RV road trip.
2. Make a plan that matches your budget
The three most expensive line items for an RV road trip are gas, campground fees, and food. All three of these can vary dramatically depending on the type of road trip you plan. Knowing your RV or tow vehicle MPG will help you plan a route that doesn’t break the bank. Remember, you don’t have to drive across the country to have an amazing adventure.
Having a campground budget will help you feel free to splurge on an RV resort at one stop and then balance that out with some state park camping or boondocking. Some folks save money by overnighting in Walmart, Cracker Barrel, or Cabela’s parking lots instead of pricey private campgrounds by the side of the road. Just call ahead to check on local ordinances.
Related How to find a safe place to park your RV or van for the night
3. Book campsites far in advance of your departure date if possible
The current state of available campsites is a hard pill to swallow for new RVers. Many people dream of hitting the road and letting the wind blow them where it may. Unfortunately, the best state and national park campsites are often booked months in advance, so making reservations is typically recommended. Carefully read online reviews to ensure the campground is a good fit. Make sure the campground has the amenities that you need, whether that’s a pool and hot tub or just sparkling clean bathhouses. Also note any cancellation policies and record them in your smartphone calendar along with the reservation information. This way you are prepared if plans do change while you’re on the road.

4. Plan an RV-friendly route
Many experienced roadtrippers love exploring the backroads and scenic byways when traveling from point A to point B. You will have to approach route planning differently when taking an RV road trip. Look for any low clearances and propane restrictions for bridges and tunnels. Think about gas stops that won’t land you in a parking lot pickle. Be aware of steep grades or switchbacks that may be tricky to navigate in an RV.
Related What’s the Best Trip Planner?
5. Research RV parking in advance
Seasoned roadtrippers love to find unexpected treasures and make unplanned stops. This becomes a bit trickier when traveling by RV. I usually call ahead to points of interest along our route and specifically ask for details about RV parking. From the Corn Palace in South Dakota to the Bay of Fundy in Nova Scotia, we’ve been able to easily navigate busy tourist attractions armed with advanced parking intel. What about those fun, unplanned stops that pop up along the way? Check the satellite map view on your smartphone to see if you will be able to navigate in and out of the location before committing.

Take an RV-safe road trip with RV GPS, now available with a Roadtrippers Membership
6. adjust your estimated time of arrival.
One of the most common mistakes new RV roadtrippers make is expecting to move at the same pace as when traveling by car. That’s not going to happen, so it’s important to have reasonable expectations when planning your itinerary. An easy rule of thumb is to plan an average route speed of 50 miles per hour. This accounts for generally slower speeds, but also longer and perhaps more frequent gas stops. Driving an RV takes a lot more focus than a car, and first-time RVers are often surprised that they are tired after a shorter time behind the wheel. For this reason, some RVers follow the 3/300 rule: Drive no more than 300 miles in a single day and arrive at your destination no later than 3 p.m.
After hundreds of days spent roadtripping in an RV over the last decade, I clearly enjoy hitting the open road with my home on wheels. I’m willing to trade a bit of flexibility for a whole lot of comfort. Find the right rig, plan ahead, and adjust your expectations a bit. Then get ready to have an amazing road trip adventure.
Meet the Author

Roadtrippers
Roadtrippers helps you find the most epic destinations and detours—from roadside attractions to natural wonders and beyond.
- Related Articles
- Latest Articles

Try this travel inspiration app for your next roadtrip

Road trip essentials: How and what to pack for your road trip

How to leave no trace during your summer road trip

The Ultimate Guide to Burning Man

How to prepare your RV for playa dust at Burning Man

Travel planning apps: Comparing options for your next adventure
Get the most inspiring stories from the road sent directly to your inbox..

- Sign up Log in Sign out
- Log in Sign out
Plan your journey, find amazing places, and take fascinating detours with our app.
If you used to sign in with Roadpass, you should now use the same username and password to log in directly with Roadtrippers above.
We couldn't find an existing Roadtrippers account using that service. Please try signing in with another option.
We need your email address to send you trip itineraries and other updates.
How do you want to plan your trip?
With just a few questions, our newest Premium feature, Autopilot, will plan your next adventure.
IMAGES
VIDEO
COMMENTS
Follow these five steps to unhitch and finish leveling your travel trailer. Extend the tongue jack until pressure begins to be taken off the hitch ball. (Use a tongue jack stand or support block to protect the pad of your jack and reduce the amount of extension required.) Unplug the 7-pin electrical connector.
This video has been updated with a new video, see the new video here: https://youtu.be/ermDoIB-y7s💥UPDATE: Before completing step 1 below - check the powe...
Here are the steps to follow: 1. Position the tow vehicle . Align the tow vehicle to your trailer and check that the trailer jack is high enough so the ball can slide under the trailer tongue with enough clearance when you back the tow vehicle up. Back the tow vehicle up and position it so the ball is right under the trailer coupler.
Level RV: Use leveling blocks or your RV's built-in leveling system to ensure a stable and even living area. Connect to Shore Power: Plug in your electrical cord to the site's power supply to run your RV's electrical systems. Connect Water Lines: Hook up your water lines to access fresh water. Connect Sewer Hose: Attach your sewer hose to ...
Keystone RV Center knows that owning your first RV can be a lot to take in. A lot of customers have questions about how to set up for their first time! We cr...
If you are hooked up to city water, simply connect your house to the water hookup on your trailer. If you are using a holding tank, fill the tank with water before connecting it to the trailer. Next, connect your power cord to the power hookup on your trailer. If you are using an RV generator, make sure it is full of fuel before starting it up.
Install leveling blocks as needed. Use leveling blocks under your wheels to raise your RV and level it from side-to-side (for towable RVs) or side-to-side and front-to-back (for motorhomes). Chock the wheels. Set these in place to ensure your RV doesn't shift. Disconnect your tow vehicle (Towable RVs only).
Hello, we are Allen & Rose and a very warm welcome to RV Field Trip! Set up your RV travel trailer at a campsite for the first time can be stressful for RV n...
Level the vehicle. Connect the power. Turn the propane on. Hook up your water line. Bleed air out of the hot water tank and turn it on. Hook up the sewer hose. Put out your outdoor items (awning, tables, chairs, etc.). Raise your antennae. Lower the outside step.
I also have 14 RV Pro Tips for Backing Up a Travel Trailer. Jennifer using a 2 way radio to direct Mike as he backs into a camping space 3. Set the Emergency Break. Always set the emergency brake as soon as you park! If your RV or travel trailer doesn't have an emergency brake, use wheel chocks on both sides of the wheels. 4. Secure Your Pet
Step 1. The decision. This is the most important part of the process as you have to decide where you want the travel trailer to remain permanently. If you are not happy with the area, you won't stay that long so make sure you get the perfect spot for you and your spouse. Step 2: Leveling.
With so many things to remember upon arrival or departure from your campsite, it can be easy to miss crucial steps during setup or tear down. That's why we created this printable RV setup checklist. ... Thomas Payne RV Furniture Renew, Refresh, Restore. Upgrade your old RV furniture and Mattress with the Thomas Payne collection.
Run bike security lock through both tires on one side of travel trailer and lock looped ends together. Put on tire covers. Insert wheel stop chocks if you are using them. RV tires with chocks, a cable lock and a wheel stop chock for additional stability. Stack of leveling pads in background under stabilizer jack.
The Complete RV Camping Checklist. Air mattress or sleeping pads. Auto/Truck Parts (fuses, filters and fluids) Basic kitchen supplies like aluminum foil, plastic wrap, and storage containers. Basic toolkit (screwdriver, pliers, hammer, wrenches, and a tape measure) Bedding, pillows, blankets.
The checklist for setting up will give you a step-by-step guide to setting up your RV. It is a printable RV checklist that you can take with you to help you get set up quickly and easily. Use it at the campsite or even while stopping for a few hours while out on the road. Do the checklist in reverse when you want to break camp.
For those who are new to RV camping, here is a step-by-step RV setup checklist to properly set up a camper for your next camping vacation. Pick a Site. The key to a successful camping trip is a good campsite. You'll want to set up your travel trailer at a campsite with the proper hookups that is relatively flat.
In our RV Basics series, we will show you have to set up your RV campsite as quickly and painlessly as possible so you can get out there and enjoy your vacation and family! Here are the steps you need to take to properly set up your campsite, starting with site selection, arrival, setting up your rig, and finally all of your outdoor gear.
You have arrived at your campsite with your travel trailer. Now it's time to get set up at the site! This video walks through our full setup checklist we f...
Setting up your travel trailer at a campsite is a process that largely depends on your trailer, amenities, location, and experience. On average, it should take around 30 minutes to an hour to completely set up your trailer. Here is a guide to setting up your travel trailer, with all the steps you need and approximate times each step should take.
Find a partner to guide you and line your tow vehicle's hitch ball up with the trailer's coupler. Make sure wheel chocks are in place and raise stabilizing jacks if extended. Retract RV steps and slide-outs. Remove the coupler pin and lock (if applicable) and open the latch.
Moving into a travel trailer requires a lot of steps, including buying the trailer, finding land to live on, selling the nonessential personal belongings, and changing the way your daily life functions. It takes a lot of initiative to get started and can take a few years to get there. 1. Decide on a Travel Trailer. 2.
Turn on the propane if it was turned off during the drive. Attach your sewage hose to the waste-water outlet. Use hose support for the black water. Keep the valves closed until you drain. Drain your tanks every 2-3 days (depending on usage). Always open the black tank (toilet tank) valve first, then the grey water tank valve (sink tank).
Correctly hitching up your towable RV (travel trailers and fifth wheel trailers) is straightforward. First, you need to use the correct hitch compatible for your setup. If desired, install the optional weight distribution hitch or sway control. If needed, reposition the tow vehicle—Remember to set the emergency brake on the tow vehicle.
Are you new to camping and RVing? Then you need to see our beginner's guide to how to set up your travel trailer in a campground.These are the step by step i...
6 steps to planning a successful RV road trip By Roadtrippers. Magazine. How to avoid dangerous roads in your RV ... Try this travel inspiration app for your next roadtrip. By Roadtrippers ... ready for you when you hit the road! Download from Apple App Store. Download from Google Play Store. Connect with us and hit up #roadtrippers. Tall tales ...
In any case, make sure to arrive at your campground with plenty of time to set up properly. You don't want to rush these things. (The 3-3-3 rule is a good one to follow.) Everything should be set ...
Matching up your rig with your desired adventure is the first step in planning a successful RV road trip. 2. Make a plan that matches your budget. The three most expensive line items for an RV road trip are gas, campground fees, and food. All three of these can vary dramatically depending on the type of road trip you plan.