Final Fantasy 15 Dungeon Guide – Costlemark Tower


Where Is The Costlemark Tower Dungeon

How To Get Inside Costlemark Tower Dungeon
Costlemark tower dungeon guide – requirements, costlemark tower dungeon guide – monsters.
Gelatin (Level 35) Weaknesses: Royal Arms, Lightning
Galvanade (Level 54) Weaknesses: Royal Arms, Guns, Machine Weapons, Blizzard Notes: If you take too long to kill these they summon lots of Thunder Bombs. Dawn Hammer works to take them down quick.
Thunder Bomb (Level 38) Weaknesses: Swords
Ereshkigal (Level 39) Weaknesses: Fire, Royal Arms, Swords
Yojimbo (Level 45) Weaknesses: Thunder
Bussemand (Level 34) Weaknesses: Great Swords & Machinery
Red Giant (Level 42) Weaknesses: N/A
Costlemark Tower Dungeon Guide – How To Get To The Boss
The next set of cubes is a puzzle. If you go in the wrong direction you will return to the Iron Giant room and face 2x Iron Giants and then 3x Iron Giants and a Nagarani, a near impossible fight at level 50. This is a really strange puzzle. I played through it several times and it felt different every time.
When you get back up take the North West most square, if it’s not available you may have to go South East again but it should be there. Take it down 2 levels. Once down, don’t go down again. Take the West cube. Kill the imps that spawn and then head South, kill the Bussemands and take the South East wall where they spawned. Then South and kill the Gelatins, then South again and kill the Bussemands, South again. Kill the Gelatins and Galvanade then East. Then click the one on the floor to go up. Kill Yojimbo.
Take the cube under Yojimbo and go back up. Kill the Imps and then take the East wall. Take down the Imps and the Galvanade and then the Southern floor, take it down twice. When you hit the floor take the Eastern wall, you’ll see a circle symbol on the floor. Kill the Bussemands and then take the floor down to go up. Follow the single path to Yojimbo with more Galvanade. Use the South wall, then East.
Drop down to kill the Gelatin. Progress, kill the Bussemands. Continue through to the boss.
Costlemark Tower Dungeon Guide – Boss Battles
Jabberwock (Level 58) Weaknesses: Blizzard
This is actually a straight forward fight. Keep your distance and unload with Techniques and Blizzard spells. He does have an AoE Petrify that is nearly impossible to dodge so bring items with immunity if possible.
Costlemark Tower Dungeon Guide – Loot
Final fantasy xv guides.
Blaine Smith
26 comments.
Awesome job on this guide! it helped a lot!
I second that! Great guide, very helpful. ?
I did this dungeon at level 30. Minimum 50 is a lie what you should put is “Gitgud filthy casuals”
In other words… carry 99 elixirs, phoenix downs and potions. Have the mega versions when possible. Food buffs help.
And make full use of invincibility frames offered by link attacks, techs, item usage, recovery from danger etc etc.
I did it with 30 potions, 10 phoenix downs, 30 hi elixirs. Use of gravisphere and high damage spells. The only tricky part was with the red giants and using the clever bow made it easy mode. So in other words no not cheating, I’m just more skilled than you. sorry not sorry.
Thats a damn lie.
I’m doing it for a friend right now hes level 40 , I can ps4 share so I can show you plebs how its done.
Took too long , I can show you a screenshot of the level, xp, And you can see the sword of the tall in the bottom right 😉 Don’t call people out just because you’re unskilled
LOL playing a non competitive game and bragging about “skill” on guide comment sections. You are the definition of a snob. No its not hard, the minimum level is there for efficiency, as its really not even worth the time to do this dungeon at levels lower than 50. Sword of the Tall isn’t even worth equipping, therefore this should be one of the last Royal Arm dungeons you do, and none of the accessories you get are really that good. You wasted high level magic on an easy dungeon then told other people to “gitgud”, who are you calling a pleb? Also, no one “took too long”, they were just never gonna waste their time watching some random asshole play through a dungeon they had already beat. No one cares that you think you’re good at a single player game dude.
But i keep saying WHY ARE PEOPLE BRAGGING!? This is by far the easiest ff game i’ve ever played. 7 yeah 7 WAS a challenge with ruby weapon and emerald but the super bosses in this game might as well be regular. Im not bragging im just saying there is no point in bragging in a game that’s as time consuming and as easy as this, besides who really cares?
the holy weapons were definitely worth my time.
Then don’t believe him. I don’t and I think it’s possible. Judging by the pic and the way he talks, he’s an extremely insignificant small child, so he likely thinks this kind of thing matters in life.
No. I don’t mind someone being better than me really. I am not salty or anything. I just said what I did because that is really what I believe (albeit slightly exaggerated). Also, I didnt even know there was something called gravisphere until you mentioned it just now. That black hole thingy is what it is. 😛 So thanks.
I too, in reality use high level spells and warping to its max. But lets be honest… the i-frames are handy too.
You were using the Clever bow exploit which they fixed I believe. That is cheating. Yes, it is very easy, tho, and isn’t even hard at level 1. Magic is supremely OP in the game and you can deal with the Iron Giants + Naga very easily with some spell casts.
You are right, tho, the dungeon is very easy. Maybe next time you can gitgud and do it legitimately.
What they fixed wasn’t how I was using the clever bow. But that’s okay. Feel big about yourself for a minute.
What a petty person to be boasting about something as minor as this.
Well ff15 is the easiest ff game i’ve every played i mean i killed a lvl 55 boss at lvl 23. Either i’m amazing or this game is easy.
Thanks so much for this guide, Captain. Found myself doing this dungeon at 11pm last night, and was so confused by the cube puzzle! I assumed I was doing it correctly, as I was opening up new cube starting points each time, until my SECOND battle with 3 red giants, Nagarani and about 50 flans and I started thinking there must be an easier way. Luckily, Ramuh bailed me out of that and then I found your guide online and followed your nice clear instructions through the cube maze and down to the boss (which was a cakewalk after the rest!). Thanks again! 🙂
In my case, it was a bit strange. When I visited the tower with Dino’s side quest active and then the dungeon quest active, the game only allowed me to activate the North West cube, which was the long maze. You get in, fight your way forward, and when the decision point comes between going East or South, you go East and that’s it.
When I came back for the boss hunt, the North West cube was ticked but not available, and I could only proceed with the North East cube, and then the South East cube. Both lead to small mazes and then you end up in the big place attached to the locked door, and you fight one red iron giant, 2 red iron giants… the good news is that all monsters killed during the first attempt are gone, at least all monsters before the mazes / cubes.
Only after clearing the 2 first cubes, the North West cube was again available and you do exactly the same thing.
There is also a weapon called Durandal in this dungeon. It’s a sword similar to the Radiant Lance pole arm.
You didnt mention missed durandal, a deamon killing sword, its by the area that looks like someone was digging a hole.
It’s worth noting that the information about the “puzzle” is wrong. You don’t have a choice which path you take. The only reason it appeared that way for you is because you had already “played through it multiple times”. Upon first entry you can only take the paths they’ll let you. Because of this you WILL have to fight the masses of Red Giants with Flan and whatever else they had in there.
Also add the Durandal information. Sword is garbage, but if people for some reason don’t have their Ultima yet it might be worth using.
THANK YOU FOR THIS. Seriously, this saved me from my headache getting worse with this place. <3
So what you’re telling me is that for this dungeon I’m in, I’m 8 levels too low and the reason I just fought 3 red giants, a Nagami thing that constantly turns my entire party into toads, and an insane number of flan because I failed a puzzle that doesn’t even seem like a puzzle. Thanks for letting me know that now, Oh and can someone quickly explain to me why there was a flash of light early in the battle? For context Gladiolus and I were toads when the light flashed, but Prompto and Ignis were dead, the flash might have triggered diologue between the characters talking about being out of the dungeon now but that may be unrelated, but for the rest of the resource consuming fight Prompto and Ignis were gone, even when I used a megaphoenix, they were alive, but they weren’t in the fight.
What if you did red check point in big room who do you get to boss?
Leave a Reply Cancel reply
Your email address will not be published. Required fields are marked *

- Succès/Trophées
- Guides/Tutos
- Centre d'aide
- Wiki Soluces
- Succes/Trophees
- Wiki soluces
Soluce Final Fantasy XV
- Donjons et Dédales
- Tour de Costlemark
- Ajouter une precision
Sommaire de la soluce
- F.A.Q : Vos questions, nos réponses
- Bien débuter
- Le Prince Mendiant
- Le Chasseur Chassé
- Le Mutant Pourpre
- Le transporteur
- Chantage cordial
- Cité perdue
- Le souhait d'un père
- Le pouvoirs des Rois
- La guerre est déclarée
- Le poids du destin
- La grotte de la cascade
- Royauté divine
- Duscae motorisé
- En route pour le Disque
- Naissance d'une légende
- L'épreuve de l'Archéen
- La voie de l'Oracle
- L'épreuve de Ramuh
- Confronter l'empire
- Les préparations du voyage
- Riposte contre l'empire
- Voyage à trois
- Petit boulot à la centrale
- Vers un nouveau pays
- Altissia, la cité des eaux
- Sommet entre dirigeants
- Premier combat pour le Roi
- L'épreuve de l'Hydréenne
- Escale royale
- Le conseiller du Roi
- Une menace à l'horizon
- Remords et remous
- Souvenirs en fumée
- La vallée gelée
- Un accueil glacial
- La capitale impériale
- Le combat du nouveau Roi
- A l'assaut de Zegnautus
- Retrouvailles et recouvrement
- Un monde de ténèbres
- Retour à Insomnia
- L'adieu du chasseur
- Faire son deuil
- Un bon chasseur
- Un dernier souvenir
- A côté de la plaque
- Le revers de la médaille
- Une tête à plaques
- Savoir qui ils étaient
- Une sorcière mal aimée
- Un coursier princier
- La baie sur le gâteau
- Besoin pressant
- La fin des haricots
- D'une pierre deux coups
- Le lard, c'est la vie
- L'apprenti bijoutier
- Jamais deux sans trois
- Noble pierre pour coeur sincère
- Qui ne risque rien n'a rien
- Ca vous change la vie
- Modifications d'armes de Cid
- Une toilette de Reine
- Une tenue de Reine
- Un éclat de Reine
- Un tempérament de Reine
- Une clarté de Reine
- Vers de nouveaux horizons (Regalia Type-F)
- Rainettes rouges
- Rainettes jaunes
- Méga-crapauds
- Vorace Wyverne
- Les lumières de Myrl
- Précieuse plume
- Remarquable arc-en-ciel
- Coeur de pêcheur
- Pêcher mignon
- Du fil à retordre
- Pêcheur de légende
- L'ami Chocobo
- Beau comme un Chocobo
- Merci pour le Chocobo
- Innovation culinaire
- Pas de bras, pas de Chocobo
- Le dernier Chocobo Noir
- Paisible paysage
- L'île de légende
- Guerre divine
- Des Dieux et des Rois
- Le toit du monde
- Images du passé
- Un crayon comme seule arme
- Toile hantée
- Une démonstration de talent
- Un tour de force
- Une preuve de prouesse
- Chariot en péril
- Arrête ton char
- Chasseur de légumes
- Grosses légumes
- Vous ne passerez pas
- Problèmes de valves
- Lointains pylônes
- Une lueur d'espoir
- La naissance d'une légende
- Le retour de la légende
- La vengeance de la légende
- La légende se rebiffe
- L'ultime légende
- Le festin du félin
- Une alliance de saveurs
- Infiltration : Garnison de Formouth
- Le réveil du Pic
- Leide : Personnes en détresse
- Leide : Voitures en panne
- Leide : Contrats de chasse
- Un vrai plat de nouilles
- Le plus grand des voleurs
- Duscae : Personnes en détresse
- Duscae : Voitures en panne
- Duscae : Contrats de chasse
- Le festin du félin 2
- Mes premiers légumes
- Une collection qui a du piquant
- Cleigne : Personnes en détresse
- Cleigne : Voitures en panne
- Cleigne : Contrats de chasse
- Un symbole de paix
- Altissia : Contrats de chasse
- Cuisine en plein air
- Pèlerinage à Hammerhead
- Promenade à deux
- Dangereux portrait
- Le photographe cachottier
- De fines rondelles
- La course des sables
- La fleur d'Iris
- La vision trouble du cuisinier
- Seigneur du Lac
- Séances photo
- L'énigme de Sylvester
- Cavernes de Daurell
- Volcan de Ravatogh
- Fourré de Malmalam
- Forêt de Myrl
- Mines de Balouve
- Canaux de Crestholm
- Ruines de Pitioss
- Profondeurs de Keycatrich
- Profondeurs de Fociaugh
- Profondeurs de Greyshire
- Profondeurs de Daurell
- Profondeurs de Balouve
- Profondeurs de Crestholm
- Profondeurs de Steyliff
- Profondeurs de Costlemark
- Contrats de chasse légendaires
- Les courses de Chocobos
- Les poires secrètes
- Les Teintures, Médailles et Légumes
- Sphères magiques
- Les armes ultimes
- Épées à Deux Mains
- Armes à Feu
- Armes Fantômes
- Accessoires
- Les Palettes de Couleurs
- Les Autocollants
- Les Musiques
- Les Composants
- Le Système de Création des Sorts
- Sorts de Feu
- Sorts de Glace
- Sorts de Foudre
- Sorts Hybrides Aléatoires
- Sorts Hybrides Feu > Glace
- Sorts Hybrides Feu > Foudre
- Sorts Hybrides Glace > Feu
- Sorts Hybrides Glace > Foudre
- Sorts Hybrides Foudre > Feu
- Sorts Hybrides Foudre > Glace
- Catalyseurs (Objets de Combat)
- Catalyseurs (Trésors)
- Catalyseurs (Ingrédients)
- Les Ingrédients
- Journaux d'Oric
- Points de contrôle
- Pain grillé au feu de bois
- Boulettes de riz fumantes
- Croque-madame
- Ragoût de légumes
- Sushi à la viande
- Ragoût Kwéh
- Brochettes du chasseur du désert
- Sandwich de carnivore
- Poisson bouilli
- Sandwich de viande panée
- Viande panée à la sauce tomate
- Côtelettes épicées
- Oeufs et tomates sautées
- Assiette de frites
- Ragoût de garula
- Carangue grillée
- Charcuterie sur toast
- Blanquette de poulet
- Brochette du pionnier
- Poulet aux épices et au riz
- Consommé pennépée
- Omelette au crabe baveuse
- Crabe à l'ancienne de Lestallum
- Barramundi au beurre
- Raviolis à la vapeur
- Escalope panée du vétéran
- Sandwich météore au jambon
- Barramundi grillé
- Quatre-quarts
- Sandwich en conserve
- Curry jardinière
- Risotto Trio de champignons
- Soupe de pois nourrissante
- Potage aux boulettes de viande
- Riz au poulet de Cleigne
- Risotto crémeux
- Tripes de Lestallum
- Riz frit du jeune chasseur
- Steak de crapaud
- Tourte Meldacio à la viande
- Risotto aux fruits de mer
- Saumon de Nebula Teriyaki
- Boulettes de riz au saumon
- Crapaud demi-glace
- Brochettes de truite braisée
- Ragoût de champignons variés
- Gâteau à la tomate
- Sandwich au poisson
- Crapaud corsé
- Moules marinières
- Paella au poulet
- Raviolis de crabe à la vapeur
- Croquettes Kwéh-Kwéh
- Galette jambon-oeuf
- Casserole cygillienne
- Spécialité de Kenny
- Riz au poulet et oeufs
- Bifteck de garula
- Sandwich majestueux
- Tourte cornue
- Brochettes du chasseur
- Bisque crémeuse
- Steak juteux
- Brochettes de champignons
- Paella traditionnelle
- Gâteau à l'orange
- Viscères infernales
- Assiette de sashimi
- Barramundi amiral grillé
- Poisson frit sauce piquante
- Galette de Taelpar
- Crabe aigre-doux
- Riz au poulet et oeufs goûteux
- Brochettes de poisson frit
- Bar allurien confit à l'huile
- Soupe à l'aileron démoniaque
- Ratatouille de champignons
- Béhémot fumé
- Griffon pané et riz
- Carpaccio de mérou
- Rôti saignant de la capitale
- Lasagna al Forno
- Bouillon de queue dorée
- Midgardsormr aux épices
- Poisson grillé aux herbes
- Mérou des marées frit
- Risotto de Ravatogh
- Brochettes royales
- Gâteau du souvenir
- Tête de truite grillée
- Ragoût de roi
- Poulet pané croustillant
- Spécialité secrète de Kenny
- Brochette démon à l'étuvée
- Canapés royaux
- Mont de Longwythe
- Conserve froide
- Cup Noodles
- Cup Noodles (quête)
- Cup Noodles V2
- Les Points de Pêche
- Les Lignes, Cannes et Moulinets
- Les Leurres
- Bar Allurien
- Bar Allurien Corail
- Bar Allurien Sombre
- Bar Allurien Cuivre
- Bar Cygillien
- Bar d'Alstor
- Bar d'Alstor à Pointes
- Bar de Lucinia
- Bar Léopard
- Bar Paon de Risorath
- Bar Sanguin
- Barramundi Amiral
- Barramundi Bizarre
- Barramundi de Vesper
- Barramundi des Roches
- Barramundi du Roc
- Barramundi Éclair
- Barramundi Rayé
- Barramundi Varech
- Brochet Barbare
- Brochet de Vesper
- Brochet Démon Tacheté
- Brochet Rosé
- Carangue Carmin
- Carangue de Galdina
- Carangue des Atolls
- Carangue Géante
- Carpe du Lucis
- Carpe du Lucis Aube
- Carpe du Lucis Aurorale
- Carpe du Lucis Bronze
- Carpe du Lucis Crépuscule
- Carpe du Lucis Écarlate
- Carpe du Lucis Neige
- Carpe du Lucis Or
- Carpe du Lucis Platine
- Carpe du Lucis Soleil
- Carpe du Lucis Tricolore
- Carpe du Lucis Vespérale
- Crapet Azur
- Crapet Corne Courte
- Crapet Corne Crochue
- Crapet Cornu
- Crapet Écorné
- Crapet Éventail
- Crapet Lotus
- Crapet Scintillant
- Grand Saumon de Nebula
- Mérou Cygillien
- Mérou des Abysses
- Mérou des Marées
- Mérou Menaçant
- Mérou Pigeon
- Mérou Scorpion
- Pirarucu Noble
- Pirarucu Régalien
- Poisson-Chat Crasseux
- Poisson-Chat Doré
- Poisson-Chat du Lucis
- Poisson-Chat Géant
- Poisson-Chat Rayé
- Poisson-Chat Rôdeur
- Poisson-Chat Roi
- Poisson-Chat Tacheté
- Revenant Lanterne
- Revenant Lanterne Noir
- Revenant Lanterne Rouge
- Saumon Argus
- Saumon de Nebula
- Saumon de Wennath
- Tête-de-Serpent
- Tête-de-Serpent Fantôme
- Tête-de-Serpent Grenat
- Tête-de-Serpent Jade
- Tête-de-Serpent Opale
- Tête-de-Serpent Saphir
- Truite Arc-en-Ciel
- Truite Arc-en-Ciel Chromée
- Truite Brune de Cleigne
- Truite Cairngorm
- Truite Cerisier
- Truite de Callatein
- Truite de Maiden
- Truite Lamelle
- Truite Léopard
- Truite Platine Merlot
- Truite Royale
- Vandoise Coeurl
- Vandoise de Duscae
- Vandoise de Vesper
- Vandoise de Wennath
- Vandoise des Cascades
- Vandoise des Cavernes
- Vandoise des Rivières
- Vandoise Fangeuse
- Vandoise Pâle
- Vandoise Royale
- Vandoise Spéculaire
- Armurerie Culless d'Hammerhead
- Armurerie Culless du Repos des Chasseurs
- Armurerie Culless de la Baie de Galdina
- Magasin Station-Service d'Hammerhead
- Bazar JM de l'Aire de Repos de Longwythe
- Bazar d'Aldare de la Baie de Galdina
- Bazar JM du Repos des Chasseurs
- Les Bonnes Gaules de Robert de la Baie de Galdina
- Armurerie Culless du Relais de Chocobos
- Armurerie Culless de la Station Coernix de Cauthess
- Bazar JM de l'Aire de Repos de Taelpar
- Épicerie du Relais de Chocobo de Wiz
- Magasin de la Station Coernix de Cauthess
- Magasin de la Station Coernix d'Alstor
- Salon pour Chocobos du Relais de Wiz
- Les Bonnes Gaules de Doris de la Source de Daurell
- Boutique Ambulante de l'Étang de Saxham
- Boutique Ambulante du Miroir de l'Archéen
- Armurerie Culless de Lestallum
- Armurerie Culless de Meldacio
- Armurerie Culless de Ravatogh
- Garde-Manger de Veenon de Lestallum
- Quincaillerie de Moatte de Lestallum
- Droguerie de Sypert de Lestallum
- Mets du Météore de Lestallum
- Ferme de Furloch de Lestallum
- Bric-à-Brac de Prissock de Lestallum
- Camion à Nouilles de Lestallum
- Bazar JM du Vieux Lestallum
- Magasin des Souvenirs de Burbost
- Bazar de Parvinath de Meldacio
- Magasin de la Station Coernix de Lestallum
- Supérette Verinas de Ravatogh
- Bazar de JM du Cap Caem
- Masure des Maléfices du Fourré de Malmalam
- Les Bonnes Gaules de Tabitha du Pont de Rachsia
- Les Bonnes Gaules de Bertrand du Rivage Est du Lac Vesper
- Boutique Ambulante de l'Îlot du Lac Vesper
- Armurerie Culless d'Altissia
- Magasin de Carliano d'Altissia
- Bazar JM d'Altissia
- La Barca del Vecchio Gobunant
- Frutti di Mare Dal Gamberetto
- Commeatus Armorum - Vendeur d'Aranea
- Armeria Madiani - Cartanica
- Commeatus Armorum - Tenebrae
- Venditio Armorum - Gralea
- Pergula Legionis - Vendeur d'Aranea
- Articoli da Viaggio Machialga - Cartanica
- Pergula Legionis - Tenebrae
- Venditio Instrumentorum - Gralea
- Magasin de la Station-Service d'Hammerhead - Chap. 14
- Abeille Brutale
- Abeille Reine
- Abeille Tueuse
- Adamankhélone
- Alacran Royal
- Alacran Sulfure
- Anak Femelle
- Aspidochélon
- Bandersnatch
- Basilic Noble
- Béhémoth Errant
- Béhémoth Roi
- Béhémoth Tyran
- Bicorne Blême
- Bicorne Mutant
- Bredoulochs
- Bulette Skarn
- Chef Sahuagin
- Cocatrix Noble
- Coeurl Aîné
- Crapaud Gaïa
- Crapaud Géant
- Crapaud Hécatonchire
- Démon Corallien
- Démon Marin
- Garula Vert
- Graine de Morbol
- Grand Bicorne
- Guêpe Soldat
- Guêpe Tueuse
- Jörmungandr
- Karlabos Errant
- Mesménir Dominant
- Mictecacihuatl
- Midgardsormr
- Milles-Pattes
- Morbol Létal
- Morveux de Morbol
- Oiseau-Tonnerre
- Oiseau-Tonnerre Écarlate
- Pamparesseux
- Pinces-Bouclier
- Pinces-Pierre
- Pinces-Rubis
- Pinces-Silex
- Poussitrix Noble
- Qiongji Jaune
- Quetzalcoatl
- Reine Garula
- Rouges-Pattes
- Sahuagin Albinos
- Taotie Albinos
- Taotie Alpha
- Taowu Géant
- Utgardsormr
- Arroz Con Leche
- Chandravarma
- Chef Tomberry
- Chevalier Tomberry
- Crème Brûlée
- Electrobombo
- Flagelleur Mental
- Galkimasera
- Géant de Fer
- Géant Mutant
- Griffe Funeste
- Griffe Funeste Mutante
- Kokyangwuti
- Nécromancien
- Psychomancien
- Pudding Lahmu
- Ruineur Mental
- AM Hoplomachus
- AM Miles Bis
- AM-X Cuirasse
- AM-X Manipulus
- AM-X Patria
- Assassin d'élite
- Berserk Blindé
- Berserk Magitech
- Bourreau Magitech
- Garde Assassin
- Garde Porte-Drapeau
- Lancier Impérial
- Neo AM-X Angelus
- Porte-Drapeau Blindé
- Porte-Drapeau Magitech
- Sergent Magitech
- Soldat Blindé
- Soldat d'Assaut
- Soldat Impérial
- Soldat Magitech
- Spadassin Magitech
- Spadassin Magitech d'élite
- Tireur Impérial
- Vétéran Impérial
- La Voie de l'Affermissement
- Le Gardien Éternel
- Le Chemin de la Mort
- Le Fidèle Compagnon du Maître d'Armes
- Connaître son Ennemi
- Le Briseur de Boucliers
- L'Ultime Combat
- Objets 1 à 24
- Objets 25 à 48
- Emplacement des 19 Piliers
- Combat Spécial
- Seul et Prisonnier
- Frappé de Stupeur
- Entre Rêve et Réalité
- Rompre avec le Passé
- Quêtes Secondaires
- Challenges Motoneige
- Combat Spécial Aranea
- Conseils pour Bien Débuter
- Carte Détaillée de Duscae
- Acheter une Conduite
- Tente avec Vue
- Prendre le Béhémoth par la Corne
- Prince sans le Sou
- Diamant dans la Vase
- Le Repos du Guerrier
- Élimination des Taoties
- A l'Assaut du Troupeau
- Étude d'un Béhémoth
- Le Trésor d'Alstor
- Prévoir, c'est Survivre
- Des Relents de Chocobo
- Emplacement des 10 Grenouilles
- Obtenir les 4 Armes Fantômes
- Comment Sortir des Limites de la Démo
- Guide Succès/Trophées
Cette partie du Guide FF15 est consacrée au Donjon de la Tour de Costlemark . Vous trouverez ici le cheminement complet de ce donjon ainsi que des indications sur sa localisation, ses conditions d'accès et sur les récompenses obtenues.
Condition d’accès : Atteindre la région de Duscae, accessible uniquement la nuit (à partir de 20h)
Récompense : 15000Xp + Epées du Conquérant (Arme Fantôme) + recette « Rôti saignant de la Capitale »
Niveau recommandé : 65
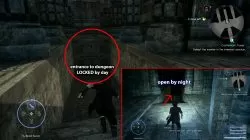
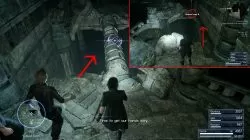
Pour accéder à la Tour de Costlemark, attendez la nuit (à partir de 20h) et rejoignez le point indiqué sur l’image au Sud de Duscae ( image1 ). Une fois arrivé à destination, descendez les escaliers et traversez la première salle, dans la seconde, éliminez les ennemis puis récupérez la Lance Rayonnante sur le sol à droite ( image2 ).

Continuez maintenant votre progression jusqu’à la prochaine salle, là-bas, débarrassez-vous des monstres et avancez le long de la corniche à droite, vous pouvez alors récupérer le Traité du Voleur sur le sol avant de vous laisser tomber dans la zone en contrebas ( image3-4 ).

Au niveau inférieur, descendez encore d’un cran et éliminez le Yojimbo, ouvrez ensuite la porte à gauche pour trouver le Guide du Chambellan , un objet qui permettra à Ignis de soigner automatiquement Noctis durant les combats ( image5-6 ).

Ceci fait, repartez dans l’autre sens et descendez d’un étage, en bas, dirigez-vous vers le renfoncement à gauche pour trouver une Pièce du Sacre de l’Oracle ( image7 ). Dirigez-vous ensuite vers la dernière pièce à droite et éliminez les monstres, récupérez ensuite l’épée Durandal sur le sol ( image8 ).

Faites maintenant demi-tour et revenez dans la zone où se trouvait la pièce du sacre, de là, partez vers le coin gauche et descendez les escaliers ( image9 ). Une fois en bas, dirigez-vous vers le Nord puis commencez à descendre la grande pente ( image10 ).

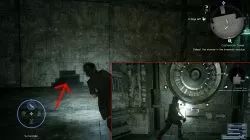
Un peu plus loin, avancez sur le pont et éliminez le Yojimbo, continuez ensuite votre progression et descendez la salle circulaire ( image11 ). Tout en bas, vous atteindrez une vaste pièce avec de nombreuses plaques sur le sol, ici, dirigez-vous vers la gauche et interagissez avec la plaque indiquée sur l’image ( image12 ). A partir de là, vous allez devoir interagir avec les blocs afin de vous ouvrir un passage, vous trouverez ci-dessous le cheminement complet de cette séquence.

Descendre d’un cran ( image13 ).

Bloc à l’Ouest ( image14 ).

Bloc au Sud ( image15 ).

Bloc à l’Est ( image16 ).

Bloc au Sud, descendre d’un niveau ( image17 ).

Bloc à l’Est ( image18 ).

Bloc au Sud ( image19 ).

Bloc à l’Est ( image20 ).

Descendre d’un cran ( image21 ).

Avancer vers le Sud puis descendre d’un cran ( image22 ).

Bloc à l’Est ( image23 ).

Avancer vers le Sud et descendre de deux crans ( image24 ).
Bloc à l’Est ( image25 ).

Bloc au Nord ( image26 ).

Avancer vers le Nord, descendre d’un cran ( image27 ).

Bloc à l’Est ( image28 ).

Bloc à l’Est ( image29 ).

Tuer le Yojimbo à l’Est, Bloc au Sud ( image30 ).

Bloc à l’Est et descendre à l’étage inférieur ( image31 ).

Bloc au Nord ( image32 ).

Bloc à l’Ouest et descendre d’un cran ( image33 ).

Avancer vers le Nord jusqu’à l’ascenseur puis descendre au dernier niveau du donjon ( image34-35 ).

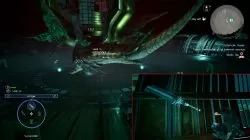
Lorsque vous atteindrez enfin la salle finale du donjon, vous devrez affronter Bredolouchs, un monstre gigantesque vulnérable aux lances, aux machines et à la glace ( image36 ). Pour le vaincre, essayez de rester dans son dos et utilisez la compétence « Persécution » d’Ignis après l’avoir immobilisé, pensez également à vous servir de sorts du type Glace quintuple (99 essences de glace + stimulant Magitech) pour lui infliger de très lourds dégâts. Lorsque vous serez parvenu à vaincre la bête, vous obtiendrez l’Epée du Conquérant ainsi que la recette du « Rôti saignant de la Capitale » ( image37 ).

Sur le même sujet

Chapitre 5 : Des nuages noirs à l'horizon

L'épreuve de l'Archéen

Il parait que ça cartonne ...
- sur la semaine
- l'année
- depuis toujours

Soluce Witcher 3 : Wild Hunt

Soluce Metal Gear Solid V : The Phantom Pain

Soluce Assassin's Creed Unity

Soluce Batman Arkham Knight

Soluce Skyrim
- PlayStation 3
- PlayStation 4
- PlayStation 5
- Xbox Series
- More Systems
Costlemark Tower
Final fantasy xv: windows edition — guide and walkthrough (pc).

Guide and Walkthrough (PC) by bover_87
Version: 1.10 | Updated: 07/26/2020 FAQ of the Month Winner: May 2020
- Previous: Crestholm Channels
Table of Contents
- Next: Pitioss Ruins
- Introduction
- Version History
- Legal Stuff
- Guide Index
- Walkthrough - Main Story
- Chapter 1 - Departure
- Chapter 2 - No Turning Back
- Chapter 3 - The Open World
- Chapter 4 - Living Legend
- Chapter 5 - Dark Clouds
- Chapter 6 - A Way Forward
- Chapter 7 - Party of Three
- Chapter 8 - Seaworthy
- Chapter 9 - Callings
- Chapter 10 - The Heart of a King
- Chapter 11 - In the Dark
- Chapter 12 - End of Days
- Chapter 13 - Redemption
- Chapter 14 - Homecoming
- Chapter 15 - End of the Road
- Missable Item Walkthrough
- Sidequests/Mini-Games
- Dave's Quests
- Cindy's Quests
- Takka's Quests
- Weapon Upgrades
- Dino's Quests
- Misc. Galdin Quests
- Sania's Quests
- Navyth's Quests
- Wiz's Quests
- Vyv's Quests
- Furloch Farms Quests
- Mind the Trap
- Prissock's Quests
- Culless Munitions Quests
- Adventurer from Another World
- Close Encounter of the Terra Kind
- Exploring Fort Vaullerey
- A Need for Noodles
- Holly's Quests
- A Feline Feast
- Fourmouth Garrison
- O Partner, My Partner
- Symbol of the Peace
- Alessio's Trading Post
- Scraps of Mystery
- Let Sleeping Mountains Lie
- Cartanica Sidequests
- A Second Sea God
- Royal Vessel Fishing Quests
- Insomnia Sidequests
- The Godslayer
- The Ultimate Magitek Armor
- Balouve Mines
- Daurell Caverns
- Malmalam Thicket
- The Rock of Ravatogh
- The Myrlwood
- Crestholm Channels
- Pitioss Ruins
- Justice Monsters Five
- Chocobo Racing
- Living off the Land
- Regalia Type-D Races
- Storyline Mini-Games
- Minor Sidequests
- Hunts & Timed Quests
- Hunts - Index
- Hunts - Hammerhead
- Hunts - Longwythe Rest Area
- Hunts - Galdin Quay
- Hunts - Alstor
- Hunts - Wiz Chocobo Post
- Hunts - Cauthess Rest Area
- Hunts - Taelpar Rest Area
- Hunts - Old Lestallum
- Hunts - Ravatogh
- Hunts - Lestallum (Surgate's Beanmine)
- Hunts - Lestallum (Tostwell Grill)
- Hunts - Meldacio Hunter HQ
- Hunts - Altissia
- Timed Quests
- Exploration
- Exploration - Leide
- Exploration - Duscae
- Exploration - Cleigne
- Exploration - Royal Vessel
- Walkthrough - DLC
- Episode Gladiolus
- Episode Ignis
- Episode Prompto
- Episode Ardyn
- Chapter 13, Verse 2: For King and Comrade
- Strategy Guide
- Building Your Characters
- Ascension Strategy
- Introduction to Defense
- Defensive Tactics
- Choosing Weapons
- Achievements
- Lists/Reference
- Status Effects
- Restaurants
- Bestiary - Leide
- Bestiary - Duscae
- Bestiary - Cleigne
- Bestiary - Niflheim
- Bestiary - Daemons
- Bestiary - Imperials & Astrals
- Copyright Notice
Guide Index > Sidequests/Mini-Games > Dungeons > This Page
*only if A Treasure Beyond Measure is active ( Tip : It's strongly advised to have A Treasure Beyond Measure (for Dino) active when doing this dungeon, to avoid having to make additional trips in here.)
Costlemark Tower is by far the most difficult content available before Chapter 15 . Like pretty much all other content, it can be completed at much lower Levels than the in-game recommendation, but this will require incredibly precise play. The dungeon is located in the Fallgrove , not far southeast of Oathe Haven; you can get a hint as to its location by visiting the Tomb of the Tall in the southwestern Fallgrove, though this is unnecessary. The dungeon only opens at night, so you will need to wait at the nearby Oathe Haven for nightfall if it's not nighttime already.
Begin the dungeon with A Treasure Beyond Measure as your active quest, assuming you have it of course.
The Upper Halls
Once you make it inside, follow the linear path. The first open room you enter has some Gelatin mush. These things are mostly a warm-up exercise; like all small Flans, they move slowly but appear in relatively large numbers and have impressive range. Once they're squished, head west. The next room has a Radiant Lance in the northeastern corner; while you're here, it's a good idea to give it to Ignis, to help hit the Holy weakness so common down in these parts. As you try to leave, a mass of Gelatin flans plus some Galvanades will appear to play with you. The Galvanades are quite powerful and capable of blowing up, so you should focus them down first before busying yourself with the desserts. After that's done, the next room is a meet-up with some Ereshkigal . They're stronger and much more aggressive Goblins for all intents and purposes, and come in huge numbers; try to avoid getting stuck in a pack of them, because you'll take major damage as a result. When they're dead, make your way across the narrow ledge along the western wall, and take the Thieves' Way II , then return to the northern balcony.
Now head to the eastern side and cross the collapsed pillar to the other side. Go through the doorway and you'll fight some Bussemands . These things are easier than the Ereshkigal imps you just fought, mostly because they are much slower, but they do hit harder so watch yourself. After they're gone, at the top of the circular ramp you can pick up a pair of Orichalcum Daggers. These Daggers, in addition to having decent stats, are great for hitting the Holy weaknesses around here. Continue into a hallway. The first dead-end has nothing, and the second, some Gelatins , after which you can collect a Mythril Shaft . Continue east along the passage and you'll be on another circular ramp. There are lots of Gelatin snacks plus a Galvanade way at the bottom, which you should be used to by now. The flans here are too far apart to be able to defend each other properly, and their mobility is terrible in a space that severely restricts it, so despite the large numbers this should be easy, just take care with the Galvanade. (There's nothing on top of the ramp, by the way.) Use the Fire-elemental deposit at the bottom if necessary, then it's time to move on. The next hallway is mostly collapsed, but there's a crawlspace you can take advantage of. Fight the pair of Ereshkigal , after which you'll find the Emerald Stone for Dino a bit behind you on the rubble to the south (assuming you're doing that quest obviously). While you may be tempted to run screaming out of here and back to Dino, don't--we still have much more to do. Change your active quest to Costlemark Tower , then take the adjoining corridor east. Another duo of Ereskigals, which will go down fast due to their small numbers and inability to corner you, then take the Durandal in the southeastern corner of the room. This Holy-elemental Sword is great here, although Ultima Weapon is going to do more damage if you have it.
Back at the junction, head west. In the next room, there's an Oracle Ascension Coin at the far end of the northern balcony. Return to the doorway here and go south. A gang of Bussemands will hopelessly attack you (show them the error of their ways), then you're free to proceed. Open the large golden door at the south end of the room, and defeat the Ereshkigal fodder (this is a larger group again, so take care not to get boxed in). There's a Hi-Elixir in here that you should add to your collection, then return to the previous room and go down the stairs to the west. Take the first door on the right (next to the stairs). Follow the rooms to an Ice-elemental deposit and a golden door, which you should open. You'll battle still more Bussemands alongside a Yojimbo . Be very wary of the Yojimbo, its Zantetsuken (when it holds its katana's sheathed handle for a while, you'll see purple energy as well) attack kills (literally), and it uses the attack far more frequently than its lesser cousins. Defeat the Bussemands first while keeping a wary eye on the Yojimbo, after which careful play will result in the samurai's timely demise. When they're defeated (if any allies were killed during the fight, give them an Elixir afterwards), on the south end of the room is a Platinum Bangle , which greatly increases the wearer's maximum HP.
Go back to the passage that connects to the stairwell and follow it east to a new room, where some more Bussemands are waiting for you. Shove their faces as far up their asses as possible, and move on with your life. The next room has a Lightning-elemental deposit and, more importantly, another Moogle Charm for you (sadly, Exp is too common to bother boosting in this game). The exit leads to a long circular ramp, where there's a Black Choker next to the doorway. Your first order of business is to exterminate the Ereshkigal and Galvanade pests that make their home near the top; you should go for the Galvanades first, but be wary, because it's very easy to get trapped and you're on the clock with the bombs. At the bottom of the ramp, collect the Mega-Potion , then cross the bridge and follow the very linear path to be ambushed by Ereshkigal behind you and a Yojimbo in front. You're in for a doozy, what with the deadly combo of constant attack spam plus Instant Death moves. Try to get rid of the goblins first, as a second Yojimbo will spawn when the first one is dusted. In any event, you'll need to defend well, and even experienced players may well need to resort to healing Items to avoid entering Danger . (Getting put into Stasis is also a real possibility; with how fast the imps attack, plus the fact that you're likely going to be trying to Parry Yojimbo's moves, you may well find yourself out of MP. Getting a few Blinks in can be a godsend.)
Once you're annihilated the opposition, your destination is the doorway to the north, immediately outside of which is a Mega Phoenix . You're on still another circular ramp now, where a giant gang of Bussemands awaits. This is a major relief coming off the last fight, just make sure not to get hit too much.
The Labyrinth
Once they're dead, and you reach the bottom, you'll enter a massive chamber. The chamber has a number of glowing blocks, plus a red switch. The red switch must be avoided at all costs; stepping on it returns you to the entrance (although you won't have to redo the battles so long as you don't rest/reset). The blocks, meanwhile, function as a puzzle, where choosing an incorrect option will thrust you into some very nasty battles.
( Note : Due to a glitch, the block in the room with the Red Giant may sometimes return you to the entrance instead of back to the main room like it's supposed to. Don't worry, your progress won't be reset, and everything you've killed will remain dead so long as you don't rest or reload your game, so just run back to the massive chamber and keep going. In addition, it's possible that you require up to four puzzle sets to reach the end. In these cases, each time you return to the Red Giant's room, you'll get a progressively tougher battle, with the third one including a Nagarini . In this case, don't worry, the path is entirely linear until the final puzzle, which is detailed in the second paragraph below. To identify it, approach all blocks within the labyrinth before examining any; if there are two that can be manipulated, it means you're on the final puzzle and need to choose the eastern one. There seems to be some degree of random chance involved in this; the factors determining how exactly your run through this section of Costlemark Tower are not currently known.)
Your first target is the glowing block in the southeast of the room. Examine it again, at which point you must battle some Ereshkigal creatures. The space is very cramped so you need to be careful, but by themselves they're not especially competent as damage dealers. When you finish, examine the block to the north, then the one to the east. Kill the lone Yojimbo (this fight is actually easy; due to the limited space, almost anything it does can be Parried and countered), then examine the block to the east again, followed by the one north of you. A quartet of Gelatin sweets awaits you; this can get very annoying due to the cramped quarters, but their damage isn't that great so you should still carry the day. Next, examine the block underneath you twice. You'll drop down a level, and be forced into battle with a Red Giant and some Flans . The Red Giant is similar to Iron Giant , but quite a bit stronger. It has far better damage and HP, and inflicts Burnt as well. Try to keep your distance from the Giant and bring down the creams first, then focus your attention on the Red Giant. Once that's done, use the portal located in the middle to return to the large chamber.
You need to use another block. Use it twice, then the one to the south twice. Bring down a couple of Bussemands , then examine the eastern block two times. Kill two more Bussemands, then use the block in the floor at the end of the passage. Kill some Ereshkigal now (there are, you guessed it, two), then examine the southern block (who would've thought) twice! Defeat the Gelatins and Galvanade , and now you have a choice. Pushing the southern block will force you to start the block puzzles all over again (and who wants that), so use the eastern block. After moving the next block, it's some more Bussemands, which are very vulnerable due to not being able to attack you until the block is fully out of the way. Bring them down, then use the block to the northeast, followed by the east twice. You'll have to kill a Yojimbo with some Galvanades . Their damage output can get very high, so try to stay on the edge of the fight and attack from behind. After that's ticked off your list, use the block to the southeast two times. Drop down here and flush down the Gelatin crap, then examine the northern block, followed by the western one. Drop down again, and kill more Bussemands (this can get dangerous depending on where you drop, though the fight is a walk if you manage to corner them). It's time for the northern block twice, some more Bussemands, and then the block under you. Now the northern block, then some Ereshkigals again, and finally the glowing block under you.
Head to the circular area. Pick up the obvious Mega Phoenix here, then equip as much Stone protection as possible. Once you're ready, use the weird device in the center of the room (it just calls out to you, doesn't it) to meet...
Boss: Jabberwock Jabberwock's Info HP 201,200 Level 58 Type Beast Drops Primary Jabberwock Sirloin (50%) Secondary Hardened Hide (50%) Appendage Dragon Horn (50%) Weaknesses and Resistances Damage Weaknesses Polearms , Machinery , Ice Damage Resistances Fire (Halves) Status Vulnerabilities Death , Alterna , Poison , Stop (Resist) , Threatened , Enervated , Enfeebled , Compromised , Disenchanted , Cursed , Neutralized , Defenseless , Burnt , Frozen , Shocked ...the only non- Daemon in the land of a million Daemons, lording it over the Daemons....Wait, what? Jabberwock's signature move is its dust attack (Phase), which can inflict Stone . Otherwise, it just uses basic physicals, all of which can be Phased or Parried besides the stomps. Its attacks do have serious range, though, so don't think that just by staying away from it you'll avoid damage. If you equipped Stone protection, this battle is very simple. You'll need to stay healed, of course, for Jabberwock can dart around the room, but if you made it this far and can defend Stone through whatever means, you shouldn't have much of a problem with the boss. The damage is what you'd expect, but almost everything is defendable through either Phase or Parry, so yet again proper defense wins the day.
After it's dead, you'll receive the Sword of the Tall in a cutscene. We still have things to do here though, so use the red Warp Tile, not the Return to entrance function.
You'll find yourself in the first room. Go in until you reach the third room, the one where you crossed a fallen pillar. This time, cross using the western wall. Take the Thieves' Way II if you didn't already, then drop through the hole and onto a balcony. Defeat the Yojimbo , then open the golden door nearby. Fight off a pair of Galvanades , then take The Good Chamberlain from the rubble. This nifty Accessory gives Ignis a chance to heal with a hidden (that is, not taken from your inventory) Potion if Noctis' HP drops below half and he's in range, further supporting Ignis as, well, support.
At this point, you can drop off the balcony to the lower area (you'll be in the area above the stairwell) if you need to explore elsewhere in the dungeon, or else you can use the Return to entrance option in the Map menu to return to Lucis.

Final Fantasy XV (FFXV) Walkthrough & Guides Wiki
- Story Walkthrough
- Beginner's Guides
- Combat Guide
- Boss Battles
Royal Tombs and Dungeon
Costlemark Tower Sidequest

★ Game8's Final Fantasy 7 Rebirth Wiki is live now!
This page contains information for completing the Sidequest Costlemark Tower in Final Fantasy XV (FFXV, FF15). Read on for more information about the Sidequest and our strategies for completing it!
List of Contents
Basic information of Costlemark Tower
How to unlock costlemark tower, costlemark tower clear conditions and rewards, how to complete costlemark tower, related links.
Coming soon!
- Royal Tombs and Dungeons

We at Game8 thank you for your support.
In order for us to make the best articles possible, share your corrections, opinions, and thoughts about 「Costlemark Tower Sidequest | FFXV」 with us!
When reporting a problem, please be as specific as possible in providing details such as what conditions the problem occurred under and what kind of effects it had.
Do you want to send this information?
Walkthrough Menu
- Final Fantasy XV Top Page
Hot Articles
- Best Early Game Ascension Abilities
- How to Farm AP
- How to Get Maximum Scores on Report Card
Message Boards
- Discussions
Chapter I: Departure
- The Pauper Prince
- The Mutant Marauder
- The Errand Prince
- Ill Tidings
- Hunter Becomes the Hunted
- A Gentleman’s Agreement
Chapter II: No Turning Back
- The Power of Kings
- Declaration of War
Chapter III: The Open World
- The Way of Gods and Kings
- The Sword in the Waterfall
- Burden of Expectation
Chapter IV: Living Legend
- The Trial of Titan
- The Archaean
- Onward to the Disc
- A Dubious Drive
Chapter V: Dark Clouds
- The Trial of Ramuh
- The Hexatheon's Blessing
- Engaging the Empire
Chapter VI: A Way Forward
- All Set to Set Sail
Chapter VII: Party of Three
- Party of Three
Chapter VIII: Seaworthy
- A Precious Source of Power
- A Brave New World
Chapter IX: Callings
- Altissia, City on the Sea
- Into the Fray
- The Trial of Leviathan
Chapter X: The Heart of a King
- Off The Rails
- The Hand of the King
Chapter XI: In The Dark
- Express Train for Trouble
Chapter XII: End of Days
- No Turning Back
- Where She Lived
- Into the Arctic Crevasse
- Breath of the Glacian
Chapter XIII: Redemption
- The Imperial Capital
- A King's Struggle
- Zegnautus Keep
- Reunion and Recovery
Chapter XIV: Homecoming
- World of Ruin
- A Cure for Insomnia
Lists of Sidequests
- Rescue Mission
- Broken Cars
- Scraps of Mystery
- Dave's Quests
- Cid's Quests
- Takka's Quests
- Dino's Quests
- Cindy's Quests
- Sania's Quests
- Navyth's Quests
- Vyv's Quests
- Holly's Quests
- Wiz's Quests
- Randolph's Quests
- Lestallum Merchants
- Chocobo Sidequests
- Allies and Miscellany
- Menace Beneath Lucis
Beginner's Guides & Strategy
- Controls & Commands
- How to Travel Quickly
- Recommended Settings Before Starting
- How to Save Game and Save Locations
- Should I Drive at Night?
- What Dialogue Options to Choose
- What to Do When you Run Out of Gas
- How to Sprint Infinitely
- Things to Do in Each Town
- How to Fast Forward to Nighttime
- How to Use Potions and Items
- How to Change Appearance
- How to Point-Warp and Warp-Strike Easily
- Is Active or Wait Mode Better?
- How to Beat Daemons
- How to Use Summons
- How to Use Ring Magic
- How to Break the Damage Limit
- When to Use Royal Arms
- Elemancy System and How to Use Spells
- How to Switch Characters
- Explanation of Character Levels and Stats
- How to Increase Skill Levels
- Merits and Demerits of Setting Up Camp
- How to Level Up Quickly
- How to Farm EXP Quickly
- How to Earn Gil Quickly
- How to Get Rare Coins
- What to Buy Early in the Game
- Best and Worst Treasure Items to Sell
- List of Best Weapons and How to Get Them
- List of Best Accessories and How to Get Them
- List of Royal Arms Locations
- List of Upgradable Weapons
- Bounty Hunting Guide
- How to Get Chocobos
- How to Increase Hunter Rank
- How to Unlock Regalia Type-F
- How to Fish and Catch Big Fish
- How to Win Chocobo Races
- Justice Monsters Five Guide and Rewards
- How to Use Multiple Balls at Once (Justice Monsters Five)
Ascension Abilities
- Exploration

Skills Guide
- Fishing Skill Information
- Cooking Skill Information
- Survival Skill Information
- Photography Skill Information
List of Equipments
- Greatswords
- Accessories
List of Items
- Consumables
- Ingredients
- Leisure Goods
Regional Maps
- Galdin Quay
- Prairie Outpost
- Keycatrich Trench
- Old Lestallum
- Disc of Cauthess
- Wiz Chocobo Post
- The Vesperpool
- Rock of Ravatogh
List of Hunts
- Hunts in Hammerhead
- Hunts in Longwythe Rest Area
- Hunts in Galdin Quay
- Hunts in Coernix Station - Alstor
- Hunts in Wiz Chocobo Post
- Hunts in Verinas Mart - Ravatogh
- Hunts in Lestallum (Thoroughfare)
- Hunts in Lestallum (Market)
- Hunts in Old Lestallum
- Hunts in Cauthess Rest Area
- Hunts in Taelpar Rest Area
- Hunts in Altissia (Maagho)
- Hunts from the Meldacio Hunter HQ
List of Monsters
- Monsters / Beasts
- Monsters / Daemons
- Monsters / Imperial Army
List of Bosses
- How to Defeat Ardyn
- How to Defeat Aranea
- How to Defeat Ifrit
- How to Defeat Leviathan
- How to Defeat Ravus
- How to Defeat Titan
List of Characters by Region
- Iris Amicitia
- Jared Hester
- Talcott Hester
- Cindy Aurum
- Cid Sophiar
- Camelia Claustra
- Weskham Armaugh
- Iedolas Aldercapt
- Ravus Nox Fleuret
- Aranea Highwind
- Caligo Ulldor
All Final Fantasy Walkthroughs
- Final Fantasy 7 Remake
- Final Fantasy 8
- Final Fantasy 9
- Final Fantasy 10
- Final Fantasy 12
- Final Fantasy 16
- Final Fantasy Crystal Chronicles
- Stranger of Paradise: Final Fantasy Origin
Japanese Wiki (日本語版)
- 1 Power to the Pylons Sidequest
- 2 List of Best Accessories and How...
- We could not find the message board you were looking for.
Gaming News

TRIBE NINE, a New ARPG by Danganronpa Creators, Closed Be...

Wuthering Waves Review (June 2024)

Autopsy Simulator Review (18+)
More Gaming News
Popular Games

Wuthering Waves Walkthrough & Guides Wiki

Genshin Impact Walkthrough & Guides Wiki

Honkai: Star Rail Walkthrough & Guides Wiki

Pokemon Scarlet and Violet (SV) Walkthrough & Guides Wiki

Paper Mario: The Thousand-Year Door (TTYD) Walkthrough & Guides Wiki

Diablo 4 (D4) Walkthrough & Guides Wiki

Monster Hunter Rise: Sunbreak Walkthrough & Guides Wiki

Persona 3 Reload Walkthrough & Guides Wiki

FF7 Rebirth Walkthrough & Guides Wiki

Palworld Walkthrough & Guides Wiki
Recommended Games

Elden Ring Walkthrough & Guides Wiki

Super Smash Bros. Ultimate Walkthrough & Guides Wiki

Pokemon Legends: Arceus Walkthrough & Guides Wiki

FF7 Remake Walkthrough & Guides Wiki

New Pokemon Snap Walkthrough & Guides Wiki

Hyrule Warriors: Age of Calamity Walkthrough & Guides Wiki

The Legend of Zelda: Breath of the Wild Walkthrough & Guides Wiki
All rights reserved
© 2016 - 2018 SQUARE ENIX CO., LTD. All Rights Reserved. MAIN CHARACTER DESIGN: TETSUYA NOMURA FINAL FANTASY, SQUARE ENIX and the SQUARE ENIX logo are trademarks or registered trademarks of Square Enix Holdings Co., Ltd. The copyrights of videos of games used in our content and other intellectual property rights belong to the provider of the game. The contents we provide on this site were created personally by members of the Game8 editorial department. We refuse the right to reuse or repost content taken without our permission such as data or images to other sites.

- Popular Articles
Costlemark Tower
Costlemark Tower is a Dungeon
- 1 Strategy Guide
- 3.1 Requirements
- 3.2 General Strategy
- 3.3 Enemies Weakness
- 3.4 Detailed Guide of Each Room
- 3.5 Treasures on Each Floor
Strategy Guide
Costlemark Tower isn’t the easiest location in the game, not by a long shot! That’s the reason why I’ve compiled a little guide to hopefully make your trip through this dungeon a little less painful and infuriating than it was originally going to be.
To start things off a little awkward, this dungeon can only be accessed at night, so if for some reason you can’t quite figure out why you can’t get inside the dungeon, have a quick check to make sure that the sun is no longer shining. However, if the time is right, follow the glowing red lights down into the dungeon to kick things off!
Follow along a linear path until you come across a couple of broken bridges that you can traverse. You’ll be besieged by a few enemies that might put up a little bit of a fight, but at the start of the dungeon you don’t have too much to worry about to begin with. Travel across the fallen pillar towards the east of the map and continue down the spiralling path to continue on with your progress.
Simply carry on the direction the map implies for you to go, up until you come across a narrow passage that Noctis will squeeze through and is a good indication that you’re going in the correct direction. Take the stairs down and follow along the hallway until you come to a spiralling ramp that travels down for a fair distance.
Be aware: there are plenty of enemies that spawn on this one particular ramp and depending on how far you get down the ramp, a new swarm of enemies will spawn. Taking out one group of enemies at a time is definitely for the best because getting swarmed by a vast number of level 60+ enemies will quickly lead to frustration and death! Just take them one at a time; slow and steady, and you should have no problems moving forward.
Following on from the spiral ramp we’ve got a couple of Yojimbo ’s cropping up to ruin our day. They have a variety of wide-arcing attacks, so dodging away tends to be the best course of action to deal with them. Oh, and to make things a tad easier, they don’t exactly like swords, as such it will lead to some lovely extra chunks of damage being dealt if you’ve got some nice weapons going into this – of which I would recommend. Shortly after this there will be another spiral ramp for you to head down to progress through the dungeon.
- Be Wary – There’s a red panel in the room after the spiral ramp and if you step on it you will be teleported back to the beginning of the dungeon, so you can have some respite before returning to the dungeon. The reason I say this is because if you didn’t know about this little panel and what it does, you wouldn’t be the first person to stand on it, nor will you be the last – even if you want to scream bloody murder after accidentally stepping on it and finding out what it actually does.
In the 4 corners of this room there are active tiles that each and every single one of them teleports you into a room with a group of enemies that progressively get harder with every new corner tile you stand on. After each battle, take the middle panel to go back up where you were to repeat the process again until all 4 are all done and dusted.
Eventually one of the triggers from the tiles will lead you to a fork in the road – it is highly recommended that you don’t go right, due to just how aggressive and strong the enemies that lie in wait truly are. Instead, go straight ahead and follow the path to a brand new area that will soon lead you to the big, bad boss of the dungeon: the Jabberwock .
The Jabberwock that you find is a level 58 and in comparison to the rest of the dungeon is a little on the easier side, I must admit. Make sure to strike against its legs to potentially cripple it and to deal the max amount of damage against its weakness: polearms. There’s not much to watch out for in this particular fight, other than when the Jabberwock raises its one leg to slam it down onto the ground, as that one attack can do some far-reaching AOE that’s best to be avoided.
Before too long the beast should be felled and you will be rewarded in kind with a brand new Royal Arm to add to your arsenal.
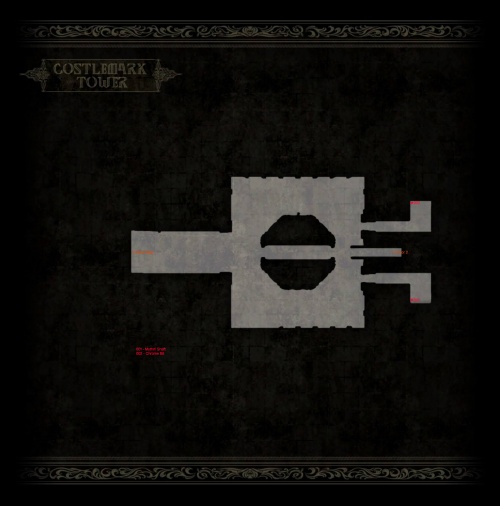
Costlemark Tower (Lvl 99)
Costlemark Tower (Menace) is a Level 99 Menace Dungeon locked behind the vault in Costlemark Tower .
Requirements
- Jabberwock Sirloin (sold in Meldacio Hunter HQ )
- Cleigne Darkshell (sold in Cape Caem )
- Fine Cleigne Wheat (sold in Lestallum , Old Lestallum , Altissia )
- Three Wind-up Lord Vexxos from the Justice Monster Five machine in Altissia. Use 99 of one element, and 49 of the other two elements plus a Wind-up Lord Vexxos, to get Flare , Freeze , and Electron with 338 potency . (Need the Ascension node Ultimate Powercraft , should be fine if potency is less, but no Maxicasts .)
- A good Greatsword and a good pair of Daggers . I used Apocalypse from A Menace Sleeps in Balouve 1st campsite and Vigilantes from A Menace Sleeps in the Grotto 1st campsite.
- Ribbons , Safety Bits , Mystic Circlet (or best magic enhancing equipment, Mystic Circlet can be found in A Menace Sleeps in Crestholm 1st campsite) for Noctis (and optional Friendship Band for teammates). Two Ribbons and Safety Bits can be acquired from Sania quest and Lestallum Hunts must be equipped on Noctis and Ignis. I had extras so I equipped them on Gladiolus as well.
- Sword of the Father , Scepter of the Pious , and Shield of the Just to boost magic and defense .
- Techniques , Regroup for Ignis and Impulse for Gladiolus.
General Strategy
- Use magic frequently. Most of the time the damage output will be close to 99,999 if not capped at that amount. This will one-shot weak enemies, or take out more than 50% of their HP on stronger enemies with few exceptions. You should have 53 or more casts of Flare, Freeze, and Electron, that is more than plenty to get through all 60 rooms of the dungeon. I ended using around 20 of each during my attempt.
- Start most battles by casting a magic. If there are more than one enemy in the room try to get as many as possible. Roll and warp around the room until enemies are close to each other.
- Use Regroup when HP is low, this is the main HP recovery method in battles.
- Always camp to and eat Lasagna al Forno, being immune to elemental attacks will make things very easy.
Enemies Weakness
Not all resistance and immunity are listed, only for those without elemental weaknesses.
- Havocfang - Weak to Greatswords , Daggers , and Ice . Easy enemy, consider using Freeze for groups of four or more.
- Hobgoblin - Weak to Greatswords, Machinery , Fire , and Light . Easy enemy, consider using Flare for groups of four or more.
- Mindflayer - Weak to Polearms , Daggers, and Light, resistant to Ice, absorbs Lightning . 148,800 HP, after one use of Flare, it can be taken down easily with Daggers.
- Malboro - Weak to Greatswords, Machinery, and Fire. 108,700 HP, after one use of Flare, it can be taken down easily with Greatswords.
- Iron Giant - Weak to Greatswords, Shields , and Light, resistant to Lightning, absorbs Fire. 150,100 HP, consider casting Freeze twice, due to its strong physical attacks. Run around or attack with caution during the cool down time between casts. This is more essential in the room with four Iron Giants.
- Jormungand - Weak to Swords , Daggers, and Lightning. 603,600 HP, takes 4 to 5 casts of Electron to take down. We are immune to its Fire attacks.
- Goblin - Weak to Polearms, Daggers, Fire and Light. Easy enemy, consider using Flare for groups of four or more.
- Braindrainer - Weak to Polearms, Daggers, Lightning and Light. 185,000 HP, after one use of Electron, it can be taken down easily with Daggers. Two cast also works perfectly, good option when in the room with four Braindrainers.
- Elder Coeurl - Weak to Swords and Daggers, immune to all elements. 123,000 HP, focus on one target as it will try to regain HP. Due to its agility it is harder to land hits, but being immune to its Lightning attacks, it does not pose as a threat.
- Uttu - Weak to Greatswords, Machinery, and Light, immune to Ice, absorbs Fire and Lightning. 122,000 HP, go all out attack with Greatswords, it will be down in no time. We are immune to its Lightning attacks.
- Serpentess - Weak to Greatswords, Daggers, and Light, immune to Fire, absorbs Ice. 196,400 HP, cast Electron, decrease its HP to around 40% with physical attacks then finish it off with another Electron. This is because it is capable of self-destruct when HP falls to 33% or less.
- Bilrost - Weak to Swords, Daggers, and Ice. 649,700 HP, takes 4 to 5 casts of Freeze to take down. We are immune to its Fire attacks.
Detailed Guide of Each Room
Treasures on each floor.
*Random Treasure
In regards to floors with branching paths the directions left, right, straight refer to when your back is to the entrance you entered from
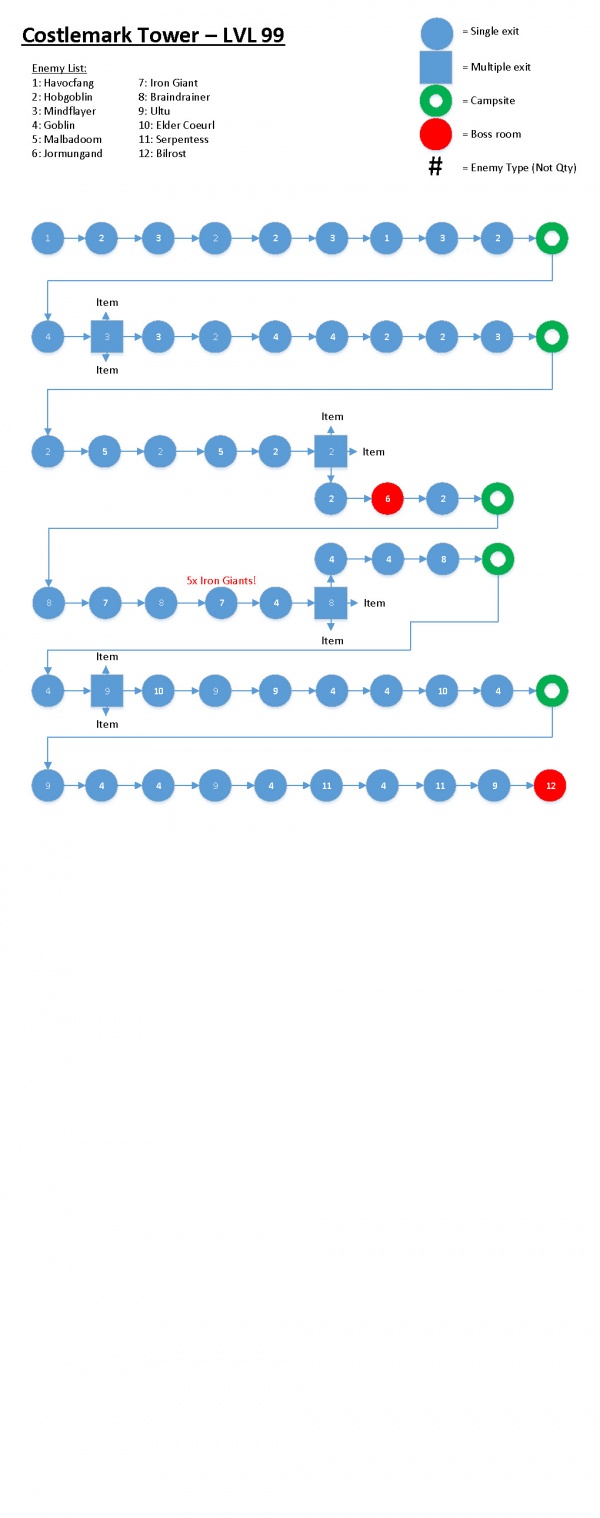
- Menace Dungeons
Navigation menu
Personal tools.
- Create account
- View source
- View history
- Recent changes
- Random page
- What links here
- Related changes
- Special pages
- Printable version
- Permanent link
- Page information
- Browse properties
- This page was last modified on 14 March 2017, at 00:05.
- Content is available under Creative Commons Attribution-ShareAlike unless otherwise noted.
- Privacy policy
- About Final Fantasy XV Wiki
- Disclaimers
- Mobile view

Costlemark Tower
- Edit source
- View history
The Fallgrove ruins in the southern reaches of Duscae Were once a single fortress whose stone towers touched the sky The wisdom of the ancients is within these walls enshrined Their pillars pierce the heavens, bridging mortal and divine Monolith
Costlemark Tower is an optional dungeon in Final Fantasy XV located in the Fallgrove in southern Lucis in Duscae . The player must defeat the boss at its end to acquire a royal arm . Entry into the dungeon is required to complete Dino's final sidequest, A Treasure Beyond Measure .
The dungeon's entrance is magically sealed and will only open at night .
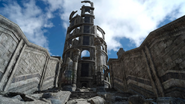
Costlemark Tower is a labyrinth of underground ruins. Although ruins of large structures remain above-ground, they are all but gone in present day, and what is left is the underground portion.
Using the Ring of Lucii (via Umbra from Chapter 13 or beyond) makes this dungeon easy, as the player can use Death to sap away bussemands and gelatins in an instant, and send the harder daemons (yojimbo, red giants, jabberwock etc.) into the void with Alterna .
- 4.1 Retrieving the royal arm
- 4.2 A Treasure Beyond Measure
- 4.3.1 Strategy
- 4.3.2 List of floors
- 6 Behind the scenes
Almanac [ ]
In the above-ground portion of the ruins.
Costlemark was once part of the ancient civilization of Solheim , but now lies in ruin along with its arcane technology. Some believe it was a military installation. [1] A king of Lucis once led an expedition into the ruins to learn about the ancients' wisdom. Instead of a trove of knowledge, they found a fearsome daemon, which they believed had been discovered there by Solheimians and sealed up. The men who accompanied the king died at the hands of the beast, and as a final resort, the king sacrificed his own life to cage the monster. [2]
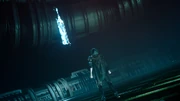
Noctis obtains the Sword of the Tall.
At some point, the Sword of the Tall was stolen from the Tomb of the Tall and ended up in the depths of Costlemark. Prince Noctis and his retinue explore the ruins and recover the royal arm, and gain the key to the menace dungeons from Ezma Auburnbrie after proving their worth. In the sealed dungeon the retinue comes across monoliths left behind the king who had sealed it.
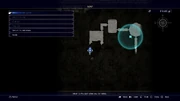
Thieves' Way II map.
- Thieves' Way II (room with the Ereshkigal, cross the ledge the opposite of the pipe)
- Oracle Ascension Coin (near large gold doors)
- Platinum Bangle ( Map )
- Moogle Charm ( Map )
- Mega-Potion
- Mega Phoenix
- Emerald Stone (quest item)
- Mythril Shaft
- Sword of the Tall (boss room)
Retrieving the royal arm [ ]
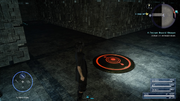
Glowing pad.
Costlemark Tower is populated with powerful enemies and the quests associated with the location recommend that the party be at least Level 55. The dungeon is structured as a mostly linear descent into the underground. As the party approaches the end there is a large chamber dotted with floor panels. Each panel leads to a gauntlet of enemies situated in a multilayer underground maze that will either lead to the end of the dungeon, or a large trap room underneath the previous chamber where the player will have to fight a red giant reinforced by many flan ; each subsequent visit to this room increases the difficulty of the fight, culminating in three red giants and a nagarani .
Once the player drops down there by either method, they must go through the maze until they get to an intersection where they can either go right or straight. Going straight leads to the dungeon's final boss.
Map of the correct route from the Ultimania .
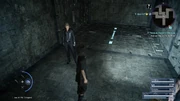
Circle on the floor shows the right way.
There is a clue as to which way to go: once the player gets to the multiple pathways part, they can look for a circle on the ground in front of one of the paths; the one that has the symbol is always the correct one.
An elevator takes the party to the end of the dungeon, where they fight the Jabberwock that, upon defeat, will drop the Sword of the Tall .
A Treasure Beyond Measure [ ]
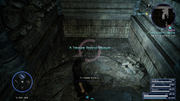
Noctis finds the emerald.
Dino sends the party to acquire ore at Costlemark Tower as his final request. The quest becomes available after completing "No Gain, No Gem". Dino asks for an Emerald Stone, which is found deep at Costlemark Tower. Completing the quest yields 3,000 EXP and an Emerald Bracelet .
A Menace Sleeps in Costlemark [ ]
This optional sidequest, with a recommended level of 99, is one of eight quests given to the party by Ezma Auburnbrie in Chapter 15. To start the quest one must complete the following optional dungeons: Costlemark Tower, Crestholm Channels , Balouve Mines , and the Daurell Caverns .
When the prerequisites are met, the sidequest will appear at the Meldacio Hunter HQ southeast of the Vesperpool . Ezma will hand over the Sealbreaker's Key, which will grant access to the mysterious large doors found in the lowest sections of the dungeons. To begin the quest, A Menace Sleeps in Costlemark, the party must enter Costlemark Tower and return to its lowest level, where a sealed door awaits.
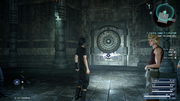
The sealed door located in the base of Costlemark Tower.
Upon entering the sealed door, the party's map and the item menu will both become inactive for as long as they're inside. Similar to the other sealed dungeons, the party will follow a linear path battling room after room of progressively stronger foes with a reward present in the center of each chamber. Battles within the sealed door cannot be fled. Havens are scattered about the journey where the player can replenish HP and cook .
The dungeon has various good accessories to pick up, though some of them spawn randomly: Blue Diamond Bracelet (Strength +80), Black Choker (HP Recovery Rate +6%), Onion Bangle (HP +2500), Hypno Crown (Magic +300), Soul of Thamasa (MP +50), Applied Sorcery ( Noctis automatically uses ethers ), Celestriad (elemental resistance), and Tarot Card (Spirit +150). As Noctis approaches the item in the final room, the Bilröst will attack. Defeating the boss completes the quest and Noctis will be able to collect the Dark Matter Bracelet (Strength +100).
Strategy [ ]
Costlemark's Menace Dungeon is the second longest dungeon and easily the hardest. No items can be used once through the sealed door, and thus if the player character's health falls to 0 and the party can't help him out of Danger , the player will have to start again from the last haven.
The party should be level 90+ before attempting, and could benefit from a more defensive build. The accessories Magitek Suit V2 , Black Hood and Anklet of the Gods are good choices. The Grand Chamberlain for Ignis can be useful also, but isn't reliable. Most enemies in the dungeon are weak to daggers and greatswords, but the "boss" enemies are weak to swords, so the Zwill Crossblades are great, and the Ultima Blade or Balmung can help when parrying. The Vortex weapons from Adventurer from Another World are also good for their innate critical hits and high stats.
Some other precautions can be taken before entering:
- It is best to stock up on magic with healcast, and enter the dungeon with full elements and healcast items for elemancy .
- Bringing Ingredients for recipes with the best buffs— Legendary Herb-Grilled Whopper is useful early on, but when magic becomes vital— King's Stew and Kenny's Secret Recipe are among the best.
- Recovery skills learned in Ascension keep the party alive longer. A lot of the harder battles can result in only the player character being left alive.
- Armiger is powerful and recharges fast amid all the battles so the player can unleash it often. Noctis can't fall into Danger state during normal Armiger.
The player can use the Ring of the Lucii and the Magitek Exosuit to clear the dungeon.
List of floors [ ]
Enemies [ ].
- Thunder Bomb
- Garchimacera
- Jabberwock (boss)
- Braindrainer
- Elder Coeurl
- Bilröst (Menace boss)
Behind the scenes [ ]
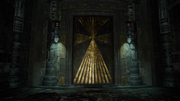
Light ray door.
Costlemark Tower and Steyliff Grove are made of the same interior assets with the same red "runes" on their mechanisms, light ray designs on doors and glowing warp pads. Whereas Steyliff has an apparently magical underwater boss room, Costlemark has a boss room with a mystical device.
Warp-striking at the area with the moving blocks can be glitchy . If the player clips through a wall and there is no platform beneath them, they will fall into the abyss before being teleported outside the dungeon entrance.
Gallery [ ]
- ↑ Final Fantasy XV , Almanac entry for Costlemark Tower in Windows / Royal Editions : Scholars suspect Costlemark Tower helped solidify the nation's hold on the continent, possibly serving as a military base of operations.
- ↑ Final Fantasy XV , Monoliths in Costlemark Menace Dungeon in Windows / Royal Edition
- Final Fantasy
- 1 Sephiroth
- 2 Cloud Strife
- 3 Final Fantasy Tactics jobs
FFXV Costlemark Tower Dungeon
Home » Final Fantasy XV » FFXV Costlemark Tower Dungeon
How to enter Costlemark Tower
Costlemark Tower walkthrough
Jabberwock boss fight
Costlemark Tower Locked Door
YOU MAY ALSO READ

MORE CONTENT IN Final Fantasy XV

FFXV Strategy Guides & Walkthroughs
Leave a reply cancel reply.
Your email address will not be published. Required fields are marked *
Save my name, email, and website in this browser for the next time I comment.
58 COMMENTS
I defeated to boss, but im stuck in the room and i can’t get out og the dungon, i tried to look for the red circle but it wasn’t there, and i can’t use the “Return To Entrance” option. what do i do
I know it’s a bit late, but the panels are numbered. If you look at the stones near each elevator you’ll notice the base of columns. The first elevator you go through has four stone columns. Elevator four. The second has three columns. The game will make you venture forth through each elevator in reverse numerical order until you reach the end.
Thanks for the guide. But wtf is the point of the Sword of the Tall? It does a lot of damage yes but it does NEGATIVE 40% on fire/ice/lightening/magic and -30 on something else!! and it damages you when you use it!, and it ONLY does 22 more damage points than Hyperion! and Hyperion doesnt hurt you in any of those areas, plus it gives more HP! Hyperion gives 310 whereas Sword of the Tall does 200… So whats the point of this greatsword that is the reward for the most difficult regular dungeon..?
The sword is part of the Armiger..all of the Royal Arms will take HP from Noctis when used. That was explained early on in the game.
Fuck this place x1000. I did two elevators and was exhausted of supplies. Left, restocked and came back. Had to do first elevator twice before second opened and then on fourth it glitched me through the wall and outside the dungeon when fighting a mob. Followed by me quitting the game and again fuck this place *1000.
This level is clearly not designed to be fun.
If you want to do something that isn’t fun, do the Pittios Dungeon.
Never again will I go near that place….
I have completed the pithioss dungeon very easily .
Those who are stuck in the tower after defeating the dragon thing there is a dick in the room you fight it that you need to stand on to teleport to the dungeon entrance. Took me hours to find ????
My game just shut off when I was here……my foot touch the side of the table my tv is on…..and it turned off…. I REFUSE!
I’m at the end I get on the elevator my guys fall from the sky and fall off the platform and I get up and I can’t get out there’s no cube no red spot that I can touch to open idk how to leave
Took me 2 hours 16 phoniex downs, 50 elixirs, and 17 hi elixirs and I was level 61 but in the end it was worth it because of the cool gaint chainsaw sword armiger plus the anti daemon weapons were very helpful in beating the dungeon.
Piece of rubbish keeps me doing the same one tile over and over again
The map will make you go down the wrong elevator 3 times, till you finally can use the southwest elevator (the others should be marked with a tick(checkmark) indicating the routes you have already taken. Once you are able to take the southwest elevator keep an eye on your minimap. You will eventally reach a point where some Jellys will spawn, you will have a choice to use two paths. South or East. Go East.
So, not sure if this will help anyone but it only took me 2 tries in order to get to the Boss.
I went and did Vyvs quest, and they tell you the sword was stolen by Daemons, so you are guided to Costlemark Tower (You cant take the picture because its nighttime and Costlemark is only open at Nighttime)
The guide here is pretty good until it gets to the part with the 4 Different paths — when looking at the map, all i did was go inside the Bottom Right fake path and defeat the monsters, then once i was back in the main room with 4 paths, i went and did the Upper Left one.
This led me the right way because i reached the point where once inside the tunnels i found the path with the Carved Circle in front of it, which the led me right to the boss (But right before that i almost got killed by a bunch of Thunder Bombs and a Yojimbo)
I got the Armiger Sword out of the Jabberwock Boss and now i am on my way to Altissia.
That large room is nuts! I had three red giants and a Nagarani plus some small enemies all spawn there at the same time. Needless to say, that fight was waaaaaay tougher than the Jormungand itself. Nice 12,000 experience at the end of it though.
i leveled up 23 times just from doing this dungeon. the Galdian Guey hotel gives X2.0 EXP. In the beggining i was level 37 in Chap. 2. Now cause of this dungeon im level 65 on chap 6
The yojimbo bridge was bugged for me. As soon as I killed him another one would respawn. After killing 4 of them I just ran away and into the next room instead.
So, I was doing this and only from finishing 2/4 cubes thingy I can fight the boss, but it didn’t drop the Sword of the Tall. I went back to do it again and on my 4th cube it just skipped and show the cutscene of dropping the Sword of the Tall. LOL
I quit the game because of this glitch. Wasted three hours? And why have the dungeon repopulate after you beat the BOSS? Makes no sense. What a waste of time this whole game was. Nothing but fetch quests, and plot that didn’t make a lick of sense, offensive representations of women, and slow travel. The Witcher was better in every regard, and it never lost me three hours of my life. Square can suck it. I’ll never buy another one of their games.
Soo the witcher has no repopulate?? That would be boring af kill everything and no more enemies.. The tower is still way to easy and im lv 58 Got everything maybe your just a noob don’t blame square that it’s to difficult
For the four panels, you need to do them all in a specific order: 4, 3, 2, 1. The pillars right next to the platform indicate which number they are. Number 1 will take you towards the boss.
If you drop down the hole where you walk across the wall and drop down into the hole you will find an item called the good chamberlain
ended up in that large room 3 times, the 3rd time i had 3 iron giants with the flaming sword, 3 nagani’s and 10 flans….wtf???…..thank god i’m level 97….could of given people more of a heads up about the enemies in that room other than ‘a bunch of monsters’ in the guide
I did the same thing only I was 62, good thing I was stacked on healing items.
Im stuck like eternity since i forgot which path i chosen before, and had no idea that the monster will multiply each time i choose the wrong path ?
beat the boss. got the sword . now I cant leave the tower . any ideas?
Press the map menu (R3) and return to entrance. hope this helps!
I did the same thing and it won’t let me return to entrance
There is a red disk on the floor in the bossromm after you defeat him, it will teleport you to the entrance of the Dungeon
all four lead to fuck corridor for me this dungeon sucks
The one you should concentrate on is the one on the bottom left, as it was the one that lead us to the boss. When you go down, there will be a place where you can choose further path (down or forward). Try going forward. Hope it helps!
defeating dragon do noth =(
So I played through the dungeon with the quest active and still no sword for me.
I don’t know about the others but I followed your instructions to the T and I managed to get through Dungeon without a hitch. thanks for what you do gosu – Ronin Yukimura
tiles are not random ,its always the southeast one that lead to the sphere elevator but this one can also take you to red giants you have to chose the correct one at some point in the path. Jabberwock and the dragon are both in the bottom floor accessed via sphere elevator you but cant get them at once.
sorry SOUTHWEST one not soutteast one. the tile that lead to elevator is the SOUTHWAST one.
So tell me why I enter the dungeon and cleared it on chapter 6 without knowing there’s a quest to be giving for it
I only had to fight one Red Giant and the second time brought me to the Jabberwock I did step on the red disk to get it to check off on the map. I think the dragon in the sewers might be harder to fight.
So beat the jaberwock yet I didn’t get the armiger. Nope instead I’m stuck with the quest saying defeat monster in the innermost sanctum…… I did that already -_-. And before you say use the platform. That’s not working either. Also my summons don’t work. What do?
you need to go out. select the Costlemark Tower quest, go back down, suffer through the everlasting cubes of eternity. once you go down you will get the royal arm and the quest, but it might be a bug for me (I pressed share during the cut scene). So what happened, is that while I was getting the royal arm, Mr dragon’s cut scene was playing as well, the next thing I know the dragon is attacking me, and I cannot target it, arminger requires a target, the rest of the team is AFK. So I had to put it down just by spamming attack, and trust me without targeting, Noct is retarded. I spent like 5 hrs in that place. https://www.youtube.com/watch?v=1MdlJjSM0is
You sir, just got a new subscriber, lol
Got the same issue here 2,5 hours,……. with being stuck the quest saying “defeat the monste in the innermost sanctum”
Platform only works in the day time I believe. Same as you can only get inside at night
Your guide is confusing as all bloody fuck for the room with the 4 pannels
in goes in a pattern of 4, 3 , 2, 1 (based on the no. of pillar they represent).. on the last plate (1)..keep going until you reach a place where u have a choice of going forward or right. go forward. you can actually see a circular pattern on the ground that will lead u in the right direction.
Thanks John. This helped me out a lot. This should be included in the instructions above.
this 😀 thx man you helped
Just to put a note out there. For the people who found this dungeon without acquiring the quest, if you do the dungeon without the quest active the royal arm will not be given to you hence you end up with a glitch dungeon. Make sure to get the quest active then go back to the boss room. You will then get your great sword.
Do you the the quest you get off Dino? because i had the quest and and the dungeon glitched on me when i beat the boss and I’m not sure how to fix it.
No, just return to the entrance and go back to the boss. The only problem would be that you will have to redo the boss again.
im lost and getting pissed off at the instructions… I have all the bs cubes in order and had to go down to the cuking pit again to fight the giants and naga a third time cause your bad instructions.. you made it sound like as soon as i came up from underneath the red return to enterance thing would be there and the next one i had to go to was the right of that..which is misleading and bs and i had to go down and do that bs again for nothing…i am lost though..i went to the top right corner on my MAP!!!! Which you should put! Then went the path with yojimbo and the other crap but at the end it just was an elevator cube going up to the start of thecube room…. wtf?..
I didn’t have any issues with his instructions, I felt they were pretty straight forward like this dungeon ???
Quit bitching, those fights are easy regardless.
those fights are a pain in the ass without the ring, true king power, or anything above level 55, this is by far my LEAST favorite dungeon of them all.
you can also get the radiant spear in this dungeon. before durandal..
And a “The Good Chamberlain
If I recall correctly…. You by this by continuing down the path after getting the thieves way 2, then FALL down.
Final Fantasy 15 Costlemark Tower - location, how to get Tomb of the Tall and beat Red Giant, Jabberwock
How to beat Costlemark Tower in Final Fantasy 15.
Costlemark Tower is one of the toughest dungeons in Final Fantasy 15 , combining a lengthy multi-floored dungeon topped off with some tough bosses, including the Red Giant and Jabberwock .
Make sure you're a high level, have a good meal inside you and have some EXP buffs to get the most of its spoilers. Also, we'd recommend you follow Dino 's questline before tackling this one as the final item he needs is in here and it will save you a second visit.
When you're done, be sure to check out other Final Fantasy 15 dungeons and tombs for more places to explore.

Costlemark Tower for Tomb of the Tall
Recommended level: 55
Head for Fallgrove and walk east up the path to find the tower, but bear in mind that the doors don't open during the day so you need to be there between 7PM and 4AM.
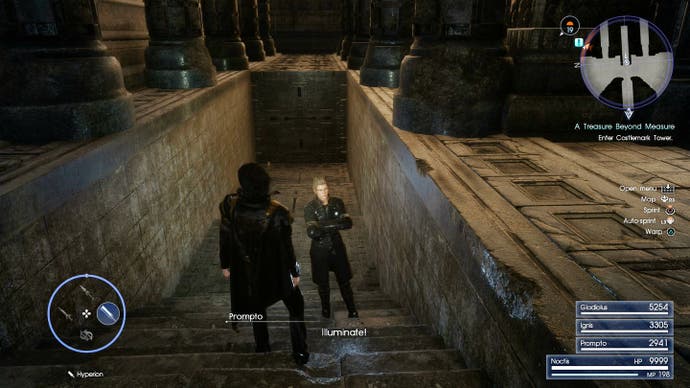
Head inside and follow the path around, and in the first room you'll encounter some Gelatins, tougher cousins of the Flans. Head west from the room and follow the path round until you find more Gelatins and some Galvanades - these guys can be a real pain as they have massive Lightning AoE attacks, so focus on them first if you can.
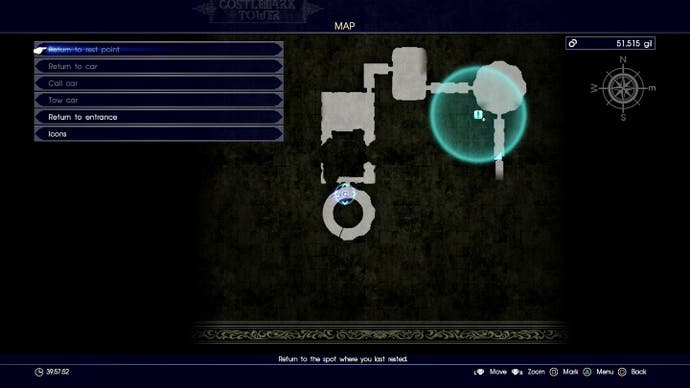
Keep following the path until you reach a room with two collapsed balconies; cross the narrow beam on the left and descend the stairs to the next floor.
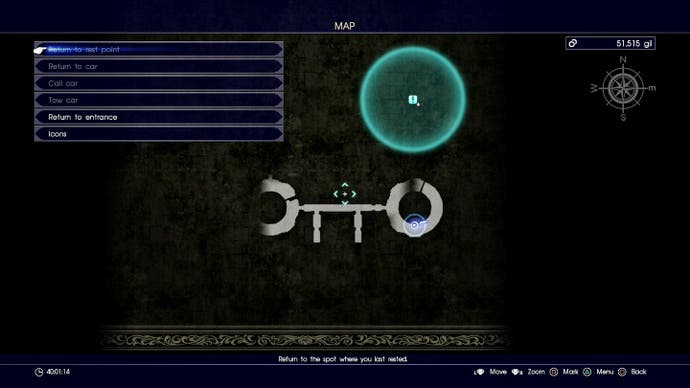
You'll now be descending a couple of long spiral ramps - there are more pockets of enemies along the way, but you'll eventually reach the bottom. Head through the exit in the north wall, crawl through the small gap, and turn left into the corridor. (If you're following Dino's stone location quest , the Emerald Stone will be in this room.)
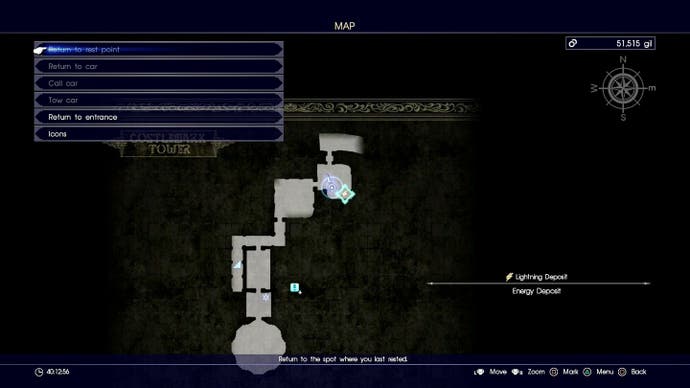
Head down the stairs at the end and keep following the passageway through a couple of open rooms full of Gelatins and Galvanades until you reach a long curved ramp. Follow it to the bottom and you'll emerge in a large rectangular room. On the floor there are some glowing blocks, and there's also a red switch on the floor. Don't stand on that as it'll send you back to the entrance, and instead stand on the glowing block in the south west corner of the room and activate it to descend to a labyrinth below.
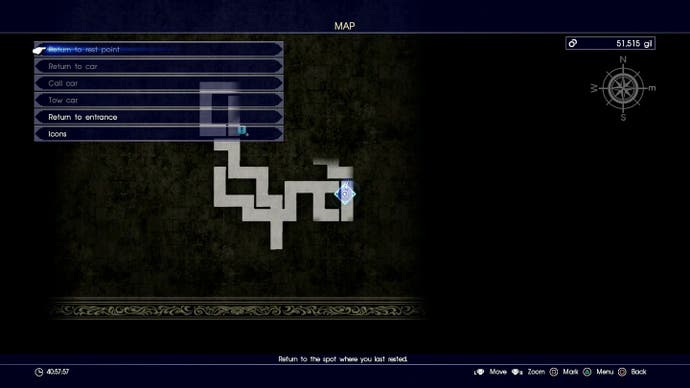
You'll now find yourself in a series of small rooms each full of enemies that you'll need to kill to proceed. Activate the blocks in turn to progress through the maze, and when you reach a room where you have a choice choose the one facing east - heading south will lead you to the Red Giant sub-boss and force you to double back.
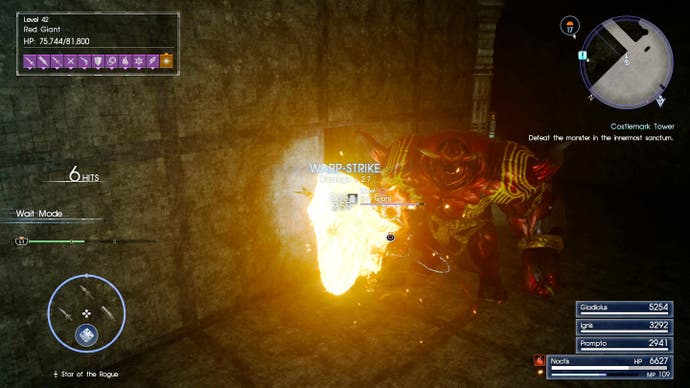
(If you're looking for the locked door after gaining access to them, you'll have to face him - it's through a small hole in the wall on the north side of the room. Be aware he's resistant to everything apart from your Armiger and Royal weapons.)
When you finally emerge you'll be in a small circular room. Heal up and get ready to fight, then descend the elevator to face the Jabberwock. His main attacks are a tail sweep and stamping his massive feet, but he'll also cause Petrification if you get caught in his breath - you're immune to damage while you're turned to stone so it's not a major problem, but it's still best avoided.
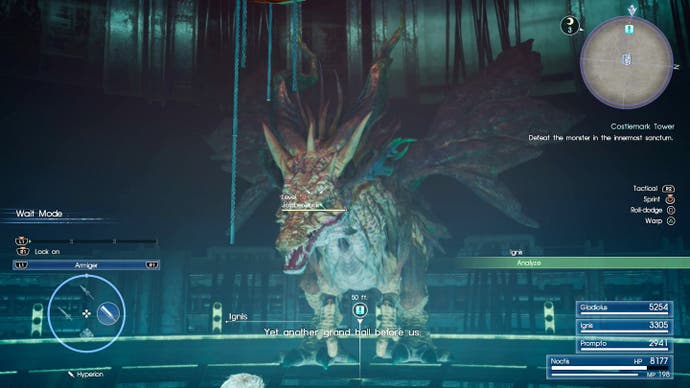
Need more help? Our Final Fantasy 15 guide and walkthrough can provide tips on main story, as well as the open-world's many quests and activities. Learning how to get AP fast , EXP fast and money or Gil fast will aid you in many optional dungeons and tombs - including how to open and explore their locked doors . There's also plenty of interesting side-quests, too, such as the Scraps of Mystery and Professors Protege frog locations . And if you want to get around easier, you can rent a Chocobo , learn the infinite sprint trick and later in the game, get the flying car Regalia Type F . There's also more to see and do with DLC, such as Episode Gladiolus and Episode Prompto .
As this is a boss his weaknesses and resistances are hard to gauge, but we found a combination of Warp Strikes with a Broadsword together with Gladio's Tempest Link Attack worked fairly effectively.
Once the beast is vanquished use the red switch on the ground to return to the entrance, and if it's now daytime you'll need to use the white switch by the entrance to get back outside, and don't forget to return to Dino if you grabbed the stone for him.
Today's Wordle hint and answer on Friday 7th June for 1084
Today’s Connections hint and answer on 7th June for 362
GTA+ Rewards for June 2024, all rewards and benefits explained
Wuthering Waves 1.1 release date and 1.1 Banners
Wuthering Waves Save the World? Save the Cat! walkthrough
GTA Online Weekly Update, 6th June 2024
How to complete A Free Meal I in Wuthering Waves
How to complete A Free Meal II in Wuthering Waves
- Les + attendus
- Tous les Jeux
- Find Your Next Game
- Culture Geek
- Réalité Virtuelle
- Rétrogaming
- Toutes les actus
- Actus JVTECH
- Tests produits High-Tech
- Guides d'achat High-Tech
- Gaming Live
- Vidéos Tests
- Vidéos Previews
- Replay Web TV
- Toutes les vidéos
- Hardware PC
- Xbox Series
- Overwatch 2
- League of Legends
- Genshin Impact
- Tous les Forums
- Tout support
Commencez par vous rendre au Tombeau du Conquérant, à l'ouest de l'inscription « The Fallgrove » au sud-est de Duscae sur votre carte, et lisez la note laissée par le clan Meldacio là où devait se trouver l'arme fantôme. De nuit, rendez-vous ensuite à la Tour de Costlemark, au nord de la même inscription « The Fallgrove », pour y trouver l'entrée qui se ne révèle qu'à ce moment là droit en face de vous. Soyez toutefois conscient qu'il faudra au moins avoir une équipe de niveau 60 et très bien préparée pour pouvoir triompher de ce donjon.
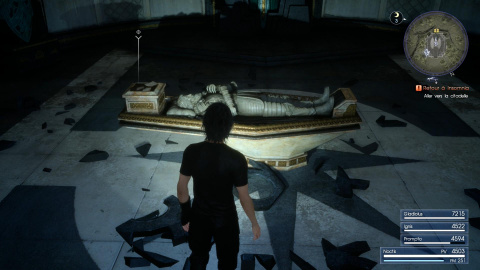
A l'intérieur, éliminez un premier groupe de Gelées sensibles à la Foudre et à la Lumière et dans la salle suivante, concentrez toutes vos attaques et commandes sur les Shrapnelo, sensibles aux pistolets aux machines et à la Lumière, pour les empêcher d'exploser. Ces ennemis grossiront en effet sitôt le combat commencé et feront apparaître plusieurs doubles plus petits d'eux-même dans une explosion très douloureuse, situation que vous souhaitez définitivement éviter. Ramassez la Lance rayonnante dans le coin nord-est avant de continuer et utilisez-la, ainsi que l'épée Durandal si vous l'avez, pour éliminer les Ereshkigal dans la pièce suivante, sensibles à la lumière.
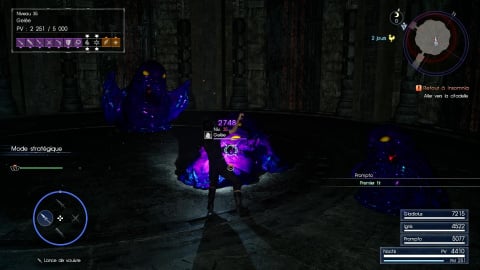
Glissez-vous sur l'étroit rebord à droite pour ramasser le Traité du voleur , laissez-vous tomber par deux fois dans le trou au fond, éliminez le Yojimbo avec la lance rayonnante et réservez le même sort aux deux Sharpenlo derrière la porte un peu plus loin, où se trouve également le Guide du Chambellan sur le tas de gravas. Allez ensuite vous laisser tomber au bout du blacon en vous préparant à combattre. En suivant le chemin de gauche au lieu de vous laisser tomber à côté du traité du voleur, vous pourrez récupérer les dagues Orichalques sur la gauche de la pente en colimaçon et devrez affronter des Bussemand, sensibles au Feu, à la Lumière et aux armes à deux mains.
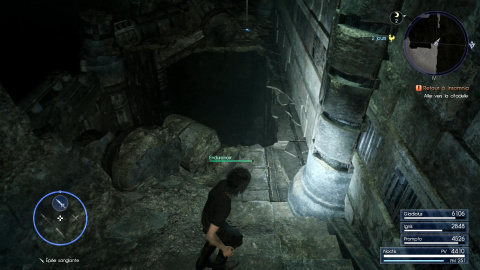
En suivant cet itinéraire, vous devrez affronter plus de groupes de monstres en descendant au cœur de la tour, mais pourrez également récupérer l'épée Durandal dans une pièce gardée par des Ereshkigal à l'est. Une fois rendu au même point devant la porte, allez chercher si vous le souhaitez le Super-élixir à l'intérieur gardé par des Ereshkigal et récupérez l 'Armille de titane dans la pièce du dessous, gardée elle par des Bussemand.
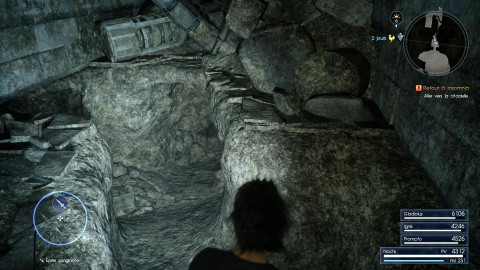
Ramassez l 'Amulette de mog au sol dans l'une des pièces au nord-ouest, ramassez également la Torque noire juste à gauche en atteignant le balcon et enfoncez-vous encore davantage dans la tour en combattant les groupes de monstres les uns après les autres jusqu'à finalement atteindre une large salle cubique. Ne marchez surtout pas sur le rond rouge qui s'y trouve, sous peine de vous voir téléporté à l'entrée du donjon, et observez plutôt tour à tour chacun des cubes luminescents au sol pour en trouver un avec lequel interagir.
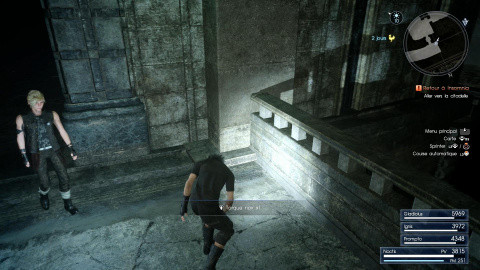
Il s'agira alors, au prix de nombreux combats et d'une lente progression, de pousser les cubes dans le sous-sol pour vous dégager un passage vers une autre grande pièce, où apparaîtront de nombreux daemons dont un Géant mutant très résistant. En empruntant ensuite le cube central de cette pièce, vous reviendrez dans la grande salle précédente, et un autre cube au sol pourra être poussé : vous devrez répéter l'opération trois fois avec autant de cubes différents en vous frayant à chaque fois un chemin jusqu'à la pièce remplie de daemons. Des daemons qui seront d'ailleurs chaque fois plus nombreux, allant jusqu'à cumuler 3 Géants mutants et une Nagaraja.
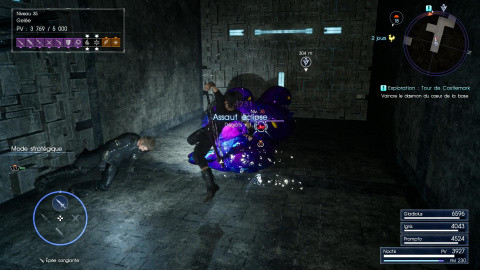
Une fois vos trois ou quatre passages effectués dans la pièce remplie de daemons, vous pourrez finalement interagir avec le cube du coin sud-ouest au sol : suivez à nouveau le parcours de poussées et de combats, continuez tout droit vers l'est à mi-chemin au lieu de pousser le cube de droite au sud, et interagissez avec le mécanisme rond pour finalement atteindre l'arène du boss.
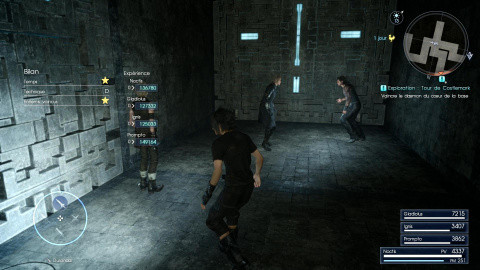
Le Bredoulochs , c'est son nom, est un grand dragon vulnérable aux lances, aux machines et à la Glace, qui n'utilisera que des piétinements et autres attaques physiques de base : autant dire que comparé à la purge que vous venez de traverser, il ne représente pas un grand défi. Concentrez vos assauts sur ses pattes arrières et sa tête, lâchez quelques magies de Glace aux moments opportuns et rouez-le de coups lorsqu'il tombe sur le côté. Victorieux, vous récupérez automatiquement l’ Épée du Conquérant et êtes libre de repartir du donjon.
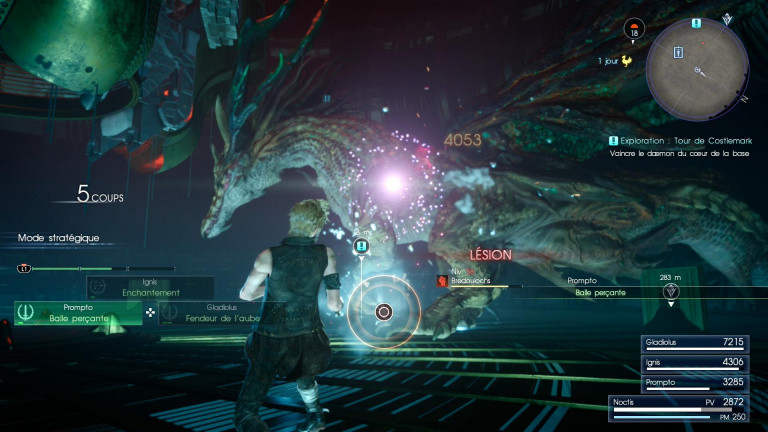
- Chapitre 01 - Le départ
- Chapitre 02 - Reprendre la route
- Chapitre 03 - Un vaste monde
- Chapitre 04 - La grâce des dieux
- Chapitre 05 - Des nuages noirs à l'horizon
- Chapitre 06 - Une nouvelle résolution
- Chapitre 07 - Voyage à trois
- Chapitre 08 - Mettre les voiles
- Chapitre 09 - La croisée des destins
- Chapitre 10 - L'étoffe des rois
- Chapitre 11 - Le piège
- Chapitre 12 - Un monde sur le déclin
- La capitale impériale
- Le combat du nouveau roi
- A l'assaut de Zegnautus
- Retrouvailles et recouvrement
- Chapitre 14 - Le retour du roi élu
- Expérience et Gils faciles : meilleure méthode, plus d'un million d'EXP en 2h !
- Gagner facilement des PC
- Conseils pour bien débuter
- Choisir les bonnes Compétences
- Débloquer la location de chocobos
- Jouer en mode Stratégique
- Bien se placer en combat
- Utiliser les Commandes et la Parade
- Gagner des Gils
- La bonne cuisine
- Recevoir plus d'Expérience
- Sprint illimité
- Quelles différences entre modes Normal et Facile ?
- Épisodes DLC
- En quête de confiance
- La voie de l'affermissement
- La voie de la mort
- Connaître son ennemi
- L'ultime épreuve
- Mode Challenge
- Seul et prisonnier
- Frappé de stupeur
- Entre rêve et réalité
- Rompre avec le passé
- La menace magitech
- Missions annexes
- Combinaisons anti-froid
- Carnaval kupo-kwéh
- Comment participer à l'événement
- Un carnaval de rêve, un loot mystérieux à gagner
- Courses chococerceaux
- Chocobos de poche baladeurs
- Les six petits mogs
- Question de passion
- Service royal au Maagho
- Pimp Pampa Poum & Mog flingueur
- La pêche au prix
- Défis photo kupo-kwéh
- Quêtes secondaires
- Amélioration des armes par Cid Sophiar
- Marchands de Lestallum
- Quêtes en duo
- Séances photo
- Ruines de Pitioss : soluce du donjon caché
- Tombeau de la Juste
- Mines de Balouve - Tombeau du Virtuose
- Forêt de Myrl - Tombeau du Dragon
- Volcan de Ravatogh - Tombeau du Démon
- Fourré de Malmalam - Tombeau du Saint
- Tour de Costlemark - Tombeau du Conquérant
- Canaux de Crestholm
- Cavernes de Daurell
- Profondeurs de Keycatrich
- Profondeurs de Balouve
- Profondeurs de Fociaugh
- Profondeurs de Greyshire
- Profondeurs de Daurell
- Profondeurs de Crestholm
- Profondeurs de Costlemark
- Profondeurs de Steyliff
- Les quêtes légendaires de Randolph
- La naissance d'une légende
- Le retour de la légende
- La vengeance de la légende
- La légende se rebiffe
- L'ultime légende
- Généralités sur la Magie dans FF15
- Création, Effets & Duplication : comment lancer un sort boosté, plus de trois fois !
- Liste des Effets magiques
- Puissance des sorts
- Liste des Sphères magiques
- Les meilleurs catalyseurs
- Liste de toutes les recettes, de leurs effets et comment les débloquer
- Liste des ingrédients et où les obtenir
- Recettes préférées des personnages et leurs avantages
- Monter rapidement le niveau de Cuisine
- Généralités sur la Pêche dans FF15
- Bonus des niveaux de Pêche
- Zones de pêche et Boutiques
- Photographie
- Pièces du sacre de l'Oracle : où les trouver ?
- Pièces de l'énigme et Puzzles de Sylvester
- Guide des trophées et succès
- Duel dans la capitale
- Reprendre la route
- Un vaste monde
- Une légende ressuscitée
- Des nuages noirs à l'horizon
- Une nouvelle résolution
- Voyage à trois
- Mettre les voiles
- La croisée des destins
- L'étoffe des rois
- Un monde sur le déclin
- L'heure de la revanche
- Le retour du roi élu
- Ma première chasse
- Dompteur de tortue
- Jockey chocobo
- Pêcheur débutant
- Pêcheur expert
- Survivant débutant
- Survivant expert
- Photographe débutant
- Photographe expert
- Cuisinier débutant
- Cuisinier expert
- Jeune conducteur
- Pilote de Regalia
- Digne héritier
- Le pouvoir des rois
- Une bonne accroche
- Frères d'arme
- Combo surprise
- Prompt à la riposte
- Intervention divine
- Pour la Justice !
- Nouveau pouvoir
- Très compétent
- Un fil de la trame I
- Un fil de la trame II
- Un fil de la trame III
- Un fil de la trame IV
- Un fil de la trame V
- La trame de l'histoire
- La fin de FF15 en fuite des mois avant sa sortie !
- Terminer Final Fantasy 15 en étant niveau 1, sans objets : c'est possible !
- Final Fantasy XV sur Nintendo Switch ?
- Des musiques tellement cultes qu'on les entend... dans le train !
- Débloquer l’épée étincelante et les bombes à foudre
- Débloquer le marteau étincelant, les bombes à pluie et les bombes à météorite
- Débloquer les étoiles de jet et le bouclier du brave
- Accueil Final Fantasy XV
- Quêtes secondaires
- Quêtes en duo
- Contrats de chasse
- Donjons et tombeaux
Tour de Costlemark
Dans ce guide de Final Fantasy XV sur le donjon "Tour de Costlemark", vous partirez au bosquet des Vestiges pour récupérer l'arme fantôme, l'Épée du Conquérant.
Détails du donjon Niveau recommandé : 55 Arme fantôme : Épée du Conquérant Localisation: Bosquet des Vestiges
Pour entamer ce donjon, il est suggéré d'avoir au minimum un niveau 55, si vous n'êtes pas à ce niveau, préparez-vous avec des potions et des queues de phénix. Afin d'accéder au donjon, dirigez-vous avec la Régalia au parking du Bosquet des Vestiges. La Tour de Costelmark n'est ouverte que la nuit, vous pouvez passer à la nuit dans un sanctuaire.
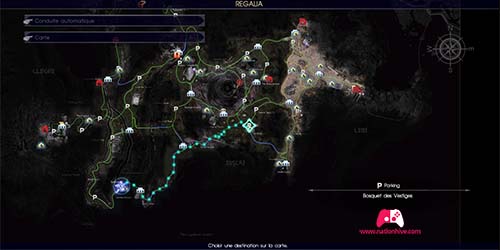
Entrez dans le donjon qui est relativement linéaire. Vous arriverez dans une salle en cercle ou des Gelées vous attendront. Prenez le chemin de gauche puis continuez à avancer jusqu'à vous retrouver sur une pièce en ruine avec un pilier à traverser. Passez de l'autre côté du pilier pour rejoindre une descente qui tourne. Descendez cette pente jusqu'à être bloqué. Vous devrez sauter dans le vide.
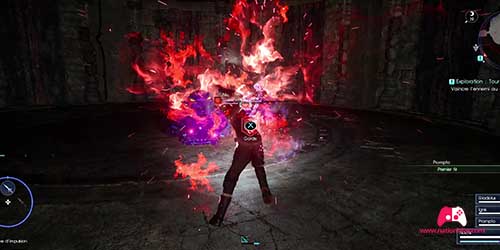
Vous devrez à nouveau vous faire tomber dans le vide pour atteindre une nouvelle salle circulaire. Avancez puis prenez à droite pour trouver de l'essence de Foudre. Continuez votre chemin pour trouver un chemin qui descend. Descendez-le puis prenez le chemin de droite. Vous serez en face d'une nouvelle pente circulaire, descendez là puis sortez de l'escalier à droite.
Vous serez en face d'une grande salle avec des dalles au sol. Faites très attention à ne pas marcher sur la dalle rouge qui vous amènera dès le début du donjon. Dans la salle, vous trouverez quatre dalles possédant une ligne bleue, vous devrez passer l'épreuve des quatre dalles avant de rencontrer le boss.
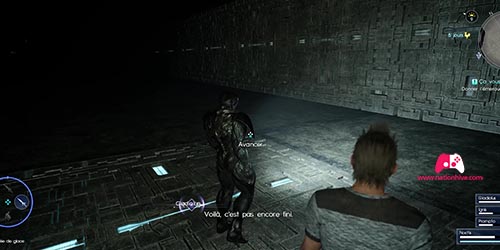
La première dalle Dirigez-vous vers la première dalle afin de l'activer, le sol descendra et vous serrez face à un mur ou un sol que vous devez activer pour continuer. La suite est relativement linéaire, activer le mur ou le sol, vous battre avec les monstres et continuer. Vous finirez pas arriver sur une grande salle avec un Colosse de fer et des Flans. Débarrassez-vous d’eux pour activer la dalle au sol afin de vous retrouver à nouveau dans la salle principale.
La deuxième dalle Recommencez l'opération avec la deuxième dalle de la salle principale et avancez à nouveau jusqu'à arriver devant deux Colosses de fer et des Flans. Une fois les ennemis tués, retourner dans la salle principale en activant la dalle au sol.
La troisième dalle Activer la troisième dalle de la salle principale pour recommencer le cheminement. La grande salle est occupée par trois Colosses de fer, des Flans et un Nagaraja. Ce combat sera relativement difficile, préparez bien vos potions et remèdes. Lorsque les ennemis seront tués, activez la dalle pour retourner dans la salle principale.
La quatrième dalle La dernière dalle se trouve en bas à gauche de la salle. Vous devrez faire la même chose que les trois premières, à l'exception que vous arriverez à un choix entre deux cubes à pousser. Ne prenez pas celui de droite, choisissez d'avancer, poussez sur la dalle qui a un cercle sur le sol en avant. Vous finirez par arriver dans une salle circulaire avec des piliers.
Activer la sphère située au milieu de la pièce pour rencontrer le boss. Bredoulochs est sensible aux lances, aux machines et à la glace. Il est résistant à la lumière et au feu. Les armes Shurikens du Dragon et les dagues Kukris de Nyx sont performantes contre ce boss. Utilisez la compétence "Enchantement" de Ignis pour assigner le sort Glace à votre arme dès que vous pouvez.
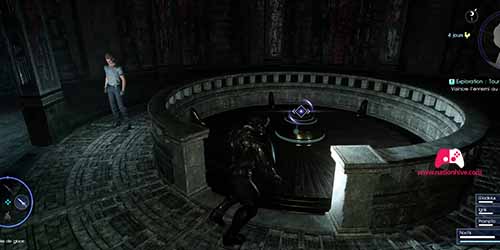
Une fois que vous aurez terrassé le boss, vous obtiendrez l' Épée du conquérant . Vous pouvez à présent marcher sur la dalle rouge pour retourner à l'entrée du donjon.
soluce FF15 Position de tous les donjons
Découvrez où sont placés tous les donjons du jeu et à quel niveau vous pourrez tenter de les explorer dans ce guide.
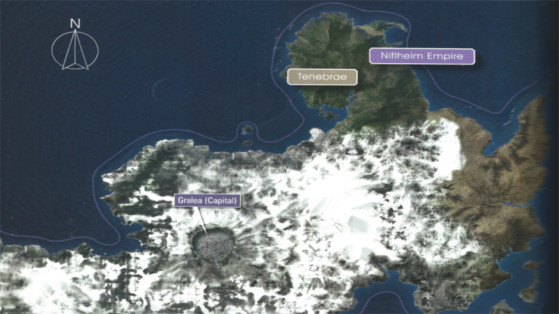
Tout est inscrit sur la carte ci-dessous (cliquez pour agrandir) et pour plus d'informations, référez-vous à la légende inscrite dans le tableau. Rappelons tout de même que la plupart des donjons de Final Fantasy XV ont deux «couches», dont une ne pourra être exploré qu'après avoir terminé l'aventure. Pour savoir comment débloquer l'accès de ces deuxièmes parties très haut niveau, suivez ce guide .
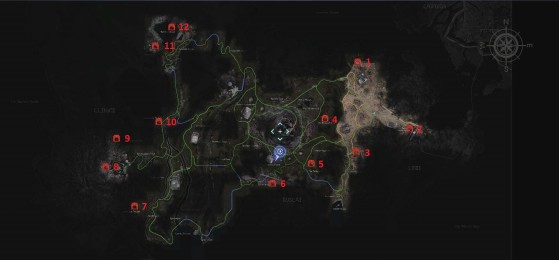
Tests, guides et plus si affinités... Vous apporte son aide depuis 2012 sur vos AAA favoris.
Pour le donjon 8, Volcan de Ravatogh, il y a au pied du volcan un gars qui vous propose un steak de behemoth ou quelque chose chose comme ça je ne me souviens plus exactement du nom du plat, et qui permet de courir sans dépenser d'endurance, et notamment au moment de l'escalade. Très pratique la première fois qu'on le fait.
L'actu
17:25 Vous n'avez jamais joué à ce JRPG signé Square Enix ? Sa version améliorée est actuellement en promo à -50%, mais faites vite car ça ne va pas durer !
17:53 Test Final Fantasy XV sur PC, PS4, Xbox One
04:22 FF15 : Retour sur les Ruines de Pitioss, un défi d'un genre nouveau pour la saga Final Fantasy
15:45 Final Fantasy XV : trailer pour l'anime du prologue de l'Episode Ardyn
19:23 Square Enix tease le prologue de Final Fantasy XV : Episode Ardyn
09:00 Final Fantasy XV perd 33 millions et annule ses DLC
11:57 FInal Fantasy XV PC : Les mods supportés dès la semaine prochaine
08:58 FFXV PC : Guides et astuces
15:46 FFXV : Emplacement des Armes Royales
15:15 FFXV soluce vidéo : Donjon secret, Les Ruines de Pitioss
recommandés

à découvrir


IMAGES
VIDEO
COMMENTS
Final Fantasy XV is filled with awesome dungeons that will push Noctis and friends to their very limits. This Final Fantasy 15 Dungeon Guide - Costlemark Tower focuses on the Costlemark Tower that features level 50+ enemies and the chance at nabbing yourself and awesome Royal Arms weapon. Completing Costlemark Tower is one of the requirements ...
Cette partie du Guide FF15 est consacrée au Donjon de la Tour de Costlemark. Vous trouverez ici le cheminement complet de ce donjon ainsi que des indications sur sa localisation, ses conditions d'accès et sur les récompenses obtenues. Condition d'accès : Atteindre la région de Duscae, accessible uniquement la nuit (à partir de 20h ...
Despite it being a tall tower, this dungeon will take you deep, down into the depths of the earth. To enter the dungeon, you need to come at night time. The tower will be glowing with red light ...
Costlemark Tower. Before setting off for Costlemark Tower, there are a few things you should do prior to it that will make things easier on you in the long run. If you've leveled Ignis' cooking skill to nine, then you have a recipe called Lasagna al Forno, which has the Resistant buff on it; this nullifies fire, ice and lightning attacks ...
*only if A Treasure Beyond Measure is active (Tip: It's strongly advised to have A Treasure Beyond Measure (for Dino) active when doing this dungeon, to avoid having to make additional trips in here.)Costlemark Tower is by far the most difficult content available before Chapter 15.Like pretty much all other content, it can be completed at much lower Levels than the in-game recommendation, but ...
Final Fantasy 7 Rebirth Wiki. is live now! This page contains information for completing the Sidequest Costlemark Tower in Final Fantasy XV (FFXV, FF15). Read on for more information about the Sidequest and our strategies for completing it!
We are immune to its Lightning attacks. Serpentess - Weak to Greatswords, Daggers, and Light, immune to Fire, absorbs Ice. 196,400 HP, cast Electron, decrease its HP to around 40% with physical attacks then finish it off with another Electron. This is because it is capable of self-destruct when HP falls to 33% or less.
Costlemark Tower is an optional dungeon in Final Fantasy XV located in the Fallgrove in southern Lucis in Duscae.The player must defeat the boss at its end to acquire a royal arm.Entry into the dungeon is required to complete Dino's final sidequest, A Treasure Beyond Measure.. The dungeon's entrance is magically sealed and will only open at night.. Costlemark Tower is a labyrinth of ...
TIMESTAMPS:00:45 Radiant Lance01:09 Thieves Way 201:58 Orichalcum Daggers03:15 Emerald Stone for Treasure Beyond Measure Quest03:35 Durandal Sword04:55 Moogl...
Scholars suspect Costlemark Tower helped solidify the nation's hold on the continent, possibly serving as a military base of operations. The outer walls of the tower glow red when night descends upon the Fallgrove, and the entrance to the structure is revealed.
Costlemark Tower is a dungeon in Final Fantasy XV. It is a part of the Treasure beyond measure quest given to you by Dino, and it can be difficult to beat. The first problem you'll encounter is how to enter Costlemark Tower.Once you're in, you'll probably need help finding the Emerald stone location or discovering how to defeat Jabberwock boss that is located in the innermost sanctum.
Costlemark Tower is the hardest regular dungeon in the game, at least when it comes to the levels of the monsters lurking inside. The dungeon is quite peculiar, as you can access it only during the night - during the night the entrance will be locked. The recommended level to enter this dungeon is 55, although you shouldn't come here until you ...
salut les amis voici un petit guide pour vous aidez a réussir la tour de costlemark sans trop de difficultés si cette vidéo vous a plus n'hésitez pas a mett...
Costlemark Tower is one of the toughest dungeons in Final Fantasy 15, combining a lengthy multi-floored dungeon topped off with some tough bosses, including the Red Giant and Jabberwock.
This is not only the hardest of the secret dungeons, but also the second longest. This dungeon has 60 floors and will most likely take you multiple hours to complete, usually somewhere around two ...
LIRE LA DESCRIPTION !! Dans cette vidéo je vous montre le chemin pour aller affronter le boss , je vous conseille d'etre au niveau 70 pour le faire et faite ...
Venez découvrir tout ce qu'il faut savoir sur la partie : "Tour de Costlemark - Tombeau du Conquérant" du jeu Final Fantasy XV dans son wiki.
Tour de Costlemark. Dans ce guide de Final Fantasy XV sur le donjon "Tour de Costlemark", vous partirez au bosquet des Vestiges pour récupérer l'arme fantôme, l'Épée du Conquérant. Pour entamer ce donjon, il est suggéré d'avoir au minimum un niveau 55, si vous n'êtes pas à ce niveau, préparez-vous avec des potions et des queues de ...
Before setting off for Costlemark Tower, there are a few things you should do prior to it that will make things easier on you in the long run. If… Contents Final Fantasy XV
Soluce Final Fantasy XV : Profondeurs de Costlemark. Notre guide complet des profondeurs de Costlemark est enfin disponible. Découvrez comment venir à bout du dernier donjon end-game de Final ...
bienvenue à tous sur ma chaîne pour un moment de detente et de fun sur tous les jeux du moment. Posez moi vos questions et je vous ferai découvrir l'univers ...
Rappelons tout de même que la plupart des donjons de Final Fantasy XV ont deux «couches», ... Tour de Costlemark. 50/55. Donjon très long et dangereux accessible uniquement la nuit. Préparez ...
Hello tout le monde ici Raki san!Aujourd'hui je vous poste une vidéo sur le Donjon" la Tour de Costlemark" un donjon bien corsé car il y a énormément d'ennem...